
Tools & materials you'll need
Affiliate linksAs an Amazon Associate FixlyGuide earns from qualifying purchases — at no extra cost to you. Prices and availability are accurate as of publication and subject to change.
Quick Answer
Homes built before 1978 often harbor lead-based paint, a significant health hazard, especially during DIY renovations. Activities like sanding, scraping, or demolition can release microscopic lead dust particles that are easily inhaled or ingested. To safeguard your family, implement stringent containment measures, utilize HEPA-filtered vacuums and air purifiers, and meticulously clean all work areas to prevent costly remediation and severe health consequences, particularly for children.
The Problem
You're excited to update your vintage home, perhaps stripping old trim, sanding down a doorframe, or even tackling a full-room demolition. What you might not realize is that the charming character you love could be hiding a silent threat: lead-based paint. Used extensively in homes until its ban in 1978, lead paint poses a serious health risk when disturbed. Unlike intact paint, which is generally stable, renovation activities create insidious lead dust. This dust is invisible to the naked eye, can travel throughout your home on currents of air, and settles on surfaces, toys, and even food. Ingesting or inhaling even tiny amounts can lead to lead poisoning, affecting the brain, kidneys, and nervous system, with children being particularly vulnerable. Understanding this danger isn't about fear-mongering; it's about empowering you to renovate safely and protect your family's long-term health.
How It Works
Lead, a heavy metal, was a common additive in paint manufacturers for decades due to its durability, vibrant color, and resistance to moisture and corrosion. When lead-based paint is present, it's typically found in multiple layers beneath newer, lead-free topcoats. The danger arises when these layers are disturbed. Think of paint as a protective matrix; as long as it's intact and not flaking, chipping, or being abraded, the lead remains encased. However, when you introduce friction, heat, or impact—like sanding a window sill at 8,000 RPM, using a heat gun to blister old layers, or swinging a sledgehammer—this matrix is broken. Microscopic particles of lead-infused paint become airborne dust. These particles are often smaller than a grain of pollen, easily bypassing the body's natural defenses and embedding themselves in lungs or being swallowed. Once ingested or inhaled, lead enters the bloodstream, mimicking calcium to cross the blood-brain barrier and accumulate in bones, soft tissues, and organs. It can persist in the body for years, causing cumulative damage. Furthermore, lead-contaminated dust can track from the work area to other parts of the house on shoes, clothing, and even pets, leading to widespread contamination long after the renovation project is seemingly complete.
Step-by-Step Fix
1. Test Before You Touch — Before starting any renovation project in a pre-1978 home, assume lead paint is present and test. Several options exist, from DIY kits to professional assessments. * DIY Test Kits: These typically involve swabbing a treated cotton tip against a scratched paint surface to detect a color change indicating lead. Follow manufacturer instructions precisely. They are generally reliable for a quick indication but may not detect all lead levels. Expect to pay $10-$30 per kit. * Professional Lead Inspection: For larger projects or whole-house renovations, hiring a certified lead inspector is recommended. They use X-Ray Fluorescence (XRF) analyzers to detect lead instantly and non-destructively through multiple layers of paint, providing precise readings and location data. This service can cost $300-$600, but provides peace of mind and a comprehensive report. * Paint Chip Sampling: Another professional option, where small paint chips are carefully removed and sent to an accredited lab for analysis. This is highly accurate but destructive to the painted surface. Costs vary based on the number of samples.
2. Prepare and Contain the Area — Lead dust spreads easily, so isolating your work zone is paramount. * Seal Off the Room: Close all windows and doors. Use 6-mil plastic sheeting and painter's tape to seal off doorways, HVAC vents, and any other openings leading to unaffected areas. Overlap sheeting by at least 12 inches at seams. * Cover Everything: Remove all furniture, curtains, rugs, and personal items from the room. If items cannot be removed, cover them completely with 6-mil plastic sheeting and tape it securely to the floor or walls. * Protect Floors: Lay down at least two layers of 6-mil plastic sheeting on the floor, extending up the walls by 6-12 inches. Secure the edges with painter's tape. Create a "flap" at the entrance to your work zone with overlapping plastic where you can step in and out.
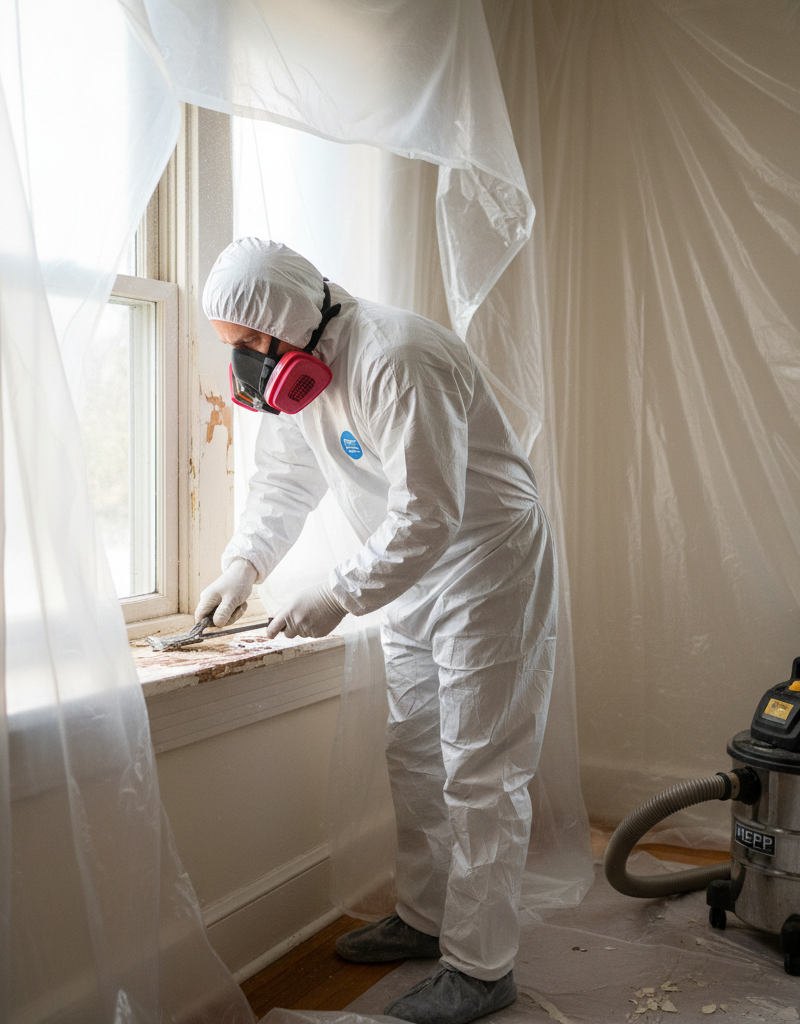
3. Gear Up for Safety — Personal protective equipment (PPE) is non-negotiable when working with lead paint. * Respirator: Use at least an N100 or P100 particulate respirator (half-mask type) with HEPA filters. Simple dust masks are NOT sufficient. Ensure a tight seal by performing a user seal check. * Disposable Clothing: Wear disposable coveralls or old clothes that can be laundered separately from other household items or disposed of. Use disposable shoe covers and gloves (nitrile or latex). * Eye Protection: Safety glasses or goggles are essential to protect your eyes from dust and debris.
4. Choose Low-Dust Work Methods — Avoid techniques that generate excessive lead dust whenever possible. * Wet Scraping/Sanding: If manual removal is necessary, wet the paint surface with water (a misting bottle works well) before scraping or sanding. This helps "glue" dust particles together, preventing them from becoming airborne. Place a drop cloth directly under the work area. * Enclosure/Encapsulation: For intact lead paint, consider enclosing it with new drywall or paneling, or encapsulating it with a specialized sealant designed for lead paint. These methods seal the lead in place without creating dust. * Chemical Strippers (Caustic): Use caution with chemical strippers, as some can be highly corrosive. Always follow manufacturer instructions, ensure good ventilation, and protect skin and eyes. Test in an inconspicuous area first. Avoid harsh methylene chloride strippers. * Avoid High-Dust Methods: Never use dry sanding, open-flame torch burning, high-temperature heat guns (over 1100°F), or power tools without HEPA-filtered attachments. These methods vigorously aerosolize lead particles.
5. Clean As You Go (and Afterward) — Thorough cleaning is critical for lead dust removal. * HEPA Vacuum: Use only a vacuum equipped with a HEPA filter. Standard household vacuums will simply blow fine lead dust particles back into the air. Vacuum all surfaces, including walls, ceilings, and floors. * Wet Wipe: After vacuuming, wet-wipe all surfaces repeatedly using heavy-duty cleaning wipes or cloths dampened with a lead-specific cleaning solution (e.g., TSP substitute) or plain water with a squirt of all-purpose cleaner. Rinse rags frequently in a separate bucket of water. Change water often. * Dispose of Waste Properly: Carefully fold and roll up all plastic sheeting (flooring and wall coverings) with the contaminated side inward. Place all contaminated materials—plastic, cleaning rags, disposable clothing, paint chips—into heavy-duty construction bags. Seal the bags and label them as "hazardous waste." Check with your local waste management facility for proper disposal procedures, as lead waste often requires special handling.
6. Post-Renovation Air Cleansing — Ensure any remaining airborne lead dust is captured. * Air Scrubber/HEPA Air Purifier: After initial cleaning, run a HEPA-filtered air scrubber or a high-quality HEPA air purifier in the sealed work area for at least 24-48 hours to capture any lingering airborne lead particles. Direct the exhaust outside if possible. This significantly reduces the remaining particulate load.
Common Causes
The primary "cause" of lead paint exposure is disturbing painted surfaces in homes built before 1978. While the material is inherently dangerous when aerosolized, specific activities dramatically increase the risk:
- Sanding and Scraping: Dry sanding or aggressive scraping of old paint layers pulverizes the paint into fine, respirable dust.
- Demolition: Tearing down walls, ceilings, or architectural elements coated in lead paint creates significant amounts of lead-contaminated dust and debris.
- Heat Stripping: Using high-temperature heat guns to remove paint can vaporize lead, creating dangerous fumes and fine dust, especially if the temperature exceeds 900°F.
- Power Tools Without HEPA Attachments: Grinders, saws, and sanders generate immense amounts of dust. Without proper HEPA vacuum shroud attachments, this dust is released directly into the air.
- Impact and Friction: Opening and closing old lead-painted windows and doors can grind paint into dust over time, accumulating in the window well or on the floor below.
- Renovation Debris Disturbance: Improper cleanup of lead-painted debris, allowing it to sit or be swept dry, can re-aerosolize lead particles.
Common Mistakes
- Not Testing First: Assuming your home is free of lead paint or that "it
Related Articles
Keep troubleshooting with these hand-picked guides from FixlyGuide:
- 7 Inspection Red Flags That Secretly Signal a $20,000 Bill — Don't let your dream home become a money pit. Many buyers and even some inspectors overlook subtle home inspection red flags that lead to f…
- 7 Hidden Equity Drains Costing You Thousands Annually — Your home is an asset, but silent problems like minor leaks, poor insulation, and deferred maintenance can drain its value. Discover the se…
- The 12 Checks That Prevent 80% of Costly Home Repairs — Don't wait for a disaster. Our comprehensive monthly home maintenance checklist reveals the surprising, simple tasks that catch small issue…
- The Surprising Trick to Cutting Your Dryer Bill By $100 Per Year — Installing a clothesline can significantly reduce your energy bills and add a fresh scent to your laundry. This guide covers how to choose…
- Is a Wall-Mounted Pressure Washer Right for Your Garage? The Unvarnished Truth — Discover if a wall-mounted pressure washer is the right cleaning solution for your home, offering a powerful and space-saving alternative t…
- What's That Burning Dust Smell When Your Heat Kicks On? The HVAC Secret — That weird smell when your furnace starts isn't always serious, but understanding its cause can prevent bigger issues and improve home air…
This article was independently written by FixlyGuide based on the source topic.
Frequently asked questions
How do I know if my home has lead paint?+
The only way to know for sure is to test. You can use DIY lead test kits available at hardware stores, or for more comprehensive and accurate results, hire a certified lead inspector who uses an XRF analyzer or takes paint chip samples for lab analysis. Assume lead is present in any home built before 1978.
What are the health risks of lead paint exposure?+
Ingesting or inhaling lead dust can cause lead poisoning, leading to severe health problems, especially in children. Symptoms can include developmental delays, learning difficulties, headaches, irritability, abdominal pain, and kidney damage. For adults, it can cause high blood pressure, joint and muscle pain, and reproductive issues.
Can I renovate safely if my home has lead paint?+
Yes, but it requires strict adherence to lead-safe work practices. This includes containing the work area, using personal protective equipment like N100 respirators, employing low-dust methods, using HEPA-filtered vacuums for cleanup, and properly disposing of lead-contaminated waste. Professional lead abatement may be necessary for extensive projects.
Are there specific tools to avoid when dealing with lead paint?+
Absolutely avoid dry sanding, using high-temperature heat guns (over 1100°F), open-flame torches, or power tools like grinders and sanders without dedicated HEPA vacuum attachments. These methods generate extremely high levels of hazardous lead dust and should never be used on lead-painted surfaces by DIYers.
What should I do if I accidentally disturb lead paint?+
Immediately stop work, ventilate the area, and seal off the contaminated zone. Don appropriate PPE, including an N100 respirator. Use a HEPA vacuum and wet-wipe all surfaces repeatedly. Place all contaminated materials in sealed bags. Consider consulting a lead professional for advice on proper cleanup and testing.


Discussion
Loading comments…