
Tools & materials you'll need
Affiliate linksAs an Amazon Associate FixlyGuide earns from qualifying purchases — at no extra cost to you. Prices and availability are accurate as of publication and subject to change.
Quick Answer
Lead paint, a common feature in homes built before 1978, becomes a serious health hazard when it's disturbed. Renovations, even minor ones like sanding a window sill or drilling into a wall, can generate microscopic lead dust. This dust, invisible to the naked eye, can be inhaled, ingested, or carried throughout your home on clothing and shoes, leading to lead poisoning. Young children are particularly vulnerable, experiencing developmental delays, learning disabilities, and behavioral problems. Adults can suffer from high blood pressure, joint pain, memory issues, and even kidney damage. Therefore, before undertaking any repair or renovation in an older home, assume lead paint is present and take stringent precautions to protect yourself and your family.
The Problem
You've just bought your dream home, a charming house built in the 1960s. You're excited to start DIY renovations, perhaps repainting the living room or replacing some old trim. What you might not realize is that beneath those layers of modern paint, or even within the original trim, lies a silent threat: lead-based paint. While intact lead paint generally isn't a hazard, disturbing it through activities like scraping, sanding, drilling, or demolition releases fine, invisible lead dust and chips into the air. This dust is the primary vector for lead poisoning. Even a small amount of lead dust, equivalent to a sugar packet, can contaminate a large area and remain a hazard for decades if not properly addressed. The symptoms of lead poisoning can be subtle and mimic other illnesses, often going undiagnosed until significant damage has occurred. It's not just about direct contact; lead dust can settle on surfaces, get into carpets, and be tracked throughout the house, making every corner a potential exposure point.
How It Works
Lead-based paint was widely used in homes before 1978 due to its durability, vibrant color, and moisture resistance. The lead compounds, typically lead carbonate or lead chromate, were bound within the paint film. When this paint is intact and not chipping or peeling, the lead is encapsulated and poses minimal risk. However, any activity that breaks the paint film releases lead particles. Imagine minuscule shards of glass, but instead of glass, they are lead compounds. Sanding grinds the paint into a fine, respirable dust that can float in the air for hours. Scraping creates larger chips and dust. Drilling pulverizes the paint around the drilled area. Even opening and closing a lead-painted window can create friction, generating lead dust in the window well. These particles are too small to see, yet they are easily inhaled into the lungs, where lead can pass into the bloodstream. If they settle on surfaces, they can be ingested by children who put their hands or toys in their mouths. Lead mimics calcium in the body and can be stored in bones, teeth, and soft tissues for years, causing cumulative damage to the nervous system, kidneys, and blood-forming organs. Children absorb lead at a higher rate than adults and their developing brains are far more susceptible to its neurotoxic effects, leading to irreversible intellectual and developmental impairments.
Step-by-Step Fix
Addressing lead paint hazards during a renovation requires careful planning and execution. The goal is always to contain the dust, minimize exposure, and clean thoroughly.
-
Test for Lead Paint — Don't guess, know for sure. Before starting any work on painted surfaces in a pre-1978 home, purchase a reliable lead test kit from a hardware store. Follow the kit instructions meticulously. Some kits require swabbing the surface, while others involve scraping a small sample. Test multiple areas, especially those prone to wear and tear like windows, doors, and trim. If any test is positive, assume all similar painted surfaces contain lead.
- If your home was built after 1978: Lead paint is highly unlikely, but still proceed with caution if you suspect older layers of paint.
- Safety: Always wear gloves when handling lead test kits.
-
Plan Your Containment Zone — Isolate the work area completely. Before any paint disturbance, seal off the room or area where you'll be working. Close doors, cover HVAC vents with plastic sheeting and painter's tape to prevent dust from circulating. Remove all furniture, curtains, rugs, and personal belongings. If items cannot be removed, cover them completely with heavy-duty plastic sheeting, sealed with tape. Use 6-mil plastic sheeting to cover the floor, extending at least 6 feet beyond the work area.
- Tools: Heavy-duty 6-mil plastic sheeting, painter's tape, utility knife or scissors.
-
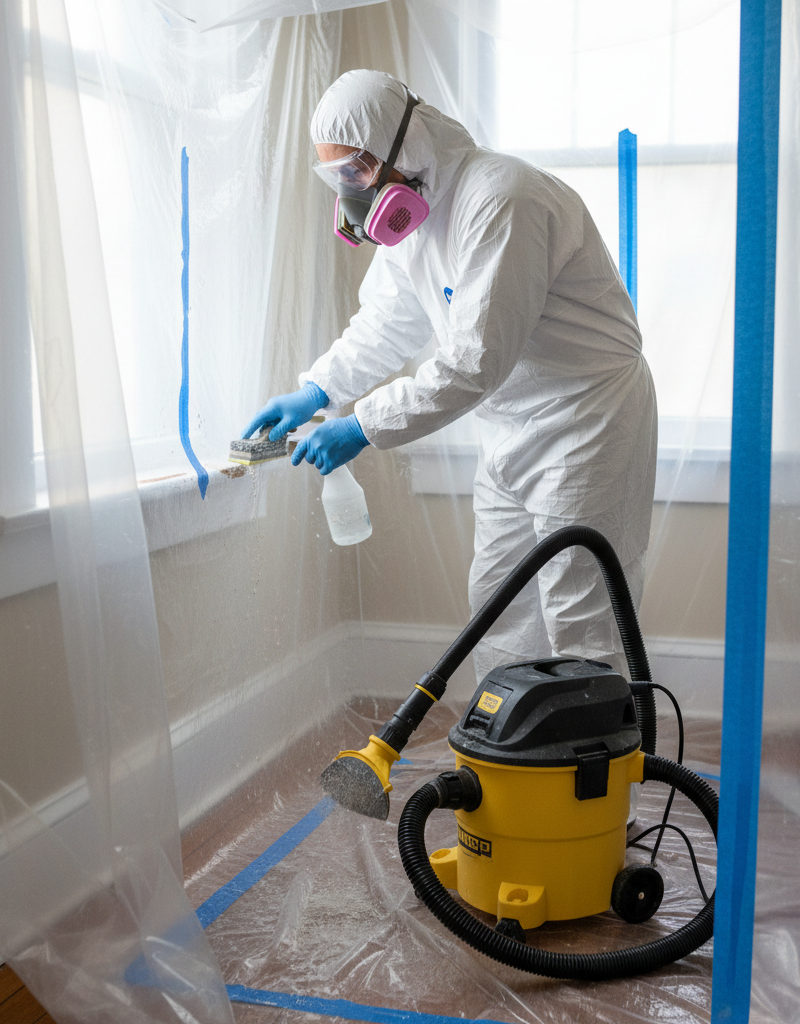
Prepare for Safe Work Practices — Gear up before you start. Don the appropriate personal protective equipment (PPE). This includes a NIOSH-approved respirator (N100 or P100 cartridges are essential for lead dust), disposable coveralls (Tyvek suits are good), shoe covers, safety glasses, and chemical-resistant gloves. Keep a separate pair of dedicated work shoes that will not leave the contained area or will be thrown away.
- Safety: Never use a paper dust mask; it offers no protection against lead dust. Your respirator must be fit-tested to ensure a proper seal.
-
Start Work with Lead-Safe Techniques — Minimize dust generation. Avoid methods that create high levels of dust, such as power sanding, open-flame burning, or using heat guns above 1100°F (593°C). Instead, opt for wet scraping, wet sanding, or using chemical paint removers (ensure they are lead-safe). When drilling, use a shroud and connect it to a HEPA-filtered vacuum. If you must sand, use a HEPA-filtered sander or sand by hand with wet sandpaper.
- If paint chips are large: Gently pry them off rather than scraping vigorously.
-
Clean as You Go — Don't let dust accumulate. Periodically during your work, and definitely at the end of each work session, clean the area. Do NOT dry sweep or use a regular household vacuum cleaner, as these will disperse lead dust into the air. Instead, use a HEPA-filtered vacuum (essential!) to vacuum all surfaces, including floors, walls, and sealed coverings. Follow with wet wiping all surfaces with a disposable damp cloth and a general all-purpose cleaner. Dispose of cloths and mop heads as lead waste.
- Tools: HEPA vacuum, disposable wet wipes, bucket with all-purpose cleaner.
-
Proper Waste Disposal — Handle contaminated materials responsibly. Collect all plastic sheeting, coveralls, shoe covers, tape, painter's cloths, and any removed paint chips and dust. Double-bag all contaminated waste in heavy-duty plastic bags, tie them securely, and label them clearly as
Related Articles
Keep troubleshooting with these hand-picked guides from FixlyGuide:
- 7 Inspection Red Flags That Secretly Signal a $20,000 Bill — Don't let your dream home become a money pit. Many buyers and even some inspectors overlook subtle home inspection red flags that lead to f…
- Your Home's Secret To-Do List: Are You Missing It? — Most new homeowners focus on decorating, but ignoring a basic home maintenance checklist can lead to thousands in unexpected repairs. Learn…
- 7 Hidden Equity Drains Costing You Thousands Annually — Your home is an asset, but silent problems like minor leaks, poor insulation, and deferred maintenance can drain its value. Discover the se…
- Is That Sweet Car Smell a Secret Killer? (& 6 Other Odors to Watch For) — Unusual odors in your car aren't just unpleasant; they're often critical warnings of underlying mechanical issues that could compromise saf…
- The 12 Checks That Prevent 80% of Costly Home Repairs — Don't wait for a disaster. Our comprehensive monthly home maintenance checklist reveals the surprising, simple tasks that catch small issue…
- The Invisible Hail Damage Mistake Most Homeowners Make (And How to Spot It) — Discover how to accurately assess hail damage on your home's siding, understand its hidden impacts, and perform essential repairs to protec…
Get the print-ready PDF of this guide
A clean, ad-free, printable version you can keep on your phone or pin to the workshop wall. Free with a FixlyGuide account.
- Print-optimized layout
- Tools, materials & every step included
- Saved to your account
This article was independently written by FixlyGuide based on the source topic.
Frequently asked questions
How do I know if my home has lead paint?+
The most reliable way is to test. Purchase a lead test kit from a hardware store and follow the instructions carefully for painted surfaces in homes built before 1978. For comprehensive analysis, consider hiring a certified lead inspector.
What are the health risks of lead paint exposure?+
Lead exposure, even at low levels, can cause serious health problems. In children, it can lead to developmental delays, learning disabilities, behavioral issues, and stunted growth. In adults, it can cause high blood pressure, joint and muscle pain, headaches, memory problems, and kidney damage.
Can I renovate safely with lead paint?+
Yes, but it requires strict adherence to lead-safe work practices. This includes containing the work area, using personal protective equipment (like a respirator), wet working methods to minimize dust, and thorough HEPA-filtered vacuuming and wet wiping for cleanup. Avoid dry sanding or open-flame burning.
When should I call a professional for lead paint?+
For large-scale renovations, extensive paint removal, or if you're dealing with lead paint on a regular basis, a certified lead abatement professional is recommended. They have specialized equipment and training to safely remove or encapsulate lead paint, ensuring compliance with federal and local regulations.
What kind of respirator do I need for lead dust?+
A NIOSH-approved respirator with N100 or P100 cartridges is essential for protection against lead dust. Standard paper dust masks are not sufficient and will not protect you from inhaling lead particles. Ensure your respirator fits properly.


Discussion
Loading comments…