Tools & materials you'll need
Affiliate linksAs an Amazon Associate FixlyGuide earns from qualifying purchases — at no extra cost to you. Prices and availability are accurate as of publication and subject to change.
Quick Answer
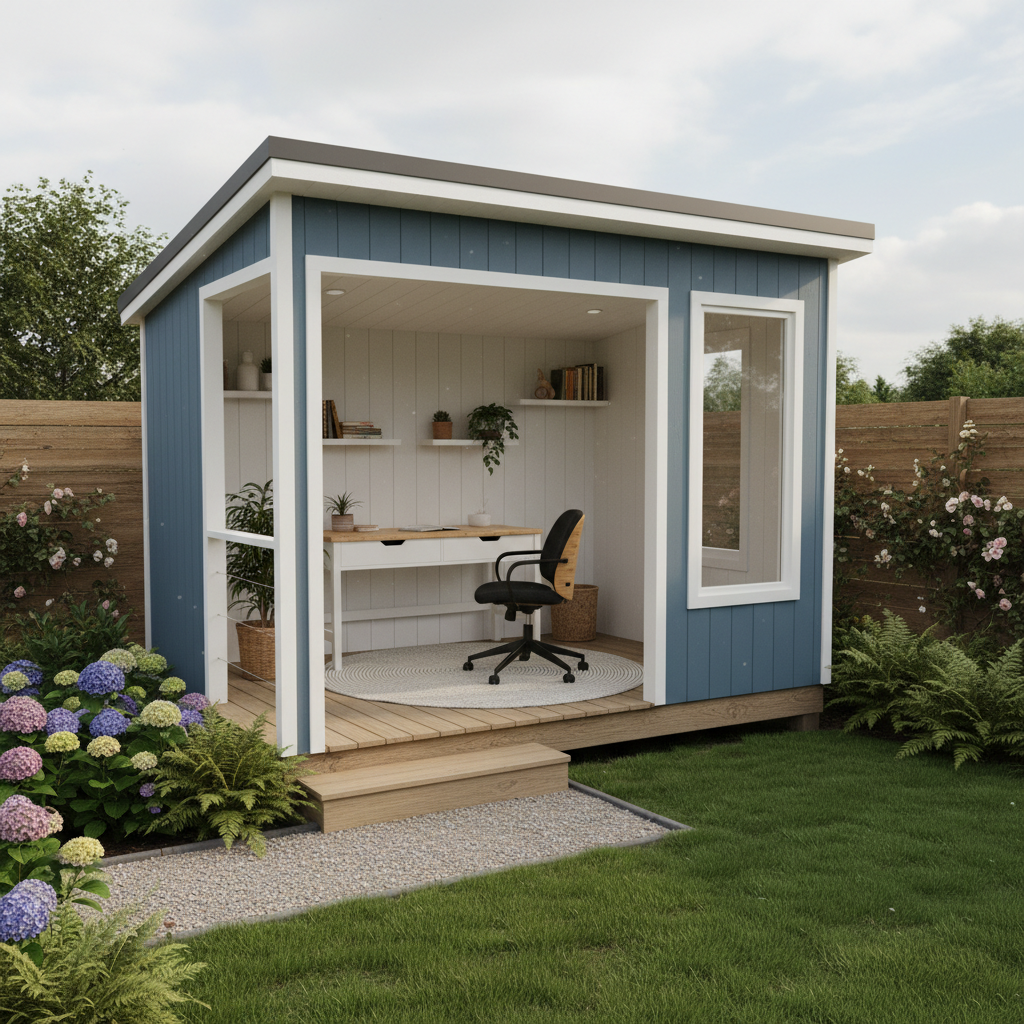
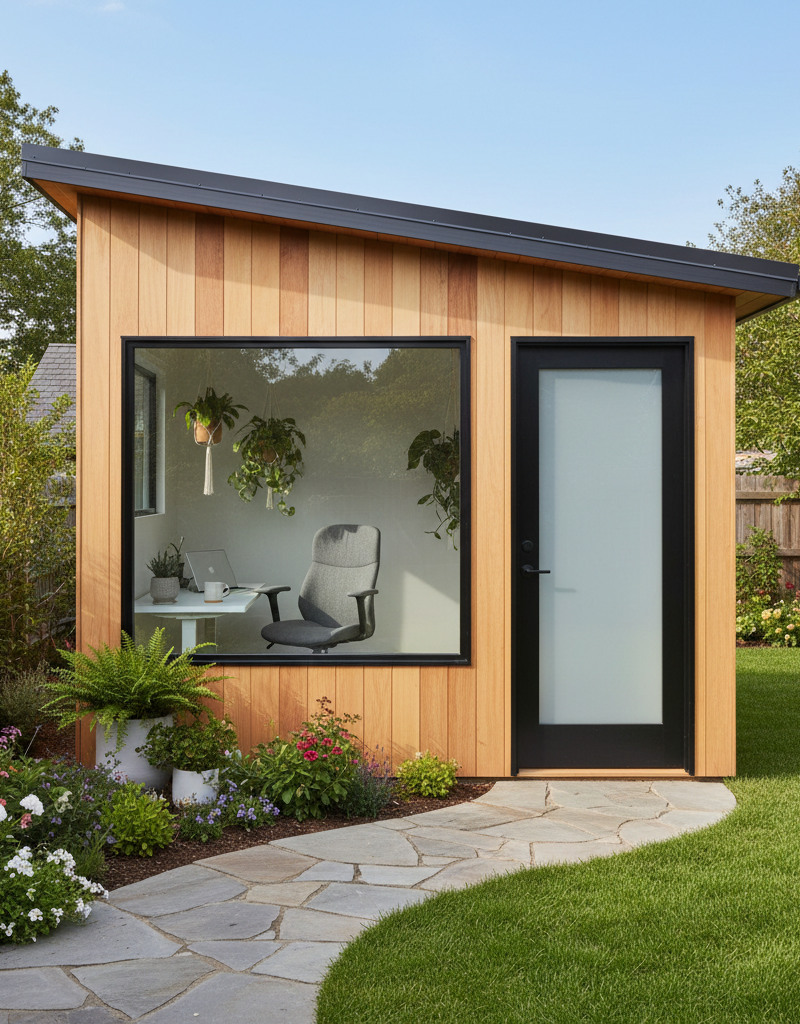
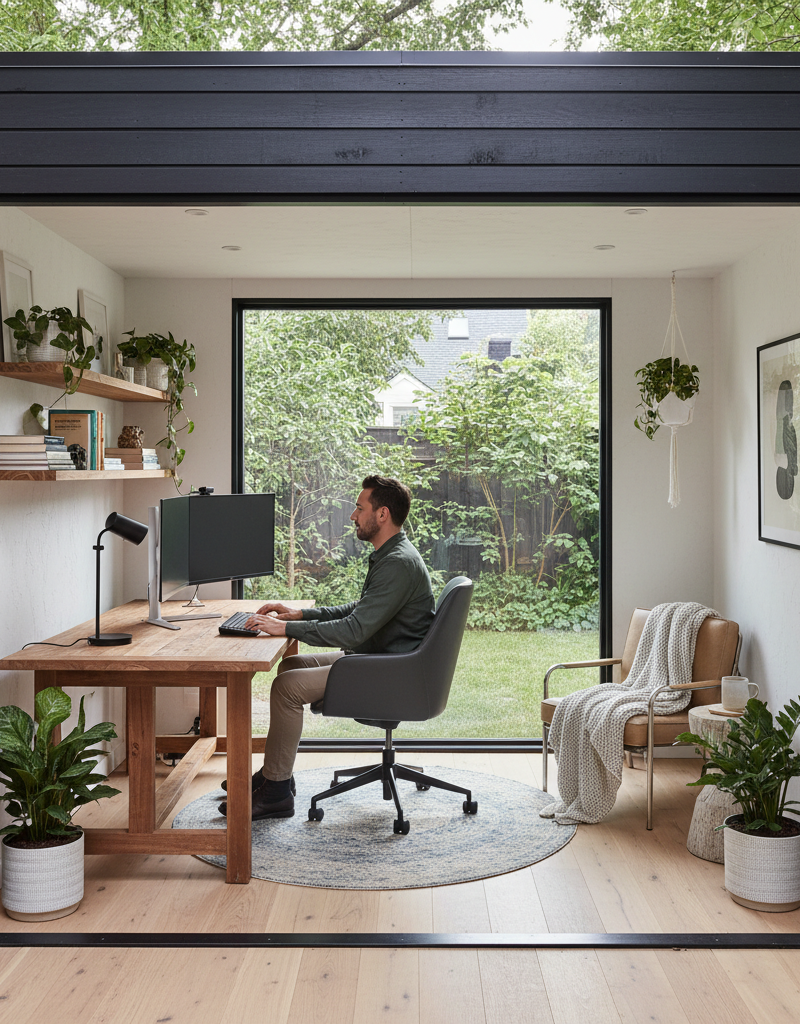
Converting an old shed into a functional, comfortable home office requires more than just tidying up. It involves critical steps like ensuring a sound foundation, weatherproofing the structure, insulating for year-round comfort, and safely installing electrical power. With careful planning and execution, even a dilapidated shed can become a professional and inspiring workspace, adding significant value and utility to your property.
The Problem
Many homeowners have an aging shed in their backyard – often ignored, overflowing with forgotten tools, or slowly succumbing to the elements. These structures, while seemingly past their prime, represent untapped potential. The problem isn't just an eyesore; it's a wasted opportunity for valuable space. In an era where remote work is increasingly common, the need for a dedicated, distraction-free home office has never been greater. Trying to work from a kitchen table or spare bedroom often leads to decreased productivity, a blurred work-life balance, and a constant feeling of clutter. The thought of transforming a neglected shed into a functional office can seem daunting, especially when considering structural integrity, weather elements, and the complexity of adding utilities.
How It Works
A successful shed-to-office conversion hinges on understanding basic construction principles and how environmental factors affect the structure. Most sheds are built on simple wood skids or concrete blocks, designed for storage, not human habitation. This means the foundation often needs reinforcement or leveling to support added weight and ensure longevity.
The shed's exterior, including the roof and walls, acts as the primary barrier against weather. Water intrusion, whether from a leaky roof or capillary action through the walls, is the enemy of any interior space. Proper flashing, robust roofing materials (like asphalt shingles or metal panels), and exterior siding with a good moisture barrier are crucial. Ventilation is equally important to prevent condensation and mold growth, especially in insulated spaces. Simple vents in the eaves and gables can create a convection airflow, drawing out moist, warm air.
Insulation works by creating a thermal break, slowing the transfer of heat in summer and retaining it in winter. Different types of insulation, such as fiberglass batts, rigid foam panels, or spray foam, have varying R-values (thermal resistance) and installation methods. A vapor barrier, typically a sheet of polyethylene, is installed on the warm side of the insulation to prevent moisture from migrating into the wall cavity and condensing.
Finally, electrical power involves bringing a sub-panel or dedicating a circuit from the main house panel to the shed. This requires trenching for underground conduit, pulling appropriate gauge wire, and safely installing outlets, switches, and lighting fixtures. All wiring must comply with local electrical codes, often necessitating a licensed electrician for connection to the main service and final inspection. Understanding these core functions—structure, weatherproofing, insulation, and electrical—is fundamental to planning and executing a lasting, comfortable home office.
Step-by-Step Fix
Here's how to breathe new life into an old shed and turn it into a productive home office:
- Assess and Clear the Shed — Before you touch a hammer, completely empty the shed.
- Safety First: Wear gloves and a dust mask. Watch for pests like wasps, spiders, or rodents.
- Inspect Thoroughly: Look for rot, termite damage, sagging rooflines, and a deteriorating foundation. Document any issues with photos. This initial assessment will dictate the scope of your project.
- Reinforce the Foundation and Level the Structure — A stable base is paramount for any habitable structure.
- If on Skids/Blocks: Use a hydraulic jack and shims (composite or pressure-treated wood) to level the shed. Place new concrete blocks or piers as needed for additional support.
- If on Concrete Slab: Inspect for cracks. Minor cracks can be filled with concrete repair epoxy. Major cracks or a settling slab might require professional assessment.
- Pro Tip: Ensure proper drainage around the foundation to prevent future moisture issues. Grade the earth away from the shed if necessary.
- Repair Structural Damage — Address any compromised framing immediately.
- Replacing Rotted Wood: Cut out rotted sections of studs, joists, or rafters. Use new pressure-treated lumber for repairs, connecting with structural screws or framing connectors.
- Roof Repair: Patch or replace damaged sheathing. Consider adding hurricane ties for extra roof-to-wall connection strength if you live in a high-wind area.
- Wall Reinforcement: Add blocking between studs for rigidity or sister new studs alongside damaged ones.
- Weatherproof the Exterior — Protect your office from the elements.
- Roofing: Repair or replace shingles. Ensure drip edges are correctly installed to guide water into gutters. For metal roofs, check for loose fasteners and seal any gaps.
- Siding: Patch holes, replace damaged sections, and apply a fresh coat of exterior paint or stain. Consider adding a house wrap (e.g., Tyvek) under new siding for an extra moisture barrier.
- Seal Gaps: Caulk around windows, doors, and any penetrations. Ensure existing windows and doors seal tightly; replace them if they are beyond repair.
- Install New Windows and Doors (Optional but Recommended) — Improve natural light and aesthetics.
- Rough Opening: Ensure the rough openings are plumb, level, and square.
- Installation: Follow manufacturer instructions for shimming, fastening, and sealing (flashing tape, caulk).
- Considerations: Choose energy-efficient windows, like double-pane, to help with insulation. A wider door can be great for moving furniture.
- Insulate Walls, Ceiling, and Floor — Create an energy-efficient, comfortable space.
- Walls: Install fiberglass batts, rigid foam, or mineral wool insulation between studs.
- Ceiling: Insulate between rafters or ceiling joists. Ensure baffles are in place to maintain attic ventilation if you have a vented roof design.
- Floor: Install rigid foam insulation or fiberglass batts with a wire mesh or thin plywood support under the floor joists to prevent sagging.
- Vapor Barrier: After insulation, staple a 6-mil polyethylene vapor barrier to the warm side of the framed cavities (typically the interior side).
- Run Electrical Wiring — This step often requires professional help.
- Permits: Check local codes – electrical work almost always requires permits and inspections.
- Trenching: Dig a trench for underground conduit from your house's main panel to the shed. The depth and type of conduit/wire depend on local codes.
- Rough-in: Install electrical boxes for outlets, switches, and lighting. Run appropriate gauge wire through studs and joists, leaving enough slack for connections.
- Professional Connection: A licensed electrician must connect the shed's wiring to your main electrical panel.
- Safety: Always turn off power at the main breaker before working on electrical components. Use a voltage tester to confirm power is off.
- Install Interior Finishes — Bring your office to life.
- Drywall/Plywood: Install drywall sheets or plywood paneling on walls and ceilings. Finish drywall seams with joint compound and tape.
- Flooring: Lay down a durable and comfortable flooring option like laminate, vinyl plank, or engineered wood.
- Paint: Apply primer and paint to walls and trim.
- Lighting and Fixtures: Install light fixtures, ceiling fans, outlets, and switches after the electrical inspection.
- HVAC: Consider a mini-split heat pump for efficient heating and cooling, or a portable electric heater/AC unit.
Common Causes
The primary reason sheds become neglected is often a combination of factors:
- Age and Exposure: Older sheds, especially those built with non-pressure-treated lumber, are highly susceptible to rot, insect damage, and general deterioration from continuous exposure to rain, sun, and temperature fluctuations.
- Poor Initial Construction: Many backyard sheds are built with minimal foundations, inadequate flashing, or low-quality materials, accelerating their decline. They weren't designed for the long haul or for habitation.
- Lack of Maintenance: Periodic inspections, repainting, sealing cracks, and clearing gutters are often overlooked, leading to small issues becoming major problems over time.
- Shifting Ground: Changes in soil moisture or frost heave can cause foundations to shift and settle, leading to structural instability, cracked walls, and misaligned doors.
- Water Intrusion: Leaky roofs, clogged gutters, or improper drainage around the base of the shed are common culprits, leading to wood rot, mold, and damage to stored items.
Common Mistakes
Homeowners making a shed-to-office conversion often stumble on critical details:
- Ignoring Foundation Issues: Trying to build on a weak, unlevel, or rotting foundation will lead to problems down the road, from crooked walls to structural failure. Always start with a solid base.
- Skipping Weatherproofing Steps: Neglecting proper roofing, siding repairs, or sealing gaps will result in leaks, mold, and damage to the interior finishes, making the shed unusable in bad weather.
- Under-Insulating: Skimping on insulation means your office will be scorching in summer and freezing in winter, drastically increasing heating/cooling costs and making it uncomfortable for work. Don't forget the floor and ceiling.
- DIYing Complex Electrical: Attempting to wire a shed without knowledge of codes or proper techniques is extremely dangerous, risking fires, electrocution, and failing critical inspections. Always consult or hire a licensed electrician.
- Forgetting Ventilation: Without proper airflow, especially in combination with insulation, condensation can build up, leading to mold, mildew, and stale air, even if the shed is otherwise weatherproof.
- Neglecting Permits: Many jurisdictions require permits for significant structural changes or adding electrical service to an outbuilding. Failing to obtain them can lead to fines, forced demolition, or issues with home resale.
Cost & Time Breakdown
| Task | DIY Cost | Pro Cost | Time |
|---|---|---|---|
| Foundation Repair/Leveling | $100–$400 | $500–$1,500 | 4–8 hours |
| Structural & Roof Repair | $200–$800 | $800–$2,500 | 1–3 days |
| Weatherproofing (Siding/Paint) | $300–$1,000 | $1,000–$3,000 | 1–2 days |
| Insulation & Vapor Barrier | $400–$1,200 | $800–$2,000 | 1–2 days |
| Electrical Rough-in | $200–$500 (materials) | $1,500–$5,000 (pro only) | 1–3 days |
| Interior Finishing (Drywall/Floor/Paint) | $600–$1,800 | $2,000–$6,000 | 3–7 days |
| Total Estimated Project | $1,800–$5,700 | $6,600–$20,000+ | 1–3 weeks |
(Note: Costs can vary significantly based on shed size, material choices, current condition, and local labor rates. Electrical work is strongly recommended for professionals.)
Tips & Prevention
- Regular Inspections: Twice a year, walk around your shed. Look for loose shingles, peeling paint, signs of pests, or leaning walls. Early detection prevents major repairs.
- Maintain Drainage: Keep gutters clean and ensure the ground around the shed slopes away from the foundation to prevent water intrusion.
- Good Ventilation: Even after conversion, maintain good airflow. If a mini-split isn't used, ensure ridge and soffit vents are clear, or consider a small exhaust fan if condensation is an issue.
- Prevent Pests: Seal all entry points, use screens on vents, and keep the area around the shed clear of debris and overgrown vegetation.
- Quality Materials: When making repairs or additions, invest in durable, weather-resistant materials especially for roofing, siding, and pressure-treated lumber for any ground contact.
- Smart Electrical Planning: Before starting, map out exactly where you'll need outlets, lights, and any special equipment (e.g., mini-split, powerful computer setup). This prevents needing to open walls later.
- Consider Natural Light Seriously: Maximize natural light with strategically placed windows or even a skylight. This reduces reliance on artificial lighting and creates a more pleasant workspace.
When to Call a Professional
While many aspects of a shed conversion are within a capable DIYer's reach, some tasks demand a licensed professional for safety, code compliance, and effective results. You must call a licensed electrician for all aspects of connecting the shed's electrical system to your home's main panel. This includes trenching, sub-panel installation, and final circuit connections, as improper wiring poses severe fire and electrocution risks. If your shed's foundation shows significant cracking, major settling, or extensive rot that compromises the structure's integrity, consult a structural engineer or a foundation repair specialist. They can assess the damage and recommend safe, lasting solutions. For extensive roof damage, such as a sagging ridge line or widespread rot beyond simple patch repairs, a professional roofing contractor can ensure a watertight and durable new roof. Finally, if you're unsure about local building codes or permit requirements for ANY part of your project, especially for structural changes or utility additions, contact your local building department or a general contractor familiar with local regulations. Proceeding without proper permits or understanding code can lead to fines and rework.
Related Articles
Keep troubleshooting with these hand-picked guides from FixlyGuide:
- The Single Board Secret to Attracting Bluebirds: A Quick DIY House — Discover how to construct an ideal bluebird house using just one cedar board, providing a safe and inviting home for these cherished backya…
- 7 Hidden Equity Drains Costing You Thousands Annually — Your home is an asset, but silent problems like minor leaks, poor insulation, and deferred maintenance can drain its value. Discover the se…
- The Surprising Trick to Cutting Your Dryer Bill By $100 Per Year — Installing a clothesline can significantly reduce your energy bills and add a fresh scent to your laundry. This guide covers how to choose…
- The 7 Critical Household Filters You're Forgetting (And What They Cost You) — Neglected household filters are quietly costing you money, diminishing air quality, and paving the way for expensive repairs. Discover the…
- The 12 Checks That Prevent 80% of Costly Home Repairs — Don't wait for a disaster. Our comprehensive monthly home maintenance checklist reveals the surprising, simple tasks that catch small issue…
- Can Your Kitchen Wiring Handle a High-CFM Range Hood? — Discover if your home's existing electrical circuit can support a powerful, high-CFM range hood upgrade without the need for a costly, comp…
Get the print-ready PDF of this guide
A clean, ad-free, printable version you can keep on your phone or pin to the workshop wall. We'll also send occasional weekly tips matched to your home situation.
- Print-optimized layout
- Tools, materials & every step included
- Unsubscribe anytime
This article was independently written by FixlyGuide based on the source topic.
Frequently asked questions
How much does it cost to convert a shed into an office?+
The cost to convert a shed into an office can range from a DIY budget of $1,800 to $5,700, primarily for materials, up to $6,600 to $20,000+ if hiring professionals for significant portions like electrical work, foundation repair, and extensive finishing. The total cost depends on the shed's original condition, size, and the quality of finishes chosen.
Do I need a permit to turn my shed into an office?+
In most jurisdictions, you will need a permit to convert a shed into a habitable space like an office, especially if you are adding electrical service, significant structural changes, or plumbing. Always check with your local building department before starting any work to understand specific requirements and avoid penalties.
How do I insulate a shed for year-round use?+
To insulate a shed for year-round use, you'll need to insulate the walls, ceiling, and floor. Common materials include fiberglass batts, rigid foam panels, or mineral wool. It's crucial to also install a vapor barrier on the warm side of the insulation to prevent moisture buildup and ensure adequate ventilation to prevent condensation and mold.
What kind of foundation is best for a shed office?+
The best foundation for a shed office typically depends on its size, weight, and local soil conditions. Options include a properly leveled and anchored concrete slab, a sturdy pier and beam foundation with concrete footings, or heavy-duty skids set on a gravel base with concrete blocks. The foundation must be stable, level, and ensure proper drainage to prevent moisture issues and structural damage over time.

Discussion
Loading comments…