
Tools & materials you'll need
Affiliate linksAs an Amazon Associate FixlyGuide earns from qualifying purchases — at no extra cost to you. Prices and availability are accurate as of publication and subject to change.
Quick Answer
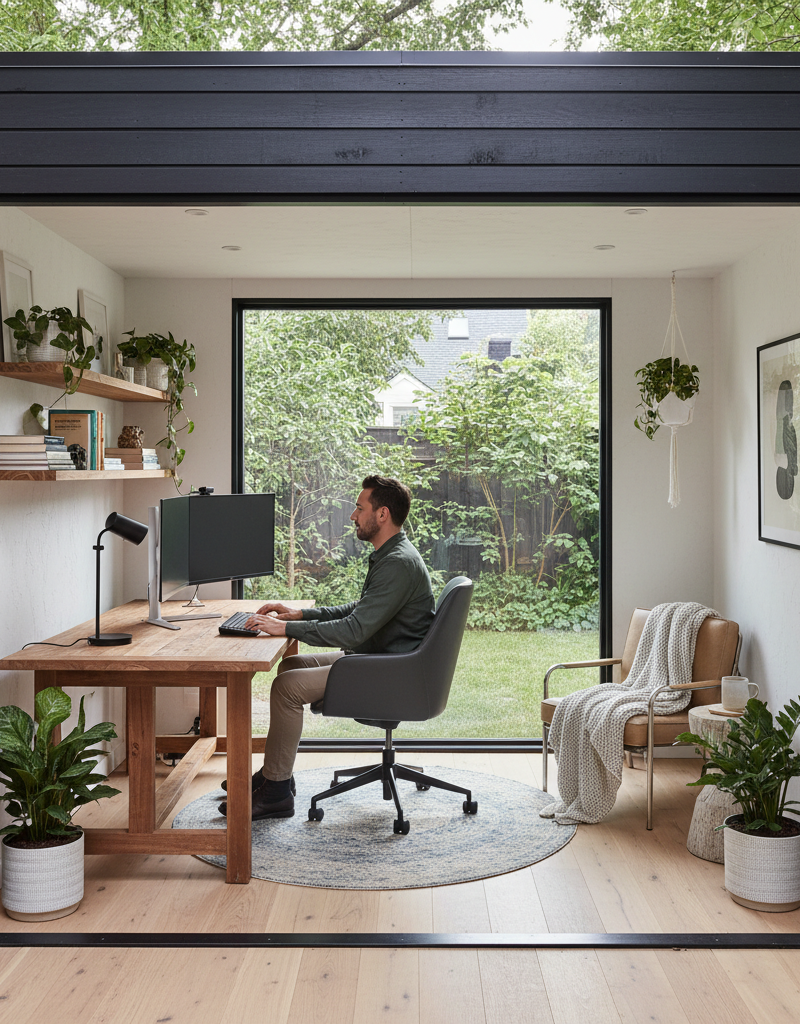
Turning an old, disused shed into a functional backyard office, art studio, or even a small guest retreat is an achievable DIY project that can significantly expand your home's usable space. The core process involves assessing the existing structure, making necessary repairs and reinforcements, adding insulation and weatherproofing, and then finishing the interior to suit its new purpose. Careful planning, especially regarding local zoning and permit requirements for structures and utility connections, can help you avoid costly delays and ensure a smooth transformation.
The Problem
Many homeowners have an old, neglected shed in their backyard. It might be leaning, leaking, filled with clutter, or simply an eyesore. This dilapidated structure represents a significant amount of wasted potential — valuable square footage that could be repurposed rather than torn down. The challenge lies in seeing beyond the rot and rust to envision a functional, comfortable space, and then understanding the practical steps required to bring that vision to life without breaking the bank or running afoul of local building codes. Homeowners often struggle with knowing where to start, what materials to use, and how to tackle common issues like structural instability, poor insulation, or lack of electricity.
How It Works
Transforming a shed isn't just about cosmetic changes; it's about making a basic structure habitable and functional. Think of it in layers, starting from the ground up and outside in. First, the foundation needs to be stable and level. Many older sheds sit directly on dirt, concrete blocks, or a crumbling slab, which can lead to moisture issues and structural sag. Reinforcing or replacing the foundation provides a solid base. Next, the framing — walls, roof, and floor joists — must be sound. Water damage, rot, or insect infestation can compromise these elements, requiring repair or replacement to ensure safety and longevity. Once the structure is sound, weatherproofing becomes paramount. This involves repairing or replacing roofing materials, patching holes in siding, and ensuring windows and doors seal properly to keep out moisture and pests.
With the exterior secured, attention turns to making the interior comfortable. Insulation is critical, particularly for a space intended for year-round use. Walls, floor, and ceiling typically receive batt insulation, rigid foam boards, or blown-in insulation, creating a thermal envelope that keeps the space warm in winter and cool in summer. A vapor barrier is usually installed on the warm side of the insulation to prevent condensation buildup within the wall cavities. Installing drywall, plywood, or other wall coverings creates a finished interior.
Finally, utilities like electricity and sometimes plumbing transform a shed into a truly functional space. A qualified electrician typically extends a dedicated circuit from the main house panel to the shed, installing outlets, switches, and lighting. If plumbing is desired for a small sink or toilet, this usually involves trenching water supply and drainage lines, often connecting to existing house lines. These utility connections are often the most complex and permit-sensitive aspects of a shed transformation. Understanding the sequence and interplay of these components is key to a successful project.
Step-by-Step Fix
1. Assess and Plan — Thoroughly inspect your shed's existing condition and define its new purpose. * Check for rot, insect damage, foundation issues, and roof leaks. Document everything. * Consider your needs: office, art studio, gym, guest room? How much space, light, and power do you need? * Research local zoning laws and building codes. Many jurisdictions allow unpermitted accessory structures under specific size (e.g., 100-200 sq ft) and height limits, especially if they lack dedicated plumbing or aren't considered habitable dwellings. Always check before you start.
2. Clear and Demolish — Remove all existing contents and any unsalvageable components. * Safety Note: Wear gloves, eye protection, and a dust mask. Be careful with sharp objects and old, rusty fasteners. * Empty the shed completely. Sort items for disposal, recycling, or storage. * Remove any rotted siding, flooring, or framing that cannot be repaired.
3. Foundation and Structural Repair — Ensure a stable, level, and dry base for your shed. * Address any sagging or unlevel areas. If on concrete blocks, re-level and consider adding a gravel bed for drainage. * For a dirt floor, consider pouring a new concrete slab or building a robust wooden skid foundation on gravel. This provides a moisture barrier and a solid anchoring point. * Repair or replace any rotted floor joists, wall studs, or roof rafters. Use pressure-treated lumber for any wood in contact with the ground.
4. Weatherproof the Exterior — Protect your new space from the elements. * Repair or replace damaged roofing. Options include asphalt shingles, metal roofing, or rubber membranes, depending on your roof pitch and budget. * Patch or replace damaged siding. Ensure all seams are properly sealed and consider adding house wrap beneath new siding for an extra layer of moisture protection. * Inspect and repair or replace existing windows and doors. Add weatherstripping to all openings for improved energy efficiency.
5. Run Electrical (and Plumbing, if applicable) — Bring power and water to your shed. * Professional Callout: For any wiring, especially extending a new circuit from your main panel, always consult a licensed electrician. Incorrect wiring is a fire hazard and can void insurance. * An electrician will likely install a subpanel or a dedicated circuit, running appropriate gauge wire underground in conduit to the shed. Install outlets, switches, and lighting fixtures. * If adding plumbing, trench and lay water supply and drainage lines. This often requires tying into existing house lines and may require permits and inspections. Consider simpler alternatives like a rain barrel for garden water or a composting toilet for waste.
6. Insulate and Vapor Barrier — Create a comfortable interior climate. * Install insulation in walls, floor, and ceiling cavities. Common choices include fiberglass batts, mineral wool, or rigid foam boards. * Place a vapor barrier (e.g., 6-mil poly sheeting) on the warm side of the insulation (interior side in most climates) to prevent moisture condensation within the walls.
7. Interior Finishing — Transform the raw structure into a finished room. * Install drywall, plywood, or other desired wall and ceiling coverings. Finish seams and paint. * Lay flooring. Options range from inexpensive vinyl plank to laminate or even engineered wood, depending on your intended use and budget. * Install trim, baseboards, and shelves. Add furniture and decor to complete your new space.
8. Exterior Aesthetics — Make your shed look like an inviting part of your home. * Add fresh paint or stain to the siding and trim. * Landscape around the shed: add a small pathway, some planting beds, or even a small deck to create an inviting entrance.
Common Causes
- Neglect and Lack of Maintenance: Most sheds fall into disrepair due to years of ignoring minor leaks, chipped paint, or small structural shifts, allowing problems to escalate. Regular inspections and minor repairs could prevent major overhauls.
- Poor Original Construction: Many pre-built or DIY sheds are constructed with minimal foundations, inadequate flashing, or untreated wood, making them susceptible to rot and moisture damage from the outset.
- Moisture Infiltration: Leaky roofs, gaps in siding, unsealed windows, and direct contact with soil are primary culprits for water damage, leading to wood rot, mold, and pest infestations.
- Lack of Drainage: Sheds built in low-lying areas or without proper grading around the base can experience water pooling, which undermines foundations and encourages rot.
- Pest Infestation: Termites, carpenter ants, and rodents can cause significant structural damage if not addressed promptly, often attracted by moisture-damaged wood.
- Environmental Exposure: Constant sun exposure can degrade roofing materials and paint, while strong winds can lift shingles or damage siding over time.
Common Mistakes
- Skipping the Permit Check: Assuming a small structure won't require a permit can lead to costly fines, mandatory demolition, or difficulty selling your home later. Always check local zoning and building departments, especially if adding utilities.
- Ignoring Foundation Issues: Building on a compromised or unlevel foundation will lead to future structural problems, uneven floors, and continuous moisture issues. Repair the base thoroughly.
- Under-Insulating: Skimping on insulation means your new space will be uncomfortably hot in summer and cold in winter, driving up heating/cooling costs and making it less usable.
- Neglecting a Vapor Barrier: Without a proper vapor barrier, moisture can migrate into wall cavities, leading to mold growth, dampened insulation (reducing its effectiveness), and wood rot.
- Attempting Complex Electrical/Plumbing Without Experience: DIYing electrical or plumbing without proper knowledge is dangerous and often violates code. These are areas where professional help is usually required for safety and compliance.
- Overlooking Ventilation: A well-sealed and insulated shed still needs air circulation to prevent stale air, moisture buildup, and potential mold. Include passive vents or a small exhaust fan.
Cost & Time Breakdown
| Task | DIY Cost | Pro Cost | Time |
|---|---|---|---|
| Foundation repair/reinforcement | $50–$300 | $300–$1,000 | 1-2 days |
| Structural wood replacement | $100–$500 | $500–$1,500 | 1-3 days |
| Roofing & exterior weatherproofing | $200–$1,000 | $800–$2,500 | 2-4 days |
| Electrical installation | $200–$800 (materials) | $1,000–$3,000+ (pro) | 1-2 days (pro) |
| Insulation & vapor barrier | $100–$400 | $400–$1,200 (install) | 1-2 days |
| Interior finishing (drywall, paint, floor) | $300–$1,000 | $1,000–$3,000 | 3-7 days |
Tips & Prevention
- Regular Inspections: Twice a year, walk around your shed. Look for loose shingles, cracked caulk, signs of pest activity, or pooling water around the base. Address small issues immediately before they become big problems.
- Maintain Good Drainage: Ensure the ground around your shed slopes away from the foundation. Clear gutters and downspouts if they drain onto or near the shed. Consider a gravel perimeter for moisture control.
- Use Quality Materials: When making repairs or additions, invest in weather-resistant and durable materials, especially for roofing, siding, and any components close to the ground (e.g., pressure-treated lumber).
- Ventilation is Key: Even a well-insulated space needs airflow. Install soffit and ridge vents, or simple gable vents, to allow air circulation and prevent moisture buildup.
- Pest Control: Seal all small openings and cracks to prevent pests from entering. Consider using pest-resistant paint or treatments, especially for wood components.
- Stay Within Code Limits: If you want to avoid permits, design your shed transformation to stay within your local municipality's unpermitted accessory structure guidelines for size and utility connections. This often means no dedicated plumbing or permanent sleeping quarters.
When to Call a Professional
While many aspects of a shed transformation are DIY-friendly, certain tasks warrant professional expertise to ensure safety, compliance, and longevity. Always call a licensed electrician for extending new electrical circuits, installing a subpanel, or any work connecting to your home's main electrical system. Improper electrical work is a serious fire hazard and can lead to electrocution. Similarly, for new plumbing installations that tie into your home's water supply or waste lines, consult a licensed plumber. These often involve trenching, specific pipe sizing, and adherence to health codes. If your shed has severe structural damage, such as significant foundation cracks, leaning walls, or widespread rot affecting major support beams, a structural engineer or an experienced general contractor should be consulted before beginning any work. They can assess the extent of the damage and recommend the safest and most effective repair strategies.
Related Articles
Keep troubleshooting with these hand-picked guides from FixlyGuide:
- The Secret Power Tool Hiding in Your Garage for a Speedier Clean — Unlock the hidden potential of your cordless drill to tackle stubborn household grime, soap scum, and dirt with specialized cleaning attach…
- The Single Board Secret to Attracting Bluebirds: A Quick DIY House — Discover how to construct an ideal bluebird house using just one cedar board, providing a safe and inviting home for these cherished backya…
- 7 Hidden Equity Drains Costing You Thousands Annually — Your home is an asset, but silent problems like minor leaks, poor insulation, and deferred maintenance can drain its value. Discover the se…
- The Surprising Reason Your House Ticks and Pops At Night (And What It Means) — That unsettling ticking or popping sound in your house at night is usually normal thermal expansion and contraction, but sometimes it signa…
- The 3 Hidden Ways Your — Uncover the surprising habits and hidden household issues that are silently increasing your homeownership costs and learn how to fix them.
- The Secret to a Flawless Drywall Patch Is In the Paper — Frustrated by drywall patches that always show through? That telltale bump or sanding mark can ruin a perfect wall. Discover the 'Californi…
This article was independently written by FixlyGuide based on the source topic.
Frequently asked questions
Do I need a permit to convert my shed into an office?+
It depends on your local municipality and the scope of the project. Many areas allow smaller accessory structures (e.g., under 100-200 sq ft) without permits, especially if they don't have permanent plumbing or aren't used for sleeping. However, adding electricity or extensive structural changes often triggers permit requirements. Always check with your local planning or building department before starting.
How much does it cost to convert a shed into a home office?+
Costs can vary widely based on the shed's condition, the desired finishes, and whether you do the work yourself or hire pros. DIY material costs can range from $1,000 to $5,000+. Hiring professionals for electrical, plumbing, and major structural work could bring the total to $5,000 to $15,000 or more. The biggest cost variables are often electrical/plumbing and severe structural repairs.
What's the most important first step in shed conversion?+
The most important first step is a thorough assessment of the shed's existing condition, particularly its foundation, roof, and framing. Simultaneously, research your local zoning and building codes to understand what is permissible without permits and what will require them. This planning phase prevents costly rework and unexpected issues later on.
Can I insulate my shed for year-round use?+
Yes, proper insulation is crucial for year-round comfort. Insulate the floor, walls, and ceiling using materials like fiberglass batts, mineral wool, or rigid foam boards. Don't forget a vapor barrier on the interior (warm side) of the insulation to prevent condensation and moisture issues within the walls.
When should I consider tearing down the old shed instead of converting it?+
Consider demolition if the shed's foundation is severely compromised, if there's extensive widespread rot throughout the framing that would require rebuilding most of the structure, or if the cost of repairs significantly exceeds the cost of building a new shed that better suits your needs. If the shed is structurally unsound or infested with severe pests that have extensively damaged the wood, a fresh start might be more practical and cost-effective.


Discussion
Loading comments…