
Tools & materials you'll need
Affiliate linksAs an Amazon Associate FixlyGuide earns from qualifying purchases — at no extra cost to you. Prices and availability are accurate as of publication and subject to change.
Quick Answer
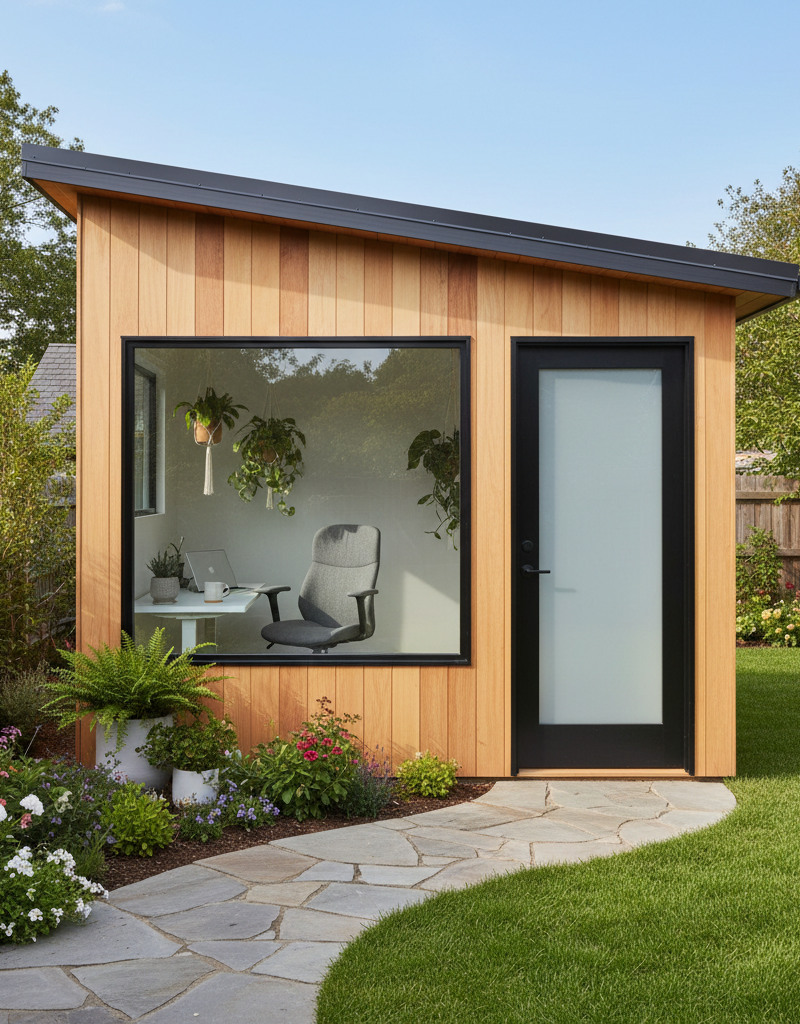
Turning an old, disused backyard shed into a vibrant, functional space like a home office, art studio, or personal gym is a highly rewarding DIY project. It involves careful planning, structural reinforcement, weatherization, insulation, and the strategic addition of utilities like electricity. The key is to assess the existing structure's integrity and then systematically upgrade it to meet the demands of its new purpose, ensuring comfort, safety, and longevity.
The Problem
Many homes have a backyard shed that's seen better days. It might be a repository for forgotten tools, overgrown with weeds, or simply an eyesore taking up valuable yard space. Often, these sheds suffer from deteriorated siding, leaky roofs, inadequate foundations, and a complete lack of climate control or electrical service. This presents a missed opportunity for homeowners who could benefit from additional usable square footage without the expense and complexity of a home extension. The challenge lies in converting a dilapidated, uninsulated storage unit into a comfortable, safe, and electrically sound environment suitable for regular occupancy.
How It Works
Transforming a shed is essentially a miniature construction project, focusing on making the existing framework habitable. It starts with the foundation: a solid, level base is critical to prevent moisture intrusion and structural shifting. This might involve reinforcing an existing concrete slab or adding a gravel and paver base if the shed is on skids. Next, the walls and roof need attention. Rotting wood must be replaced, and the entire structure needs to be squared and strengthened. Weatherproofing is paramount, including repairing or replacing roofing shingles, adding drip edges, and sealing all gaps and cracks. Proper insulation, typically fiberglass batts in walls and ceiling, and rigid foam in the floor, creates a thermal envelope, making the space usable year-round. Electrical rough-in involves running conduit and wiring from your main service panel to the shed, installing outlets, switches, and lighting fixtures. This requires careful calculation of load requirements and adherence to local electrical codes. Finally, interior finishes like drywall, flooring, and paint transform the raw space into a comfortable room. Ventilation, either through windows or a small exhaust fan, is also crucial to prevent moisture buildup and ensure air quality.
Step-by-Step Fix
-
Assess and Clear the Site — Begin by emptying the shed and thoroughly inspecting its current condition.
- Tools: Work gloves, pry bar, trash bags, broom.
- Safety: Wear sturdy closed-toe shoes and gloves. Watch for pests, sharp objects, and unstable structures. If the shed shows significant structural rot or imminent collapse, stop and consider professional demolition or repair.
- If this doesn't work: If the foundation is severely cracked or uneven beyond minor shimming, a new foundation might be required. Consult a local concrete contractor.
-
Repair Structural Issues — Replace any rotten studs, sills, or roof rafters. Ensure the structure is plumb and square.
- Tools: Circular saw, drill, measuring tape, level, framing lumber, structural screws.
- Materials: Pressure-treated lumber for any ground contact, exterior-grade plywood for sheathing.
- Tip: Use wood filler and exterior paint on minor imperfections on existing siding.
-
Reinforce and Level the Foundation — If on skids, ensure the shed is level and well-supported on concrete blocks or pavers. For concrete slabs, repair cracks with concrete repair caulk.
- Tools: Shovel, tamper, gravel, concrete blocks/pavers, shims, level, concrete crack filler.
- Note: For sheds directly on soil, create a gravel perimeter to improve drainage.
-
Weatherproof the Exterior — Repair or replace damaged siding and roofing. Install drip edges and seal all exterior gaps with high-quality caulk.
- Tools: Roofing hammer, pry bar, utility knife, caulk gun, roofing nails, roofing felt, shingles, exterior caulk.
- Materials: Siding panels (T-111, vinyl, fiber cement), roofing felt, asphalt shingles, flashing, exterior-grade caulk.
- Safety: Use a sturdy ladder, ensure a spotter if working on the roof. Be mindful of power lines.
-
Install Windows and Doors — Replace old, inefficient windows and doors with new, energy-efficient units. Ensure proper sealing and flashing.
- Tools: Saw, drill, shims, level, measuring tape, exterior screws, insulation foam sealant (low expansion).
- Materials: Pre-hung windows/doors, flashing tape, shims, exterior trim boards.
-
Run Electrical Service (Pro Recommended) — This step is best left to a licensed electrician. They will safely run a dedicated circuit from your main panel, install a subpanel in the shed, and wire for outlets, switches, and lighting.
- Pro Callout: Never attempt to run new electrical circuits or connect to your main service panel yourself unless you are a qualified, licensed electrician. High voltage electricity can cause severe injury or death, and improper wiring is a fire hazard. Always hire a professional for electrical work.
-
Insulate Walls, Ceiling, and Floor — Install appropriate insulation. Fiberglass batts for walls and ceiling, rigid foam boards for the floor.
- Tools: Utility knife, tape measure, staple gun, safety glasses, dust mask.
- Materials: R-13 or R-19 fiberglass batts (walls/ceiling), R-10 or R-15 rigid foam insulation (floor), vapor barrier (plastic sheeting).
- Safety: Wear gloves, long sleeves, eye protection, and a dust mask when handling fiberglass insulation.
-
Finish Interior Walls and Floor — Install drywall or plywood paneling for walls. Lay down flooring such as laminate, vinyl plank, or epoxy coating.
- Tools: Drywall saw, drill, utility knife, mud pan, taping knife, level, flooring cutter.
- Materials: Drywall sheets, drywall screws, joint compound, joint tape, flooring materials, primer, paint.
- Tip: Consider a durable, easy-to-clean flooring option like vinyl plank for a shed that might see foot traffic with dirt or debris.
-
Paint and Decorate — Apply primer and paint to walls and trim. Furnish the space according to its new purpose.
- Tools: Paint brushes, rollers, paint trays, drop cloths.
- Materials: Interior primer, interior paint, caulk.
- Tip: Use light colors to make the space feel larger and brighter.
Common Causes
- Neglect and Lack of Maintenance: The most significant cause of shed deterioration is simply ignoring routine maintenance. Small issues like a loose shingle or a rotting board can quickly escalate if not addressed. Proper sealing and sealing on a regular basis is crucial in terms of prevention, as this can really prolong the life of the shed and avoid bigger problems later.
- Poor Initial Construction: Many off-the-shelf sheds are built with minimal foundations and lower-grade materials, making them susceptible to environmental damage over time. This can lead to a shorter lifespan than expected.
- Water Damage: Poor drainage around the shed, inadequate roofing, or unsealed siding allows water to penetrate, leading to wood rot, mold, and structural compromise. Water is really the enemy of the structure of the shed. It will cause all sorts of problems in both the short-term and the long-term, and it should be avoided as much as possible.
- Pest Infestations: Rodents and insects can chew through wood, insulation, and even wiring, compromising the shed's integrity and creating health hazards. Be sure to address these issues right away, as they can cause bigger problems later on.
- Lack of Ventilation: Insufficient airflow can lead to condensation buildup, fostering mold growth and accelerating the decay of internal components. You can improve this by using proper insulation and ventilation techniques.
- Foundation Movement: Uneven settling of the ground beneath the shed can cause racking, twisting, and structural stress, leading to misaligned doors, windows, and cracked walls. Ensuring a proper foundation is very crucial in order to prevent structural complications later on. You don't want to find yourself having difficulties with your shed later on down the line.
Common Mistakes
- Underestimating Electrical Needs: Many DIYers underestimate the power requirements for a comfortable office or studio, leading to overloaded circuits or inadequate lighting. Plan for dedicated circuits for high-draw items like heaters or air conditioners.
- Skipping Proper Foundation Work: Rushing the foundation or assuming an existing one is sufficient is a recipe for future problems like uneven floors, moisture intrusion, and structural instability. Always ensure a level, well-drained, and robust base.
- Neglecting a Vapor Barrier: Without a proper vapor barrier behind drywall and under flooring, moisture can condense within wall cavities, leading to mold, mildew, and rot, even with insulation.
- Inadequate Ventilation: A sealed, insulated shed needs proper ventilation to prevent stuffiness and moisture buildup, especially if it will be occupied regularly. Consider a small exhaust fan or strategically placed operable windows. If you find yourself having issues with this later on, you can make these changes.
- Ignoring Local Building Codes: Attempting major shed transformations without checking local zoning and building codes can lead to costly rework, fines, or even forced demolition. Zoning regulations can be complicated, so it's best to consult a local authority to be sure.
- DIYing Complex Electrical Work: Attempting to wire a shed yourself without proper knowledge and permits is extremely dangerous and almost always violates code. Always hire a licensed electrician for this critical step.
Cost & Time Breakdown
| Task | DIY Cost | Pro Cost | Time |
|---|---|---|---|
| Foundation repair/reinforcement | $50–$300 | $300–$1,000 | 4–8 hours |
| Structural repairs | $100–$500 | $500–$2,000 | 1–3 days |
| Roofing & Siding | $200–$1,500 | $800–$3,500 | 2–4 days |
| Windows & Doors (materials) | $300–$1,000 | Included in install | 1 day |
| Electrical rough-in | DO NOT DIY | $1,000–$3,000+ | 1–2 days |
| Insulation | $150–$400 | $300–$800 | 1 day |
| Interior finishes (drywall, paint, floor) | $300–$1,200 | $1,000–$4,000 | 3–7 days |
| TOTAL | $1,100–$5,100 | $4,400–$14,300+ | 1–3 weeks active |
Tips & Prevention
- Annual Inspection: Once a year, walk around your shed. Check for loose shingles, cracked caulk, signs of pest entry, and proper drainage. Catching small issues early prevents major headaches.
- Gutter Installation: Consider adding gutters and downspouts to divert rainwater away from the foundation, protecting the base and preventing erosion. This is a fairly inexpensive addition but can drastically improve the life of your shed and keep its structural integrity for longer.
- Proper Ventilation: Ensure adequate airflow with vents or an operable window on opposing sides to prevent moisture buildup and maintain air quality.
- Regular Cleaning: Keep the perimeter of the shed clear of debris, overgrown vegetation, and anything that can trap moisture against the siding or provide a hiding place for pests. This is an easy way to avoid problems that can become larger further down the line.
- High-Quality Materials: When replacing components, opt for exterior-grade, pressure-treated, or rot-resistant materials to ensure longevity, especially in areas exposed to the elements.
- Interior Moisture Control: If using the shed as a living or workspace, consider a small dehumidifier during humid months, especially if sensitive electronics or materials are present.
When to Call a Professional
While many aspects of a shed transformation can be tackled by a competent DIYer, certain critical tasks absolutely require professional expertise. Any work involving your home's main electrical panel, running new dedicated circuits, or installing a subpanel in the shed should only be performed by a licensed and insured electrician. Electrical fires and electrocution are serious risks for DIYers. Similarly, if your shed's foundation shows significant structural damage, major cracks, or uneven settling over several inches, consult a structural engineer or a foundation repair specialist before proceeding. These issues can compromise the entire structure's safety and longevity. For extensive roofing repairs, especially on steeply pitched roofs or if you're uncomfortable working at heights, a professional roofer can ensure a watertight and durable installation. Finally, if local building codes for your specific project seem complex or overwhelming, a general contractor specializing in outbuildings can guide you through the process, acquire necessary permits, and ensure all work meets safety and legal standards.
Related Articles
Keep troubleshooting with these hand-picked guides from FixlyGuide:
- The Secret Power Tool Hiding in Your Garage for a Speedier Clean — Unlock the hidden potential of your cordless drill to tackle stubborn household grime, soap scum, and dirt with specialized cleaning attach…
- The Single Board Secret to Attracting Bluebirds: A Quick DIY House — Discover how to construct an ideal bluebird house using just one cedar board, providing a safe and inviting home for these cherished backya…
- The Secret Weapon Against Gaming Clutter: A $25 Custom Controller Stand You Can Build — Discover how a simple, custom-built stand using common materials can transform your gaming space, eliminating clutter and protecting your e…
- 7 Hidden Equity Drains Costing You Thousands Annually — Your home is an asset, but silent problems like minor leaks, poor insulation, and deferred maintenance can drain its value. Discover the se…
- The Single Cedar Board Secret to Attracting Bluebirds This Spring — Discover how a single cedar board can be transformed into a welcoming home for bluebirds, enriching your yard with their vibrant presence a…
- The 7 Critical Home Inspection Mistakes Most Homeowners Make (and How to Spot Them) — Discover the crucial home inspection mistakes homeowners commonly overlook and learn how to identify potential problems before they become…
Get the print-ready PDF of this guide
A clean, ad-free, printable version you can keep on your phone or pin to the workshop wall. We'll also send occasional weekly tips matched to your home situation.
- Print-optimized layout
- Tools, materials & every step included
- Unsubscribe anytime
This article was independently written by FixlyGuide based on the source topic.
Frequently asked questions
How much does it cost to convert a shed into an office?+
The cost to convert a shed into an office varies widely depending on the shed's starting condition, the quality of materials, and whether you DIY or hire professionals. Expect to spend $1,100–$5,100 for a DIY conversion and $4,400–$14,300+ for a professionally completed project, excluding significant structural overhauls or high-end finishes.
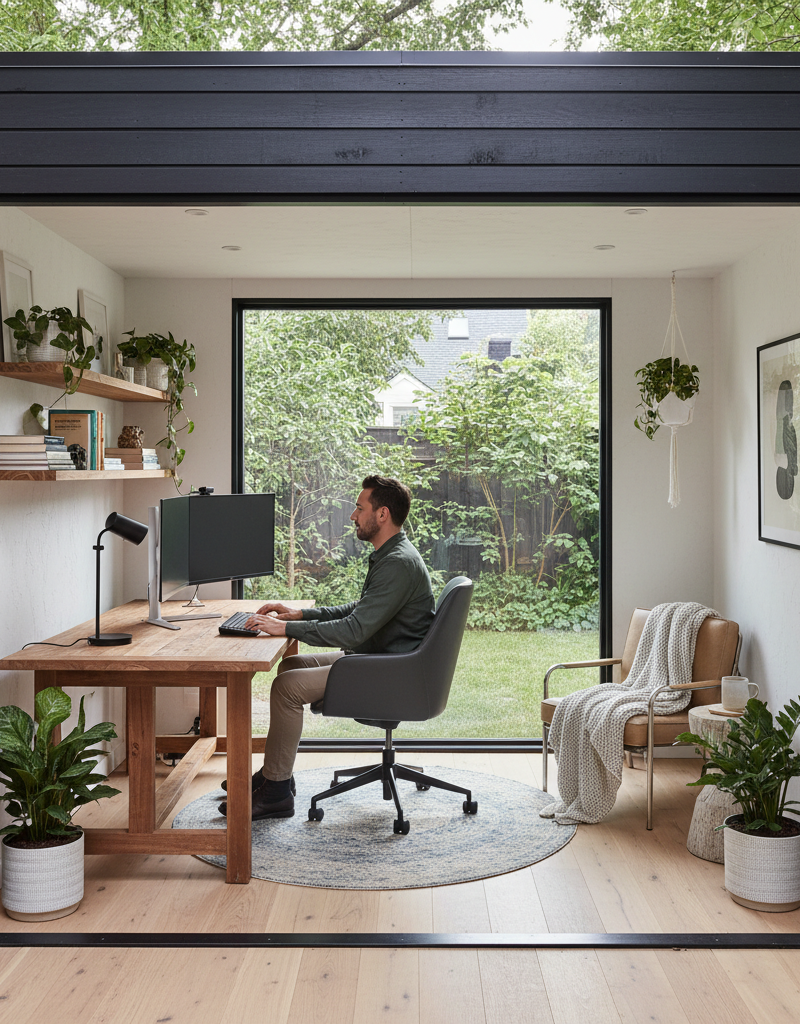
Can I put a desk and computer in my shed?+
Yes, once properly insulated, weatherized, and equipped with electrical service, a shed can absolutely house a desk, computer, and other office equipment. Ensure the space is climate-controlled for comfort and to protect electronics from extreme temperatures and humidity.
Do I need a permit to convert my shed?+
Permit requirements for shed conversions vary significantly by location and the scope of work. Adding electricity, plumbing, changing the footprint, or intending to use it as a habitable space almost always requires permits. Always check with your local planning department before starting any major renovation.

Discussion
Loading comments…