
Tools & materials you'll need
Affiliate linksAs an Amazon Associate FixlyGuide earns from qualifying purchases — at no extra cost to you. Prices and availability are accurate as of publication and subject to change.
Quick Answer
Many homeowners inadvertently make costly mistakes during their spring yard preparation, often leading to issues like poor plant growth, pest infestations, and even structural damage to their landscape. The most common errors include improper pruning techniques, neglecting soil health, over-fertilizing, mistiming weed control, and failing to inspect irrigation systems. By understanding and avoiding these pitfalls, you can ensure a healthier, more vibrant yard and save substantial money on future repairs or replacements.
The Problem
As winter fades, the anticipation of a lush, vibrant yard drives many enthusiastic homeowners to begin their spring yard preparation. However, this eagerness, when coupled with a lack of specific knowledge, often leads to a cycle of common, yet easily avoidable, mistakes. These aren't minor oversights; they are errors that can actively harm your plants, degrade your soil, invite diseases and pests, and ultimately lead to significant financial outlays for remediation or replacement. Imagine pruning a beloved shrub at the wrong time, only to discover you've sacrificed its entire season's bloom. Or applying fertilizer haphazardly, causing detrimental runoff and damaging your lawn. The problem isn't a lack of effort, but a misdirection of effort, turning what should be a rejuvenative process into a detrimental one. Recognizing these common mistakes before they're made is the critical first step in achieving a truly thriving spring landscape.
How It Works
Understanding the fundamental biological processes at play in your yard is key to effective spring preparation. During winter, plants enter a dormant state, conserving energy. As temperatures rise in spring, they awaken, drawing nutrients and water to fuel new growth. This is a critical period of vulnerability and opportunity.
Soil Health: Your soil is the foundation of your yard's health. It's a complex ecosystem teeming with microorganisms that break down organic matter, making nutrients available to plant roots. Compacted or nutrient-depleted soil restricts root growth and nutrient uptake, leading to weak plants susceptible to disease. Spring is when you can most effectively amend and aerate the soil, setting the stage for robust growth.
Plant Physiology: Each plant species has unique needs regarding water, light, and nutrients. Understanding when and how a plant grows, flowers, and fruits is crucial for proper care. For instance, spring-flowering shrubs (like lilacs or forsythia) set their flower buds on old wood in the previous season. Pruning them in early spring before they bloom will remove those buds, preventing flowers. Summer-flowering shrubs (like hydrangeas or roses) flower on new wood, so pruning them in early spring encourages more blooms. Incorrect pruning wounds can also create entry points for pests and diseases.
Weed Cycles: Weeds are opportunistic, often germinating when soil temperatures are just right. Many common weeds are annuals, meaning they complete their life cycle within one year. Pre-emergent herbicides work by forming a barrier in the soil that prevents weed seeds from germinating. Timing is everything: apply too early, and the barrier breaks down before all seeds germinate; apply too late, and seeds have already sprouted.
Irrigation and Drainage: After winter, your irrigation system components (pipes, sprinkler heads, valves) are susceptible to damage from freezing and thawing cycles. A properly functioning system delivers water efficiently, preventing both under-watering (leading to stress) and over-watering (leading to root rot and nutrient leaching). Good drainage ensures water doesn't pool, which can suffocate roots and create breeding grounds for pests. Checking and repairing your system in spring is vital for efficient water use and plant health throughout the hotter months.
Step-by-Step Fix
1. Correctly Prune for Health and Bloom — Avoid removing future blooms or stressing plants.
Pruning at the wrong time or with improper technique is one of the most common and damaging spring mistakes. For most deciduous trees and shrubs, the ideal time to prune is when they are dormant, typically in late winter or very early spring, before new growth begins. However, spring-flowering shrubs (like lilacs, forsythia, dogwood) should be pruned after they finish flowering. They set their buds on old wood in the previous season, so pruning them earlier will remove the very wood that holds the flowers.
- Tools: Sharp bypass pruners, loppers, pruning saw.
- Technique: Always make clean cuts just outside the branch collar or a lateral bud. Remove dead, damaged, or diseased branches first. Then, thin out crossing branches or those growing inwards to improve air circulation and light penetration. For overgrown shrubs, consider a 3-year rejuvenation prune, removing one-third of the oldest, thickest stems each year.
- If this doesn't work: If your plant isn't flowering despite correct pruning, reassess its sun exposure, soil nutrients, and watering schedule. Extremely stressed plants may not have the energy to produce blooms.
2. Revitalize Your Soil, Don't Just Fertilize — Focus on long-term soil health over quick fixes.
Many homeowners jump straight to applying synthetic fertilizers without first understanding their soil's actual needs or improving its structure. This can lead to chemical imbalances, nutrient runoff, and further soil degradation. A soil test is inexpensive and provides invaluable data.
- Tools: Soil test kit (available at garden centers or through local extension offices), shovel, wheelbarrow, compost, aged manure.
- Process: Collect soil samples from several areas of your yard, mix them, and send them to a lab for analysis. Based on the results, amend your soil with appropriate organic matter. For most yards, adding 1-2 inches of high-quality compost or aged manure to garden beds and lightly top-dressing lawns can significantly improve soil structure, water retention, and nutrient availability. Work it into the top 6-8 inches of garden beds. For lawns, rake it into the turf or use a broadcast spreader.
- If this doesn't work: If soil test results show extreme deficiencies or pH imbalances, consult with a local nursery or extension office for targeted solutions, which might include specific soil amendments like agricultural lime (to raise pH) or elemental sulfur (to lower pH).
3. Time Your Weed Control Strategically — Prevent weeds before they become a problem.
One of the biggest mistakes is waiting until weeds are visible and established before taking action. By then, they're harder to control and have likely already dispersed seeds. The key to effective weed control, especially for annual weeds like crabgrass, is prevention.
- Tools: Broadcast spreader, hand weeder/cultivator, pre-emergent herbicide (granular or liquid), post-emergent herbicide (spot treatment).
- Process: Apply a pre-emergent herbicide to your lawn when soil temperatures consistently reach 50-55°F (usually when forsythia blooms or dogwoods are in full flower). This creates a chemical barrier that prevents weed seeds from germinating. Follow product instructions meticulously regarding application rate and watering. For garden beds, apply a layer of mulch (2-3 inches thick) after clearing existing weeds to suppress new growth. Hand-weed any stubborn or perennial weeds that emerge throughout the season.
- Safety Note: Always read and follow all label instructions for herbicides, including wearing appropriate personal protective equipment (gloves, eye protection) and adhering to re-entry intervals for pets and children.
- If this doesn't work: If weeds persist, you may need a combination approach. For large infestations, consider a targeted post-emergent herbicide for existing weeds, but be aware that these can sometimes harm desirable plants if not applied carefully. Persistent perennial weeds might require repeated applications or manual removal to exhaust their root systems.
4. Don't Neglect Your Irrigation System — Ensure efficient watering and prevent leaks.
Leaving an irrigation system unchecked after winter can lead to costly water waste, damaged plants, and even property damage from leaks. Freezing temperatures can crack pipes and damage sprinkler heads.
- Tools: Screwdriver, adjustable wrench, replacement sprinkler heads/nozzles, plumber's tape, wire brush.
- Process: Slowly open the main water valve to your irrigation system, checking for leaks at valves, pipes, and connections. Run each zone manually, inspecting every sprinkler head for proper operation. Look for broken heads, clogged nozzles, or incorrect spray patterns. Clean or replace clogged nozzles. Adjust heads to ensure they are watering only intended areas and not sidewalks or driveways. Check drip lines for kinks or blockages. If you have a rain sensor, ensure it's clean and functioning correctly.
- If this doesn't work: If you find significant leaks, continue to have low pressure in certain zones, or cannot get a specific zone to turn on, you likely have a more complex issue with a solenoid valve, main line break, or controller, which may require professional help.
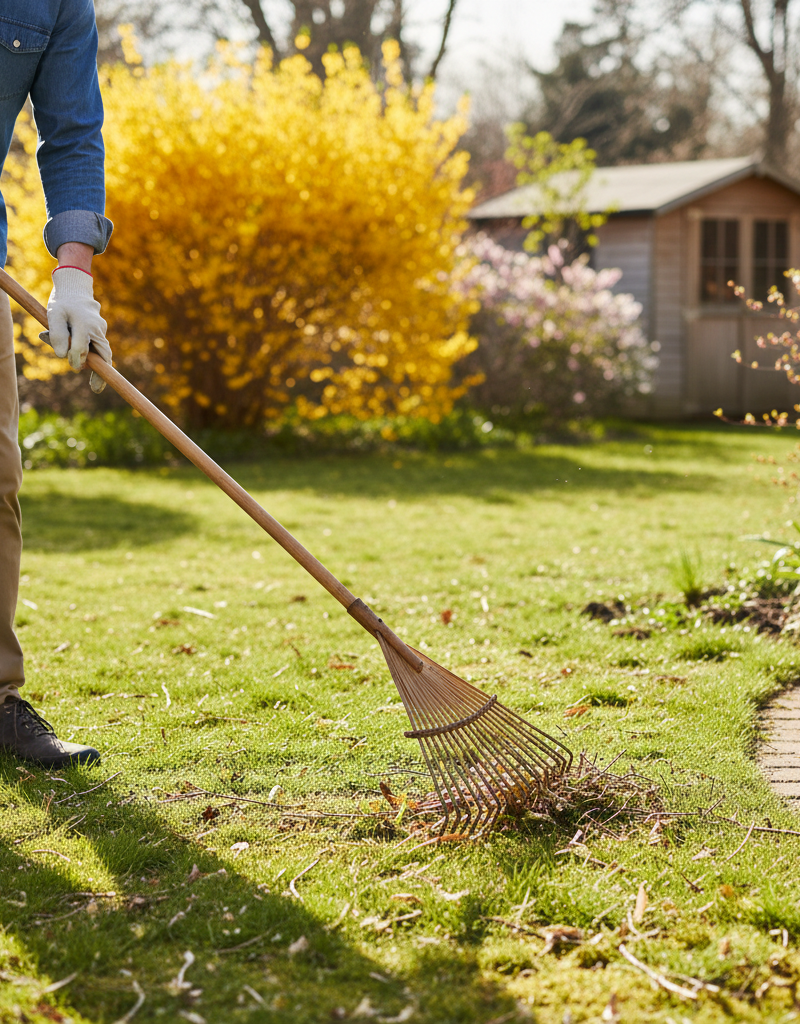
5. Clean Up Thoroughly, But Don't Overwork Wet Soil — Clear debris without compacting the soil.
Leaving behind winter debris like fallen leaves, branches, and dead plant matter can harbor pests and diseases, creating an unhealthy environment for new growth. However, working wet soil can cause severe compaction, which stifles root growth.
- Tools: Rake, leaf blower, wheelbarrow, garden gloves.
- Process: Wait until the soil has dried out sufficiently to work without compaction – a good test is to grab a handful and squeeze; if water drips out or it forms a solid ball, it's too wet. Rake up all remaining leaves, fallen branches, and any winter cover crops. Clear out any dead annuals or perennial stalks that weren't cut back in the fall. Examine garden beds for signs of overwintering pests or diseases and remove affected plant material. Add healthy organic debris to your compost pile.
- Safety Note: When using a leaf blower, wear eye and ear protection. Be mindful of dust and debris, especially if allergies are a concern.
- If this doesn't work: If you notice persistent fungal growth or signs of pest infestation during cleanup, isolate and remove the affected material immediately to prevent spread. Consider an organic fungicide or insecticide if the problem is widespread, but always identify the issue first.
Common Causes
- Lack of Soil Testing: Guessing soil needs leads to incorrect amendments and fertilizer applications. Healthy soil is the bedrock of a healthy yard.
- Incorrect Pruning Schedules: Not knowing if a plant blooms on old or new wood results in removed flower buds or inhibited growth.
- Ignoring Pre-Emergent Timing: Applying too early or too late renders pre-emergent herbicides ineffective against seasonal weeds.
- Neglecting Irrigation Checks: Winter weather, undetected leaks, or clogs can dramatically reduce irrigation efficiency and waste water.
- Working Wet Soil: Compacting soil by walking or tilling when it's still saturated from winter rains damages soil structure and suffocates roots.
- Over-reliance on Chemicals: Using too many synthetic fertilizers or pesticides without addressing underlying soil or plant health issues creates a dependency and can harm beneficial organisms.
Common Mistakes
- Mistake #1: Pruning Spring-Flowering Shrubs Too Early. Many homeowners prune lilacs, forsythia, or rhododendrons in early spring before they bloom, inadvertently cutting off all the buds that would produce flowers. Instead: Wait until after they have finished flowering to prune spring-blooming plants. This allows you to enjoy the blooms and then shape the plant for next year's growth.
- Mistake #2: Applying Fertilizer Without a Soil Test. Blindly applying a general-purpose fertilizer can lead to nutrient imbalances, harming plants and contributing to runoff pollution. Instead: Get a soil test every 3-5 years. This tells you exactly what your soil needs, allowing for targeted and efficient fertilization with the correct nutrients.
- Mistake #3: Ignoring Weeds Until They're Large. Letting weeds establish and go to seed increases their presence exponentially in subsequent seasons. Instead: Apply a pre-emergent herbicide in early spring when soil temperatures consistently reach 50-55°F to prevent weed seeds from germinating. Address any established weeds promptly by hand-pulling or spot-treating before they spread.
- Mistake #4: Not Checking Your Sprinkler System. A damaged or improperly adjusted irrigation system wastes water, leads to uneven watering, and stresses plants. Instead: Run your irrigation system zone by zone in early spring. Look for broken heads, leaks, or misdirected sprays and make necessary repairs or adjustments to ensure efficient and even watering.
- Mistake #5: Tilling or Working Soil When It's Soggy. Digging or walking on overly wet soil compacts it, destroying its structure and making it difficult for roots to grow and water to penetrate. Instead: Wait until the soil is dry enough to crumble easily in your hand. If it forms a solid ball or drips water when squeezed, it's too wet to work.
Cost & Time Breakdown
| Task | DIY Cost | Pro Cost | Time |
|---|---|---|---|
| Soil Testing | $20–$50 | Included in svc | 15–30 min |
| Pruning | $0–$30 | $100–$300 | 1–3 hours |
| Soil Amending (Compost) | $50–$150 | $200–$500 | 2–4 hours |
| Weed Control (Pre-emergent) | $30–$80 | $100–$250 | 30–60 min |
| Irrigation Check/Minor Repair | $0–$50 | $150–$400 | 1–2 hours |
| General Cleanup | $0 | $100–$300 | 1–3 hours |
DIY costs reflect materials only. Pro costs reflect labor + materials for an average-sized yard.
Tips & Prevention
- Regular Soil Testing: Perform a soil test every 3-5 years to monitor nutrient levels and pH, allowing for targeted amendments rather than guesswork. This is the single best long-term prevention strategy.
- Mulch Annually: Apply a fresh 2-3 inch layer of organic mulch (shredded bark, compost) to garden beds each spring. This suppresses weeds, conserves moisture, moderates soil temperature, and slowly adds organic matter.
- Sharpen Tools: Keep pruning shears, loppers, and shovels sharp. Clean cuts heal faster on plants, and sharp tools make tasks easier and safer. Clean tools prevent disease spread.
- Water Wisely: Once your irrigation system is checked, consider installing a smart irrigation controller that adjusts watering schedules based on local weather and plant needs, preventing overwatering and conserving water.
- Observe Your Yard: Spend time walking your yard weekly. Early detection of pests, diseases, or nutrient deficiencies allows for quicker, less costly intervention.
- Right Plant, Right Place: When adding new plants, choose varieties that are well-suited to your local climate, soil type, and sun exposure. This reduces stress, making them more resilient to pests and diseases.
When to Call a Professional
While many spring yard preparation tasks are manageable for a DIY enthusiast, certain situations warrant calling a licensed professional. If you identify a major irrigation line break that's causing significant water pooling or low pressure across multiple zones, a licensed irrigation specialist has the expertise and specialized tools to diagnose and repair complex issues. Similarly, if your soil test reveals severe, persistent nutrient deficiencies or pH imbalances that don't respond to general advice, an arborist or certified landscaper can provide a tailored nutrient plan. For extensive tree or shrub pruning, especially for large trees near power lines or structures, or for species requiring advanced techniques, a certified arborist is essential for safety and to ensure the long-term health of the plant. Finally, if you're dealing with a widespread, unidentified plant disease or pest infestation that rapidly spreads, a professional can correctly identify the problem and recommend effective, safe treatments to save your landscape.
Related Articles
Keep troubleshooting with these hand-picked guides from FixlyGuide:
- The #1 Mistake Killing Your Lawn's Crabgrass Defense (And the Easy Fix) — Discover why common crabgrass removal methods fail and how to naturally eliminate this stubborn weed for a healthier lawn.
- The Eternal Weed Battle: Why They Always Come Back (And How to Actually Win) — Stop the cycle of endless weeding by understanding why weeds persist and how to implement long-term control strategies.
- The #1 Pruning Mistake Homeowners Make (And How to Fix It) — Learn the most common pruning mistake homeowners make and how to properly prune shrubs for healthier growth and more abundant blooms.
- The #1 Mistake Homeowners Make When Testing Soil pH (And How to Get It Right Every Time) — Learn the critical mistake most homeowners make when testing lawn soil pH and how to perform accurate tests at home for a healthier, greene…
- The #1 Pre-Emergent Mistake Wrecking Your Weed Control (And How to Fix It) — Applying pre-emergent at the wrong time is the most common mistake, leading to ineffective weed control and wasted effort for homeowners.
- The Secret to Lush Raised Beds? It's Not Just About How You Water — Smart irrigation for raised garden beds isn't just about automation; it's about delivering the right amount of water precisely when your pl…
Frequently asked questions
When is the best time to prune most shrubs in the spring?+
For most spring-flowering shrubs (like lilacs, forsythia), the best time to prune is immediately after they finish blooming. For summer-flowering shrubs and deciduous trees, late winter to very early spring before new growth emerges is ideal.
How often should I test my soil?+
It's recommended to perform a soil test every 3-5 years. This provides valuable information about your soil's nutrient levels and pH, allowing you to make informed decisions about amendments and fertilization.
Can I apply pre-emergent herbicide and fertilize at the same time?+
Yes, many products combine pre-emergent herbicides with fertilizer, offering a convenient single application. However, always check the product label for specific instructions and ensure it's suitable for your lawn type and needs.
What's the ideal soil temperature for applying pre-emergent for crabgrass?+
The ideal soil temperature for crabgrass pre-emergent is consistently between 50-55°F at a depth of 2-3 inches. You can monitor this with a soil thermometer or often relate it to local plant indicators, such as when forsythia bushes are in full bloom.
Why is working wet soil a bad idea?+
Working wet soil can destroy its structure by compacting it. This reduces pore space, making it difficult for plant roots to access oxygen and water, leading to poor growth and drainage issues. Always wait until the soil is dry enough to crumble easily in your hand.


Discussion
Loading comments…