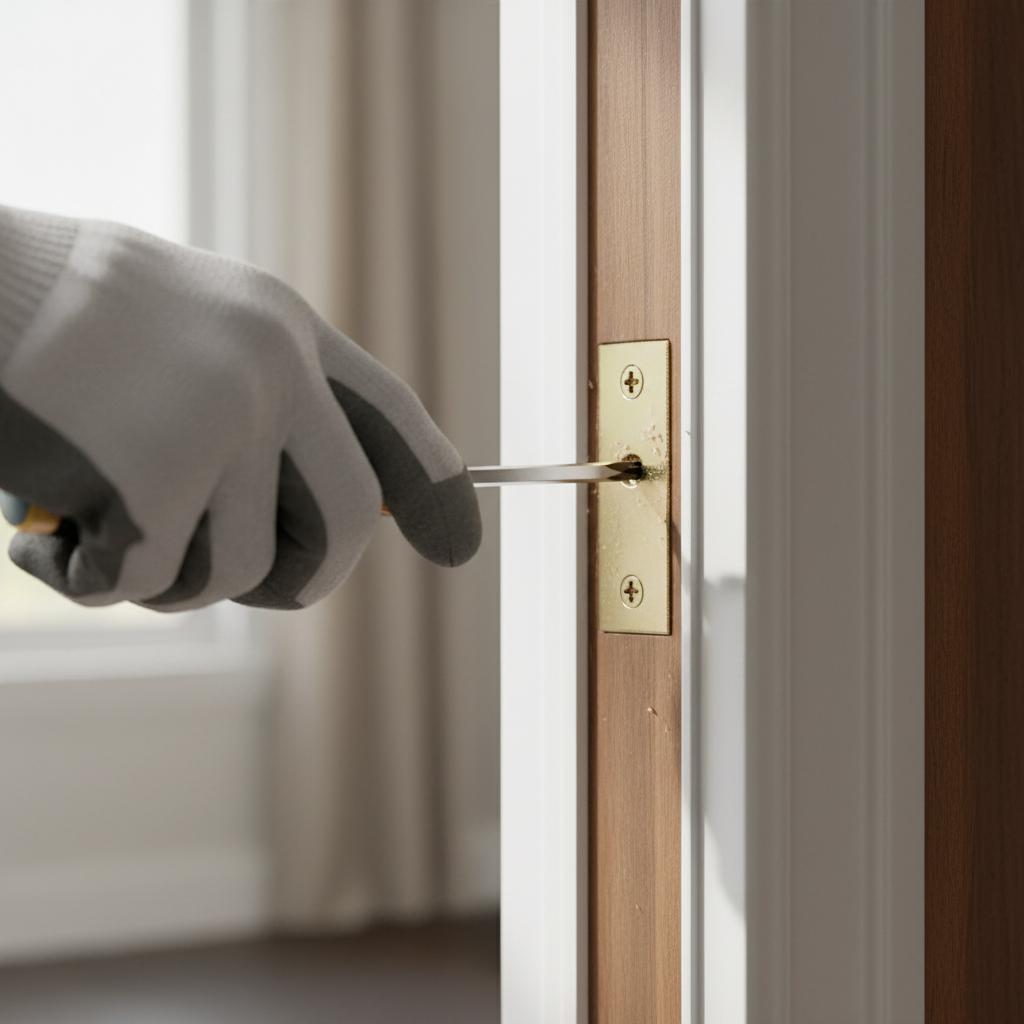
- Slowly close the door. Does it rub the threshold? Stick at the top corner? Fail to latch? Pinpoint the exact location of the interference, as this directs your repair.
- If the door rubs the hinge-side jamb at the top, the issue might be a problem with the hinge plate mortise or the hinge itself.
- If the door rubs the latch-side jamb at the top, it's a classic sign of a sagging door where the top hinge has pulled away.
Published May 23, 2026Last updated August 17, 2026
Tools & materials you'll need
Affiliate linksAs an Amazon Associate FixlyGuide earns from qualifying purchases — at no extra cost to you. Prices and availability are accurate as of publication and subject to change.
Quick Answer
A sagging door that rubs, sticks, or won't latch properly can often be remedied in under two minutes by simply tightening loose hinge screws. If screws are stripped, slightly longer screws or wood shims can provide a firmer grip. For minor frame rubbing, carefully bending a hinge pin can sometimes realign the door. These simple adjustments can save you the hassle and expense of calling a professional or replacing the door.
The Problem
A door that sags is more than just an aesthetic issue; it's a functional problem that can lead to significant frustration and even damage. When a door sags, it means it has shifted out of its proper alignment within the door frame. This misalignment can manifest in several annoying ways: the bottom edge of the door might drag across the floor, leaving scuff marks or making an irritating scraping sound. The top corner of the door, usually on the latch side, might begin to bind or stick against the door frame, making it difficult to open or close smoothly. Perhaps the most common complaint is a door that simply won't latch, swinging freely unless manually held shut, compromising privacy and security. Over time, the continuous rubbing and forcing of a misaligned door can wear down finishes, damage flooring, or even loosen the door frame itself, escalating a minor annoyance into a more substantial repair.
How It Works
To understand why a door sags, it helps to visualize how a door functions within its frame. A door's entire weight is supported by its hinges, typically two to three per door. Each hinge consists of two leaves: one attached to the door jamb (the vertical part of the door frame) and the other to the door itself. These leaves are joined by a hinge pin, which allows the door to pivot open and closed. The screws securing these hinges are critical. They anchor the door's considerable weight against the forces of gravity and repeated motion. The door jamb itself is often made of softer wood than the framing behind it, or it may have been pre-drilled with pilot holes that, over years of use, become enlarged and lose their grip. Every time the door opens or closes, especially if it's done with any force, a small amount of stress is applied to these hinge screws and the wood fibers they grip. Over thousands of cycles, these screws can slowly work themselves loose. Once loosened, the door's weight begins to pull the top hinge downward and away from the jamb, causing the door to 'drop' or sag. This shift is usually most noticeable on the latch side, where the top corner of the door will move closer to or into the frame, while the bottom corner on the latch side will drop away from the frame, creating the diagonal misalignment we associate with a sagging door. Understanding this mechanism clues us into the simplest and most effective solutions: re-securing the hinges to their proper anchor points.
Step-by-Step Fix
1. Gather Your Tools — Before you begin, collect all necessary items to avoid interruptions. * You'll need a screwdriver (Phillips or flathead, depending on your hinge screws), possibly a drill for pilot holes, longer screws (2½ to 3 inches), wood shims or toothpicks, a hammer, and safety glasses.
2. Identify the Sagging Point — Stand back and observe how the door closes and where it binds. * Slowly close the door. Does it rub the threshold? Stick at the top corner? Fail to latch? Pinpoint the exact location of the interference, as this directs your repair. * If the door rubs the hinge-side jamb at the top, the issue might be a problem with the hinge plate mortise or the hinge itself. * If the door rubs the latch-side jamb at the top, it's a classic sign of a sagging door where the top hinge has pulled away.
3. Check and Tighten Hinges — The simplest fix often yields the best results. * Open the door wide to access both hinge sets. Take your screwdriver and, starting with the top hinge, tighten every screw on both the door-side and jamb-side hinge plates. * Work your way down to the middle and bottom hinges, tightening all screws firmly but carefully to avoid stripping. * Test the door after tightening. If the sagging is minor, this might be all that's needed to resolve the issue.
4. Address Stripped Screw Holes (Shallow) — For screws that just won't grip. * If a screw spins freely in the hole, it's stripped. Remove the loose screw. Break off a few wooden toothpicks or matchsticks (without heads) and insert them into the stripped hole until it's packed tightly. * Snap off any excess wood flush with the surface. Apply a drop of wood glue to the toothpicks for added strength, if desired, and let it dry for a few minutes. * Reinsert the original screw into the reinforced hole and tighten. The wood shims provide new material for the screw threads to grip.
5. Address Stripped Screw Holes (Deep/Severe) — When the wood behind the jamb is compromised. * For severely stripped holes, or if the door frame itself feels loose around the hinges, remove one screw from the jamb-side of the top hinge (the one closest to the latch side of the door). * Replace it with a longer, 2½ to 3-inch wood screw. These longer screws will penetrate through the door jamb and into the wall stud behind it, providing a much stronger anchor point. * Safety Note: Be careful not to overtighten, which can crack the jamb. Start with one long screw per hinge, usually the top hinge first, and re-test the door's alignment. You may need to pre-drill a pilot hole if the wood is very hard, using a drill bit slightly smaller than the screw's shank.
6. Adjust Hinge Pin (Minor Sag) — A subtle trick for fine-tuning door alignment. * If the door still rubs slightly at the top, latch-side corner after tightening screws, you might try a hinge pin adjustment. Remove the pin from the top hinge (you may need to tap it out from the bottom with a hammer and nail set). * Place the hinge pin on a hard surface and gently tap the center of the pin with a hammer, bending it ever so slightly—we're talking fractions of an inch here, creating a subtle arc. * Reinsert the bent pin. The slight bend will pull the hinge leaves together more tightly, effectively pulling the top of the door slightly closer to the hinge side, lifting the latch side. * If the door now binds too much on the hinge side, you've over-bent the pin. Try again with less bend, or use a new, straight pin. This method is for subtle adjustments only.
7. Shim the Hinges (Significant Sag) — When the door needs to be shifted entirely. * If the door needs to move parallel to the frame (e.g., if it's too close to the latch-side jamb at the top and bottom), you can use shims. For most sagging doors (rubbing top latch side), you'll shim the bottom hinge on the jamb side. * Remove the bottom hinge screws from the jamb side. Carefully insert thin cardboard or plastic shims behind the hinge plate, then reattach the screws. * This effectively pushes the bottom of the door slightly away from the jamb, pivoting the top of the door 'up' and away from the top jamb, correcting the sag.
8. Test and Repeat — Patience is key for perfect alignment. * After each adjustment, open and close the door several times, paying close attention to any rubbing or sticking. Make small, incremental changes. It's often better to make a series of minor adjustments than one large one.
Common Causes
- Loose Hinge Screws: This is far and away the most frequent culprit. Over time, due to the door's weight and repeated use, screws can work themselves loose, allowing the door to shift.
- Stripped Screw Holes: The wood around hinge screw holes, especially in softer jamb material, can become worn or damaged, preventing screws from getting a tight grip.
- Insufficient Hinge Support: Sometimes the screws used for hinges are too short, not reaching the structural framing behind the door jamb, leading to instability over time.
- House Settling: As a house ages, it settles. This natural process can cause door frames to shift out of square, leading to door misalignment even if the hinges themselves are secure.
- Heavy Doors: Solid core or exterior doors are heavier. Their increased weight puts more stress on hinges and screws, making them more prone to sagging over time.
- Door Warping: While less common for interior doors, changes in humidity and temperature can cause wooden doors to warp or twist, leading to them dragging or sticking in the frame.
Common Mistakes
- Ignoring Loose Screws First: Many homeowners jump to more complex solutions (like planing the door) without first trying the simplest fix: tightening every hinge screw. Always start here!
- Using Too Short Screws: Replacing stripped screws with new ones of the same short length won't fix the underlying problem of insufficient grip. Always opt for longer screws (2½ to 3 inches) into the wall studs if possible.
- Overtightening Screws: While you want screws snug, overtightening, especially in soft wood, can strip the hole further or even crack the door jamb or hinge plate. Stop when you feel firm resistance.
- Applying Shims Incorrectly: Shimming a hinge needs to be done strategically. Shimming the top hinge on the jamb side will push the top of the door away from the jamb, while shimming the bottom hinge will pull the top of the door towards the jamb (or lift the latch side). Understand the desired effect before shimming.
- Planing the Door Prematurely: Removing wood from the door itself should be a last resort. If the issue is hinge-related, planing the door won't solve the core problem and can lead to an ill-fitting door if the hinges are later fixed correctly.
- Forcing the Door: Continually forcing a sagging or sticking door can worsen the issue, damaging the door, the frame, or causing the hinges to loosen further. Address the problem promptly.
Cost & Time Breakdown
| Task | DIY cost | Pro cost | Time |
|---|---|---|---|
| Tighten existing hinge screws | $0 | $50–$100 | 2–5 minutes |
| Reinforce stripped holes (shims/toothpicks) | $0–$5 | $80–$150 | 10–20 minutes |
| Replace with longer screws | $5–$10 | $80–$150 | 15–30 minutes |
| Hinge pin adjustment (bending) | $0 | $100–$200 | 10–20 minutes |
| Shimming hinges | $0–$5 | $100–$200 | 20–40 minutes |
| Planing door (if necessary after all else fails) | $0 (if you own tools) | $150–$300 | 1–2 hours |
Tips & Prevention
- Regular Hinge Checks: Make it a habit to check your door hinges periodically – perhaps twice a year. Gently jiggle the door when it's open; any excessive movement indicates loose hinges that need prompt tightening.
- Proper Screw Length: When installing new doors or replacing hinges, ensure that at least one screw per hinge on the jamb side is long enough (2½ to 3 inches) to penetrate into the wall stud behind the jamb. This provides crucial structural stability.
- Avoid Slamming: Consistently slamming doors puts unnecessary stress on hinges and screws, accelerating wear and tear. Encourage everyone in the household to close doors gently.
- Maintain Humidity Levels: For wooden doors, especially in older homes, extreme fluctuations in humidity can cause the door itself to swell or shrink, leading to binding. Using a humidifier or dehumidifier can help maintain stable conditions.
- Don't Hang Heavy Items: Avoid hanging excessively heavy items like elaborate wreaths or multiple coats on door handles for extended periods, as this adds continuous, uneven stress to the hinges.
- Lubricate Hinges: Occasionally applying a spray lubricant (like silicone or dry PTFE spray) to hinge pins can ensure smoother operation, reducing friction and stress on the hinge components.
When to Call a Professional
While many sagging door issues are DIY-friendly, there are specific situations where a licensed professional, such as a carpenter or handyman, should be consulted. If, after attempting all the hinge adjustments and screw replacements, the door continues to sag, bind severely, or fails to latch, the problem might be more complex than just loose hardware. This could indicate foundational shifting of your home, a significantly warped door frame that's out of square, or serious damage to the door jamb itself that requires structural repair or replacement. Additionally, if the door is an exterior door and you suspect issues with weatherproofing or security after attempting repairs, a professional can ensure proper sealing and fit. They have specialized tools and expertise to assess frame integrity, correct severe warping, or expertly plane and rehang a door, ensuring a proper, lasting fix without compromising your home's structure or security.
Related Articles
Keep troubleshooting with these hand-picked guides from FixlyGuide:
- The 12 Checks That Prevent 80% of Costly Home Repairs — Don't wait for a disaster. Our comprehensive monthly home maintenance checklist reveals the surprising, simple tasks that catch small issue…
- The Hidden Reason Your AC Isn't Cooling (And 7 Fixes Homeowners Miss) — If your central AC isn't cooling your home, the culprit often lies in an overlooked issue that's simple to fix, preventing costly professio…
- The Secret Weapon Against Gaming Clutter: A $25 Custom Controller Stand You Can Build — Discover how a simple, custom-built stand using common materials can transform your gaming space, eliminating clutter and protecting your e…
- The Secret Window AC Trick That Slashes Your Summer Electric Bill By 30% — Mastering simple window AC maintenance can significantly reduce your cooling costs and extend the life of your unit, often by more than 30%.
- 7 Hidden Equity Drains Costing You Thousands Annually — Your home is an asset, but silent problems like minor leaks, poor insulation, and deferred maintenance can drain its value. Discover the se…
- The Surprising Reason Your Interior Door Sticks (It's Not Always Humidity) — Before you blame humidity, learn the common culprits behind a sticking interior door and how to fix them with simple DIY steps.
Repair or replace this system?
Plug in four numbers and see which choice holds up financially.
Free and instant. Educational guidance only — not a quote, inspection, or professional diagnosis.
Questions to ask before you sign
Ask every contractor the same questions and the cheapest bid stops looking cheapest. Check them off as you go — your progress is saved on this device.
Free, no signup. Bring this to every walkthrough so you compare bids on the same terms.
What should this project cost?
Enter your project details for a realistic cost range before you call anyone.
Cost depends heavily on which system turns out to be the source.
- Regional adjustment
- National average
- Labor share (typical)
- ~$1,620
- Quotes to collect
- 3 written estimates
Educational estimate based on national averages — not a binding quote. Always confirm with written local estimates.
Repair or replace?
Run the age, cost ratio, and repair history through the calculator before you commit.
- Estimate this projectGet a cost range for your scope and ZIP before you call anyone.Open
- Get local estimatesSend one request and compare written estimates from vetted pros.Open
Free, no signup required. Estimates are educational guidance, not a quote or an inspection.
This article was independently written by FixlyGuide based on the source topic.
Frequently asked questions
Why does my door suddenly sag?+
The most common reason for a door to suddenly sag is loose hinge screws. Over time, the weight of the door and repeated use can cause the screws holding the hinges to the door frame or the door itself to loosen, allowing the door to drop out of alignment.
Can I fix a sagging door without taking it off the hinges?+
Yes, in many cases, you can fix a sagging door without removing it. The primary solutions, such as tightening hinge screws, reinforcing stripped holes with shims, or even replacing screws with longer ones, can often be done with the door still in place.
What kind of screws should I use for door hinges?+
For reinforcing door hinges, it's recommended to use screws that are 2½ to 3 inches long. These longer screws can reach into the structural framing behind the door jamb, providing a much more secure anchor than the shorter screws typically supplied with hinges, which often only grip the jamb itself.
Discussion
Loading comments…