
Tools & materials you'll need
Affiliate links- AmazonHEPA-filter Vacuum1 · Essential for trapping fine soot particles.
- AmazonBox Fans2-3 · For creating cross-ventilation.
- AmazonChemical Sponges (Soot Sponges)5-10 · Used dry to lift oily soot before washing.
- AmazonMicrofiber Cloths24
- AmazonN95 or P100 Respirator Mask1
- AmazonSafety Goggles1
- AmazonHeavy-Duty Nitrile Gloves1 pair
As an Amazon Associate FixlyGuide earns from qualifying purchases — at no extra cost to you. Prices and availability are accurate as of publication and subject to change.
Quick Answer
To get smoke smell out of a house after a kitchen fire, you must first ventilate the area completely. Then, remove all soot particles from hard surfaces using a HEPA vacuum and a powerful degreasing cleaner like Trisodium Phosphate (TSP). Finally, launder all textiles with an odor-removing booster and use activated charcoal or a professionally-handled ozone generator to neutralize any remaining airborne odor molecules.
Why This Works
That stubborn, acrid smell left after a kitchen fire isn’t just a scent; it’s a complex chemical cocktail. Smoke is composed of microscopic, airborne particulate matter (soot) and a host of volatile organic compounds (VOCs). These particles are often greasy, acidic, and incredibly small, allowing them to penetrate deep into porous surfaces like drywall, wood, upholstery, and even the subfloor. A simple air freshener only masks these odors temporarily. Effective removal requires a two-pronged attack based on surface chemistry.
First, you must achieve physical removal. Soot particles are oily and cling to surfaces with a strong adhesive bond. To break this bond, you need a powerful alkaline cleaner with high surfactancy. This is where products like Trisodium Phosphate (TSP) or a strong degreaser like Krud Kutter shine. Surfactants in these cleaners have a hydrophilic (water-loving) head and a lipophilic (oil-loving) tail. The tail end embeds itself in the greasy soot, while the head pulls the particle off the surface and into the cleaning water. Wiping before cleaning with a dry chemical sponge prevents smearing this greasy soot.
Second, you must address the invisible VOCs through chemical neutralization. After the physical soot is gone, these gaseous molecules remain embedded in materials. This is where oxidation comes in. Running an ozone (O3) generator, for example, floods the environment with unstable oxygen molecules that aggressively react with and break down the chemical structure of the odor-causing VOCs, neutralizing them permanently. Similarly, washing fabrics with an oxygen-based cleaner like OxiClean releases sodium percarbonate, which uses a form of oxygen bleach to break down odor molecules trapped in the fibers.
What You Need
Tools:
- HEPA-filter Vacuum: Essential for trapping fine soot particles without re-circulating them.
- Box Fans (2-3): For critical ventilation.
- Chemical Sponges (Soot Sponges): At least 5-10, depending on the area. These are used dry.
- Microfiber Cloths: A large pack (24+) for washing and rinsing.
- Buckets (2): For a two-bucket washing system.
- N95 or P100 Respirator Mask: Non-negotiable for protecting your lungs from soot and chemicals.
- Safety Goggles: To protect your eyes from splashes.
- Heavy-Duty Nitrile Gloves: To protect your skin.
- Optional: Ozone Generator: For advanced odor neutralization (rental may be possible).
Materials:
- Krud Kutter Original Concentrate or Trisodium Phosphate (TSP): Your primary wall-washing degreaser.
- Dawn Powerwash: Excellent for cutting through thick, greasy soot on kitchen surfaces.
- OxiClean Odor Blasters or White Vinegar: For laundering fabrics.
- Kilz Restoration Primer: A specialty stain and odor-blocking primer if you plan to repaint.
- Activated Charcoal Bags: For passive, continuous odor absorption after cleaning.
- Trash Bags: Heavy-duty bags for disposing of contaminated items.
Step-by-Step Method
-
Safety First & Maximize Ventilation. Before starting, put on your N95 respirator, goggles, and gloves. Soot contains harmful carcinogens. Open every window in the house. Place box fans in windows, facing out, to pull smoky air out and create a strong cross-draft. Leave them running throughout the entire process.
-
Discard Compromised Items. Be ruthless. Throw out all food that was exposed—including non-perishables in cardboard or plastic bags, as odors can easily penetrate these. Soot is acidic and can damage electronics over time, so assess these items carefully. Bag up all contaminated porous items you intend to wash (curtains, bedding, clothing, towels).
-
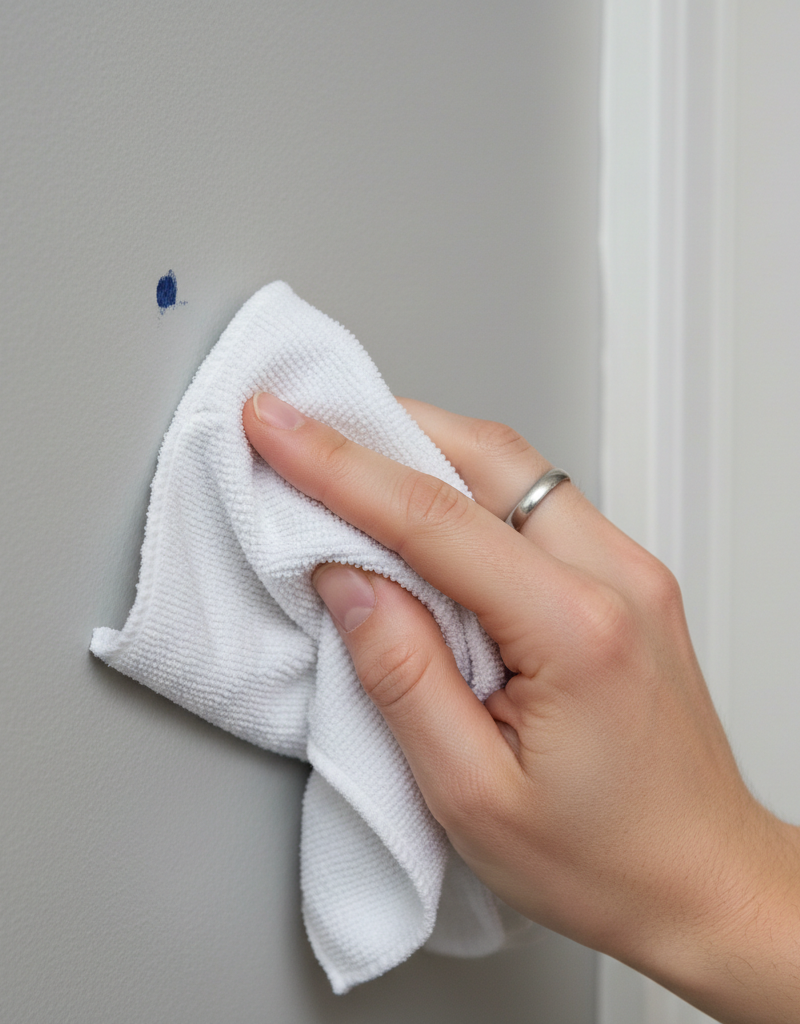
Dry-Clean with a Chemical Sponge. Do not use water yet. Water will smear the oily soot, making it much harder to remove. Start with the ceilings and work your way down the walls. Use a dry chemical sponge (also called a soot sponge) with straight, parallel strokes. Overlap your strokes slightly. As the sponge surface becomes loaded with soot, use a scissor to cut away the soiled layer to expose a fresh one.
-
Conduct a HEPA Vacuum Pass. Using a HEPA-filter vacuum is critical; a standard vacuum will just blow the smallest, smearest particles back into the air. Use the brush attachment to vacuum everything. Go over the ceilings, walls (yes, after dry sponging), floors, baseboards, window sills, and any furniture you are keeping.
-
Prepare a Strong Degreasing Solution. Now it’s time to wash. If using TSP, a highly effective alkaline cleaner, mix 1/2 cup of TSP into 2 gallons of hot water (wear your gloves and goggles!). For a less harsh but still potent option, use Krud Kutter Original according to the label’s directions for heavy soil. Prepare a second bucket with clean, warm water for rinsing.
-
Wash All Hard Surfaces. Following the top-to-bottom rule, begin with the ceiling, then move to the walls. Dip a microfiber cloth in your TSP or Krud Kutter solution, wring it out so it’s damp but not dripping, and wash a 3x3 foot section at a time. Immediately follow with a separate, clean microfiber cloth dipped in your rinse water. Overlap your sections to ensure complete coverage. Change your rinse water frequently, as soon as it looks dirty.
-
Deep Clean the Kitchen. The kitchen is ground zero and needs special attention. Use a targeted degreaser like Dawn Powerwash on cabinets (inside and out), the range hood, and backsplashes. Spray it on, let it sit for 5-10 minutes to break down the greasy soot, then scrub and wipe clean. For countertops, be mindful of the material: use the degreaser on laminate, but stick to a pH-neutral stone cleaner for granite or marble to avoid etching the surface.
-
Address Flooring and Fixtures. Clean hard surface floors with your chosen degreasing solution. If you have carpet, it almost certainly requires professional steam cleaning with a soot-removal agent. Vacuuming is not enough. Don’t forget to wipe down all light fixtures, ceiling fans, doors, trim, and hardware.
-
Launder Every Single Fabric. Take all your bagged-up textiles (clothes, curtains, linens) to a laundromat with large-capacity machines if necessary. Wash them in the hottest water the fabric can tolerate. Add a full cup of distilled white vinegar or a scoop of an oxygen-based booster like OxiClean Odor Blasters to each load. You may need to wash items twice.
-
Clean the HVAC System & Change Filters. This is a step many people miss. Your HVAC system has been circulating smoky air, and soot has settled in the ductwork. At a minimum, change your furnace filter immediately. Change it again in one week, and again a month later. For moderate to severe smoke, you MUST hire a professional duct cleaning service. Otherwise, the smell will return the first time you turn on the heat or AC.
-
Neutralize Lingering Odors. Once all surfaces are physically clean, tackle the remaining embedded VOCs. Start by placing large bags of activated charcoal or bowls of white vinegar in every room to passively absorb odors. This can take several days.
-
Consider Advanced Oxidation (Use with Caution). For the most stubborn smells, an ozone generator is the final step. EXTREME CAUTION IS REQUIRED. Ozone is harmful to breathe and damages rubber and plants. Rent a machine and place it in the sealed house. Remove all people, pets, and houseplants. Run the generator for the time recommended by the manufacturer (typically 4-8 hours). After the cycle, air out the house for several more hours before it's safe to re-enter. This process chemically alters and destroys the final odor molecules.
Common Mistakes
- Washing Before Dry Sponging: The most common error. Applying a liquid cleaner to dry, oily soot creates a smeared, stained mess that is much harder to clean.
- Ignoring the HVAC System: Failing to change your air filter and have ducts cleaned will lead to the smell re-circulating for months.
- Using a Standard Vacuum: A non-HEPA vacuum lacks the filtration to trap the finest soot particles and will act as an effective soot-spreader.
- Forgetting "Hidden" Surfaces: The smell will persist if you don't clean inside closets, pantries, cabinets, and light fixtures.
- Painting Over the Smell: Simply painting a wall will not trap a smoke odor. The soot and VOCs will bleed through the new paint within weeks. You must clean first, then use a dedicated odor-blocking primer like Kilz Restoration.
- Relying on Scented Products: Air fresheners, candles, and sprays only provide temporary masking. The underlying odor-causing particles must be physically removed and chemically neutralized.
Cost & Time Breakdown
| Task | DIY Cost Estimate | Professional Cost Estimate | Time Estimate (DIY) |
|---|---|---|---|
| Initial Soot Cleaning | $75 - $150 (Sponges, TSP) | $800 - $2,000+ | 10-20 hours |
| Textile & Fabric Cleaning | $20 - $50 (Detergent, Oxi) | $300 - $600+ | 4-8 hours |
| HVAC Duct Cleaning | $10 (Filter only) | $450 - $1,000 | 2-4 hours (for Pro) |
| Ozone Generator Rental | $70 - $120 per day | $200 - $500 (as part of svc) | 24 hours (incl. airing out) |
| Totals | $175 - $330 | $1,750 - $4,100+ | 2-4+ Full Days |
Prevention & Maintenance
- Upgrade Kitchen Safety: Keep a Class K (for kitchen fires involving oils and fats) fire extinguisher within easy reach. Never leave cooking unattended.
- Maintain Your Range Hood: Clean the grease filter on your range hood monthly. A clean filter is far more effective at capturing greasy smoke and preventing its spread.
- Regular Filter Changes: After the fire, replace your HVAC filter monthly for the first three months to capture any residual soot. Then, return to a quarterly schedule.
- Manage Grease Buildup: Regularly clean kitchen cabinet surfaces with a degreaser to prevent the buildup of cooking grease, which can act as fuel in a fire and contribute to odors.
- Aerate Your Home: Make it a habit to open windows for 15-20 minutes each day to allow fresh air to circulate and prevent any stale odors from building up.
When to Call a Professional
While this DIY guide is effective for minor to moderate kitchen fires (e.g., a stovetop grease fire that was quickly extinguished), you should call a professional fire remediation service immediately under certain conditions. If the fire was large enough to require the fire department, if there is any visible structural charring to walls or ceilings, or if smoke has been sitting for more than 48 hours, the problem is likely too extensive for DIY methods. Professionals have specialized equipment, safer and stronger chemicals, and the expertise to deal with complex situations, including smoke from burnt plastics or synthetic materials, which is far more toxic. Furthermore, a professional remediation company can provide the necessary documentation for an insurance claim. Do not risk your health or your home's long-term integrity; for significant fire events, make the call.
Get the print-ready PDF of this guide
A clean, ad-free, printable version you can keep on your phone or pin to the workshop wall. Free with a FixlyGuide account.
- Print-optimized layout
- Tools, materials & every step included
- Saved to your account
Frequently asked questions
How long does it take for the smoke smell to go away completely?+
With this thorough cleaning method, you should notice a major improvement within 2-3 days. However, complete odor elimination, especially for faint smells that appear on humid days, could take a week or more of cleaning and airing out. For severe fires, some professional services may be needed to achieve 100% removal.
Can I just paint over the walls to get rid of the smoke smell?+
No, this is a critical mistake. Soot is oily and acidic and will bleed through standard paint, bringing the smell with it. You must thoroughly clean the walls to remove all soot residue first, then apply a specialized, solvent-based, odor-blocking primer like Kilz Restoration or BIN Shellac-Based Primer before you can begin to paint.
Is it safe to stay in my house while cleaning the smoke damage?+
It is not recommended. Soot contains fine particulate matter that is harmful to inhale. You should always wear an N95 or P100 respirator. If you are using an ozone generator, it is mandatory to vacate the premises completely, including removing pets and plants, as ozone is toxic to all living things.
Will my insurance cover professional fire smoke remediation?+
In most cases, a standard homeowner's insurance policy does cover fire and smoke damage, including the cost of professional remediation services. It is crucial to document everything with photos and contact your insurance agent as soon as possible after the event to understand your coverage and procedures.


Discussion
Loading comments…