Tools & materials you'll need
Affiliate linksAs an Amazon Associate FixlyGuide earns from qualifying purchases — at no extra cost to you. Prices and availability are accurate as of publication and subject to change.
Quick Answer
Removing ice dams safely requires a methodical approach, primarily relying on targeted melting or careful physical removal. The most common and dangerous mistake homeowners make is using blunt force – hammers, axes, or shovels – directly on ice dams. This can lead to significant damage to shingles, gutters, and underlying roof structures, not to mention a serious risk of falling. Instead, focus on using calcium chloride ice melt in nylon stockings, a roof rake from the ground, or a professional-grade steam cleaner to create channels for water to drain, mitigating further damage to your home.
The Problem
Ice dams are a common winter nemesis for homeowners, particularly in regions with heavy snowfall and fluctuating temperatures. They form when heat escapes from your home's interior, warming the roof surface and melting snow. This melted water then travels down the roof, reaching the colder eaves and gutters, where it refreezes. This continuous melt-and-freeze cycle creates a growing wedge of ice – the ice dam – at the edge of your roof. The dam prevents subsequent melted snow from draining properly off the roof. Instead, this water pools behind the ice, seeps under shingles, and can eventually leak into your attic, walls, and ceilings. This can lead to a host of expensive problems, including damaged insulation, stained drywall, peeling paint, mold growth, and compromised structural integrity. Beyond internal damage, ice dams can also tear off gutters, loosen shingles, and pose a falling hazard as heavy ice chunks break off.
How It Works
Understanding how ice dams form is crucial to preventing and safely removing them. The process starts with a temperature differential across your roof. Heat typically escapes from the living spaces below, warming the roof decking. This heat transfer can be due to insufficient attic insulation, poor attic ventilation, or unsealed air leaks from the conditioned living space into the attic. As snow accumulates on the roof, the portion directly over the warmer attic melts. This meltwater flows downwards between the snowpack and the warm roof surface.
When this water reaches the unheated eaves – the part of the roof that extends beyond the exterior walls – it encounters temperatures below freezing. Without the heat transfer from the living space, these edges remain cold. The water then refreezes, forming a small ridge of ice. As more meltwater flows down, it adds to this ridge, gradually building up the ice dam. The larger the dam, the more water it can hold back. This trapped water, unable to run off the roof, backs up under the shingles through capillary action. Most asphalt shingles and their underlayment are designed to shed water downwards, not to withstand standing water or water flowing uphill. Once water gets under the shingles, it finds pathways through nail holes, seams, and imperfections in the roofing felt, eventually penetrating the roof deck and leaking into the attic or wall cavities. The weight of heavy ice dams can also strain gutters, causing them to detach or bend, and in extreme cases, lift or dislodge shingles themselves.
Step-by-Step Fix
1. Assess the Situation from the Ground — Before considering any removal, carefully observe the ice dam from a safe ground-level position.
- Safety First: Do not climb onto a snowy or icy roof unless you are a trained professional with appropriate safety gear. It's incredibly dangerous.
- Look at the size, location, and thickness of the ice dam. Note any areas where water is actively pooling or dripping.
- Identify potential drainage points once the ice is cleared.
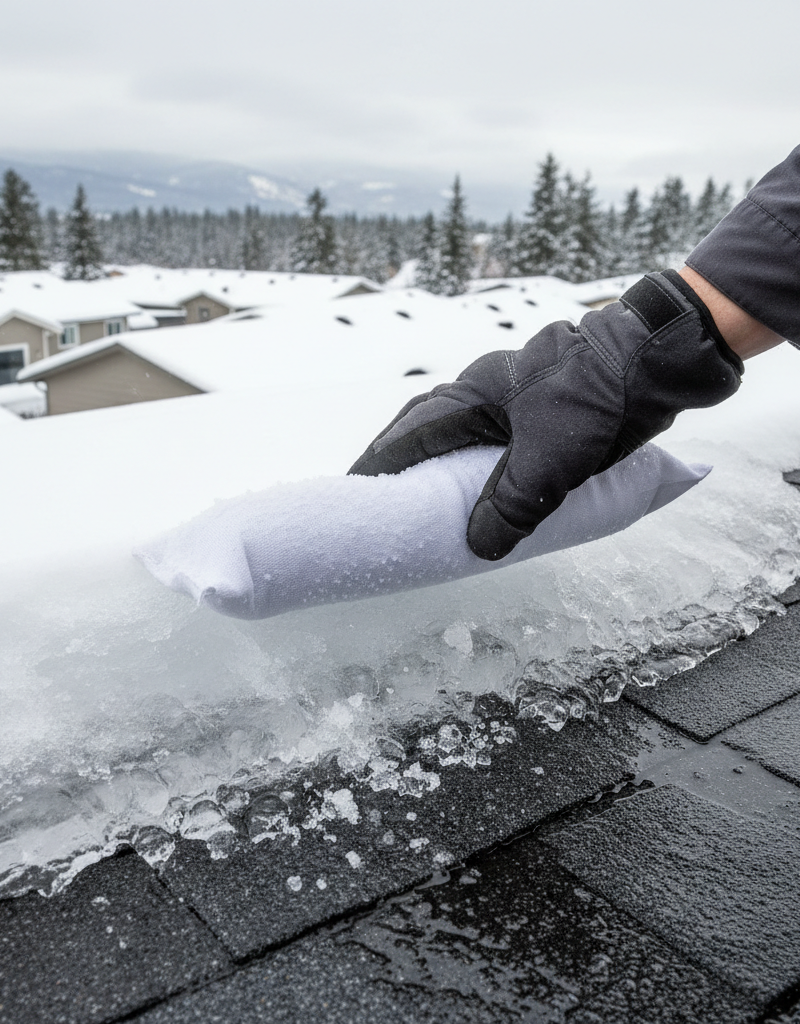
2. Choose Your Method: Ice Melt Socks — This is often the safest and most accessible DIY method for smaller to medium-sized dams.
- Materials: Calcium chloride ice melt (rock salt, sodium chloride, or magnesium chloride can damage some roofing and vegetation; calcium chloride is generally safer), old nylon stockings or thin socks, a sturdy ladder.
- Prepare: Fill the nylon stockings with calcium chloride ice melt. Don't overfill; aim for a snake-like shape about 2-3 feet long.
- Apply: Carefully place the filled stockings directly over the ice dam, perpendicular to the eave. Position them so they rest on the dam and extend slightly onto the clear roof surface. The calcium chloride will slowly melt channels through the ice, allowing trapped water to drain.
- Monitor: Check the socks periodically. As they melt, the water will drain through the channels. Reposition or replace socks if needed. This method is slow but effective and prevents damage from harsh tools.
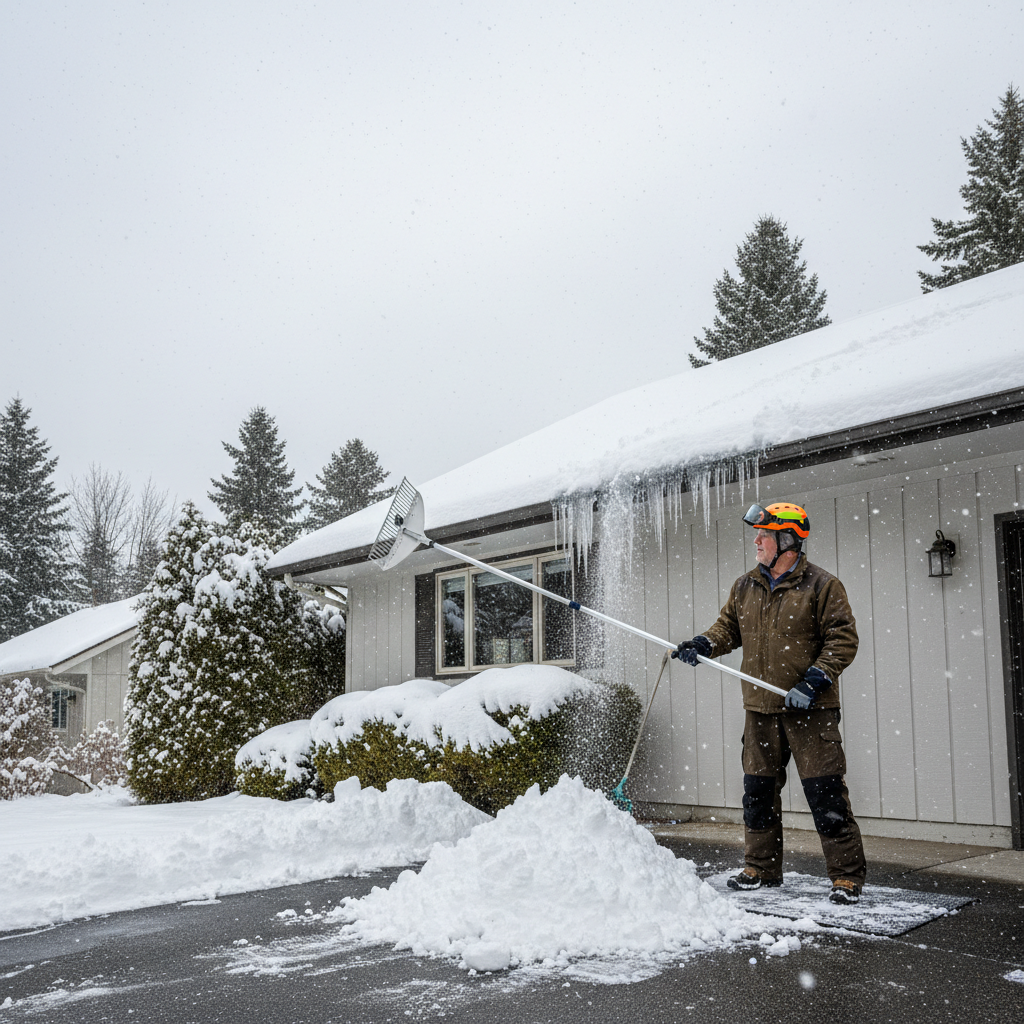
3. Choose Your Method: Roof Rake — Ideal for removing snow behind the ice dam, which helps prevent future dam growth and can reduce the dam's size indirectly.
- Materials: A long-handled aluminum roof rake (available at hardware stores), safety glasses, gloves.
- Safety First: Always work from the ground. Be aware of overhead power lines. Do not stand on icy patches.
- Technique: Gently pull snow from the roof, working from the eaves towards the peak. Aim to clear the first 3-4 feet of snow above the ice dam. Avoid scraping the rake directly against the shingles, which can cause damage. Let the weight of the snow do most of the work.
- Caution: This method removes snow but doesn't directly remove the ice dam itself. It alleviates pressure and prevents the dam from growing larger.
4. Choose Your Method: Steam Cleaner — The most effective and least damaging method for substantial ice dams, though it often requires renting specialized equipment or hiring a pro.
- Materials: Low-pressure, high-temperature steam ice dam removal machine (usually rented or operated by professionals), safety goggles, waterproof gloves, sturdy ladder (if operating from a height).
- Process: Direct the steam nozzle onto the ice dam, slowly moving it to create channels. The steam melts the ice without impacting the roof surface. Professionals use specialized tips to cut precise paths.
- Warning: DIY steam cleaning can be dangerous. Improper use can lead to burns or damage if the wrong equipment or technique is used. For significant dams, professional steam removal is highly recommended.
5. Create Drainage Channels (Initial Relief) — Regardless of the method, the goal is to create pathways for water to escape.
- Focus: Instead of trying to remove the entire dam at once, concentrate on melting or cutting several narrow channels through it, extending from the trapped water behind the dam to the gutter or edge of the roof.
- Patience: This process takes time. Do not rush it by applying excessive force or inappropriate tools.
6. Remove Loose Ice Gently — Once channels are established and the dam has significantly softened, any loose chunks of ice can be carefully removed.
- Tools: A plastic shovel or a very soft-bristled broom can be used to nudge softened ice. Avoid anything metal or sharp.
- Caution: Falling ice can be extremely heavy and dangerous. Ensure no one is below and be mindful of where the ice will fall.
7. Clear Gutters (If Safe and Accessible) — Once the ice dam recedes, clearing gutters can improve future drainage.
- Method: If portions of the gutters are still iced, apply a small amount of calcium chloride in a stocking directly into the gutter, or use a plastic scoop if ice is soft enough.
- Safety: Do not attempt to clear frozen gutters by prying or hammering. This will almost certainly damage them.
8. Address the Root Cause — After the immediate crisis, focus on long-term prevention.
- Inspection: In warmer weather, inspect your attic for adequate insulation (R-49 to R-60 is recommended in most northern climates), proper ventilation (soffit and ridge vents working together), and sealed air leaks.
- Air Sealing: Seal gaps around light fixtures, plumbing stacks, electrical wires, and attic hatches that allow warm air to escape into the attic. Use caulk, expanding foam, and weatherstripping.
Common Causes
- Poor Attic Insulation: Insufficient insulation in the attic allows heat from the living space to readily transfer to the roof deck, warming the snow above.
- Inadequate Attic Ventilation: A lack of proper airflow through the attic (soffit and ridge vents) prevents cold outdoor air from circulating and keeping the roof deck uniformly cold. This leads to hotter roof sections above conditioned spaces and colder eaves, setting the stage for melting and refreezing.
- Air Leaks into Attic: Gaps, cracks, and unsealed penetrations (e.g., around recessed lighting, exhaust fans, chimneys, plumbing vents) in the ceiling below the attic allow warm, moist air directly into the attic space, locally warming the roof.
- Skipped Roof Maintenance: Clogged gutters overflowing with debris can worsen ice dam formation by creating additional obstacles for proper water drainage.
- South-facing Roof Syndrome: While not a
Related Articles
Keep troubleshooting with these hand-picked guides from FixlyGuide:
- The $20 Trick That Melts Ice Dams (and Saves Your Roof) — Discover a surprisingly simple, budget-friendly method to safely remove ice dams and prevent costly roof damage to your home.
- The #1 Mistake Homeowners Make with Ice Dams (and How to Fix It SAFELY) — Most homeowners approach ice dam removal incorrectly, creating more damage or safety risks. Learn the right, safe methods to protect your r…
- The 3 Hidden Reasons Your Roof Gets Ice Dams (and the Only Safe Way to Remove Them) — Discover the real causes of ice dams and the safest, most effective methods for removal, preventing costly roof and water damage this winte…
- The $30 Secret to Banishing Ice Dams Without Damaging Your Roof — Discover how a simple, inexpensive trick can safely eliminate dangerous ice dams from your roof and prevent costly damage to your home.
- The $30 Secret to Banishing Ice Dams From Your Roof (Before They Destroy It) — Learn safe and effective methods to remove ice dams from your roof and prevent costly damage to your home's structure and interior.
- The #1 Gutter Mistake You're Making (And 3 Hidden Causes of Overflow) — Overflowing gutters in heavy rain are often a sign of a deeper issue than just debris, leading to potential foundation damage and costly re…
Recommended for DIYers & woodworkers
Sponsored
The Top 20 Tools for Workshops of Any Budget
No stationary machines or power tools required — plus 3 fundamental tools that can't be bought at any price.
Get the free guide
Ted's Woodworking — The #1 Woodworking Resource
Detailed instructions, dimensioned drawings, materials & cutting lists, and 3D schematics for every skill level.
See the plansSponsored: links above are affiliate links. FixlyGuide may earn a commission on qualifying purchases — at no extra cost to you.
Frequently asked questions
Is it safe to chip away at an ice dam with a hammer or axe?+
Absolutely not. Using harsh tools like hammers, axes, or chisels to chip at ice dams is incredibly dangerous for both you and your roof. It can easily damage shingles, gutters, and the underlying roof structure, leading to costly repairs. It also creates dangerous falling ice chunks. Always opt for gentler methods like ice melt or steaming.
What's the best type of ice melt for my roof?+
Calcium chloride is generally recommended as the safest ice melt for roofs. It's less corrosive to roofing materials and less harmful to vegetation than sodium chloride (rock salt) or magnesium chloride. Always use it in moderation and ensure it can drain properly once it melts the ice.
How can I prevent ice dams from forming in the first place?+
Prevention is key! Focus on improving your attic's insulation and ventilation. Ensure you have adequate R-value insulation (R-49 to R-60 in most cold climates), seal all air leaks between your living space and attic, and make sure your soffit and ridge vents are clear and unobstructed to allow for proper airflow. Also, keep gutters clean before winter.
When should I call a professional for ice dam removal?+
You should call a professional if the ice dam is very large, if you have a multi-story home and cannot safely reach the dam from the ground, or if you suspect water is already leaking into your home. Professionals often use specialized steam equipment that can safely and quickly remove large dams without damaging your roof.


Discussion
Loading comments…