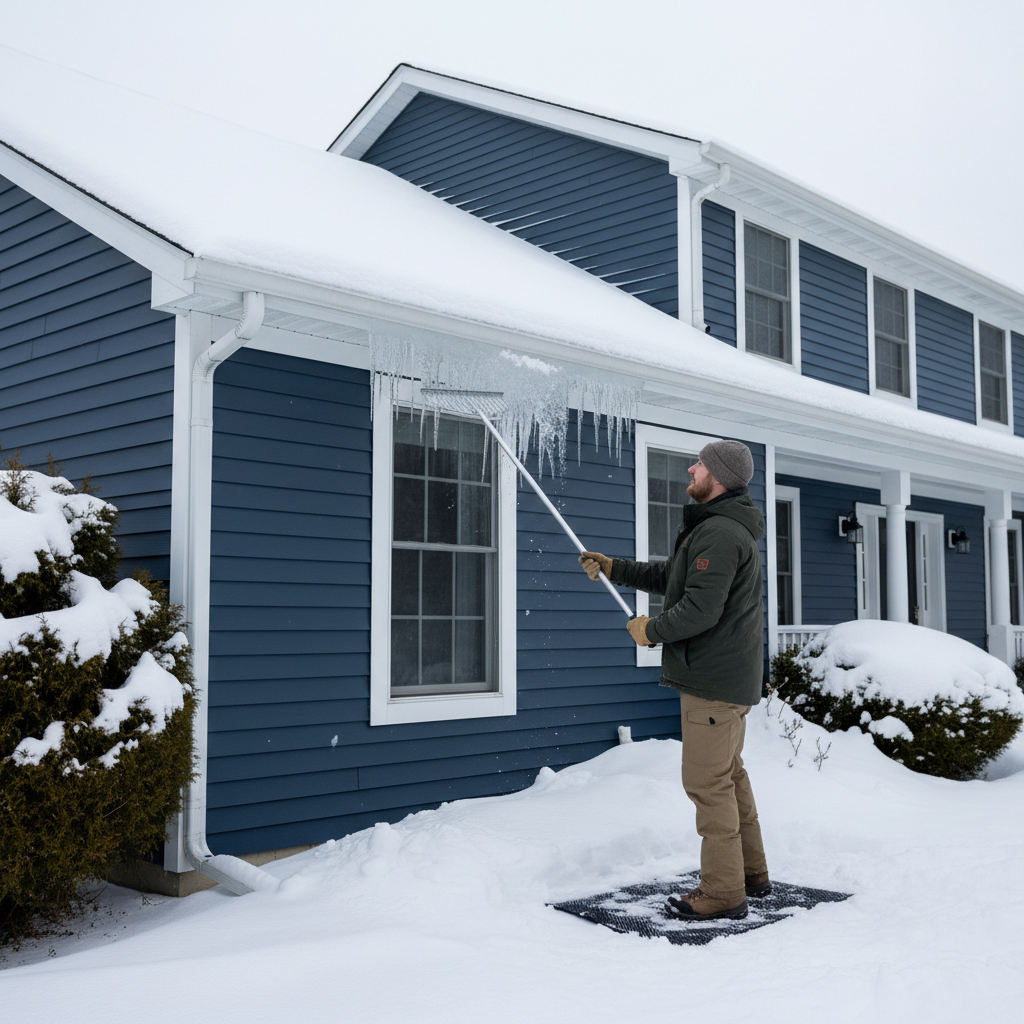
- Clear the Snowpack — The first line of defense
- Safety Note: Keep an eye out for snow and ice falling off the roof. Pets and kids need to stay out of the work zone.
- Inspect the Dam — Assess the situation
- Prepare Calcium Chloride Sacks — The gentle approach
- Place the Sacks Strategically — Creating drainage channels
General remodeling · Renovation planning
| Project category | General remodeling |
|---|---|
| Problem type | Renovation planning |
| Trade required | General contracting |
| Urgency | Planned project |
| Safety risk | Low safety risk |
| DIY suitability | Pro recommended |
| Cost category | Major investment |
| Typical timeline | Design and permitting often 2–4 months before work starts |
| Contractor type | General contractor |
Repair option
Phase the work and fix the building envelope first.
Replacement option
Full renovation with permits, design, and a general contractor.
Common causes
- Space no longer fits how the household lives
- Resale preparation
- Deferred maintenance stacking up
Relevant tools:project cost estimatorcompare quoteshome improvement material prices
Published July 28, 2026Last updated August 17, 2026
Tools & materials you'll need
Affiliate linksAs an Amazon Associate FixlyGuide earns from qualifying purchases — at no extra cost to you. Prices and availability are accurate as of publication and subject to change.
Quick Answer
Removing an ice dam safely usually starts with getting the snow off the lower edge of the roof. I use a roof rake for that, working from the ground so I’m not climbing around on a slick roof like a fool. Once the snow’s out of the way, I’ll use calcium chloride ice melt to carve drainage channels so the water can get moving again. Don’t use a hammer, sharp tools, or rock salt. You’ll shred shingles and beat up the gutters, and what started as a manageable problem turns into an expensive mess real quick.
The Problem
There’s nothing pretty about an ice dam, even if it looks nice from the yard for about five minutes. Folks see that glistening ridge and say, “Oh, it’s just ice, it’ll melt.” I’ve heard that line plenty. I tell ’em it’s about as smart as ignoring a small crack in a foundation. That thing’s not harmless.
Ice dams aren’t just some winter eyesore. They’re pressure points for water intrusion and roof damage. A little ridge of ice can turn into hundreds of pounds of frozen water, forcing its way under shingles, backing up into walls, and rotting fascia boards before you know it. I’ve seen kitchens in Andover get wrecked by water running down inside walls from an ice dam that looked harmless from the driveway. And it’s not only the weight — it’s what happens when water gets trapped, freezes, thaws, then freezes again. That expansion and contraction cycle tears at roof materials like nobody’s business.
How It Works
Knowing how an ice dam forms is half the battle. It’s a mix of heat loss, snow, and cold weather all working against you.
Say you’ve got snow sitting on the roof. At the same time, your attic’s leaking heat from inside the house. Could be lousy insulation. Could be air leaks around fixtures. Could be ductwork that isn’t sealed right. That heat warms the roof deck and melts the bottom layer of snow.
Now that meltwater starts moving down the roof, sliding under the snow layer until it hits the cold eaves — the overhang past your exterior walls. Those eaves don’t get warmed by the attic, so they stay colder. When the water hits that cold section, it refreezes and starts building a barrier. More meltwater comes down, hits the wall of ice, pools up behind it, and freezes again. Layer by layer, you end up with a real dam.
That trapped water can back up under shingles, soak insulation, and work its way into ceilings and walls. And here’s the kicker: the worst dams often show up after a good snow followed by a few days around 32°F — perfect melt-and-refreeze weather.
Step-by-Step Fix
Before you touch anything, put on slip-resistant boots, heavy gloves, and eye protection. Seriously. An icy ladder doesn’t care how careful you think you are. I’ve had a couple ugly slips over the years, and I don’t recommend making that part of your day. If you’re uneasy on a ladder or the roof pitch is steep, call a pro. No shame in that.
- Clear the Snowpack — The first line of defense
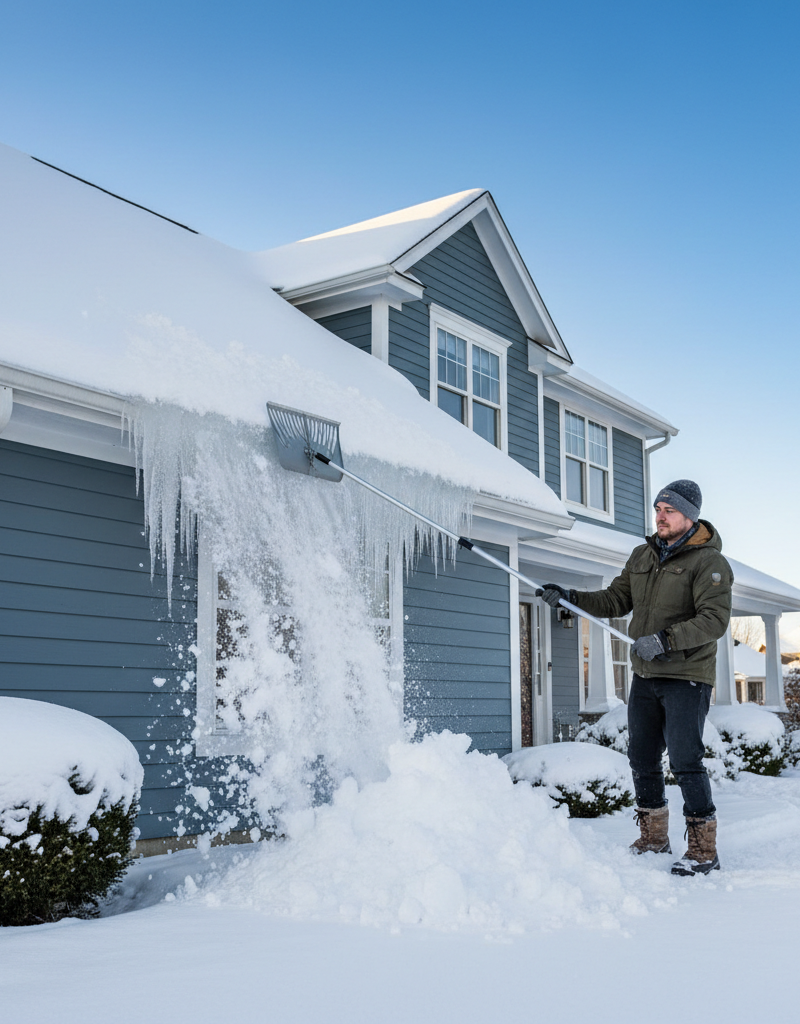
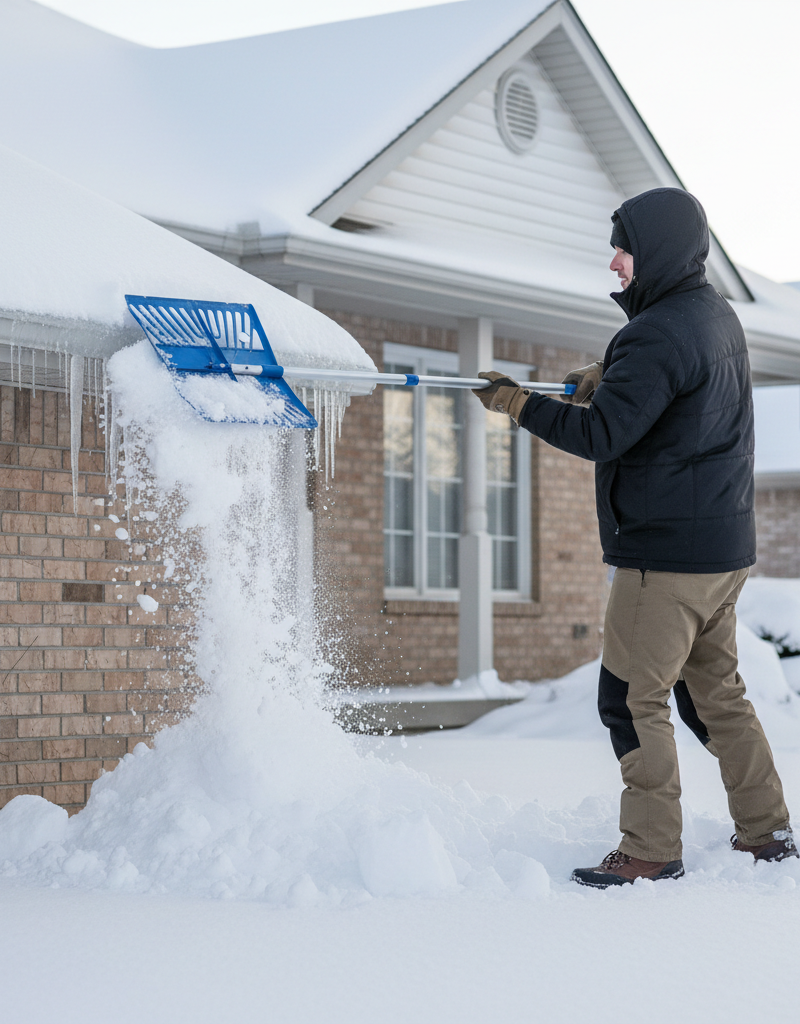
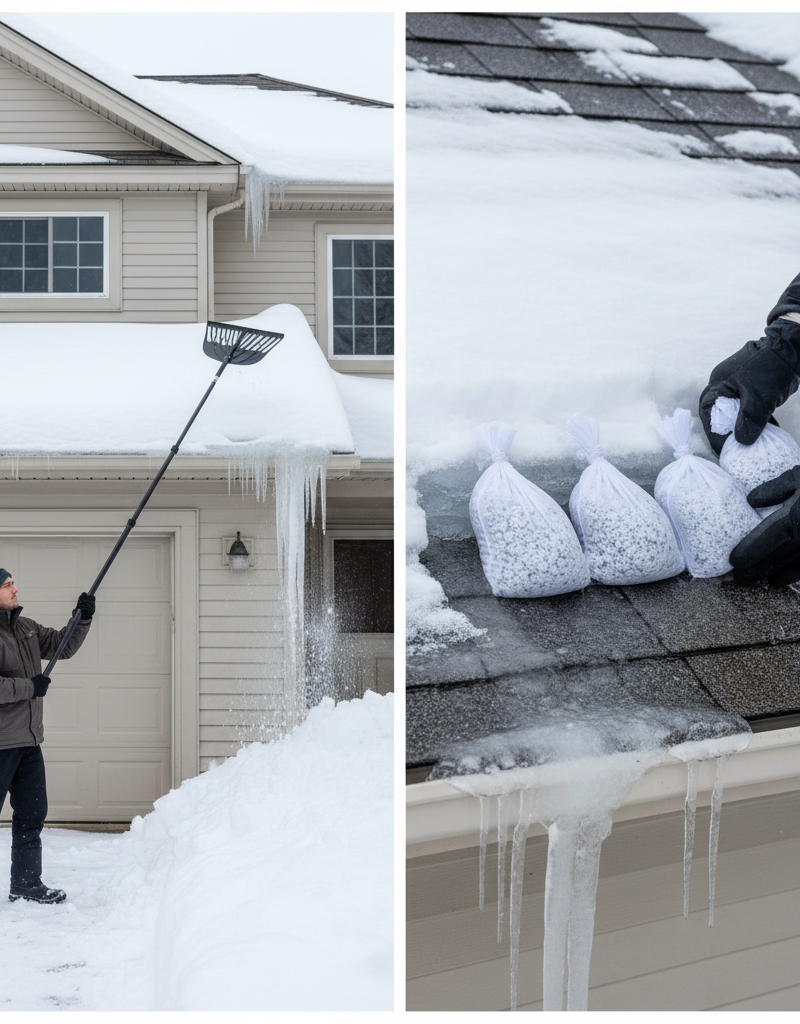
Start with a roof rake and pull off as much snow as you can from the lower 3-4 feet of the roof, all from the ground. Don’t climb a ladder and lean out trying to reach it; that’s asking for trouble. Work the rake over the eaves and a few feet up the roof. You’re getting rid of the insulating blanket that’s causing uneven melting.- Safety Note: Keep an eye out for snow and ice falling off the roof. Pets and kids need to stay out of the work zone.
- Inspect the Dam — Assess the situation
After you’ve opened things up a bit, you can actually see what you’re dealing with. Check how thick the ice is and how far it runs back up the roof. That tells you how much ice melt you’ll need. Don’t start chiseling at it. - Prepare Calcium Chloride Sacks — The gentle approach
Fill old socks, pantyhose, or even the leg of an old pair of jeans with calcium chloride ice melt. Don’t use rock salt (sodium chloride); it’ll corrode metal and can damage asphalt shingles, plants, and concrete. You want a slow, steady release. I usually go with about a pound of calcium chloride per foot of sock. - Place the Sacks Strategically — Creating drainage channels
Set the filled socks directly on top of the ice dam, perpendicular to the eave. Space them out about 2-3 feet along the dam. The whole point is to melt channels through the ice so the backed-up water can drain off the roof. The calcium chloride will work its way into the ice underneath and around the sock.- If the dam is thick: You may need a second row a foot or two above the first once the initial channels start opening up.
- Monitor the Melting — Patience is key
This isn’t instant. Sometimes it takes several hours, sometimes a full day, depending on how thick the dam is and how cold it is outside. Check from the ground now and then to see whether water’s moving through the channels. You’ll start seeing little trenches where the socks sit. - Replenish if Necessary — Keep the melt going
If the dam’s a beast or the temperature’s really low, the calcium chloride can get spent before the channels are fully open. If the melting slows way down, carefully add more socks or replace the ones already there. - Clear Debris (Optional) — Post-dam clean-up
Once the channels are open and most of the dam has melted, you might have slush or a few ice chunks left over. If it’s safe and you’re comfortable doing it, you can lightly clear those with your roof rake. Just don’t gouge the shingles. - Address the Root Cause — Prevent future problems
When the weather warms up, get into the attic and look around. Check the insulation. You want at least 12-15 inches of blown-in fiberglass or cellulose. Seal gaps around vent pipes, electrical wires, and light fixtures with expanding foam or caulk. Make sure attic ventilation isn’t blocked. That’s the long-term fix, not just treating the symptom.
Common Causes
It’s almost never just one thing that creates an ice dam. Usually it’s a perfect winter mix of weather and house problems. Here’s what I run into most:
- Uneven Roof Temperatures: This is the big one. Heat from the living space leaks into the attic and warms the roof deck, which melts the snow. The colder eaves, since they’re not sitting over heated areas, refreeze that meltwater. Bad attic insulation and weak air sealing are usually behind it.
- Insufficient Attic Ventilation: A properly vented attic pulls cold air in through soffit vents and sends it out through ridge or gable vents, so the attic stays close to outdoor temperature. That keeps the roof deck from heating up. If vents are blocked or undersized, hot air gets trapped.
- Heavy Snowfall: A thick snow blanket acts like insulation. Even a decent attic can only do so much if the roof’s buried under a pile of snow for days.
- Fluctuating Outdoor Temperatures: Temps bouncing above freezing during the day and dropping hard at night are ice dam weather, plain and simple. Melt, freeze, melt, freeze — it keeps stacking up.
- Clogged Gutters: If gutters are packed with leaves and junk, meltwater can’t drain like it should. Then it pools, freezes in the gutter, and the whole mess starts there.
Common Mistakes
I’ve seen some real winners over the years. Folks trying to bully ice off a roof usually end up turning a small problem into a bigger repair bill.
- Hacking Away with a Hammer or Chisel: That’s a fast way to ruin shingles, flashing, and sometimes the roof deck itself. I saw a guy in Billerica go after an ice dam with a pickaxe once — he punched a hole right through the plywood. The roof repair cost way more than calling a pro would’ve.
- Using Rock Salt (Sodium Chloride): Sure, it’ll melt ice. It’ll also corrode stuff. It can pit and stain concrete, kill plants, and degrade asphalt shingles and metal gutters over time. Use calcium chloride instead.
- Pouring Hot Water on the Dam: Sounds slick, right? No dice. The hot water melts some ice, then it refreezes fast, and now you may have a worse dam or a slicker walkway. Plus, standing on an icy ladder with a bucket of hot water is asking for a trip to the ER.
- Ignoring the Root Cause: Taking the ice off is like putting a band-aid on a broken leg. If you don’t fix the attic bypasses and insulation issues that caused it, you’ll be back at it next winter. Same story, different storm.
- Walking on an Icy Roof: I know, obvious. People still do it. An icy roof is dangerous. One slip can wreck your day fast. If you absolutely have to be up there, use proper fall protection — but honestly, stay off an icy roof unless you’re trained for it.
Cost & Time Breakdown
Here’s a rough idea of what you’re looking at if you do it yourself or bring in the cavalry.
| Task | DIY Cost | Pro Cost | Time |
|---|---|---|---|
| Roof Rake Snow Removal | $0 (if you own) | $100–$300 | 30–60 minutes |
| Calcium Chloride Application | $20–$50 | Included in pro service | 1–2 hours |
| Post-Dam Attic Assessment | $0 | $150–$400 (inspection) | 1–2 hours |
| Insulation/Ventilation Upgrade | $500–$2,500+ | $1,000–$5,000+ | 1–3 days |
| Interior Water Damage Repair | $100–$1,000+ | $500–$5,000+ | Days to weeks |
Tips & Prevention
Stopping ice dams before they start is always cheaper, safer, and a whole lot less annoying than dealing with them afterward. The real fix is getting the attic right.
- Proper Attic Insulation: This is number one. Aim for an R-value of R-49 to R-60 in your attic, which works out to about 16-20 inches of insulation for most materials. Better insulation means less heat escaping.
- Seal Air Leaks: Grab caulk or expanding foam and seal every crack and penetration between the living space and attic. Light fixtures, electrical boxes, plumbing stacks, chimney chases — all of it. Those little leaks add up fast.
- Adequate Attic Ventilation: Make sure soffit vents aren’t buried in insulation and that you’ve got enough exhaust vents, ridge or gable. You want air moving through the attic so it stays cold. A decent rule of thumb is 1 square foot of net free vent area for every 150 square feet of attic floor space, split evenly between intake and exhaust.
- Clean Gutters: Get the leaves and debris out before winter hits. Clogged gutters can feed ice buildup and keep meltwater from draining the way it should.
- Monitor Snowfall: After a heavy storm, I’ll often tell homeowners to rake the lower few feet of snow off the roof before ice dams get a foothold. That matters even more in places that get repeat problems.
When to Call a Professional
Look, I’m all for DIY, but sometimes you’ve gotta know when to back off and call in the cavalry. If the ice dam’s huge, runs far up the roof, or you’re just not comfortable with ladders and heights, pick up the phone. Don’t get cute with steep roof pitches, especially when there’s ice involved.
If you’re already seeing water stains on ceilings or walls, you’re past simple removal and into damage control — that’s a pro job for both the ice dam and the water cleanup. A good contractor’s got the safety gear, the right equipment, and usually steam tools that work well without trashing the roof. I pulled a water heater in Frisco last month that had exactly this kind of leak path, and the drywall damage was worse than the homeowner expected. Trying to fight a big dam yourself can cause more damage than the dam would’ve done on its own. Don’t be a hero. Be smart.
Related Articles
Keep troubleshooting with these hand-picked guides from FixlyGuide:
- The #1 Mistake Homeowners Make Removing Ice Dams (And 3 Safer Fixes) — Discover the safest and most effective ways to remove ice dams from your roof, avoiding common mistakes that can cause severe damage to you…
- The 3 Hidden Reasons Your Roof Gets Ice Dams (and the Easy Fixes) — Ice dams are a common winter problem that can cause significant damage to your roof and home if not addressed safely and effectively.
- The $5 Secret to Preventing Ice Dams (and Why Your Neighbors Still Get Them) — Discover the surprising truth about ice dams and how a simple, inexpensive solution can protect your home from costly winter damage.
- The $30 Secret to Banishing Ice Dams From Your Roof (Before They Destroy It) — Learn safe and effective methods to remove ice dams from your roof and prevent costly damage to your home's structure and interior.
- The $20 Trick That Melts Ice Dams (and Saves Your Roof) — Discover a surprisingly simple, budget-friendly method to safely remove ice dams and prevent costly roof damage to your home.
- Those Gutter Icicles Are a Costly Warning Sign — Discover why the icicles on your gutters are a flashing red light for ice dams, a destructive problem that can lead to costly water damage…
What should this project cost?
Enter your project details for a realistic cost range before you call anyone.
Spot repairs commonly run $400–$1,800; full replacement typically $9,000–$18,000 for an average home.
- Regional adjustment
- National average
- Labor share (typical)
- ~$2,948
- Quotes to collect
- 3 written estimates
Educational estimate based on national averages — not a binding quote. Always confirm with written local estimates.
Decide what your roof needs
Two minutes of questions turns "something is wrong up there" into a clear next step.
- Repair or replace your roof?Answer 10 questions about age, leaks, and damage to get a clear next step.Open
- Compare contractor quotesScore up to four bids on price, warranty, licensing, and timeline.Open
- Get local estimatesSend one request and compare written estimates from vetted pros.Open
Free, no signup required. Estimates are educational guidance, not a quote or an inspection.
Get the print-ready PDF of this guide
A clean, ad-free, printable version you can keep on your phone or pin to the workshop wall. Free with a FixlyGuide account.
- Print-optimized layout
- Tools, materials & every step included
- Saved to your account
Recommended for DIYers & woodworkers
Sponsored
The Top 20 Tools for Workshops of Any Budget
No stationary machines or power tools required — plus 3 fundamental tools that can't be bought at any price.
Get the free guide
Ted's Woodworking — The #1 Woodworking Resource
Detailed instructions, dimensioned drawings, materials & cutting lists, and 3D schematics for every skill level.
See the plansSponsored: links above are affiliate links. FixlyGuide may earn a commission on qualifying purchases — at no extra cost to you.
Frequently asked questions
What's the best way to remove an ice dam?+
The safest and most effective DIY method is to use a roof rake to clear snow from the lower roof, followed by placing calcium chloride ice melt in pantyhose or socks directly on the dam to create drainage channels. This melts the ice slowly and minimizes roof damage.
Can I use rock salt to melt ice dams?+
No, absolutely not. Rock salt (sodium chloride) can corrode metal gutters, damage asphalt shingles, and harm landscaping. Always opt for calcium chloride ice melt, which is much gentler on building materials and plants.
How do ice dams form in the first place?+
Ice dams form when heat escapes from your home into the attic, warming the roof deck and melting snow. This meltwater then flows down to the unheated eaves, where it refreezes, creating a barrier that traps more water behind it.
Is it safe to get on my roof to remove an ice dam?+
Only if you're an experienced professional with proper safety gear. For homeowners, it's extremely dangerous due to ice and slippery conditions. Most ice dam removal can be done from the ground with a roof rake or a secure ladder.
How much does it cost to have an ice dam removed by a professional?+
Professional ice dam removal can range from $100 to $300 per hour or more, depending on the size of the dam and the method used (e.g., steam removal). A typical job might cost between $500 and $1,500.
What tools do I need to remove an ice dam myself?+
You'll need a good quality roof rake, calcium chloride ice melt, old socks or pantyhose, a sturdy ladder, and proper safety gear like slip-resistant boots, gloves, and eye protection.
How can I prevent ice dams from forming on my roof?+
The best prevention involves improving attic insulation to an R-value of 49-60, sealing all air leaks from the living space into the attic, and ensuring your attic has adequate and unobstructed ventilation.
How long does it take for calcium chloride to melt an ice dam?+
It's not an instant fix; it can take several hours up to a full day for calcium chloride to melt effective drainage channels through an ice dam, depending on the dam's thickness and outdoor temperatures.
Will an ice dam eventually melt on its own?+
Yes, eventually, all ice dams will melt. However, they can cause significant damage to your roof, gutters, and home interior long before that happens, so it's best to address them promptly and safely.
Can ice dams damage my gutters?+
Absolutely. The sheer weight of a large ice dam can pull gutters away from the fascia board, bend them, or even rip them off completely. The constant freezing and thawing can also cause cracks and leaks.
Discussion
Loading comments…