Tools & materials you'll need
Affiliate linksAs an Amazon Associate FixlyGuide earns from qualifying purchases — at no extra cost to you. Prices and availability are accurate as of publication and subject to change.
Quick Answer
Ice dams are destructive forces that can lead to significant roof and interior damage. They typically form when attic heat melts snow on the upper roof, causing water to run down to the colder eaves where it refreezes, creating a barrier. The safest and most effective permanent solution involves addressing the root cause: improving attic insulation and ventilation. For immediate, careful removal, a roof rake can clear snow, or a calcium chloride ice melter (placed in a nylon stocking) can create channels for water to drain through existing dams.
The Problem
That beautiful blanket of snow on your roof might be hiding a destructive secret: ice dams. These thick ridges of ice form at the edges of your roof, preventing meltwater from draining properly. Instead, this water backs up under your shingles, seeping into your attic, walls, and ceilings. The results? Water stains, peeling paint, warped floors, damaged insulation, and even structural issues. It’s a common winter nightmare for homeowners in colder climates, often leading to thousands of dollars in repairs if not addressed promptly and correctly.
Ice dams are more than just an inconvenience; they're a direct threat to the integrity of your home. The sheer weight of a large ice dam can stress your gutters and fascia, pulling them away from the house. Inside, the repeated freeze-thaw cycles can cause significant damage to plaster, drywall, and even electrical components if water reaches them. Understanding why they form is the first step toward effective prevention and removal.
How It Works
Understanding ice dams boils down to a simple principle: uneven roof temperatures. Here's the breakdown:
- Heat Loss: In winter, your home's heated air rises. If your attic isn’t properly insulated and sealed, this warm air leaks into the attic space. Think of it like a sieve, allowing precious heat to escape.
- Melting Snow: This lost heat warms the roof deck, especially the parts directly above your living space. When snow falls on a heated roof, the lower layers of snow melt, even if the ambient air temperature is below freezing.
- Water Flow: The melted snow, now water, flows down the warmed roof surface, under the remaining snow, towards the eaves. Eaves, on the other hand, extend past the insulated, heated part of your home and are exposed to the cold outdoor air from all sides. They cool down significantly.
- Refreezing: As the meltwater reaches these colder eaves, it refreezes. This initial layer of ice creates a small ridge. More meltwater flows down, hits this ridge, and adds to it, growing the ice dam. The process repeats, building up a formidable barrier.
- Water Back-up: Once the ice dam is substantial enough, it prevents any subsequent meltwater from draining off the roof. This water pools behind the dam, forming a puddle that sits against your shingles. Since shingles are designed to shed water downward, not hold it, this standing water can force its way under the shingle tabs, through the roofing felt, and into your attic and home.
Effective prevention hinges on stopping this cycle. The goal is to either prevent the snow from melting unevenly or to provide a clear path for meltwater to drain, even if it does melt.
Step-by-Step Fix
Safety Note: Working on a roof, especially one covered in snow and ice, is extremely dangerous. Icy surfaces are slippery, and falls can be fatal. If you are uncomfortable with heights or feel unsafe at any point, do not proceed. Always work with a helper and never work alone. Use proper fall protection if available. Avoid working directly over windows or entryways where falling ice could injure someone below. Never use metal tools or anything that could damage your roof or gutters.
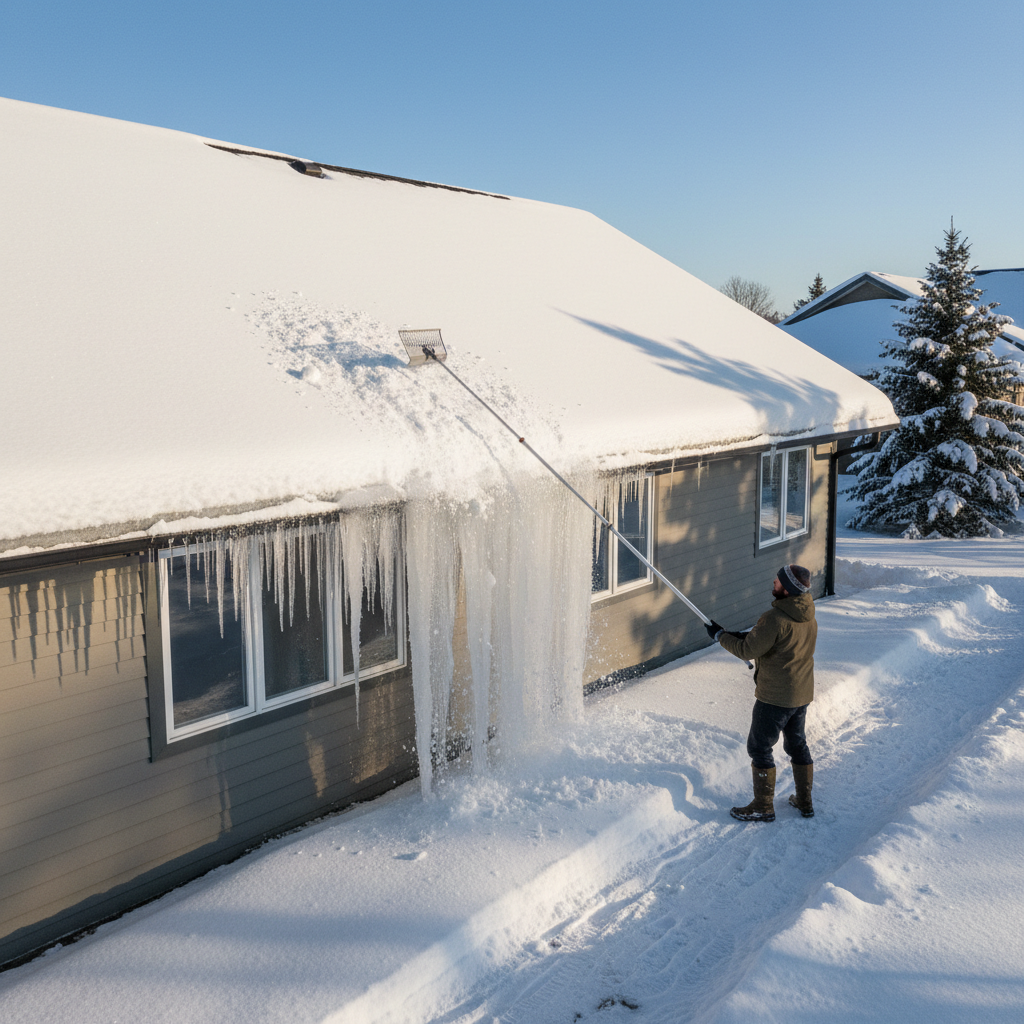
1. Clear Snow with a Roof Rake – Remove the fuel for new dams
If snow has recently fallen and ice dams haven't fully formed, or you want to prevent them, a roof rake is your best friend. From the ground, gently pull snow off the lower 3-5 feet of your roof, including over the eaves and gutters. Aim for enough clearance to expose the bare shingles.
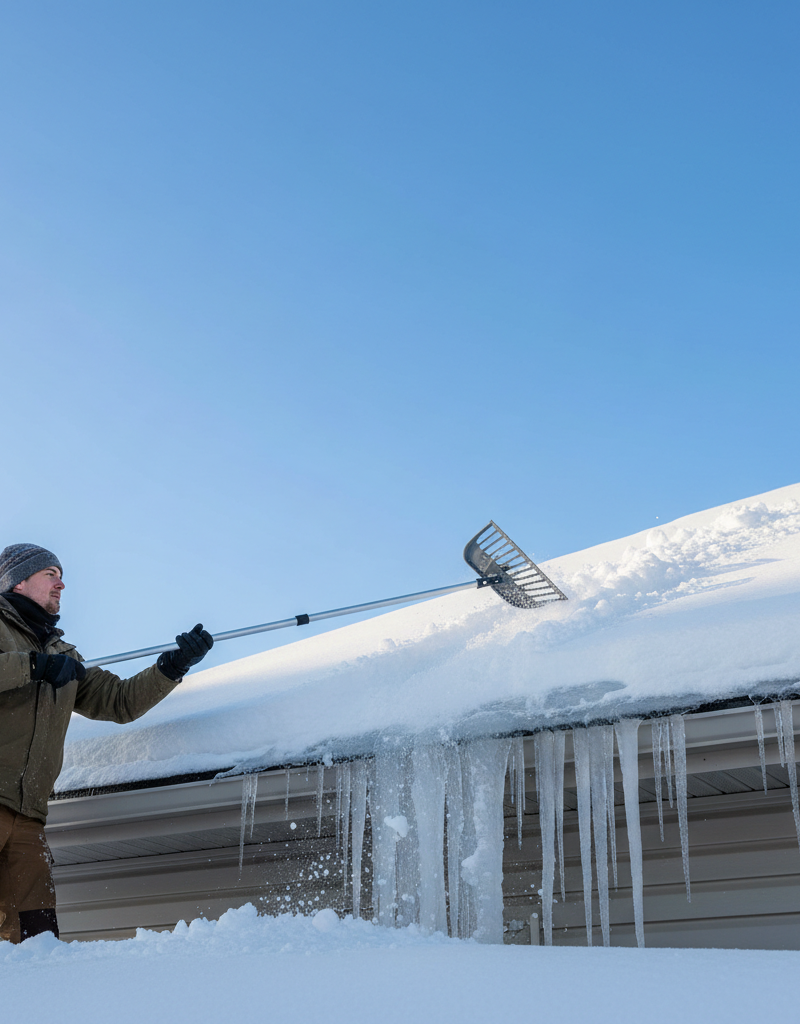
- Tool: Extendable aluminum roof rake. Look for one with wheels or soft bumpers to avoid scraping shingles.
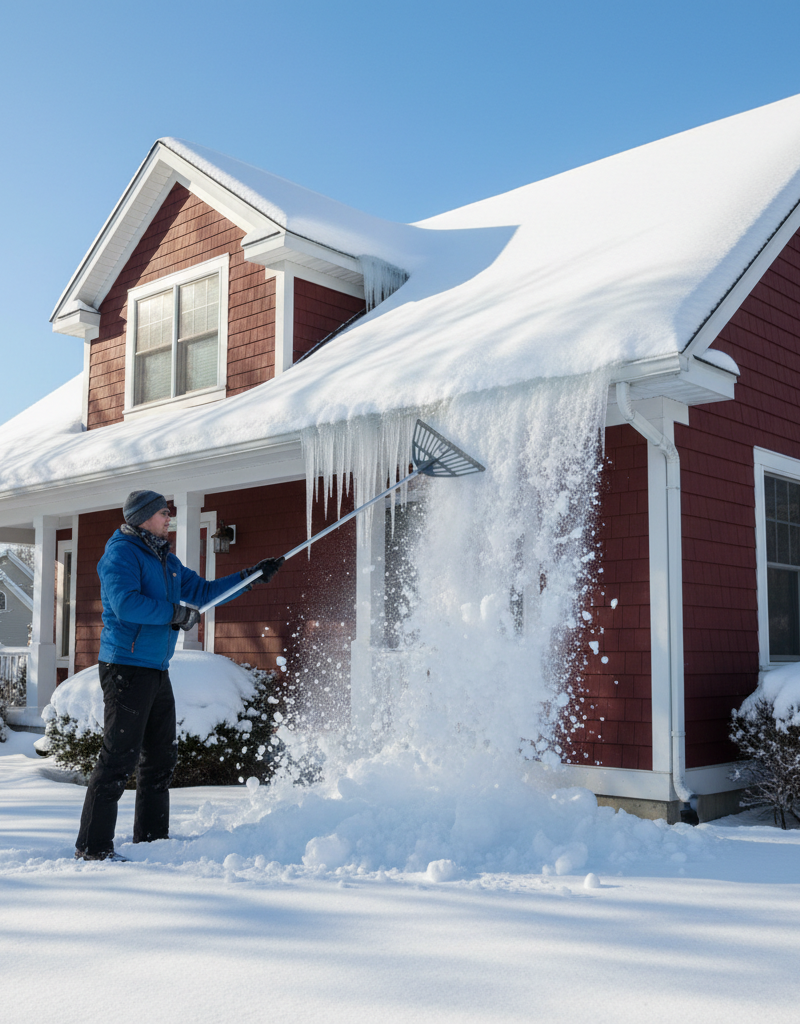
- Technique: Use smooth, even strokes. Don't dig down to the roof surface with force. Work from the peaks downwards, pulling snow onto a clear area below.
- Warning: Never stand on a ladder on an icy surface. Maintain three points of contact with your ladder at all times. Be mindful of falling snow and ice.
2. Create Channels with Calcium Chloride – Melt existing dams safely
For existing ice dams, creating channels through the ice allows trapped water to drain. Calcium chloride is less damaging to plants and masonry than rock salt (sodium chloride).
- Material Prep: Fill old nylon stockings or pantyhose with calcium chloride ice melt. Tie off the ends securely to form tubes about 1-2 feet long.
- Placement: Carefully place these stockings across the ice dam, perpendicular to the eave, directly over where water is pooling. The goal is to create narrow paths for water to drain. Place them every few feet along the dam.
- Mechanism: The calcium chloride slowly dissolves, creating a brine that melts the ice directly beneath and around the stocking, carving drainage channels. This is a slow, passive process.
- Don't: Never use a pickaxe, hammer, or chisel directly on an ice dam. This will almost certainly damage your roof, gutters, and could cause large, uncontrolled chunks of ice to fall dangerously.
3. Assess for Heat Loss Sources – Diagnose the root cause
While external interventions are temporary, the underlying issue is usually heat leaking into the attic. Start by identifying potential culprits.
- Attic Inspection: On a cold day, with snow on the roof, go into your attic. Look for cold spots or areas where snow above these spots on the roof has melted. These often indicate direct heat leaks.
- Problem Areas: Focus on recessed light fixtures, bathroom exhaust fans that vent into the attic (a major no-no!), unsealed access hatches, gaps around plumbing stacks, and poorly sealed top plates (where inner walls meet the ceiling).
- Branching: If you find warm spots, make a note to seal these next. This is a critical step for long-term prevention.
4. Improve Attic Insulation – Stop heat from escaping
Adequate insulation forms a thermal barrier between your heated living space and the cold attic.
- Current R-Value: Determine your attic's current insulation R-value. In most cold climates, an R-value of R-49 to R-60 (16-20 inches of fiberglass or cellulose) is recommended. You can measure the depth of existing insulation and consult charts online to estimate R-value.
- Adding More: If your insulation is insufficient, carefully add more. Roll out batts of fiberglass insulation perpendicular to existing joists to cover them, or blow in cellulose insulation. Ensure insulation doesn't block soffit vents.
- Safety: Wear appropriate PPE (respirator, gloves, long sleeves) when working with insulation. Avoid compressing existing insulation, as this reduces its R-value.
5. Seal Air Leaks – The invisible culprits
Insulation is only part of the battle; air sealing is equally, if not more, important for preventing heat transfer.
- Identify Leaks: Use a stick of incense or a thermal leak detector in the attic on a windy day to find air movement around ceiling penetrations (light fixtures, electrical boxes, plumbing vents, chimney chases). The smoke will show you where the air is moving.
- Seal Gaps: Use caulk for small gaps (up to 1/4 inch) and expanding foam sealant for larger gaps (up to 3 inches). For larger openings around chimneys (ensure fire-rated materials are used) or attic access panels, use rigid foam board cut to fit and sealed with foam tape or caulk.
- Venting: Ensure all bathroom and kitchen exhaust fans vent outside the house, not into the attic. Extend existing ducts with insulated ductwork if necessary.
6. Enhance Attic Ventilation – Keep the roof deck cold
Proper attic ventilation keeps the attic temperature close to the outdoor temperature, preventing uneven melting.
- Soffit Vents: Ensure soffit vents (under the eaves) are clear and not blocked by insulation. Install baffles (insulation dams) if necessary to maintain a clear air channel from the soffit into the attic.
- Ridge Vents/Gable Vents: Combine with adequate soffit ventilation to create a continuous, balanced airflow. Warm, moist air should exit high (ridge or gable vents) while cooler, drier air enters low (soffit vents).
- Net Free Area: Calculate the required
Net Free Areafor your attic ventilation. A common rule is 1 square foot of vent area for every 300 square feet of attic floor, equally split between intake (soffit) and exhaust (ridge/gable).
7. Consider Gutter Heating Cables (Temporary Solution) – Direct de-icing
While not a fix for the root cause, heating cables can prevent ice dams from forming in specific problem areas or provide a temporary measure.
- Installation: Zig-zag self-regulating heating cables along the lowest edge of the roof and inside gutters and downspouts in areas prone to severe ice dams. Follow manufacturer instructions carefully.
- Activation: Only turn them on when ice dam formation is likely or already occurring. They are not meant for continuous operation due to energy consumption.
- Limitation: This is an expensive, energy-intensive band-aid, not a permanent solution to inadequate insulation or ventilation.
Common Causes
- Inadequate Attic Insulation: This is the most prevalent cause. Too little insulation allows heat from your living space to easily pass into the attic, warming the roof deck. Old insulation can settle and lose R-value over time.
- Poor Attic Ventilation: Even with good insulation, if warm air gets into the attic, it needs an escape route. Insufficient soffit and ridge/gable vents trap heat, leading to warmer roof temperatures.
- Air Leaks from Living Space: Unsealed penetrations like recessed lights, unvented exhaust fans, plumbing stacks, and gaps around chimneys or attic hatches allow significant amounts of warm, moist air directly into the attic.
- Blocked Soffit Vents: Insulation that's pushed up against the underside of the roof deck or directly into soffit vents can block crucial intake airflow, hindering proper ventilation.
- Complex Roof Designs: Valleys, dormers, and intersecting roof lines can create areas where snow accumulates more deeply or where ventilation is naturally poorer, making these spots more susceptible to ice dam formation.
- Dirty/Clogged Gutters: While not a primary cause, clogged gutters full of debris can exacerbate an existing ice dam problem by preventing proper drainage once meltwater reaches them.
Common Mistakes
- Ignoring the Root Cause: Many homeowners focus only on removing existing ice dams without addressing the underlying issues of heat loss and poor ventilation. This leads to recurring problems winter after winter.
- Using a Sledgehammer or Pickaxe: Hitting ice dams with blunt force is a surefire way to damage shingles, gutters, and potentially yourself with falling ice. It's incredibly dangerous and costly.
- Applying Rock Salt Directly: While it melts ice, regular rock salt (sodium chloride) can be corrosive to roofing materials, damage plants, and stain driveways/walkways. Calcium chloride is a better, less damaging option.
- Aiming a Heat Gun/Torch at the Ice: Using direct heat like a heat gun or propane torch on your roof is extremely dangerous. It can melt shingles, start fires, and introduce open flames near potentially flammable materials.
- Not Considering Ladder Safety: Climbing onto a snow- and ice-covered roof, or even using a ladder on icy ground, without proper safety precautions (stable footing, helper, fall protection) is a major mistake that leads to serious injury.
- Blocking Soffit Vents with Insulation: When adding insulation, a common error is allowing it to block the soffit vents, which are critical for bringing in cold, fresh air to cool the attic. This can worsen the problem.
Cost & Time Breakdown
| Task | DIY Cost | Pro Cost | Time |
|---|---|---|---|
| Roof Raking (preventative) | $0 (if tool owned) | N/A | 15-30 mins |
| Calcium Chloride Channels | $5–$20 | N/A | 30-60 mins |
| Attic Air Sealing | $30–$150 | $300–$800 | 2–4 hours |
| Adding Attic Insulation | $300–$1,500 | $1,000–$3,000 | 4–8 hours |
| Improving Attic Ventilation | $100–$500 | $500–$2,000 | 4–8 hours |
| Gutter Heating Cables (200 ft) | $200–$400+ | $500–$1,000+ | 2–4 hours |
Tips & Prevention
- Regular Attic Checks: Periodically check your attic for signs of moisture, mold, or drafts. Do this especially before winter sets in.
- Maintain Clear Soffits: Ensure nothing, especially insulation, is blocking the airflow through your soffit vents. Use insulation baffles to keep the channels clear.
- Properly Vent Exhaust Fans: Verify that all bathroom and kitchen exhaust fans are vented directly outside your home, not into the attic space. Use insulated ductwork to prevent condensation.
- Keep Gutters Clean: While not a primary cause, clogged gutters can exacerbate drainage issues once an ice dam forms. Clean them as part of your fall maintenance.
- Monitor Snowfall: After heavy snow, especially if followed by fluctuating temperatures, watch your roof for early signs of ice dam formation. Early intervention (like snow raking) is key.
- Consider an Energy Audit: A professional energy audit can pinpoint exact areas of heat loss in your home, providing a roadmap for comprehensive ice dam prevention.
When to Call a Professional
While some aspects of ice dam management are DIY-friendly, knowing when to call a professional is crucial for safety and effective, lasting solutions. You should absolutely contact a licensed contractor if you suspect the ice dam has already caused significant water intrusion into your home, evidenced by spreading water stains on ceilings or walls, dripping water, or visible mold growth, as this requires immediate interior remediation. For persistent and severe ice dam issues that return every winter, a professional insulation and ventilation contractor can conduct a thorough energy audit to precisely identify heat loss areas and recommend comprehensive, long-term solutions for insulation and ventilation improvements. If you need to access high or steep parts of your roof, or if the ice dam is incredibly thick and widespread, professional roofers have the specialized equipment and safety training for safe and effective ice removal using methods like steam, which is far safer for your roof than DIY hammering. Never hesitate to call a pro if you feel unsafe or out of your depth, as serious falls from icy roofs are a genuine risk.
Related Articles
Keep troubleshooting with these hand-picked guides from FixlyGuide:
- The $30 Secret to Banishing Ice Dams From Your Roof (Before They Destroy It) — Learn safe and effective methods to remove ice dams from your roof and prevent costly damage to your home's structure and interior.
- The $30 Trick to Melting Ice Dams (Before They Destroy Your Roof) — Discover how to safely remove ice dams from your roof instantly with common household items, preventing costly damage. Stay safe while tack…
- The $30 Secret to Banishing Ice Dams Without Damaging Your Roof — Discover how a simple, inexpensive trick can safely eliminate dangerous ice dams from your roof and prevent costly damage to your home.
- The $20 Trick That Melts Ice Dams (and Saves Your Roof) — Discover a surprisingly simple, budget-friendly method to safely remove ice dams and prevent costly roof damage to your home.
- The #1 Mistake Homeowners Make with Ice Dams (and How to Fix It SAFELY) — Most homeowners approach ice dam removal incorrectly, creating more damage or safety risks. Learn the right, safe methods to protect your r…
- The #1 Reason Your Gutters Overflow (It's Not Clogging) — Discover the surprising true cause of overflowing gutters during heavy rain and how a simple fix can prevent costly water damage to your ho…
Recommended for DIYers & woodworkers
Sponsored
The Top 20 Tools for Workshops of Any Budget
No stationary machines or power tools required — plus 3 fundamental tools that can't be bought at any price.
Get the free guide
Ted's Woodworking — The #1 Woodworking Resource
Detailed instructions, dimensioned drawings, materials & cutting lists, and 3D schematics for every skill level.
See the plansSponsored: links above are affiliate links. FixlyGuide may earn a commission on qualifying purchases — at no extra cost to you.
Frequently asked questions
How do ice dams form?+
Ice dams form when heat from your home's interior escapes into the attic, warms the roof deck, and melts snow. This water flows down to the colder roof eaves, where it refreezes, creating a barrier that traps more meltwater.
What is the safest way to remove an ice dam?+
The safest DIY methods include using a roof rake from the ground to clear snow before dams form, or placing calcium chloride ice melt (in a nylon stocking) across existing dams to create drainage channels. Never use sharp tools or excessive force directly on the ice.
Can I prevent ice dams permanently?+
Yes, by addressing the root causes: improving attic insulation to prevent heat loss, sealing air leaks from your living space into the attic, and ensuring proper attic ventilation to keep the roof deck uniformly cold.

Discussion
Loading comments…