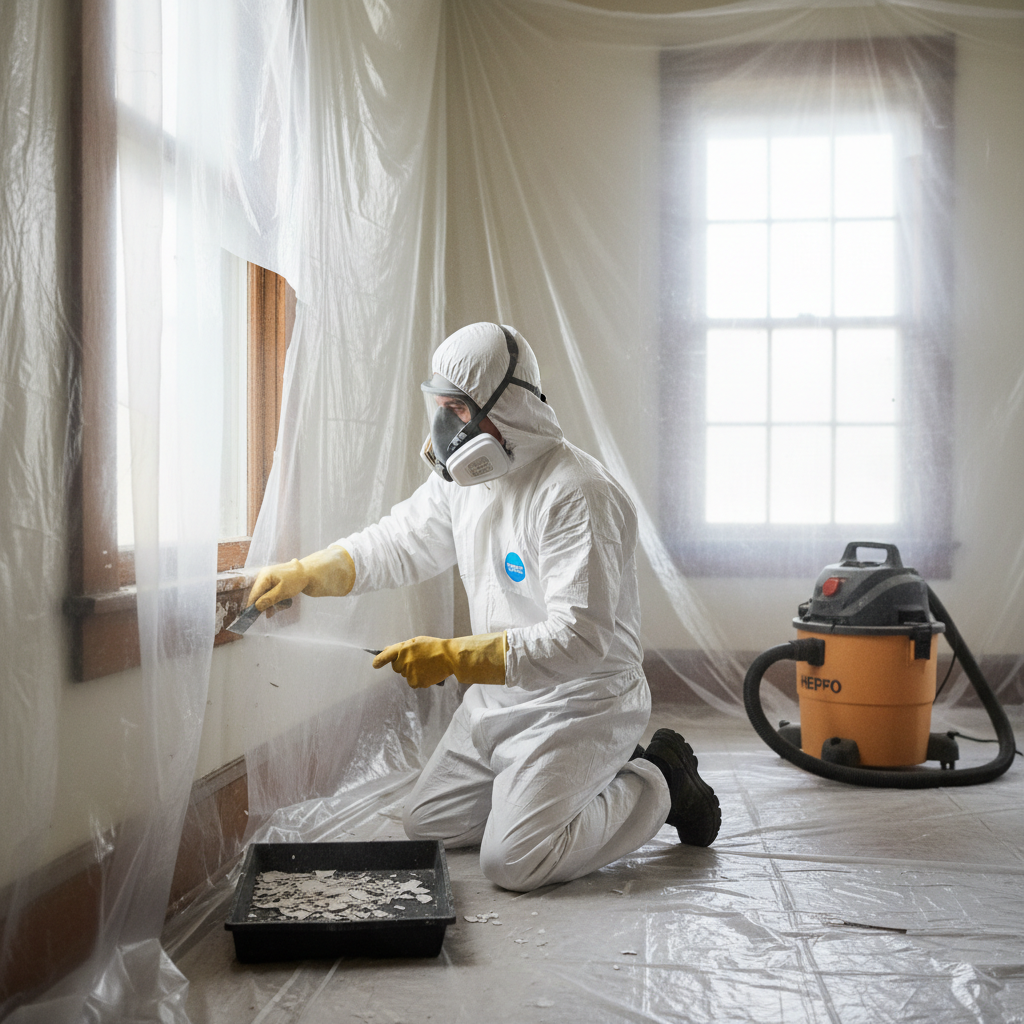
- Test the Suspect Surface – Before disturbing any paint
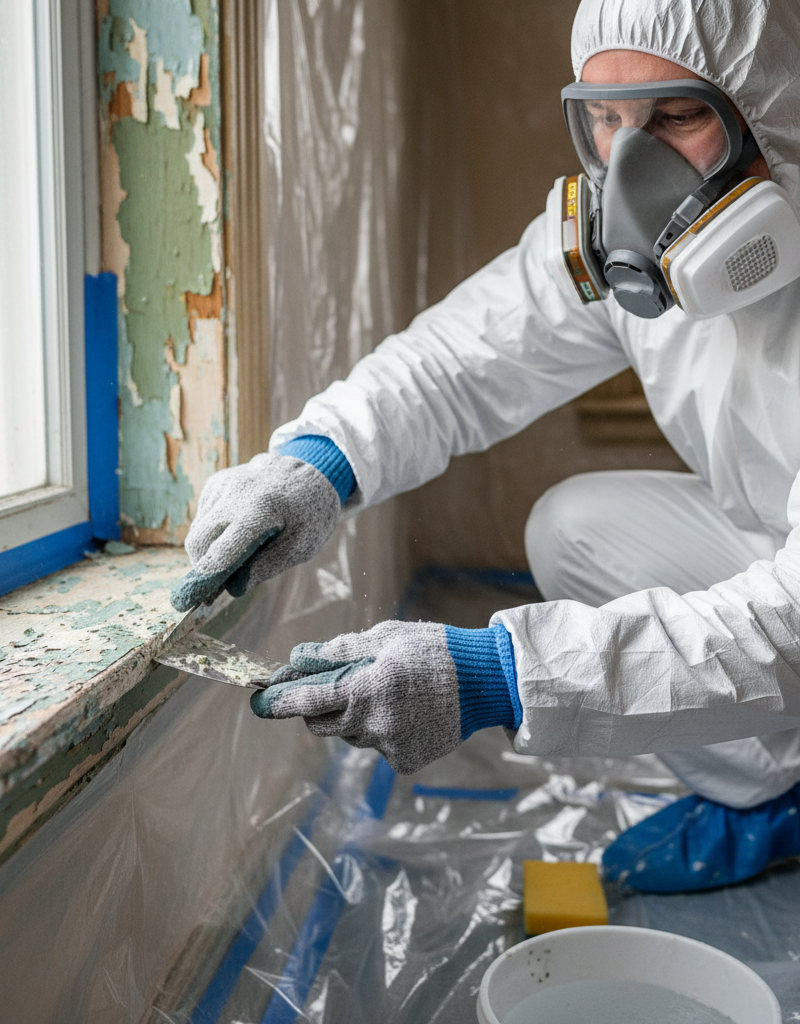
- Identify surfaces painted before 1978. Common culprits include windows, doors, trim, moldings, and even exterior siding. This initial testing is inexpensive and crucial.
- If this doesn't work: If results are inconclusive or you have any doubt, assume lead is present and take full precautions, or call a professional inspector.
General remodeling · Renovation planning
| Project category | General remodeling |
|---|---|
| Problem type | Renovation planning |
| Trade required | General contracting |
| Urgency | Planned project |
| Safety risk | Low safety risk |
| DIY suitability | Pro recommended |
| Cost category | Major investment |
| Typical timeline | Design and permitting often 2–4 months before work starts |
| Contractor type | General contractor |
Repair option
Phase the work and fix the building envelope first.
Replacement option
Full renovation with permits, design, and a general contractor.
Common causes
- Space no longer fits how the household lives
- Resale preparation
- Deferred maintenance stacking up
Relevant tools:project cost estimatorcompare quoteshome improvement material prices
Published July 19, 2026Last updated August 17, 2026
Tools & materials you'll need
Affiliate linksAs an Amazon Associate FixlyGuide earns from qualifying purchases — at no extra cost to you. Prices and availability are accurate as of publication and subject to change.
Quick Answer
If your home dates back to before 1978, any renovation or repair work that disturbs painted surfaces – such as sanding, scraping, or demolition – has the potential to release microscopic lead dust particles. These particles are invisible to the naked eye but pose a significant health risk, especially to children and pregnant women. Identifying lead paint, containing the work area, and following strict cleanup protocols are essential to protect your family during home improvements.
The Problem
Imagine you're tackling a long-awaited renovation project, perhaps stripping old trim, sanding down a door, or even just drilling a new hole for a picture hanger. It feels like a standard DIY task. But if your home was built before 1978, you could be unknowingly unleashing a silent, dangerous contaminant: lead dust. This isn't just about a peeling paint chip; it's about microscopic particles that, once airborne, can settle on every surface, be inhaled, or tracked through your home. The danger isn't in the paint itself while it's intact and undisturbed, but in the dust created when it's broken down. Lead poisoning can lead to severe developmental issues in children, neurological problems, and kidney damage. Most homeowners are completely unaware of the lurking danger, or they underestimate the ease with which lead dust can spread and contaminate an entire living space.
How It Works
Lead-based paint was widely used in homes, both indoors and outdoors, for its durability and vibrant colors until its ban in 1978. When this paint is intact and undisturbed, it generally poses little risk. The problem arises when the paint film is broken or deteriorated. Think about the friction of a window sash against its frame, the impact of a door repeatedly opening and closing, or the destructive forces of renovation. These actions chip, abrade, or pulverize the paint, releasing lead particles into the air.
Lead dust particles are incredibly small, often invisible without magnification. This allows them to become airborne easily, travel through HVAC systems, and settle on floors, toys, furniture, and food preparation surfaces. Once settled, they are easily re-aerosolized by everyday activities like walking, vacuuming, or opening a window. Young children are particularly vulnerable because they frequently put their hands and objects into their mouths, directly ingesting lead dust from contaminated surfaces. Even small amounts of lead can accumulate in the body over time, without readily apparent symptoms, leading to serious health issues down the line. Adult exposure can also cause high blood pressure, joint and muscle pain, and memory difficulties. Understanding this mechanism – that the danger isn't just in the presence of lead paint, but in the creation and spread of its dust – is crucial for any homeowner undertaking a renovation project.
Step-by-Step Fix
Remember, the best "fix" is proactive prevention and professional assessment. If you suspect lead paint, always consider professional lead abatement. These steps outline how to safely manage small, isolated disturbances, but for larger projects, always hire a certified lead abatement contractor.
-
Test the Suspect Surface – Before disturbing any paint
- Identify surfaces painted before 1978. Common culprits include windows, doors, trim, moldings, and even exterior siding. This initial testing is inexpensive and crucial.
- Use an EPA-recognized lead test kit (available at hardware stores) or, for more reliable results, send paint chip samples to an accredited lab. Follow the kit instructions meticulously; false negatives can be dangerous. If the test is positive, proceed with extreme caution.
- If this doesn't work: If results are inconclusive or you have any doubt, assume lead is present and take full precautions, or call a professional inspector.
-
Prepare the Work Area – Create a contained environment
- Remove all furniture, rugs, curtains, and personal items from the room. Cover anything that cannot be removed (e.g., built-in cabinets) with two layers of 6-mil plastic sheeting, taped securely. Seal all vents and doorways leading to other parts of the house with plastic sheeting and painter's tape. Create an airlock by hanging two sheets of plastic in a doorway, spaced apart.
- Turn off central heating/cooling to prevent lead dust from spreading through the HVAC system. Open windows in the work area for ventilation, but remember this can also spread dust outdoors.
- Safety note: Wear disposable overalls, shoe covers, a respirator (NIOSH-approved N100 or P100), safety glasses, and chemical-resistant gloves. Do not eat, drink, or smoke in the work area.
-
Perform Work Gently – Minimize dust creation
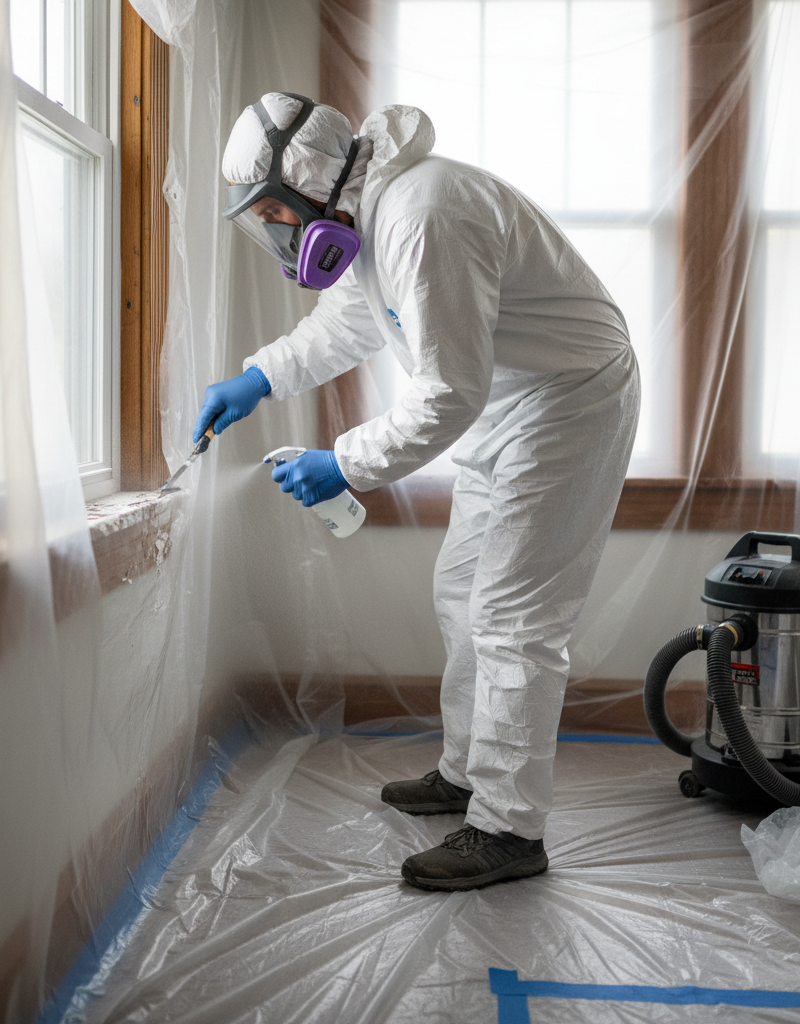
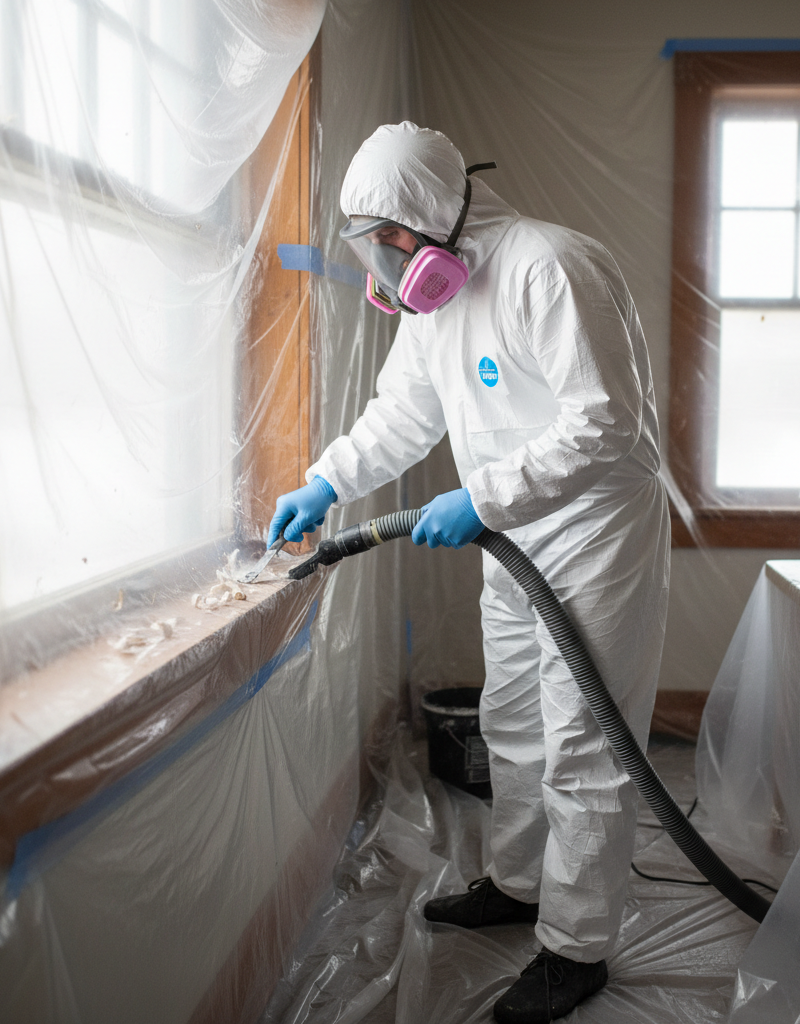
- Avoid sanding, grinding, dry scraping, or using heat guns above 1100°F (which vaporizes lead). These methods generate the most hazardous dust and fumes. If possible, use wet scraping, chemical strippers designed for lead paint removal, or specialized power tools with HEPA filter attachments.
- Work slowly and methodically. For small repairs like drilling a hole, catch dust immediately with a HEPA vacuum or by placing a sticky trap below the drill bit.
- Tools: Utility knife, scrapers, wet sanding sponges, chemical stripper (check for lead-safe formulations), spray bottle with water.
-
Isolate Debris Properly – Containment is key
- Immediately place all paint chips, dust, and contaminated materials (e.g., plastic sheeting, protective gear) into heavy-duty 6-mil plastic bags. Double bag all waste. Seal the bags tightly with tape.
- Keep the work area damp throughout the project using a spray bottle with water. This helps to suppress airborne dust.
-
Clean Thoroughly (First Pass: Wet Clean) – Remove visible contamination
- After completing the work, carefully remove the outermost layer of plastic sheeting from the floor and walls, folding it inwards to contain any debris. Place it in a sealed disposal bag.
- Wet-mop all hard floors and wipe down all surfaces (walls, windowsills, trim) with a damp cloth or sponge. Use a general all-purpose cleaner. Rinse cleaning tools frequently in a separate bucket of water.
- Safety note: Never use a regular vacuum cleaner; it will aerosolize lead dust. Only use a HEPA-filtered vacuum.
-
Clean Thoroughly (Second Pass: HEPA Vacuum & Wet Clean) – Target invisible dust
- Let surfaces air dry. Then, thoroughly vacuum all hard surfaces, including walls, ceilings, and floors, using a HEPA-filtered vacuum cleaner. Pay special attention to corners, crevices, and areas where dust might accumulate.
- Repeat the wet-mopping and wiping process with clean water and fresh cloths/sponges. Work from top to bottom, cleaning surfaces in small sections and rinsing frequently. This two-step process (HEPA vacuum, then wet clean) is crucial for picking up the invisible lead dust.
-
Discard Waste Safely – Follow local regulations
- Properly dispose of all sealed bags of lead waste, used cleaning cloths, and disposable protective gear according to your local municipal hazardous waste guidelines. Do not place lead waste in regular household trash without checking regulations.
- If you used reusable cleaning tools, thoroughly wash them with a strong detergent and rinse multiple times in a designated utility sink not used for food prep. Better yet, use disposable options whenever possible.
-
Personal Decontamination – Protect yourself and your family
- Before leaving the work area, remove disposable protective gear and place it in the sealed waste bags. Step out of the work area, remove your shoe covers, then your respirator, and finally gloves.
- Take a shower immediately after completing work to wash off any residual lead dust from your skin and hair. Change into clean clothes.
- Wash work clothes separately from other laundry, preferably with a heavy-duty detergent and hot water, and then run an empty wash cycle to clean the machine.
Common Causes
- Age of Home: Any home built before 1978 is at risk. The older the home, the higher the likelihood and concentration of lead paint.
- Friction & Impact: Surfaces that rub together (windows, doors, banisters) or sustain impact (trim near doors, high-traffic walls) release lead dust over time.
- DIY Renovation Activities: Sanding, scraping, cutting, drilling, or demolishing painted surfaces without proper containment and personal protective equipment are the primary causes of lead dust exposure.
- Deteriorating Paint: Peeling, chipping, or chalking paint, particularly on exterior surfaces, breaks down and disperses lead into the soil and air.
- Improper Cleaning: Using regular vacuums, dry sweeping, or inadequate damp wiping after disturbing lead paint will spread the hazard rather than removing it.
Common Mistakes
- Assuming No Lead: Many homeowners skip testing, assuming their paint is lead-free or that only "really old" paint contains lead. Always test if your home is pre-1978.
- Underestimating Dust Spread: Thinking lead dust will stay in one room. It's microscopic and easily spreads throughout the entire house via air currents, foot traffic, and HVAC systems.
- Using a Standard Vacuum: Regular vacuums, even those with "HEPA-style" filters, are not designed to capture lead dust. They will simply blow the fine particles back into the air, making the problem worse.
- Dry Scraping/Sanding: The absolute quickest way to generate large amounts of hazardous lead dust. Always use wet methods or specialized tools with HEPA attachments if you must sand or scrape.
- Inadequate Personal Protection: Not wearing a proper respirator (N100 or P100), eye protection, or disposable clothing leads to personal exposure and cross-contamination.
- Mixing Lead Waste with Household Trash: Lead waste is hazardous and must be disposed of according to strict local regulations, not just thrown in the regular garbage.
Cost & Time Breakdown
| Task | DIY cost | Pro cost | Time |
|---|---|---|---|
| Lead Test Kit (initial check) | $20–$50 | $300–$600 (inspector) | 5 minutes (kit) – 1 week (lab) |
| Materials for Containment/PPE | $100–$250 | Included | 1–4 hours |
| Active Work (small disturbance) | $0 | $500–$2,000+ | 1–4 hours |
| Thorough Cleanup | $0 (your labor) | $500–$1,500+ | 2–6 hours |
| Professional Lead Abatement | N/A | $5,000–$30,000+ | Days to weeks |
Tips & Prevention
- Assume Lead is Present: In any pre-1978 home, treat painted surfaces as if they contain lead until proven otherwise. This default precaution is the safest approach.
- Regular Inspections: Periodically check painted surfaces, especially around windows and doors, for signs of deterioration (peeling, chipping, chalking). Address issues promptly before lead paint becomes friable.
- Wet Clean Frequently: Regularly wet-wipe dusty surfaces in older homes, particularly sills and floors, to pick up any lead dust that may accumulate from friction points.
- Use Lead-Safe Practices: When performing minor maintenance, always use wet methods (wet sanding, wet scraping) to minimize dust. Use a spray bottle with water to keep surfaces damp.
- Prioritize Child-Occupied Areas: Focus on testing and mitigating lead hazards in areas most accessible to children, such as window wells, floors, and low-lying trim.
- Encapsulation/Enclosure: For intact lead paint, consider encapsulation (applying a specialized coating) or enclosure (covering with new, lead-free materials) as a long-term solution. This is often safer and less costly than full removal.
When to Call a Professional
While this guide outlines precautions for small, isolated disturbances, lead paint removal often requires specialized expertise and equipment. You should absolutely call a certified lead abatement professional if you are planning any renovation that will disturb a large area of painted surfaces, if lead paint is extensively peeling or chipping throughout your home, or if you have children under six years old living in the house and suspect significant lead hazards. Professionals have the tools, training, and certifications to safely contain, remove, and dispose of lead-based paint and its associated dust without contaminating your entire home or exposing your family to undue risk. They can also perform comprehensive risk assessments and provide peace of mind that your home is truly lead-safe. Do not risk your family's health, especially with high-risk activities or extensive renovations; consult with pros who follow EPA and local lead-safe regulations.", meta_title="The Invisible Dust: Why Your Renovation Could Be Hiding a Lead Hazard", meta_description="Discover the hidden dangers of lead paint during home renovations, especially in pre-1978 homes. Learn how to test, contain, and safely clean up to protect your family.", keywords=["lead paint safety", "lead dust hazard", "renovation lead paint", "pre-1978 home lead", "lead abatement DIY", "lead paint testing", "safe paint removal", "home repair lead contamination"], faq=[{"question": "How do I know if my home has lead paint?", "answer": "The only way to know for sure is to test. If your home was built before 1978, assume lead paint is present. You can use an EPA-recognized lead test kit from a hardware store or send paint chip samples to an accredited laboratory for more accurate results."}, {"question": "What kind of respirator do I need for lead paint work?", "answer": "You need a NIOSH-approved respirator with P100 or N100 filters, which are designed to filter out fine particulate matter like lead dust. Standard dust masks or surgical masks offer no protection against lead particles."}, {"question": "Can I use a regular vacuum cleaner to clean up lead dust?", "answer": "No, absolutely not. A regular vacuum cleaner will not capture microscopic lead dust particles and will instead aerosolize them, spreading the contamination further. You must use a HEPA-filtered vacuum cleaner that is specifically designed to capture these fine particles."}, {"question": "What should I do if I accidentally disturb lead paint?", "answer": "Immediately stop work, ventilate the area, and contain the dust as much as possible with wet cloths. Perform a thorough wet clean followed by HEPA vacuuming, and isolate any contaminated materials. Consider professional lead abatement or consulting with a certified lead professional for guidance."}, {"question": "Is it safer to encapsulate or remove lead paint?", "answer": "Encapsulation (covering intact lead paint with a special sealant or new material) is often safer and less costly than complete removal, especially if the paint is in good condition. Removal creates significant dust and should almost always be done by a certified professional. The best option depends on the condition of the paint and the specific area."}], hero_image_prompt="A homeowner in full protective gear (respirator, disposable suit, gloves) carefully wet scraping old paint from a window frame inside an older home. The work area is sealed off with plastic sheeting. A HEPA vacuum is visible in the background. Good lighting, realistic and slightly dusty atmosphere.", hero_image_alt="Homeowner in PPE scraping paint from a window frame, surrounded by plastic sheeting for lead safety", reading_time_minutes=11.5, cost_estimate="$20–$250 for testing and basic DIY supplies", time_estimate="1–4 hours for testing and setup, 2–6 hours for cleaning and small tasks", difficulty="moderate", tools_materials=[{"name": "EPA-recognized Lead Test Kit", "type": "material", "note": "Or lab testing kit", "qty": "1"}, {"name": "6-mil Plastic Sheeting", "type": "material", "qty": "1-2 rolls"}, {"name": "Painter
Related Articles
Keep troubleshooting with these hand-picked guides from FixlyGuide:
- 7 Inspection Red Flags That Secretly Signal a $20,000 Bill — Don't let your dream home become a money pit. Many buyers and even some inspectors overlook subtle home inspection red flags that lead to f…
- The 12 Checks That Prevent 80% of Costly Home Repairs — Don't wait for a disaster. Our comprehensive monthly home maintenance checklist reveals the surprising, simple tasks that catch small issue…
- 7 Hidden Equity Drains Costing You Thousands Annually — Your home is an asset, but silent problems like minor leaks, poor insulation, and deferred maintenance can drain its value. Discover the se…
- The Secret Power Tool Hiding in Your Garage for a Speedier Clean — Unlock the hidden potential of your cordless drill to tackle stubborn household grime, soap scum, and dirt with specialized cleaning attach…
- The Surprising Trick to Cutting Your Dryer Bill By $100 Per Year — Installing a clothesline can significantly reduce your energy bills and add a fresh scent to your laundry. This guide covers how to choose…
- The Silent Fire Hazard Lurking In Your Laundry Room — Don't let a clogged dryer vent become a silent fire starter. Learn why this common oversight is so dangerous, the clear warning signs to lo…
Should you do this yourself?
Answer five quick questions before you start. Safety outranks savings every time.
Your experience with work like this
How high do you have to work?
Does the job involve any of these?
Will it need a permit?
Specialty tools
Free and instant. Educational guidance only — not a quote, inspection, or professional diagnosis.
Estimate your own project cost
National averages are a starting point. Enter your details for a range that fits your house.
Interior paint estimator
- Paint$96
- Supplies (tape, rollers, drop cloth)$35
- Estimated total (DIY)$131
Hiring a pro? Add roughly $1.50–$4.00/sq ft for labor depending on prep work and trim detail.
Educational estimate only — always confirm with written local bids.
What should this project cost?
Enter your project details for a realistic cost range before you call anyone.
Cost depends heavily on which system turns out to be the source.
- Regional adjustment
- National average
- Labor share (typical)
- ~$1,620
- Quotes to collect
- 3 written estimates
Educational estimate based on national averages — not a binding quote. Always confirm with written local estimates.
Before you start
Check the difficulty, permits, and safety risk — then decide whether to call a pro.
Free, no signup required. Estimates are educational guidance, not a quote or an inspection.
Get the print-ready PDF of this guide
A clean, ad-free, printable version you can keep on your phone or pin to the workshop wall. Free with a FixlyGuide account.
- Print-optimized layout
- Tools, materials & every step included
- Saved to your account
This article was independently written by FixlyGuide based on the source topic.
Frequently asked questions
How do I know if my home has lead paint?+
The only way to know for sure is to test. If your home was built before 1978, assume lead paint is present. You can use an EPA-recognized lead test kit from a hardware store or send paint chip samples to an accredited laboratory for more accurate results.
What kind of respirator do I need for lead paint work?+
You need a NIOSH-approved respirator with P100 or N100 filters, which are designed to filter out fine particulate matter like lead dust. Standard dust masks or surgical masks offer no protection against lead particles.
Can I use a regular vacuum cleaner to clean up lead dust?+
No, absolutely not. A regular vacuum cleaner will not capture microscopic lead dust particles and will instead aerosolize them, spreading the contamination further. You must use a HEPA-filtered vacuum cleaner that is specifically designed to capture these fine particles.
What should I do if I accidentally disturb lead paint?+
Immediately stop work, ventilate the area, and contain the dust as much as possible with wet cloths. Perform a thorough wet clean followed by HEPA vacuuming, and isolate any contaminated materials. Consider professional lead abatement or consulting with a certified lead professional for guidance.
Is it safer to encapsulate or remove lead paint?+
Encapsulation (covering intact lead paint with a special sealant or new material) is often safer and less costly than complete removal, especially if the paint is in good condition. Removal creates significant dust and should almost always be done by a certified professional. The best option depends on the condition of the paint and the specific area.
Discussion
Loading comments…