Tools & materials you'll need
Affiliate linksAs an Amazon Associate FixlyGuide earns from qualifying purchases — at no extra cost to you. Prices and availability are accurate as of publication and subject to change.
Quick Answer
Many homes built before 1978 contain lead-based paint. While intact lead paint is generally not a hazard, disturbing it through renovation or repair activities like sanding, scraping, or drilling can create dangerous lead dust and chips. Proper containment, personal protective equipment, and lead-safe work practices are crucial to protect your family's health, especially for young children and pregnant women.
The Problem
Imagine you're tackling a long-awaited renovation project – perhaps finally stripping that old trim or sanding down a chipped window sill. It feels productive, a step towards revitalizing your living space. But if your home predates 1978, these seemingly innocent activities could be releasing a silent, insidious threat: lead dust. Lead-based paint was commonly used in homes for decades due to its durability and vibrant colors. However, as it deteriorates or is disturbed, it generates microscopic particles of lead, which, when inhaled or ingested, can cause severe and irreversible health problems. Children are particularly vulnerable, as their developing nervous systems are more susceptible to lead poisoning, which can lead to learning disabilities, behavioral issues, and developmental delays. Adults can also suffer from kidney damage, high blood pressure, reproductive problems, and neurological effects. The insidious nature of lead exposure is that it often goes unnoticed until significant damage has occurred. It's not something you can see or smell, making it a "silent toxin" that demands careful attention during any home improvement project.
How It Works
Lead is a heavy metal that was once a common additive in household paints for its properties like durability, moisture resistance, and vibrant color retention. This practice was widespread in the United States until 1978, when the federal government banned its use in residential paints due to mounting evidence of its toxicity. The danger isn't typically from undisturbed, intact lead paint on walls; it's when this paint matrix is disrupted. When you sand, scrape, drill, hammer, or even just continually open and close a lead-painted window, friction and impact can create microscopic dust particles and tiny paint chips. These particles, far too small to see with the naked eye, can become airborne and easily spread throughout your home.
Once airborne, lead dust can settle on surfaces like floors, furniture, and toys. Children, with their hand-to-mouth behaviors, are especially at risk of ingesting these particles. Adults can also inhale them or transfer them from their hands to their mouths, particularly during or after renovation work. The human body has no beneficial use for lead; once it enters the bloodstream, it circulates and can be deposited in organs, bones, and soft tissues. It interferes with various bodily functions, including the nervous system, red blood cell production, and kidney function. Over time, even low-level exposure can accumulate and lead to chronic health issues. Understanding this mechanism – that the physical act of disturbing old paint creates the hazard – is foundational to implementing effective lead-safe work practices. It highlights why containment and meticulous cleanup are not merely suggestions but critical barriers against a serious health threat.
Step-by-Step Fix
1. Identify Potential Lead Paint – Before starting any work, assume paint is lead-based if your home was built before 1978. * Look for tell-tale signs like alligatored or cracking paint, especially on windows, doors, and trim. However, intact paint can also be lead-based. * Consider a home lead test kit from a hardware store for a quick indication, but for definitive results, professional testing by a certified lead inspector is recommended, especially for larger projects.
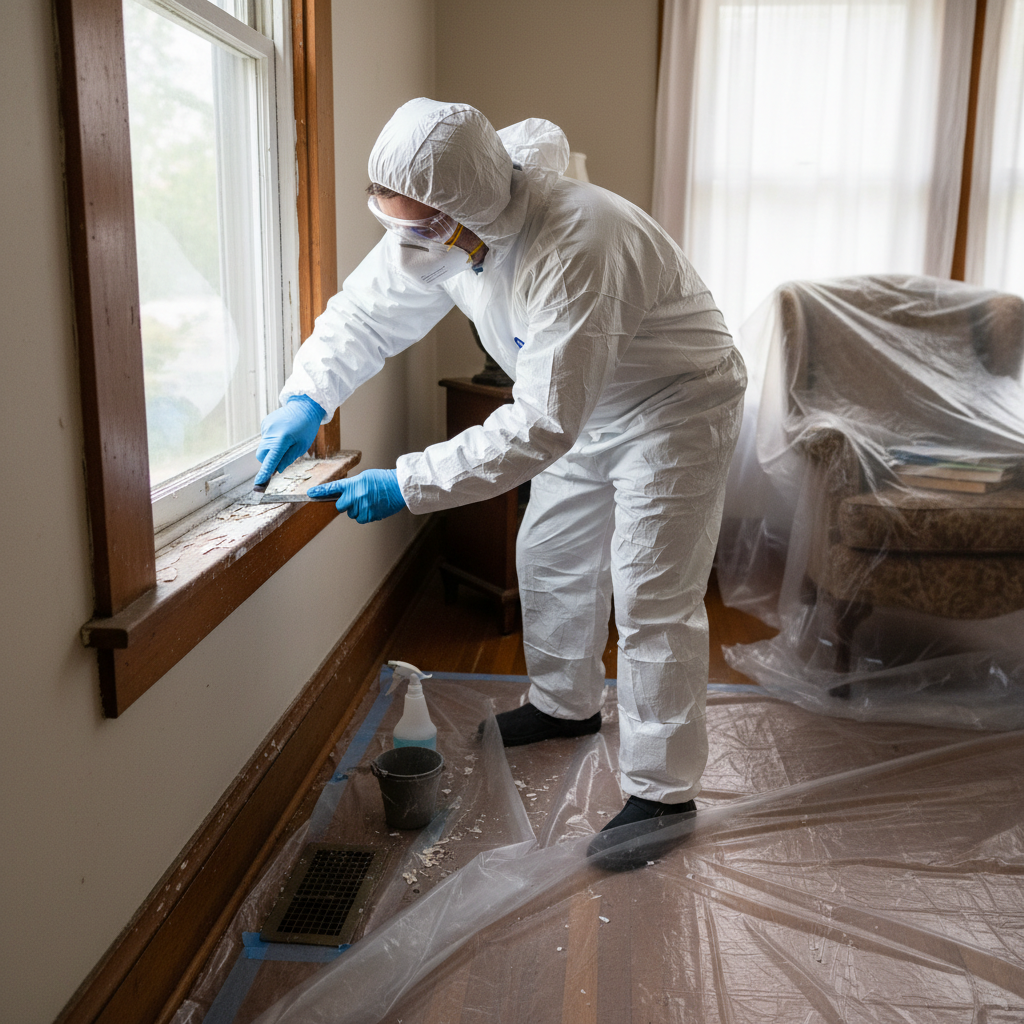
2. Prepare the Work Area – Create a contained zone to prevent lead dust from spreading. * Remove all furniture, rugs, curtains, and other movable items from the room. If items cannot be removed, cover them completely with heavy-gauge plastic sheeting and seal with painter's tape. * Close and seal all heating, ventilation, and air conditioning (HVAC) vents in the work area with plastic sheeting and tape. Turn off your HVAC system to prevent dust circulation. * Seal all doorways leading out of the work area with two sheets of plastic, creating an airlock. One sheet on the outside, one on the inside, overlapping. * Cover the floor of the work area with heavy-duty plastic sheeting, extending it up walls by at least 6 inches, and secure with painter's tape. Use two layers for added protection.
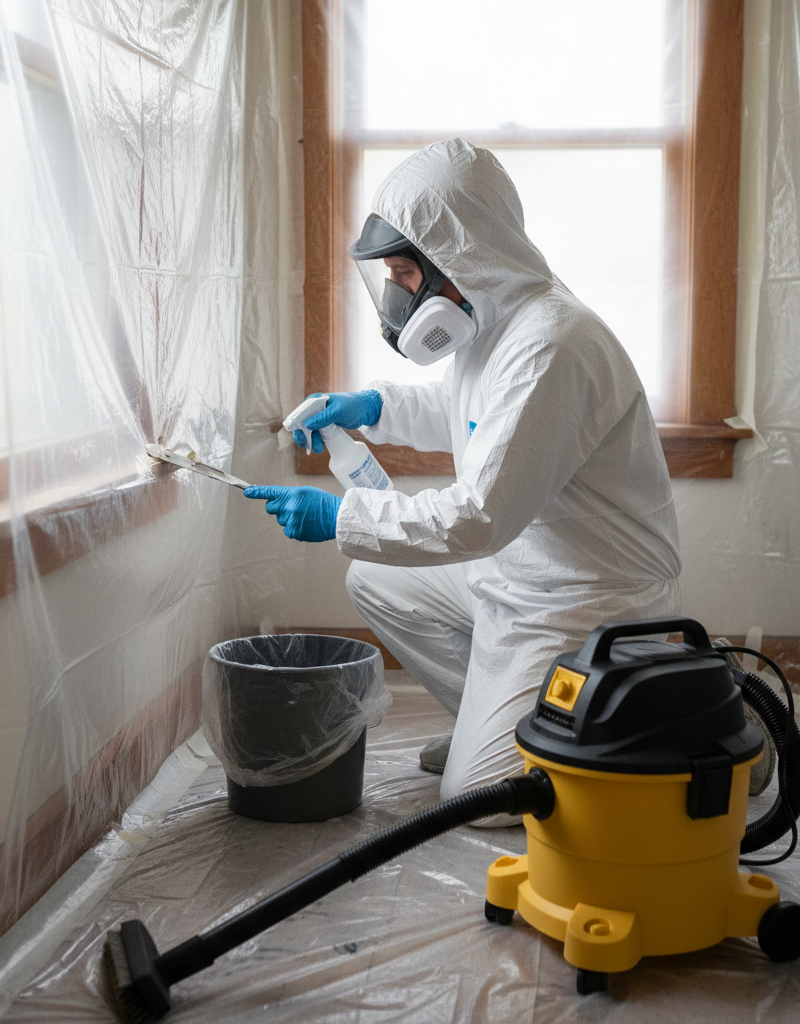
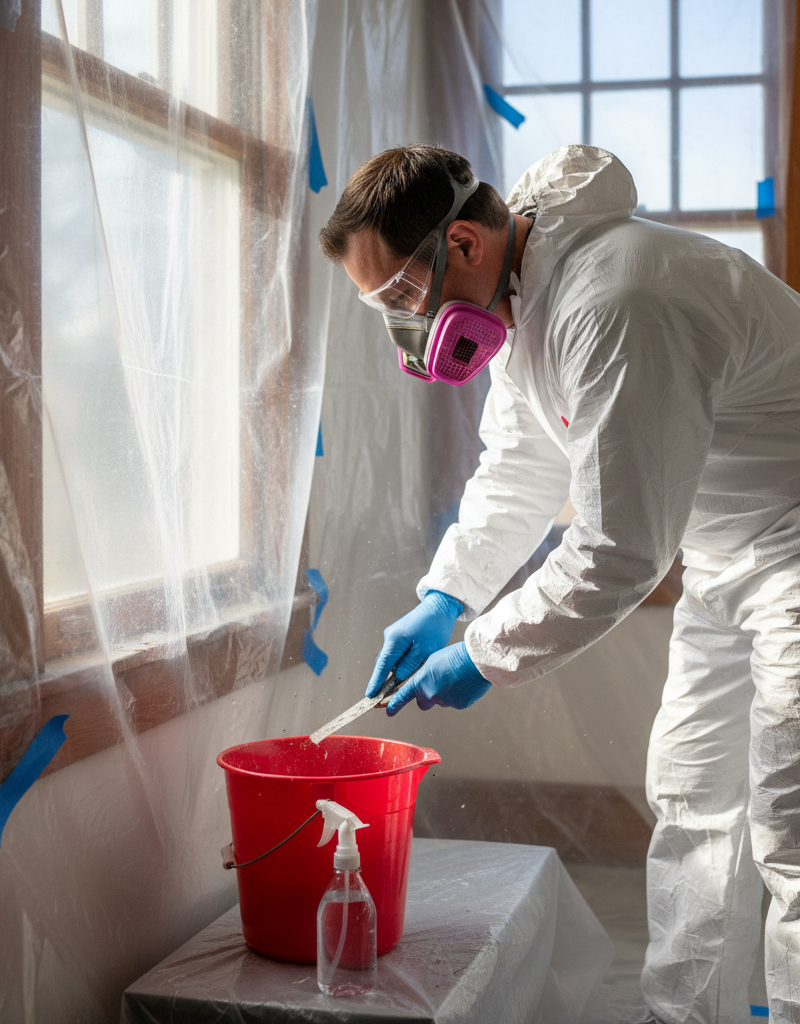
3. Don Your Personal Protective Equipment (PPE) – Protect yourself from inhaling or ingesting lead particles. * Wear a disposable N95 or P100 respirator (a regular dust mask is NOT sufficient). Ensure it fits properly and forms a seal around your face. * Use disposable coveralls or old clothing that can be bagged and laundered separately (or discarded) after work. * Wear safety glasses or goggles to protect your eyes. * Wear disposable gloves. Double gloving is a good practice.
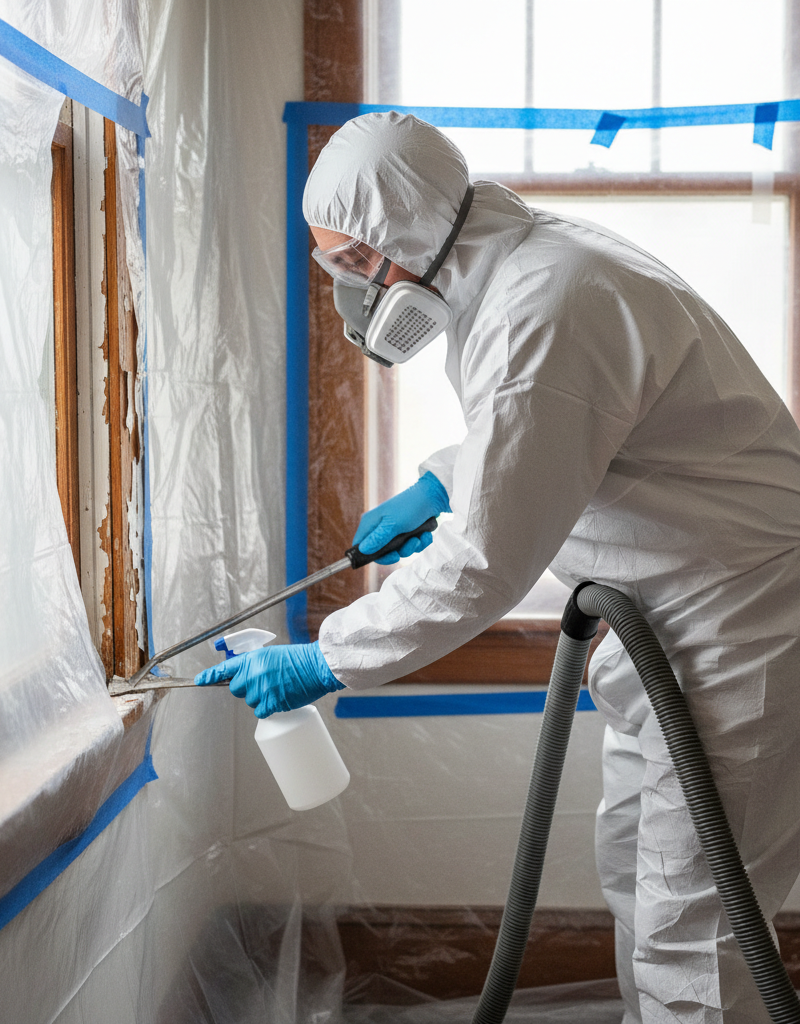
4. Use Lead-Safe Work Practices – Minimize dust creation whenever possible. * NEVER dry sand, dry scrape, or use heat guns above 1100°F (593°C) on suspected lead paint, as these methods generate extremely high levels of lead dust and fumes. * For paint removal, use wet sanding methods (using a spray bottle to keep surfaces damp), chemical strippers, or infrared paint removers. * When drilling, use a HEPA-filtered vacuum attachment if available. * Mist surfaces with water before disturbing them to help suppress dust.
5. Contain Debris as You Work – Prevent contamination during the job. * Immediately place all paint chips, dust, and debris into heavy-duty plastic bags after collection. * Keep a HEPA-filtered vacuum (specifically designed for lead; regular vacuums will just spread the dust) nearby for immediate cleanup of any spills or dust accumulation. * Avoid eating, drinking, or smoking in the work area.
6. Meticulous Cleanup – Thoroughly clean the area to remove all lead residue. * After completing the work, wet-wipe all surfaces (walls, floors, non-movable items) with a detergent solution. Use two buckets: one with clean water and detergent, the other with rinse water. Change cleaning cloths frequently. * After wet-wiping, use the HEPA-filtered vacuum on all surfaces including walls, trim, and floors. Go over surfaces slowly to ensure thorough removal. * Repeat the wet-wiping process, followed by another HEPA vacuuming. This double-clean method is crucial. * Fold up the plastic sheeting carefully, dust-side in, and place it into heavy-duty disposal bags.
7. Proper Disposal – Dispose of contaminated materials safely. * Seal all plastic bags containing lead-contaminated debris, paint chips, and disposable PPE. * Check with your local waste management facility or health department for specific instructions on disposing of lead-containing waste, as regulations vary.
8. Personal Decontamination – Prevent tracking lead dust out of the work zone. * Before leaving the work area, remove disposable coveralls and gloves, placing them in a designated disposal bag. * Wipe down your shoes with a damp cloth or remove them inside the containment. * Wash your hands and face thoroughly with soap and water immediately after leaving the work area. Shower completely as soon as possible, washing your hair.
Common Causes
- Age of Home: The overwhelming primary cause of lead paint presence is the age of the structure. Homes built before 1978 are highly likely to contain lead-based paint, with the probability increasing for homes built before 1960.
- Renovation Activities: Any activity that disturbs painted surfaces, such as sanding, scraping, drilling, hammering, cutting, or demolition, creates lead dust and chips.
- Friction and Impact: Areas subject to wear and tear, like windows and door frames rubbing together, or stair treads and railings, can generate lead dust even without explicit renovation.
- Deterioration: Peeling, chipping, blistering, or chalking paint, often due to age, moisture, or poor surface adhesion, directly releases lead particles into the environment.
- Inadequate Previous Renovation: If prior repair or renovation work on an older home was not performed using lead-safe practices, residual lead dust can remain in carpets, cracks, and vents, causing ongoing exposure.
Common Mistakes
- Dry Sanding/Scraping: This is perhaps the biggest mistake. Dry methods create vast amounts of airborne lead dust that can spread throughout the entire house and linger for months. Always use wet methods or specialized tools that capture dust at the source.
- Using a Regular Vacuum: A standard household vacuum cleaner is not designed to trap microscopic lead particles. Its exhaust will simply blow the fine lead dust into the air, making the problem worse. Only use a HEPA-filtered vacuum specifically certified for lead abatement.
- Ignoring Containment: Not sealing off the work area properly allows lead dust to escape and contaminate other rooms, furniture, and personal belongings. Take the time to set up thorough plastic sheeting barriers and turn off HVAC.
- Inadequate PPE: Relying on flimsy dust masks or no protection at all puts your health at severe risk. Always wear a quality N95 or P100 respirator, disposable gloves, and protective clothing.
- Improper Disposal: Throwing lead-contaminated debris into regular household trash can expose sanitation workers and potentially contaminate landfills. Always follow local regulations for hazardous waste disposal.
- Skipping the Shower: Leaving the work area without showering, or washing hair, risks tracking lead particles into your car, onto your clothes, and into other parts of your home. Thoroughly wash yourself and your clothes immediately after working with lead paint.
Cost & Time Breakdown
| Task | DIY cost | Pro cost | Time |
|---|---|---|---|
| Lead Test Kit (DIY) | $20–$50 | N/A | 5–10 minutes |
| Professional Lead Inspection | N/A | $300–$600 | 1–3 hours |
| PPE (Respirator, Gloves, etc.) | $30–$70 | Included | N/A |
| Containment Supplies | $40–$100 | Included | 30–60 minutes |
| Lead-Safe Tools (rent/buy) | $50–$200+ | Included | N/A |
| Cleanup Supplies | $20–$40 | Included | N/A |
| Small Project Prep & Cleanup | $100–$300 | $500–$1,500+ | 2–4 hours |
Tips & Prevention
- Test Before You Disturb: If your home was built before 1978, the safest approach is to test painted surfaces for lead before beginning any renovation or repair work. This allows you to plan accordingly.
- Encapsulate, Don't Remove: For intact lead paint in good condition, consider encapsulation (covering it with a new layer of non-lead paint, drywall, or paneling) rather than removal. This is generally safer and less costly.
- Regular Wet Cleaning: In older homes, regularly wet-wipe floors, windowsills, and other horizontal surfaces, especially in high-traffic areas or where children play, to pick up any settled lead dust from deteriorating paint.
- Maintain Paint in Good Condition: Address peeling or chipping paint promptly to prevent further deterioration and the release of lead particles. Use lead-safe practices even for small touch-ups.
- Educate Occupants: Inform all household members, especially those involved in DIY projects, about the risks of lead paint and the importance of lead-safe practices.
- Wash Hands Frequently: Ensure all occupants, particularly children, wash their hands thoroughly and often, especially before eating and after playing, to minimize inadvertent lead ingestion.
When to Call a Professional
While small, localized lead-safe paint repairs can be managed by an informed homeowner, certain situations absolutely warrant calling a certified lead abatement professional. If you are dealing with a large area of peeling or chipping lead paint, specifically more than a few square feet, or if the project involves significant demolition, structural changes, or disturbing essential components like large windows or doors throughout the house, professional intervention is critical. Complex projects can generate massive amounts of lead dust that are virtually impossible for a DIYer to contain and clean safely. Additionally, if anyone in your household, especially children or pregnant women, has elevated blood lead levels, or if your DIY efforts ever feel overwhelming or out of your depth, stop work immediately and consult a professional. They have the specialized training, equipment, and certifications to safely contain, remove, and dispose of lead-based paint according to strict federal and local regulations, ensuring the health and safety of your family. Do not take shortcuts when health is at stake." , meta_title="The 1978 Homeowner Rule: Your Renovation Might Release Toxins", meta_description="Discover the silent toxin in homes built before 1978. Learn why disturbing old paint can release lead dust and how to renovate safely to protect your family
Related Articles
Keep troubleshooting with these hand-picked guides from FixlyGuide:
- 7 Inspection Red Flags That Secretly Signal a $20,000 Bill — Don't let your dream home become a money pit. Many buyers and even some inspectors overlook subtle home inspection red flags that lead to f…
- 7 Hidden Equity Drains Costing You Thousands Annually — Your home is an asset, but silent problems like minor leaks, poor insulation, and deferred maintenance can drain its value. Discover the se…
- The 12 Checks That Prevent 80% of Costly Home Repairs — Don't wait for a disaster. Our comprehensive monthly home maintenance checklist reveals the surprising, simple tasks that catch small issue…
- The Surprising Trick to Cutting Your Dryer Bill By $100 Per Year — Installing a clothesline can significantly reduce your energy bills and add a fresh scent to your laundry. This guide covers how to choose…
- Is a Wall-Mounted Pressure Washer Right for Your Garage? The Unvarnished Truth — Discover if a wall-mounted pressure washer is the right cleaning solution for your home, offering a powerful and space-saving alternative t…
- What's That Burning Dust Smell When Your Heat Kicks On? The HVAC Secret — That weird smell when your furnace starts isn't always serious, but understanding its cause can prevent bigger issues and improve home air…
This article was independently written by FixlyGuide based on the source topic.
Frequently asked questions
How do I know if my house has lead paint?+
If your home was built before 1978, assume painted surfaces contain lead. You can use a lead test kit for a quick indication, but for definitive results, especially before major renovations, have a certified professional conduct an inspection and testing.
Is intact lead paint dangerous?+
Intact, undisturbed lead paint that is not chipping or peeling is generally not considered a health hazard. The danger arises when the paint is disturbed (e.g., sanded, scraped, drilled) or deteriorates, creating lead dust and chips that can be inhaled or ingested.
What is the safest way to remove lead paint?+
The safest methods for lead paint removal involve minimizing dust. Wet sanding, using chemical strippers with proper ventilation, or infrared paint removers are preferred. Dry scraping, sanding, or using high-heat guns are highly discouraged due to extreme dust generation.
What kind of mask do I need for lead paint?+
You need at least an N95 respirator, but a P100 respirator is strongly recommended for lead paint work. Standard dust masks or surgical masks do not provide adequate protection against microscopic lead particles. Ensure the respirator fits properly.
How do I dispose of lead paint debris?+
Lead-contaminated debris must be disposed of safely as hazardous waste. Place all paint chips, dust, and contaminated materials in heavy-duty plastic bags, seal them, and contact your local waste management facility or health department for specific disposal instructions in your area.
Discussion
Loading comments…