Tools & materials you'll need
Affiliate linksAs an Amazon Associate FixlyGuide earns from qualifying purchases — at no extra cost to you. Prices and availability are accurate as of publication and subject to change.
Quick Answer
If your home was built before 1978, there is a high probability that lead-based paint was used. The greatest risk comes not from intact, undisturbed paint, but from activities like sanding, scraping, drilling, or demolition that create lead-contaminated dust and chips. This invisible dust can be inhaled or ingested, particularly by young children, leading to serious health issues. Always test for lead before disturbing painted surfaces, implement robust containment and cleanup procedures, and use appropriate personal protective equipment.
The Problem
You're excited to finally tackle that bathroom renovation or strip layers of paint from vintage trim in your charming pre-1978 home. What you might not realize is that beneath those layers lies a silent, invisible threat: lead-based paint. While seemingly innocuous when undisturbed, any activity that breaks, scrapes, or otherwise disrupts these painted surfaces can release microscopic lead particles into the air and onto surrounding areas. This lead-infused dust settles everywhere, contaminating floors, furniture, and personal belongings. Once airborne or settled, it can be inhaled, ingested—especially by children who put their hands and toys in their mouths—or tracked throughout the house on shoes. The health consequences of lead exposure are severe, ranging from developmental delays and behavioral problems in children to neurological damage, kidney issues, and high blood pressure in adults. Ignoring this risk isn't just a potential financial mistake; it's a serious hazard to your family's health.
How It Works
Lead was a common additive to house paint before 1978, primarily because it enhanced durability, sped up drying times, and increased resistance to moisture and corrosion, making paints tougher and vibrant. It was particularly popular in high-traffic areas and on exterior surfaces. When these painted surfaces are disturbed—through actions like sanding, scraping, drilling, or even just the friction of opening and closing old windows—the paint film breaks down. This process generates microscopic particles of lead, often too small to see with the naked eye, which become airborne as dust. This 'lead dust' can remain suspended in the air for hours before settling on surfaces. Once settled, it's easily re-suspended by walking, opening doors, or using a fan. Even minute amounts can be hazardous; for example, the EPA defines lead-contaminated dust as ≥10 micrograms per square foot on floors and ≥100 micrograms per square foot on interior window sills. Children are especially vulnerable because their developing nervous systems are more susceptible to lead's toxic effects, and their hand-to-mouth behaviors increase their exposure risk. The danger isn't just from breathing; lead can be ingested directly from contaminated hands or food, or absorbed through the skin. Understanding this mechanism is crucial for effective prevention, emphasizing containment and proper cleanup over simply painting over the problem.
Step-by-Step Fix
1. Test Before You Touch — Before any renovation involving painted surfaces in homes built before 1978, assume lead is present. However, concrete testing is critical to confirm.
- Tool: Lead test kits (available at hardware stores).
- Method: Follow kit instructions, usually involving swabbing a painted surface. Remember, these are screening tests; for definitive results, consider professional lead testing.
- If positive: Proceed with extreme caution and specialized precautions, or consider professional abatement.
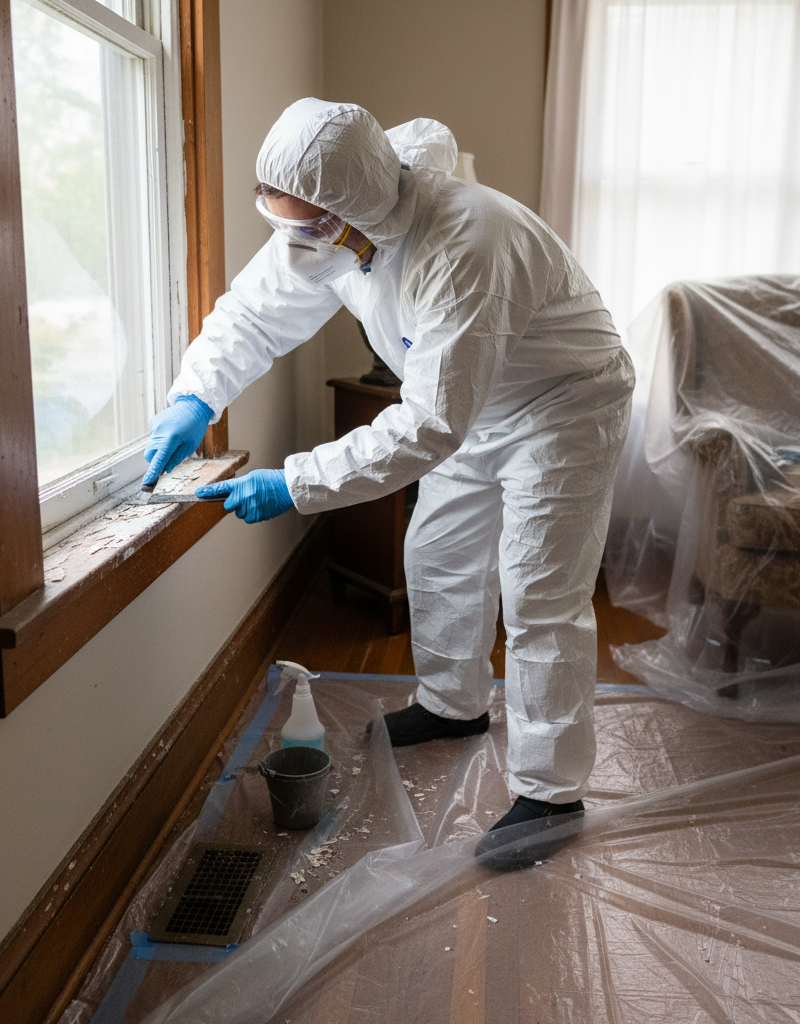
2. Prepare the Work Area — Proper containment is crucial to prevent lead dust from spreading throughout your home.
- Clear the room: Remove all furniture, curtains, rugs, and anything else that can absorb dust.
- Seal off: Use 6-mil plastic sheeting and painter's tape to completely seal off the work area from the rest of the house. Cover floors, doorways, and HVAC vents inside the room. Double-tape all seams.
- Designate a decontamination zone: Set up an area just outside the work zone for doffing PPE and initial cleanup.
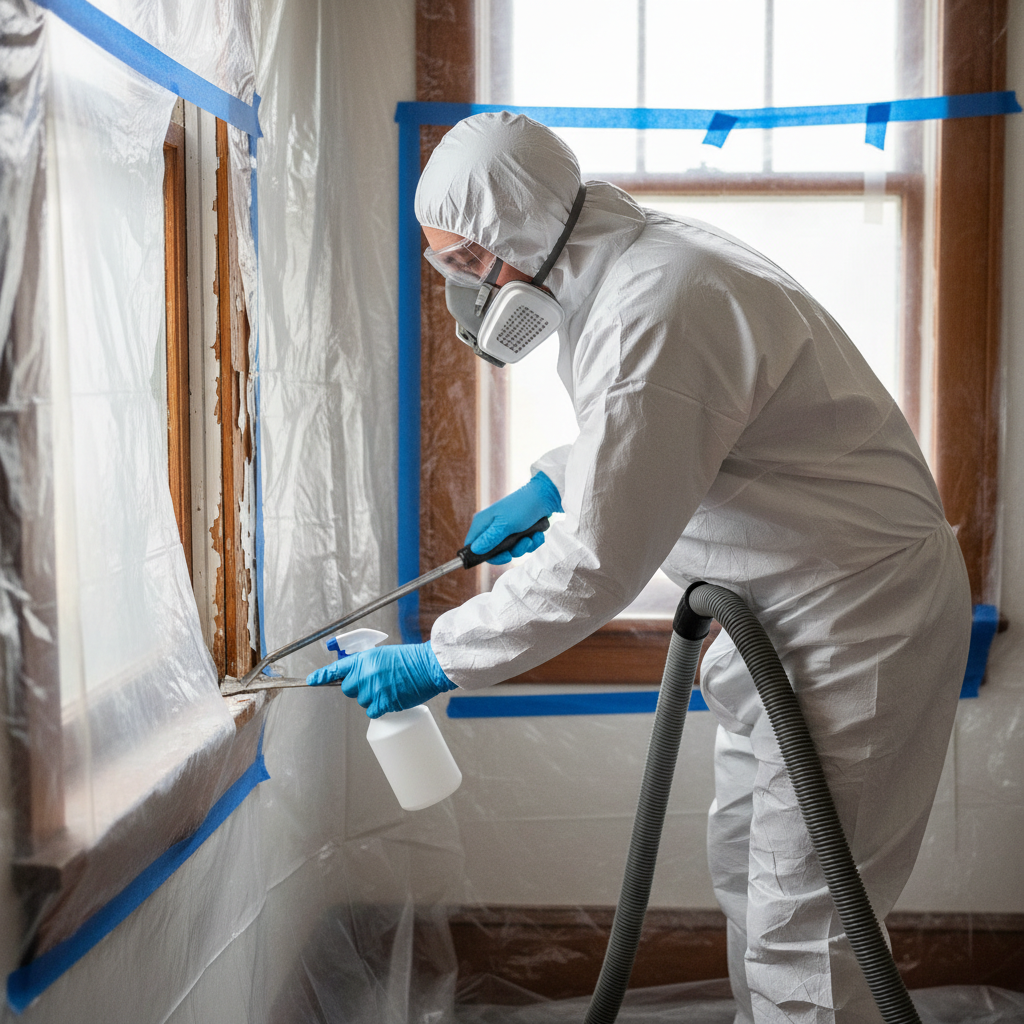
3. Don Your Protective Gear — Protect yourself from inhaling or contacting lead dust.
- Respirator: Use an N100 or P100 particulate respirator (NOT a simple paper dust mask).
- Suit: Disposable hazmat suit with a hood and booties.
- Gloves: Disposable nitrile or latex gloves, worn in layers if needed.
- Eyewear: Goggles that seal around your eyes.
4. Wet Methods are Your Friend — Minimize dust generation by keeping surfaces damp.
- Misting: Lightly mist painted surfaces with water (and a lead-safe cleaning solution if available) before scraping or sanding. This agglomerates dust particles, making them heavier and less likely to become airborne.
- No dry sanding: Absolutely avoid dry sanding or using heat guns above 110°F (43°C), as these methods aerosolize lead particles intensely.
5. Carefully Remove Paint — Choose methods that create the least amount of dust.
- Scraping: Use a hand scraper to remove loose and peeling paint. Work slowly and methodically.
- Chemical strippers: Use only non-methylene chloride removers with proper ventilation.
- Off-site removal: For items like doors or trim, consider carefully removing them and having them stripped off-site by a lead-safe professional.
6. Contain Debris Immediately — Don't let lead waste sit around.
- Plastic bags: Place all removed paint chips, dust, and disposable PPE directly into heavy-duty plastic bags. Double bag them.
- Seal: Tie off bags securely and label them as lead waste.
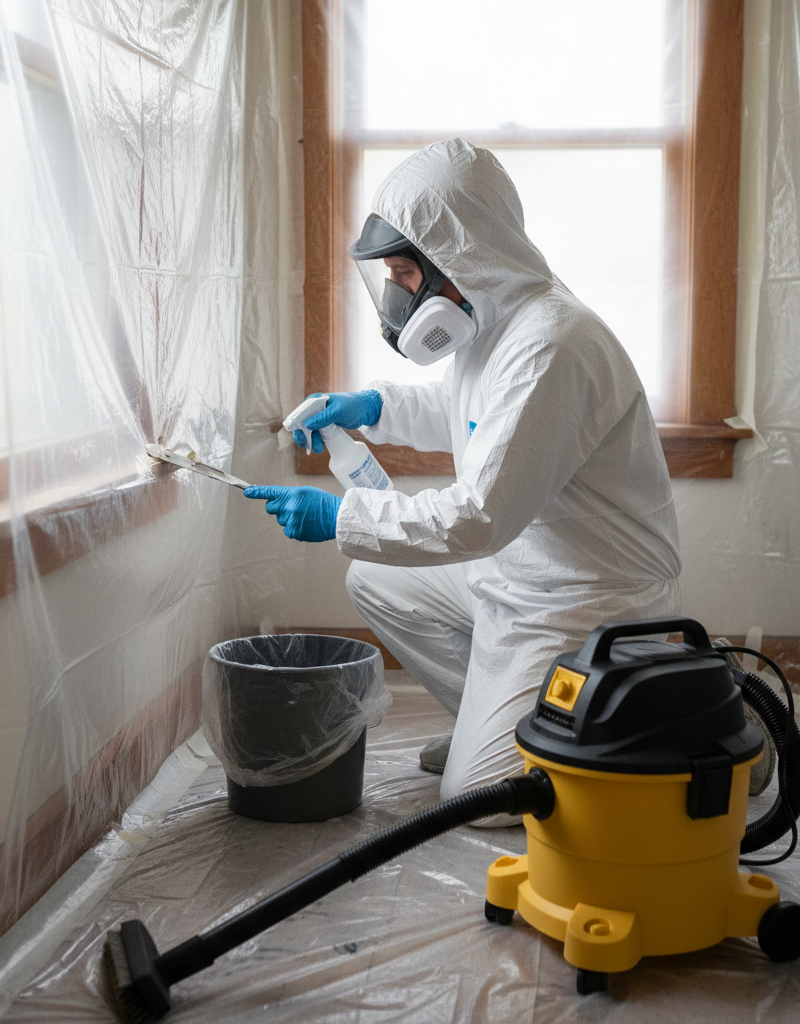
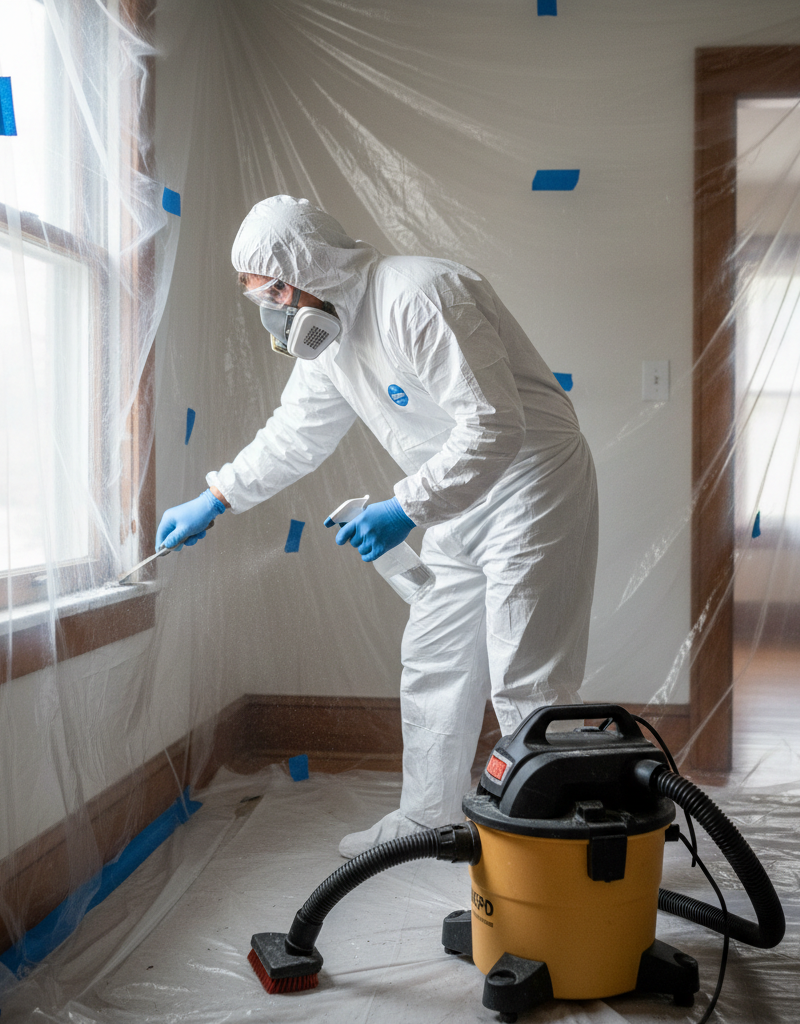
7. HEPA Vacuum First Clean-Up — A regular vacuum will just spread the lead.
- Specialized vacuum: Use a HEPA (High-Efficiency Particulate Air) vacuum cleaner to collect all dust and debris from floors, walls, and other surfaces. Do not use a standard household vacuum.
- Thoroughness: Vacuum slowly and deliberately, ensuring all visible and suspected lead dust is picked up.
8. Wet Wipe All Surfaces — Follow vacuuming with a comprehensive wet wipe.
- Two-bucket method: Use one bucket with a lead-safe detergent solution and another with clean rinse water. Wring out sponges or rags thoroughly.
- Wipe down: Wipe all hard surfaces (walls, trim, floors, windowsills) repeatedly, changing water and rags frequently. Dispose of all rags as lead waste.
9. Final Cleanup and Disposal — Ensure all lead waste is safely removed.
- Remove plastic: Carefully fold up and dispose of all plastic sheeting from the work area and containment, working from the outside in.
- Secure waste: Place all plastic, used rags, and any remaining debris into heavy-duty, sealed bags. Contact your local waste management facility for proper disposal procedures for lead-contaminated waste; it often cannot go into regular household trash.
10. Personal Decontamination — Protect yourself and prevent tracking lead into other areas.
- Before leaving: Remove disposable suit, gloves, and booties in the decontamination zone, turning them inside out as you remove them. Place directly into a sealed waste bag.
- Respirator: Wipe down your respirator with a damp cloth and store in a sealed bag. Remove eye protection and clean thoroughly.
- Shower: Shower immediately with soap and water, washing your hair, to remove any remaining lead dust from your body.
Common Causes
- Age of Home: Homes built before 1978 are the primary culprit, with the highest concentrations in properties built before 1960. The older the home, the higher the likelihood and concentration of lead paint.
- Renovation Activities: Any activity that disturbs painted surfaces, such as sanding, scraping, drilling, cutting, or demolition, is a direct cause of lead dust generation.
- Impact and Friction Surfaces: Areas like windows and doors where painted surfaces rub against each other during normal operation can generate lead dust without explicit renovation work.
- Deteriorated Paint: Peeling, chipping, blistering, or chalking paint, even if undisturbed, can release lead particles into the environment.
- Exterior Exposure: Exterior lead paint, when it deteriorates due to sun and weather, can contaminate surrounding soil, which can then be tracked indoors.
Common Mistakes
- Assuming No Lead: The biggest mistake is not testing. Never assume your pre-1978 home is lead-free; always test first, or assume it's present and take precautions.
- Dry Sanding/Scraping: Using power sanders or dry scraping techniques is the fastest way to create a massive lead dust hazard. Always use wet methods to control dust.
- Using a Regular Vacuum: Household vacuums are not designed to trap microscopic lead particles. They'll simply suck them in and blow them back out into the air, spreading contamination further.
- Inadequate Containment: Not properly sealing off the work area allows lead dust to escape and contaminate other parts of your home.
- Improper PPE: Relying on a simple dust mask instead of an N100/P100 respirator leaves your lungs vulnerable to inhaling dangerous lead particles.
- Poor Cleanup: Not following the HEPA vacuuming and wet wiping protocol means lead dust will remain on surfaces, posing ongoing risks.
Cost & Time Breakdown
| Task | DIY cost | Pro cost | Time |
|---|---|---|---|
| Lead Test Kit | $20–$50 | Included in pro. | 5–10 minutes |
| Containment Supplies (plastic, tape) | $50–$100 | Included in pro. | 1–2 hours |
| PPE (respirator, suit, gloves) | $40–$80 | Included in pro. | 10 minutes |
| Stripping/Scraping (small area) | $0–$20 (tools) | $500–$2,000+ | 2–8 hours |
| HEPA Vacuum Rental (day rate) | $40–$70 | Included in pro. | N/A |
| Professional Lead Inspection | N/A | $300–$600 | 2–4 hours |
Tips & Prevention
- Regular Inspections: Periodically inspect painted surfaces in older homes, especially around windows, doors, and areas prone to wear and tear, for chipping or peeling paint. Address issues promptly and safely.
- Maintain Paint: Keep painted surfaces in good condition. If paint is intact, it generally poses less of a risk. Regularly clean hard surfaces with a damp cloth.
- Safe Renovation Practices: If renovating, always assume lead paint is present and follow lead-safe practices, including containment, wet scraping, and HEPA vacuuming.
- Hand Washing: Encourage frequent hand washing, especially for children, to minimize the ingestion of any settled lead dust.
- Entryway Control: Use door mats at all entrances and consider a
Related Articles
Keep troubleshooting with these hand-picked guides from FixlyGuide:
- The Hidden Reason Your GFCI Trips (It's Not Always a Faulty Outlet) — A continuously tripping GFCI outlet is a critical safety warning, often indicating moisture, a faulty appliance, or a wiring problem that r…
- The 3-Ingredient Secret to Sparking Clean Carpets (That Most Don't Know) — Unlock the secret to brilliantly clean carpets with a simple, potent three-ingredient homemade solution that effectively tackles stains and…
- The Secret to Lush Raised Beds? It's Not Just About How You Water — Smart irrigation for raised garden beds isn't just about automation; it's about delivering the right amount of water precisely when your pl…
- The Hidden Reason Your GFCI Trips (It’s Not Always a Bad Outlet) — A tripping GFCI outlet is a safety mechanism doing its job, often indicating a problem like moisture, a faulty appliance, or a wiring issue…
- The 5-Minute Trick to Vacation-Proof Your Garden (Before You Leave Town) — Prevent your garden from wilting while you're away with simple, proactive steps that ensure lush growth and minimal fuss upon your return.
- The 3 Hidden Mistakes That Make Your Deck Sealer Fail (And How to Fix Them) — Properly sealing your wood deck protects it from the elements, but common mistakes often lead to early failure. Learn how to reseal your de…
This article was independently written by FixlyGuide based on the source topic.
Frequently asked questions
How do I know if my home has lead paint?+
If your home was built before 1978, assume lead paint is present. The most accurate way to know for sure is to use a lead test kit (available at hardware stores) or hire a certified lead inspector for professional testing.
Is intact lead paint dangerous?+
Intact, undisturbed lead paint generally doesn't pose a significant risk. The danger arises when the paint chips, peels, or is disturbed by renovation activities like sanding or scraping, releasing hazardous lead dust and chips.
What kind of mask do I need for lead paint work?+
You need at least an N100 or P100 particulate respirator. Simple paper dust masks are not effective against microscopic lead particles and will not protect you from inhalation.
Can I renovate a home with lead paint myself?+
While small, very contained projects can sometimes be done by a diligent DIYer following strict lead-safe practices, major renovations involving extensive paint disturbance should ideally be handled by EPA-certified lead-safe contractors to ensure proper containment and removal.
Discussion
Loading comments…