Tools & materials you'll need
Affiliate linksAs an Amazon Associate FixlyGuide earns from qualifying purchases — at no extra cost to you. Prices and availability are accurate as of publication and subject to change.
Quick Answer
A refrigerator leaking water on the floor is a frustrating, and potentially damaging, household issue. While several factors can contribute, the most frequent culprit is a clogged or frozen defrost drain line. This critical component, located in the freezer compartment, is designed to channel water, created during the defrost cycle, into a drain pan beneath the refrigerator where it evaporates. When this line becomes blocked by ice, food particles, or other debris, the melting ice and condensation have nowhere to go, overflowing the drain trough, seeping past various seals, and pooling on your kitchen floor. This problem is often surprisingly easy to diagnose and fix with common household tools, saving you from an expensive service call.
The Problem
Few things are as instantly alarming as discovering a puddle of water around your refrigerator. Beyond the immediate mess and slip hazard, unattended leaks can cause significant damage to flooring, subflooring, and cabinetry, and even create an environment ripe for mold growth. While many homeowners immediately fear a costly repair involving complex refrigerant lines or major component failures, the reality is often much simpler and more manageable.
The defrost drain line issue is particularly insidious because it often starts subtly. You might notice small puddles at first, perhaps only after the refrigerator has been running for a while or after a defrost cycle. Over time, as the blockage worsens, the leaks become more consistent and more substantial. The water typically originates from the freezer compartment, even if you see it pooling near the fresh food door or at the back of the appliance. Understanding the mechanics of how your refrigerator manages condensation is key to tackling this problem effectively.
How It Works
Modern refrigerators employ a frost-free design, which means they regularly go through a defrost cycle to prevent ice buildup on the evaporator coils. These coils are located in the freezer compartment and are responsible for cooling the air inside your refrigerator. During the cooling cycle, moisture in the air condenses and freezes onto these cold coils.
To prevent excessive ice accumulation, which would reduce the appliance's efficiency, a defrost heater activates periodically (usually every 8-10 hours). This heater melts the ice on the evaporator coils. The resulting water then drips down into a small collection trough, which funnels the water into the defrost drain hole. This hole leads to a drain tube, typically a flexible plastic hose, that runs down to a drain pan located beneath the refrigerator, near the compressor. The heat generated by the compressor helps evaporate the water in this pan, completing the cycle.
When the defrost drain line becomes clogged, this entire system breaks down. Ice, food particles, or even mold can accumulate in the drain hole or tube, creating a blockage. Instead of flowing into the drain pan, the meltwater overflows the trough, often seeping through the back wall of the freezer compartment, running down the interior or exterior of the refrigerator cabinet, and ultimately finding its way to your floor. This pathway explains why the leak might appear far from the actual source of the problem.
Step-by-Step Fix
Safety First — Always unplug the refrigerator from the wall outlet before performing any maintenance or repairs. Water and electricity are a dangerous combination. Use caution when working with sharp tools or hot water.
-
Empty and Prepare the Freezer — Remove all food items from your freezer compartment. Store perishable items in a cooler with ice while you work. Remove any shelves, drawers, or ice maker bins to gain clear access to the back panel.
- Tip: Take a photo of the freezer's interior before emptying to remember how to reassemble shelves.
-
Locate the Evaporator Cover — The drain hole is usually located beneath the evaporator coils, often concealed by a back panel inside the freezer. You'll need to remove this panel, which is typically held in place by several screws (Phillips head or hex head, depending on the model).
- Tools: Phillips head screwdriver or nut driver set.
- If you can't find it: Consult your refrigerator's owner's manual for a diagram of your specific model.
-
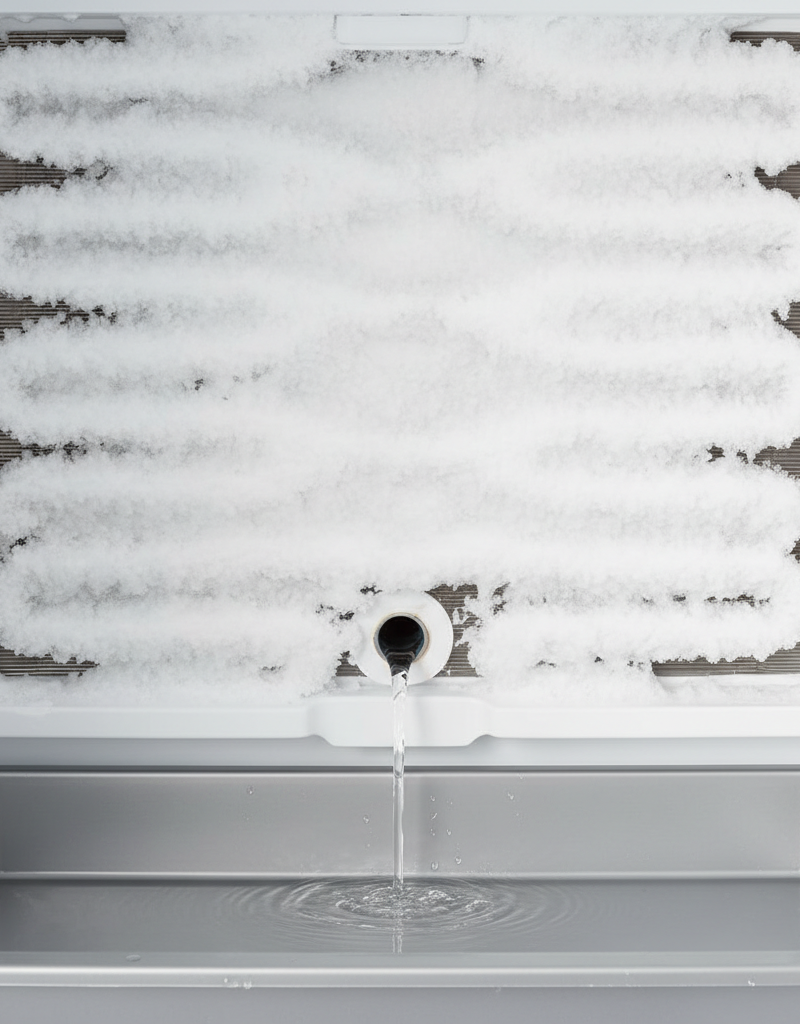
Inspect for Ice Buildup — Once the back panel is removed, you should see the evaporator coils, often covered in frost or ice. Below these coils, you'll find the drain trough and the drain hole. Look for a significant blockage of ice or debris in and around this hole.
- Common sign: A solid block of ice around the drain hole indicates a major clog.
-
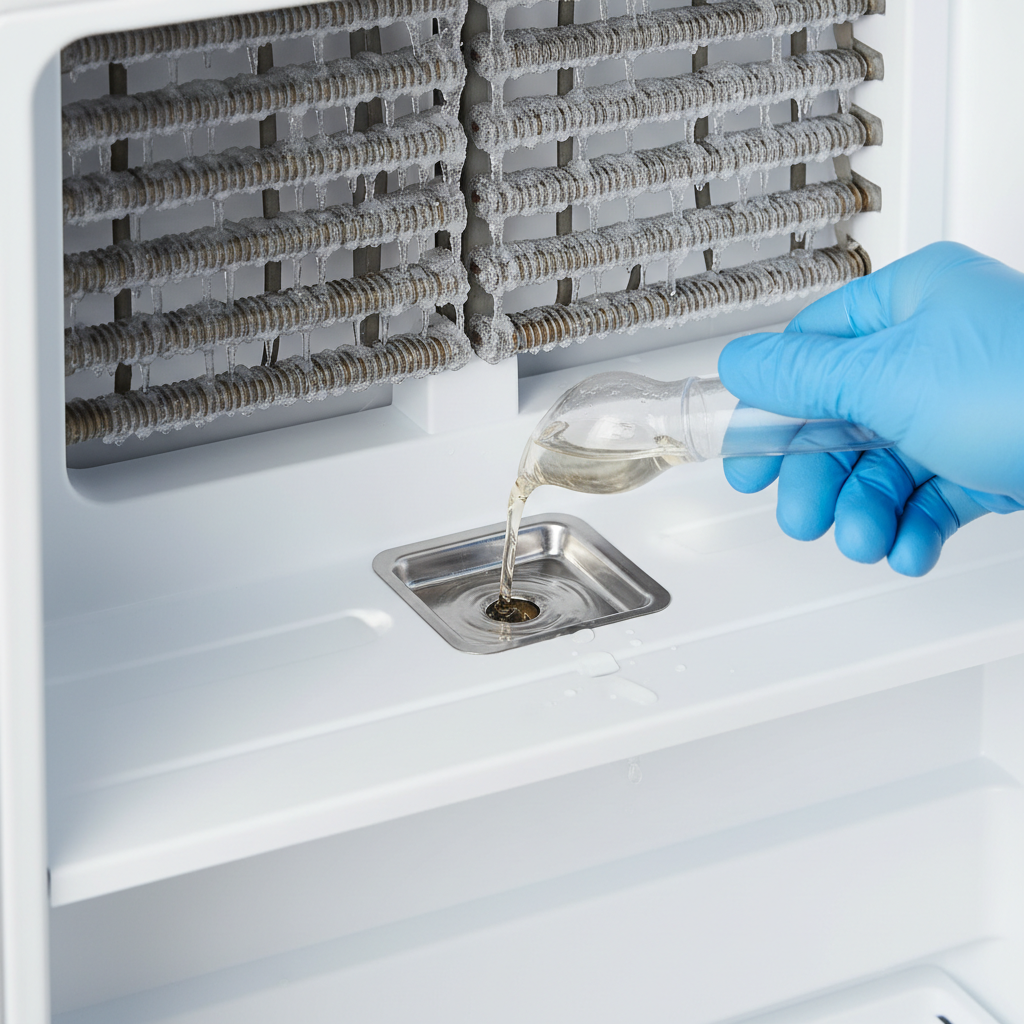
Defrost the Drain Hole — The most effective way to clear an ice blockage is to melt it. You can do this by carefully pouring warm water (not boiling, to avoid thermal shock to plastic components) into the drain hole. Use a turkey baster, syringe, or small funnel for precise application. Repeat several times until the water flows freely. Alternatively, a hairdryer on a low-heat setting can be used, but keep it moving to avoid overheating any single spot.
- Safety: Do not use sharp objects to chip away ice, as you could puncture the evaporator coils, leading to a much more expensive repair.
- If water doesn't drain: The blockage is likely further down the drain tube.
-
Clear the Drain Tube — If warm water alone doesn't clear the blockage, you'll need to address the drain tube itself. This often requires accessing the drain pan from the back of the refrigerator. Move the refrigerator away from the wall and locate the drain pan, usually a plastic tray situated above the compressor. The drain tube will likely connect to or empty into this pan.
- Tools: Flashlight, work gloves.
- How to clear: A thin piece of wire, a pipe cleaner, or a small, flexible bottle brush can often be pushed up into the drain tube from the drain pan to dislodge any obstructions. For stubborn clogs, a mixture of warm water and a small amount of bleach can be flushed through the tube to remove mold or algae buildup (follow with plain water rinse).
-
Clean the Drain Pan (Optional, but Recommended) — While you have access, remove and clean the drain pan. It can accumulate stagnant water, mold, and debris over time, which can contribute to odors and provide a breeding ground for bacteria that can then enter and clog the drain line. Wash it thoroughly with soap and water or a mild bleach solution.
-
Reassemble and Test — Once the drain line is clear and water flows freely, reassemble the back panel in the freezer. Move the refrigerator back into position, ensuring it's level. Plug the refrigerator back in. Monitor for a few hours and check the drain pan to confirm water is now collecting there. You should see a small amount of water in the pan after the next defrost cycle.
- Important: Listen for unusual sounds or strong odors as the appliance restarts.
Common Causes
- Ice Buildup in the Drain Hole: This is the most prevalent cause. During defrost cycles, if the water doesn't fully clear, it can refreeze, gradually blocking the drain hole completely.
- Food Debris: Small food particles, especially from spills or loose items in the freezer, can fall into the drain trough and block the drain hole.
- Mold or Algae Growth: The dark, damp environment of the drain line and pan can become a perfect breeding ground for mold or algae, which can form slimy blockages. This is more common in humid climates.
- Misaligned Drain Tube: Less common, but sometimes the drain tube leading to the pan can become dislodged or kinked, preventing proper water flow.
- Dirty Drain Pan: While not directly causing the leak, a filthy drain pan provides a source of debris and biological growth that can eventually migrate back into the drain line.
Common Mistakes
- Ignoring the Leak: Thinking it's 'just a little water.' Even small, consistent leaks can lead to extensive floor and cabinet damage and mold growth over time. Address it immediately.
- Using Sharp Objects to Clear Ice: Poking and chipping at ice with screwdrivers or knives can easily puncture the delicate aluminum evaporator coils, leading to a refrigerant leak and a very expensive professional repair. Use warm water or a hairdryer instead.
- Not Unplugging the Refrigerator: Working with electrical appliances, especially when water is involved, without unplugging them is extremely dangerous and can lead to electric shock.
- Overlooking the Drain Pan: Forgetting to check and clear the drain tube from the back of the refrigerator (at the drain pan connection) can leave part of the clog intact, leading to a recurrence of the leak.
- Skipping the Test: Not verifying that water is actually flowing into the drain pan after the repair means you might not have fully cleared the blockage, and the problem will return.
Cost & Time Breakdown
| Task | DIY Cost | Pro Cost | Time |
|---|---|---|---|
| Diagnose & Clear Iced Drain | $0–$5 | $100–$250 | 30–60 mins |
| Clear Algae/Debris in Drain | $0–$10 | $100–$250 | 45–90 mins |
| Clean Drain Pan | $0 | Included | 15 mins |
| Replace Kinked/Damaged Tube | $10–$30 | $150–$300 | 60 mins |
| Total for Drain Line Issue | $0–$30 | $100–$300 | 1–2 hours |
Tips & Prevention
- Regular Freezer Cleaning: Every few months, take out a few items from your freezer and quickly inspect the drain area for any signs of ice buildup or accumulated food debris.
- Check Perishables: Ensure food items are properly sealed to prevent spills and crumbs from entering the drain trough.
- Keep Produce in Crispers: While not directly related to the defrost drain, excessive moisture from unbagged produce can contribute to overall humidity in the fridge, indirectly leading to more frost.
- Monthly Drain Flush: For humid environments or older refrigerators, a monthly flush of the drain line with a turkey baster full of warm water (and a tiny bit of bleach, if prone to mold) can prevent clogs.
- Ensure Leveling: A properly leveled refrigerator helps ensure that the defrost water flows correctly toward the drain. Use a level on top of the appliance and adjust the leveling feet if necessary.
When to Call a Professional
While a clogged defrost drain is often a DIY fix, there are clear indicators when it's time to call a licensed appliance repair technician. If you've followed these steps and the leak persists, or if you encounter any of the following, a professional assessment is warranted. If water is leaking but the freezer does not defrost at all, or the evaporator coils are completely encased in a thick block of ice that doesn't melt with a simple warm water flush, you might have a problem with your defrost heater, defrost thermostat, or defrost timer. These are more complex electrical components that require specialized tools and diagnostic knowledge. Additionally, if the leak seems to originate from a completely different area, such as near the water dispenser line connection, a cracked water inlet valve, or a refrigerant line, a professional will be able to accurately diagnose and safely repair these more intricate issues. Professionals also have access to specific parts and repair techniques that might be beyond the scope of a typical homeowner. Never attempt repairs involving sealed refrigerant systems or complex electrical components unless you are specifically trained and licensed.
Related Articles
Keep troubleshooting with these hand-picked guides from FixlyGuide:
- The Secret Culprit Behind Your Leaking Refrigerator (It’s Not Always a Big Fix) — Discover the most common and often overlooked reasons why your refrigerator is leaking water on the floor, and how to fix them yourself.
- The Surprising Culprit Behind Your Refrigerator's Water Leak (It's Not Always the Ice Maker) — Discover the most common, often overlooked reason your refrigerator is leaking water and how to fix it with simple steps.
- The Secret Culprit Behind Your Leaky Refrigerator (It’s Not Always the Water Line) — Discover the most common, often overlooked, reasons your refrigerator is leaking water and how to fix them with simple DIY steps.
- The Secret Culprit Behind Your Leaky Refrigerator (It's Not What You Think) — Discover the often-overlooked reason your refrigerator is leaking water and how a simple, inexpensive fix can prevent costly damage.
- The Secret Culprit Behind Your Leaky Refrigerator (It’s Not Always a Hose) — Discover the hidden causes of your refrigerator leaking water and how to fix them with our comprehensive troubleshooting guide.
- The #1 Reason Your AC Blows Warm Air (And It's Not What You Think) — Discover the most common and often overlooked reason your AC might be blowing warm air, and how a simple capacitor fix can restore cool air.
Get the print-ready PDF of this guide
A clean, ad-free, printable version you can keep on your phone or pin to the workshop wall. Free with a FixlyGuide account.
- Print-optimized layout
- Tools, materials & every step included
- Saved to your account
Frequently asked questions
Why is my refrigerator leaking water?+
The most common reason a refrigerator leaks water is a clogged or frozen defrost drain line. This line is supposed to carry meltwater from the freezer's defrost cycle to a drain pan, but blockages cause it to overflow and leak onto your floor.
Can I fix a refrigerator water leak myself?+
Yes, many refrigerator leaks, especially those caused by a clogged defrost drain, can be fixed by a homeowner. You'll need to access the freezer and potentially the back of the refrigerator to clear the blockage with warm water or a small brush.
How often should I clean my refrigerator's drain pan?+
It's a good idea to inspect and clean your refrigerator's drain pan every 6-12 months, especially if you live in a humid environment or notice any odors coming from the back of the appliance. This prevents debris and mold from accumulating and potentially clogging the drain line.
What tools do I need to fix a leaking refrigerator?+
To fix a typical defrost drain leak, you'll generally need a Phillips head screwdriver or nut driver, a turkey baster or small funnel, warm water, and potentially a thin piece of wire or bottle brush. A flashlight is also helpful.
When should I call a professional for a refrigerator leak?+
Call a professional if the freezer isn't defrosting at all, if the leak persists after you've cleared the drain line, or if the leak seems to come from a complex area like the water dispenser line, a cracked inlet valve, or a refrigerant line.


Discussion
Loading comments…