Tools & materials you'll need
Affiliate linksAs an Amazon Associate FixlyGuide earns from qualifying purchases — at no extra cost to you. Prices and availability are accurate as of publication and subject to change.
Quick Answer
If your washing machine is leaking from the bottom, the most common culprits are a loose or improperly sealed hose connection, a clogged drain pump filter, or a damaged drain pump. Start by inspecting all hose connections for tightness and proper seating. Next, check and clean the drain pump filter, which can become blocked with lint and debris. Finally, if these don't resolve the leak, the drain pump itself might be faulty and require replacement.
The Problem
Few things are as disheartening as discovering a puddle of water under your washing machine. A leak from the bottom of the unit, particularly during the wash or spin cycle, suggests an internal issue that, if left unaddressed, can lead to significant water damage to your flooring, subfloor, and even the surrounding walls. This isn't just about a wet utility room; it's about potential mold growth, costly repairs, and a disruption to your household routine. This guide will walk you through diagnosing and fixing the most common reasons your washer might be springing a leak from its underside, empowering you to tackle the problem yourself before calling in a professional.
How It Works
A washing machine is a complex appliance, but its basic water handling system is understandable. Water enters the machine through inlet hoses, fills the tub for washing, and then is expelled through a drain hose. This entire process relies on a network of hoses, seals, and pumps working in harmony. The inlet hoses (hot and cold) connect to the back of the washer and are secured with rubber gaskets to prevent leaks. Inside the machine, various internal hoses carry water between components like the dispenser and the wash tub. Once the wash cycle is complete, the drain pump activates, pulling the water from the tub and pushing it out through the drain hose, often into a standpipe or laundry sink.
Crucially, the drain pump itself is a self-contained unit located at the bottom front of most machines, usually behind a service panel. It houses an impeller that spins rapidly to force water out. Many drain pumps also include a small filter or trap designed to catch lint, coins, buttons, and other debris before they can clog the pump or drain line. If any of these components – the inlet hoses, internal hoses, the drain pump, or its filter – become compromised, a leak can develop, often manifesting as water appearing from the bottom of the washer.
Step-by-Step Fix
SAFETY FIRST — Always unplug the washer and shut off water supply valves.
Before undertaking any repair on your washing machine, always ensure it is disconnected from power and both hot and cold water supply lines are turned off. Failure to do so can result in electrical shock or serious water damage.
1. Inspect Inlet Hoses & Connections — Start by checking the easiest potential leak points.
- Unplug the washer from the wall outlet.
- Turn off both hot and cold water supply valves located behind the machine. Turn them clockwise until hand-tight.
- Carefully pull the washer away from the wall to access the back.
- Examine the inlet hoses where they connect to the wall faucets and to the back of the washing machine. Look for any visible drips, cracks, bulges, or signs of corrosion.
- Tighten any loose connections by hand, then use channel-lock pliers or a crescent wrench for a final quarter-turn, being careful not to overtighten and strip the threads.
- If a hose appears damaged (cracked, bulging), replace it immediately. Old rubber hoses are prone to bursting. Opt for braided stainless steel hoses for better durability.
- Check the rubber washers/gaskets inside the hose couplings. If they are flattened, cracked, or missing, replace them. These cost only a few dollars and are critical for a watertight seal.
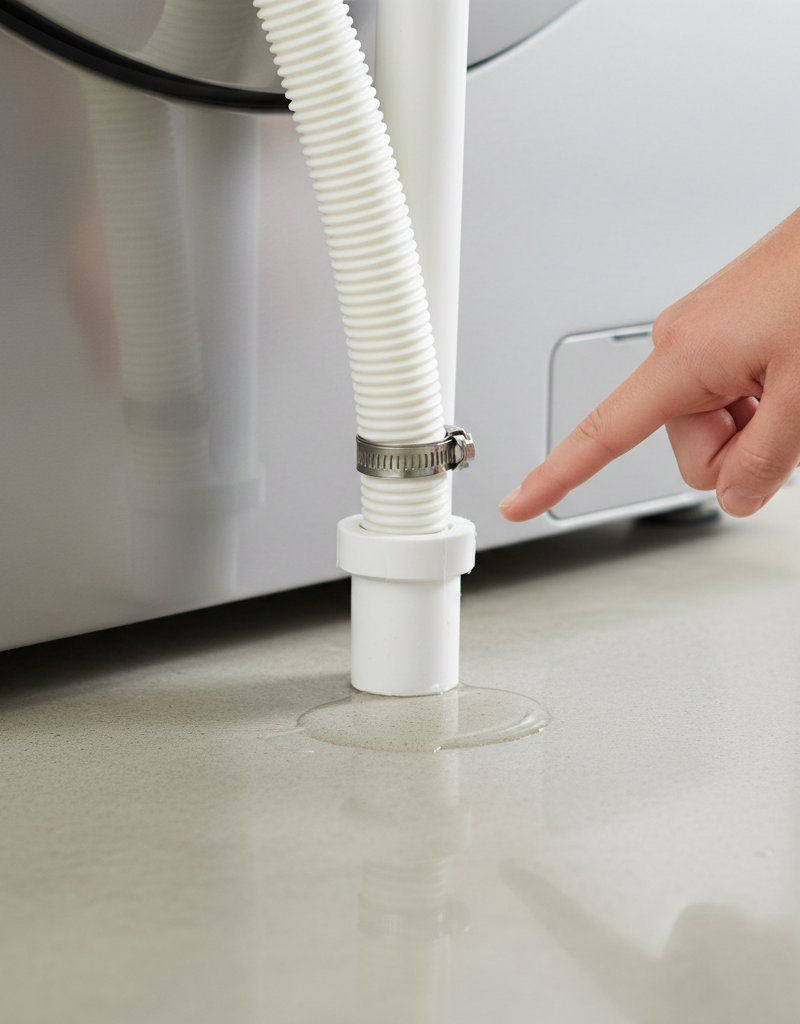
2. Check the Drain Hose Connections — Ensure proper sealing and no blockages.
- Examine the drain hose where it connects to the back of the washer and where it enters the standpipe or laundry sink.
- Ensure the hose clamp at the back of the washer is secure. If it's a spring-style clamp, ensure it's fully seated.
- Check the end of the drain hose that goes into the standpipe or sink. It should be securely placed but not so far down that it creates a siphon, which can lead to constant draining.
- Look inside the drain hose for any visible clogs near the ends. If it appears blocked or stiff, it might need replacement or a thorough cleaning.
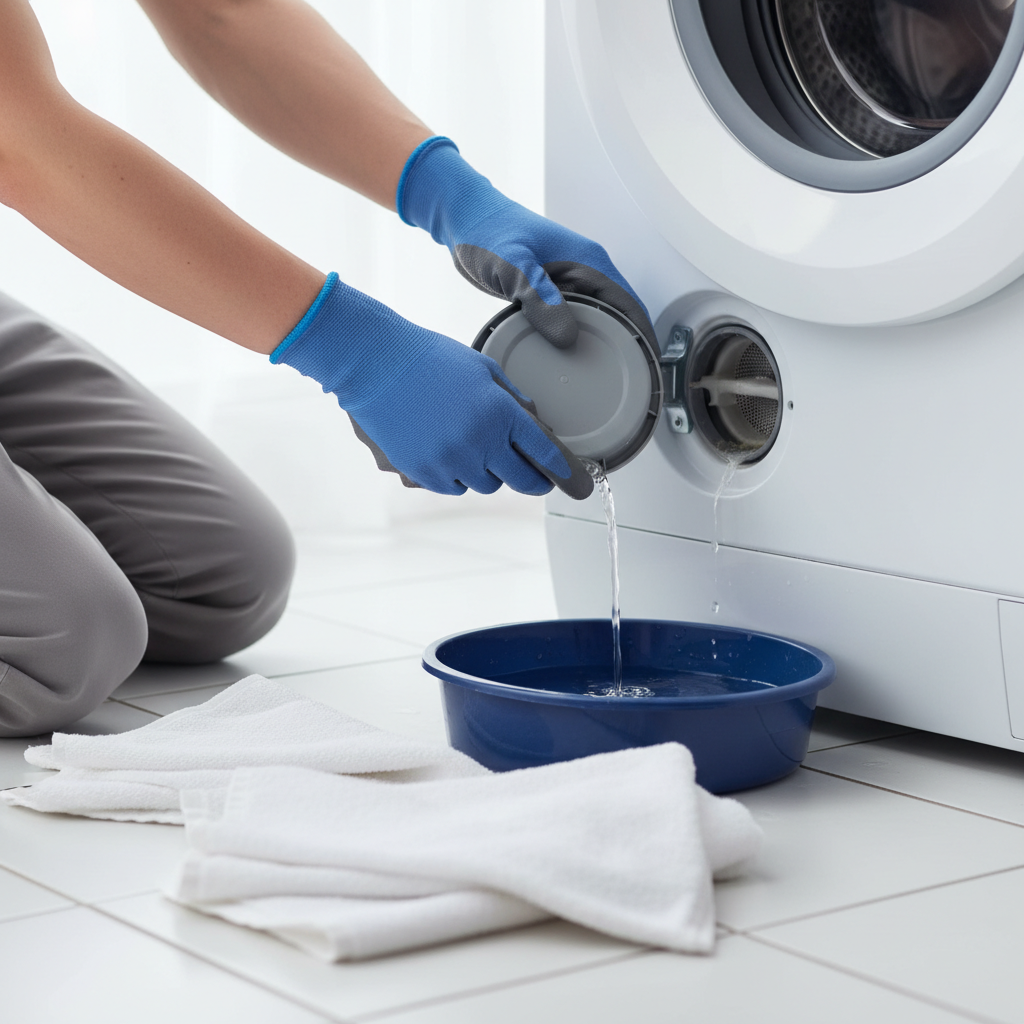
3. Clean the Drain Pump Filter/Trap — A common cause of leaks and surprisingly easy to fix.
- Most front-load and some top-load washers have a drain pump filter accessible from a small panel at the bottom front of the machine. Consult your owner's manual for its exact location and how to open the panel.
- Place shallow pans or old towels underneath the filter cap, as several cups of water will likely drain out.
- Slowly unscrew the filter cap (often a large plastic knob). Allow all water to drain into your pan.
- Once the water has drained, remove the filter completely. Clean off any lint, coins, hair, buttons, and other debris that has accumulated. Use an old toothbrush if necessary to thoroughly clean the mesh and housing.
- Inspect the rubber O-ring gasket on the filter cap. If it's damaged or missing, replace it to ensure a tight seal.
- Screw the filter back in firmly until hand-tight. Do not overtighten.
4. Inspect Internal Hoses & Clamps — Remove panels for a deeper look.
- This step requires removing the washer's back panel or, for some front-loaders, the top and front panels. Refer to your appliance's service manual or a reliable online video for your specific model.
- Safety Note: Be extremely careful when working inside the machine. Many components have sharp edges. If you encounter any wires or electrical components, exercise extreme caution.
- With panels removed, visually inspect all internal hoses – from the dispenser to the tub, and from the tub to the pump. Look for visible cracks, splits, or loose connections.
- Pay close attention to the hose leading from the bottom of the tub to the drain pump, as this hose is under significant water pressure during the drain cycle.
- Tighten any loose hose clamps. If a hose is cracked or damaged, it will need to be replaced. This often involves draining residual water, removing the specific hose clamps, and fitting a new hose. Ensure the new hose is the correct length and diameter for your model.
5. Examine the Drain Pump Itself — A last resort if other steps fail.
- After confirming hoses are good and the filter is clean, if the leak persists, the drain pump itself might be the issue. The pump is typically located at the bottom front of the machine, near the filter.
- Look for cracks in the pump housing or visible water weeping from its seams. A minor leak from the pump often indicates a failing seal around the impeller shaft or a hairline crack in the plastic housing.
- If you suspect the pump is leaking, replacement is usually the most straightforward solution. Replacing a drain pump involves disconnecting the power, shutting off water, disconnecting hoses, and sometimes electrical connectors. This can be a moderate DIY task depending on machine access.
- Tools: Pliers (for hose clamps), screwdriver (for mounting screws), shallow pan for residual water.
- If this doesn't work: If the pump is spinning but not draining, or making loud grinding noises, it's definitely faulty. If it looks fine externally but water is still leaking, replace it.
Common Causes
- Loose or Worn Inlet Hoses: The hot and cold water supply hoses, especially older rubber ones, can degrade, crack, or have loosened connections over time, leading to drips from the back of the machine.
- Clogged Drain Pump Filter: Lint, hair, coins, and other small items accumulate in this filter, restricting water flow and causing pressure to build up, sometimes forcing water out around a weakened seal or the filter cap itself.
- Damaged Drain Hose: The hose that expels water from the machine can crack, split, or become dislodged, causing water to pour out, especially during the drain and spin cycles.
- Internal Hose Issues: Hoses connecting the wash tub to the drain pump, or even to the dispenser, can develop cracks or their clamps can loosen due to vibration and age, leading to slow or intermittent leaks inside the machine's casing.
- Failing Drain Pump: The drain pump itself can crack, or its internal seals can wear out, allowing water to escape from the pump housing. Loud noises during the drain cycle often accompany a failing pump.
- Excessive Detergent/Sudsing: Using too much detergent, especially with high-efficiency (HE) machines, can create excessive suds. These suds can overflow the tub or the dispenser, mimicking a leak, particularly during the agitated wash cycle.
Common Mistakes
- Overtightening Hose Connections: While it's important for hose connections to be snug, overtightening with a wrench can strip plastic threads on the washer or compress rubber gaskets excessively, leading to damage and future leaks.
- Ignoring Rubber Gaskets/Washers: Assuming the problem is the hose itself, many DIYers overlook the condition of the small, inexpensive rubber washers inside the inlet hose couplings. These are crucial for a watertight seal and are often the true source of a persistent drip.
- Not Fully Draining Filter Area: When cleaning the drain pump filter, failing to place adequate towels or a pan can lead to water spilling onto the floor, making it seem like the original leak is worse or creating a new mess.
- Misdiagnosing a Clog as a Leak: Sometimes, water backing up from a clogged household drain system (not just the washer's internal drain) can appear to be a washer leak. Ensure your standpipe or sink drain is clear before tearing into the washer.
- Using the Wrong Detergent: Using conventional detergent in an HE washing machine (or vice-versa) can create inappropriate levels of suds, leading to overflow that might be mistaken for a mechanical leak.
- Working on a Plugged-In Machine: Attempting any internal repair or inspection without unplugging the washer is a severe safety hazard and can lead to electric shock. Always disconnect power first.
Cost & Time Breakdown
| Task | DIY cost | Pro cost | Time |
|---|---|---|---|
| Inspect Hoses | $0 | $75–$150 | 15–30 min |
| Replace Inlet Hoses | $15–$30 | $100–$200 | 20–45 min |
| Clean Drain Pump Filter | $0 | $75–$150 | 15–30 min |
| Replace Drain Pump Gasket/O-ring | $5–$10 | n/a | 10–20 min |
| Replace Internal Hoses | $20–$50 | $150–$250 | 45–90 min |
| Replace Drain Pump | $80–$150 | $200–$400 | 1–2 hours |
Tips & Prevention
- Routine Hose Inspection: Every 6-12 months, pull your washer out and inspect the inlet and drain hoses for signs of wear, cracks, or loose connections. Replace rubber hoses every 3-5 years, or upgrade to braided stainless steel hoses for better peace of mind.
- Clean the Drain Pump Filter Annually: Make it a habit to clean your drain pump filter at least once a year, or more frequently if you have pets. This prevents clogs and potential leaks.
- Use Proper Detergent: Always use the correct type and amount of detergent for your machine (HE detergent for HE machines) to prevent excessive sudsing and potential overflows.
- Level Your Machine: Ensure your washing machine is properly leveled. An unbalanced machine can vibrate excessively, potentially loosening hoses and connections over time. Check with a spirit level and adjust the feet as needed.
- Avoid Overloading: Overloading your washer can put undue stress on the tub and internal components, sometimes leading to vibrations that loosen parts and cause leaks.
When to Call a Professional
While many washing machine leaks from the bottom can be resolved with basic DIY troubleshooting, there are situations where calling a licensed appliance repair technician is the smarter, safer, and ultimately more cost-effective choice. If you've inspected and tightened all external hoses, thoroughly cleaned the drain pump filter, and the leak persists, the issue might be more complex, such as a cracked wash tub, a faulty tub seal, or a more deeply embedded internal hose leak that requires extensive disassembly. Additionally, if the leak is substantial and occurring rapidly, causing significant water accumulation, do not hesitate to shut off the water and power and call a pro immediately to prevent severe water damage. A professional can quickly diagnose intricate problems, has access to specialized tools and genuine manufacturer parts, and can perform the repair safely and efficiently, often offering a warranty on their work. If you're uncomfortable with extensive disassembly or dealing with electrical components, or if your machine is still under warranty, calling a professional is highly recommended.
Related Articles
Keep troubleshooting with these hand-picked guides from FixlyGuide:
- The Secret Culprit Behind Your Leaking Washer (It's Not Always the Hose) — A washing machine leaking water from the bottom can often be traced to common, easily fixable issues like loose hoses or a clogged drain pu…
- The Secret Culprit Behind Your Leaky Washer (It's Not Always the Hose!) — Discover the often-overlooked parts causing your washing machine to leak from the bottom and follow our guide to fix it yourself.
- The Secret Culprit Behind Your Washing Machine's Spin & Drain Failure (It's Not Always Clogs) — Discover the most overlooked reasons why your washing machine refuses to spin or drain, and how to fix them with simple tools.
- The Secret Culprit Behind Your Washing Machine's Spin-Drain Failure (It's Not Always Clogs) — Discover the hidden reasons your washing machine won't spin or drain and learn how to fix the most common culprits yourself.
- The $5 Secret to Silencing That Annoying Dripping Faucet (Single-Handle Fix) — Stop a dripping single-handle faucet with a simple and inexpensive DIY fix by replacing a worn-out o-ring or washer.
- Is Your Gutter Sagging After Every Storm? The Hidden Flaw Most Homeowners Miss — Discover the overlooked reason your gutters sag after every storm and learn the lasting fix that most homeowners miss.
Frequently asked questions
Why is my front-load washer leaking from the bottom?+
Front-load washers commonly leak from the bottom due to a clogged drain pump filter, a loose or damaged door boot seal, or issues with internal hoses or the drain pump itself. Start by checking the filter, usually behind a small panel at the bottom front.
Can too much detergent cause a washing machine to leak?+
Yes, using too much detergent, especially non-HE detergent in an HE machine, can create excessive suds. These suds can overflow the dispenser or the tub, mimicking a leak from the machine's bottom.
How do I find where my washing machine is leaking?+
To pinpoint a leak, first unplug the machine and shut off the water. Then, systematically check external hoses, the drain pump filter, and internal hoses. Place dry paper towels or cardboard under the machine to help identify the exact drip location once the washer is run through a short cycle.
Is it worth fixing a leaking washing machine?+
Most common leaks, like those from hoses or a clogged drain filter, are inexpensive DIY fixes and well worth the effort. More extensive repairs, such as replacing the main tub seal or transmission, might warrant considering the age and overall condition of the machine versus the cost of a new one.
How often should you replace washing machine hoses?+
Standard rubber washing machine inlet hoses should be inspected annually and replaced every 3-5 years. Braided stainless steel hoses are more durable and can last longer but should still be inspected periodically for wear.


Discussion
Loading comments…