- Forgetting to Unplug the Unit: Never attempt to clean coils or access internal components without first disconnecting the power. It's a serious shock hazard.
- Puncturing Refrigerant Lines: Be gentle when cleaning coils or removing ice. Using a sharp object like a screwdriver to chip away ice can easily puncture a coil, causing a refrigerant leak that requires a professional repair.
- Misdiagnosing a Bad Gasket: Don't assume a gasket is bad if it fails the dollar bill test once. Always clean it thoroughly first, as grime is often the cause of a poor seal.
- Not Allowing Enough Cooldown Time: After performing a fix, you must wait several hours (4-8 is best) for the refrigerator to reach a stable, cool temperature. Don't assume the fix failed if it's not instantly cold.
- Replacing Parts Prematurely: Don't order a new evaporator fan motor until you have verified it has power but isn't spinning. An obstruction or a bad control board could be the real issue.
HVAC · High energy usage
| Project category | HVAC |
|---|---|
| Problem type | High energy usage |
| Trade required | HVAC |
| Urgency | Planned project |
| Safety risk | Low safety risk |
| DIY suitability | DIY for experienced homeowners |
| Cost category | High cost |
| Typical timeline | Assessment within weeks; replacement planned off-season |
| Contractor type | Licensed HVAC technician |
Repair option
Duct sealing, insulation, and a tune-up before touching the equipment.
Replacement option
High-efficiency replacement sized by a load calculation, not a rule of thumb.
Common causes
- Aging, low-efficiency equipment
- Leaking ducts losing conditioned air
- Insufficient attic insulation
- Oversized system short-cycling
Relevant tools:project cost estimatorrepair or replace
Published July 7, 2026Last updated August 17, 2026
Tools & materials you'll need
Affiliate links- AmazonCondenser Coil Brush1 · A long, flexible brush designed to fit between the coils.
- AmazonVacuum with Hose/Brush Attachment1 · For removing the dust loosened by the brush.
- AmazonNut Driver or Screwdriver Set1 · For removing access panels on the back or inside the freezer.
- AmazonFlashlight1 · Essential for seeing coils located underneath the refrigerator.
- AmazonMicrofiber Cloths2
As an Amazon Associate FixlyGuide earns from qualifying purchases — at no extra cost to you. Prices and availability are accurate as of publication and subject to change.
'''
Quick Answer
A refrigerator that runs constantly but fails to cool is most often suffering from poor airflow or inefficient heat exchange. This is typically caused by dirty condenser coils caked in dust, a faulty door gasket letting in warm air, or a broken evaporator fan that fails to circulate cold air inside. Cleaning the coils and checking the fan and gasket for issues will resolve over 90% of these cases without needing a professional technician.
The Problem
It’s a sound that slowly moves from background noise to a source of genuine anxiety: the constant, unending hum of your refrigerator. It never cycles off. You open the door, expecting to feel a blast of cold air, but instead, you're met with a tepid, slightly damp environment. Your milk is spoiling days before its expiration date, and the butter is soft on the top shelf. The freezer might still feel chilly, but the refrigerator compartment is clearly failing. It's a deeply frustrating scenario; the appliance is clearly running and consuming electricity, but it’s failing at its one essential job: keeping your food cold. The good news is that the compressor running is a positive sign—it means the most expensive component in your fridge is likely still functional. The problem isn't a total failure, but a critical breakdown in the cooling system. For the vast majority of cases, the culprit is one of three common, fixable issues that prevent the system from properly removing heat and circulating cold air.
How It Works
The "always on, but not cold" problem is almost always a symptom of a breakdown in the cooling cycle's efficiency. Your refrigerator operates on a closed-loop system using a chemical called refrigerant. Think of it as a heat sponge. First, the compressor (the heart of the system) pressurizes the refrigerant gas, causing it to get very hot. This hot, high-pressure gas is pushed into the condenser coils, which are typically located on the back or bottom of your fridge. Here, a fan often helps dissipate this heat into the surrounding air, causing the refrigerant to cool down and condense into a high-pressure liquid. This is where your problem often starts: if these coils are covered in dust and pet hair, they can't release heat effectively, and the whole system suffers.
Next, this liquid refrigerant flows through an expansion valve (or capillary tube), where the pressure drops dramatically. This pressure drop causes the refrigerant to rapidly cool and turn into a very cold, low-pressure vapor inside the evaporator coils, usually located behind a panel in the freezer section. This is where the cooling actually happens; the cold evaporator coils absorb heat from the inside of the refrigerator. The evaporator fan is critical here; it blows air across these frigid coils and circulates this newly chilled air into the refrigerator and freezer compartments. If this fan is broken or blocked by ice, the cold air stays trapped in the freezer, leaving the refrigerator warm. Finally, the now-warmed refrigerant gas flows back to the compressor to start the cycle all over again. A third key component, the door gasket, ensures this is a closed system by sealing the cold air in and keeping warm, moist room air out. A leak in this seal forces the entire system to run constantly to combat the influx of warm air.
SAFETY WARNING
Disconnect Power: Before performing any diagnostic or repair work, ALWAYS unplug your refrigerator from the wall outlet or turn off the corresponding circuit breaker. This eliminates the risk of electric shock and ensures moving parts like fans do not start unexpectedly. Wait at least 10 minutes for any capacitors to discharge.
Step-by-Step Fix
Follow these diagnostic steps in order. They address the most common and easiest-to-fix issues first.
-
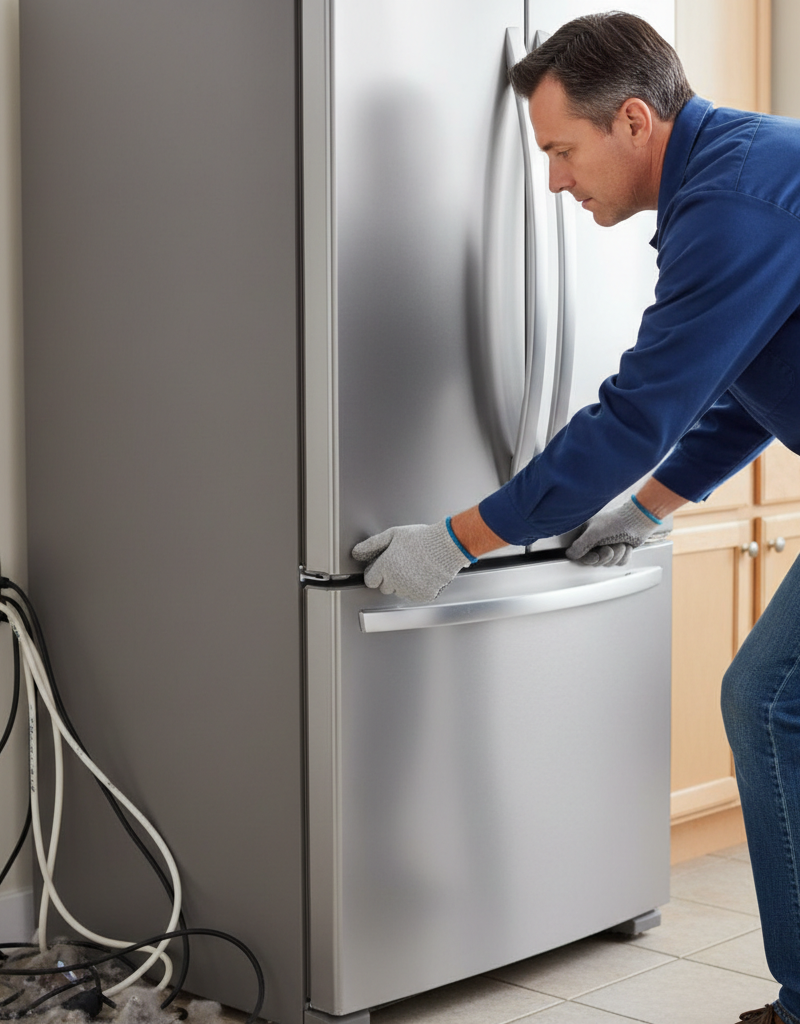
Safety First & Unplug — Before you pull the fridge from the wall, ensure it is unplugged from the electrical outlet. This step is non-negotiable for your safety. Pulling the unit out while it's running can also damage the power cord.
-
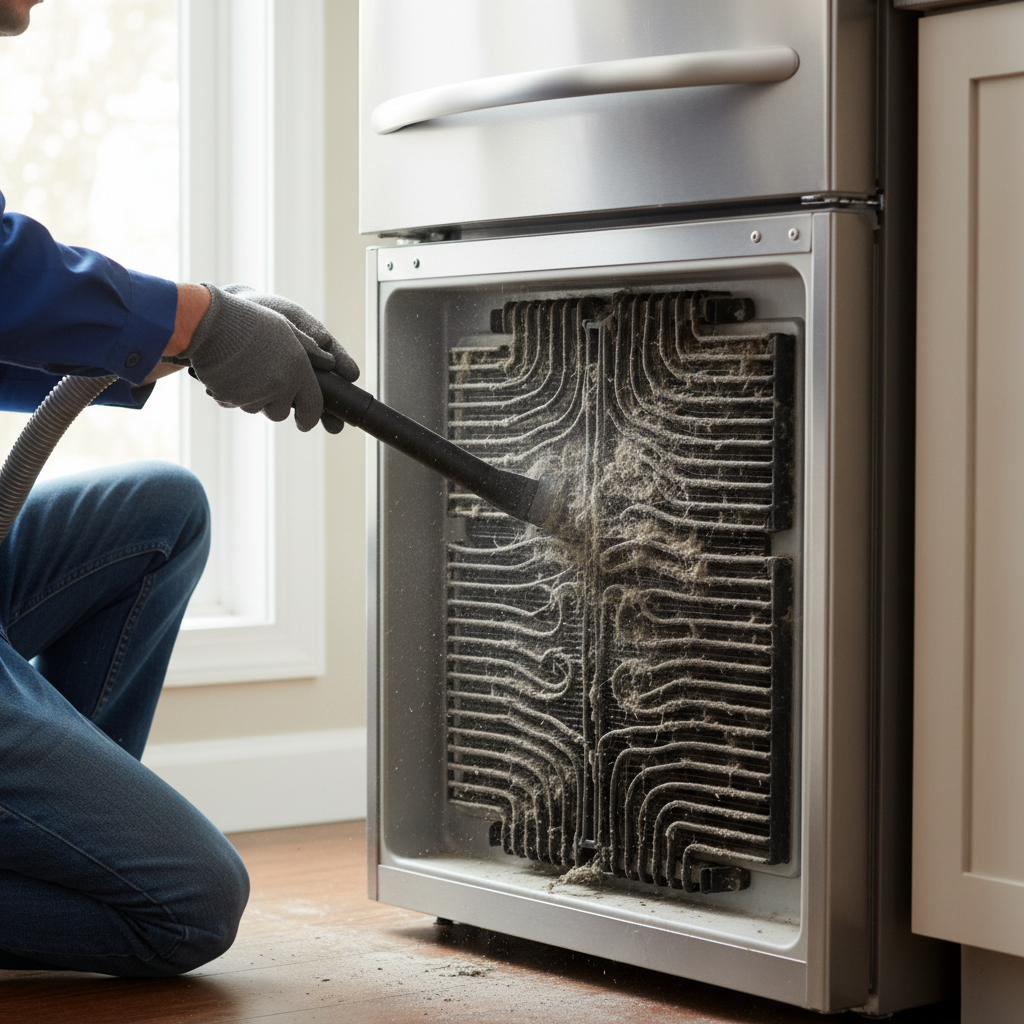
Access the Condenser Coils — Carefully pull the refrigerator away from the wall. The condenser coils will be in one of two places: on the back of the unit (a large, black, grid-like panel) or underneath the unit, accessible by removing a lower front or back panel. The user manual for your specific model will confirm the location.
-
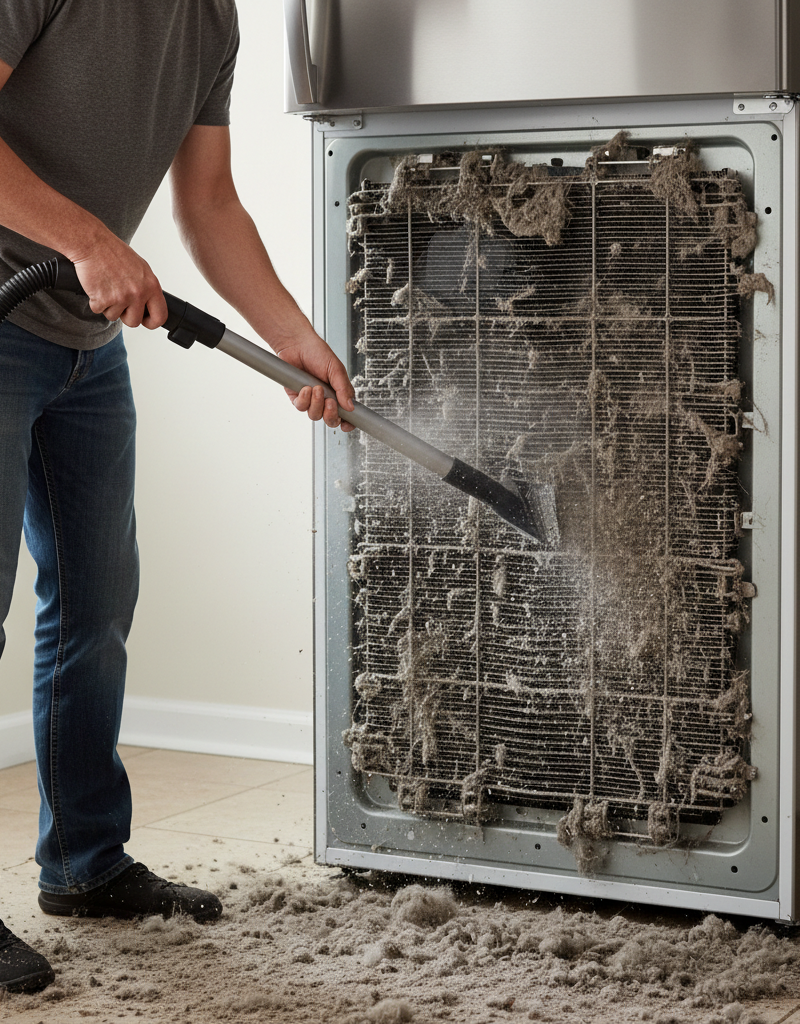
Thoroughly Clean the Coils — Using a long, flexible condenser coil brush and a vacuum cleaner with a hose attachment, gently remove all dust, pet hair, and debris from the coils. The goal is to allow air to pass freely over them. For coils underneath, you may need a flashlight to see what you're doing. Be gentle to avoid bending the delicate aluminum fins.
-
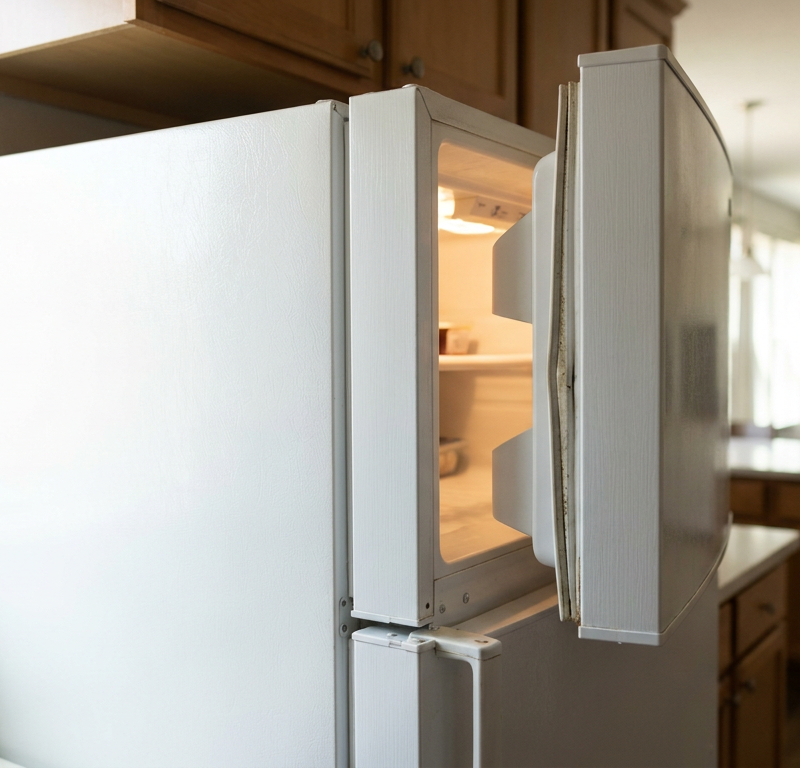
Test the Door Gasket Seal — This simple test verifies if warm air is leaking into the fridge. Take a dollar bill, place it halfway across the gasket, and close the door. Try to pull the bill out. You should feel noticeable tension or resistance. Test this in several spots around the entire perimeter of both the refrigerator and freezer doors.
-
Clean and Revive the Gasket — If you find loose spots, the gasket may just be dirty or compressed. Clean the entire surface of the gasket and the corresponding surface on the fridge frame with a cloth and a solution of warm water and mild soap. A clean surface provides a better seal. Sometimes, gently warming a stiff gasket with a hairdryer on a low setting can help it regain its shape.
-
Locate the Evaporator Fan — This fan is located inside the freezer, behind a plastic or metal panel at the back. You will need to empty the freezer of all food and shelves. Then, use a screwdriver or nut driver to remove the screws holding the back panel in place.
-
Inspect the Evaporator Fan and Coils — With the panel removed, you can see the fan and the evaporator coils behind it. First, check for any visible obstructions blocking the fan blade (e.g., a piece of ice, a zip tie, or loose wiring). Try to spin the fan blade by hand; it should turn freely. If it feels stiff or gritty, the motor is likely failing.
-
Check for Excessive Frost — While you have the panel off, look at the evaporator coils. A thin, even layer of frost is normal. However, if the coils are encased in a solid block of ice, this indicates a problem with your refrigerator’s automatic defrost system. This ice buildup will physically block the evaporator fan from spinning and prevent airflow, causing your exact symptoms.
-
Listen For the Fan Motor — If there are no obstructions or heavy ice, you can temporarily plug the refrigerator back in. On most models, the evaporator fan will run when the compressor is running and the door switch is depressed. Press the door light switch with your finger to simulate the door being closed. If the compressor kicks on but the fan doesn't spin, the fan motor is dead and needs to be replaced.
-
Reassemble and Test — If you simply cleaned the coils or gasket, you can plug the fridge back in, push it into place (leaving a few inches of clearance), and monitor it. If you performed a fan diagnostic or manually defrosted a block of ice, carefully re-install the interior panel, shelving, and food. Plug the unit in and give it at least 4-6 hours to stabilize its temperature before making a final judgment.
Common Causes
Understanding why your fridge is running constantly is key to preventing a recurrence. These are the most common culprits.
-
Dirty Condenser Coils: This is the #1 cause. The condenser coils are the radiator of your refrigerator, responsible for releasing heat from the refrigerant. When they are blanketed in a thick layer of dust, lint, and pet hair, they cannot dissipate heat effectively. The refrigerant remains too warm, forcing the compressor to run continuously in a futile attempt to cool it down. The system works harder and longer but achieves less cooling.
-
Leaky or Faulty Door Gasket: The door gasket (the rubber seal around the door) is the only barrier between the cold air inside and the warm, humid air of your kitchen. If this seal is torn, brittle, or simply not sealing tightly, it allows a constant stream of warm air to enter. The refrigerator's thermostat detects this temperature rise and keeps the compressor running non-stop to compensate for the incoming heat.
-
Failed Evaporator Fan Motor: The evaporator fan is the workhorse of air circulation. It pulls air over the ice-cold evaporator coils and distributes it throughout the freezer and refrigerator compartments. If this fan motor fails, the refrigerator essentially chokes. The freezer might get very cold right near the coils, but the cold air never reaches the refrigerator section, causing it to warm up even as the compressor and freezer components continue to run.
-
Defrost System Failure: Your refrigerator is designed to run an automatic defrost cycle to melt frost off the evaporator coils. This system involves a heater, a defrost thermostat, and a timer or control board. If any of these components fail, the coils never defrost and become encased in a solid block of ice. This ice physically blocks airflow, preventing the evaporator fan from circulating cold air, leading to a warm fridge and a constantly running compressor.
-
Overloaded Fridge or Blocked Vents: Refrigerators rely on the free circulation of air. If you've packed your fridge so tightly that air cannot move, or if items are pushed directly against the vents that connect the freezer and refrigerator compartments, you create warm spots. The thermostat, often located in the refrigerator section, will detect this warm temperature and keep the system running, even if the freezer is at the correct temperature.
Common Mistakes
Avoid these pitfalls during your diagnosis and repair.
- Forgetting to Unplug the Unit: Never attempt to clean coils or access internal components without first disconnecting the power. It's a serious shock hazard.
- Puncturing Refrigerant Lines: Be gentle when cleaning coils or removing ice. Using a sharp object like a screwdriver to chip away ice can easily puncture a coil, causing a refrigerant leak that requires a professional repair.
- Misdiagnosing a Bad Gasket: Don't assume a gasket is bad if it fails the dollar bill test once. Always clean it thoroughly first, as grime is often the cause of a poor seal.
- Not Allowing Enough Cooldown Time: After performing a fix, you must wait several hours (4-8 is best) for the refrigerator to reach a stable, cool temperature. Don't assume the fix failed if it's not instantly cold.
- Replacing Parts Prematurely: Don't order a new evaporator fan motor until you have verified it has power but isn't spinning. An obstruction or a bad control board could be the real issue.
Cost & Time Breakdown
| Task | DIY Cost | Pro Cost | Time Estimate |
|---|---|---|---|
| Condenser Coil Cleaning | $10 - $20 (for a brush) | $120 - $220 | 30 Minutes |
| Door Gasket Replacement | $50 - $150 (part) | $200 - $400 | 45-60 Minutes |
| Evaporator Fan Motor Replacement | $40 - $100 (part) | $250 - $450 | 1-2 Hours |
| Defrost System Repair (Thermostat/Heater) | $30 - $80 (part) | $250 - $500 | 1-3 Hours |
| Professional Diagnostic Call | N/A | $90 - $150 | 30-60 Minutes |
Tips & Prevention
- Clean Condenser Coils Annually: Make it a yearly ritual. If you have pets that shed, do it every six months. This is the single most effective preventative maintenance task.
- Inspect and Clean Gaskets: Every few months, wipe down the door gaskets with warm, soapy water to keep them clean and pliable.
- Ensure Proper Airflow: Do not push your refrigerator flush against the back wall. Leave at least 2-3 inches of space for air to circulate around the coils.
- Don't Block Internal Vents: Be mindful of where you place items inside the fridge and freezer. Keep bags of vegetables and other items away from the small vents that allow air to pass between compartments.
- Cool Hot Foods First: Never place large, hot pots of food directly into the refrigerator. Let them cool on the counter first to reduce the thermal load on the appliance.
When to Call a Professional
While the three main issues—coils, gaskets, and fans—are very DIY-friendly, there are times when you must call a certified technician. If you have cleaned the coils, verified the gasket is sealing, and confirmed the evaporator fan is working, but the problem persists, it's time for a pro. This is especially true if you suspect a defrost system problem (the evaporator coils are a solid block of ice that returns quickly after a manual defrost) or a sealed system/refrigerant issue. A refrigerant leak is not a DIY repair; it requires specialized equipment to handle, recover, and recharge the refrigerant and is regulated by the EPA. Signs of a sealed system problem include an oily residue around the compressor or coils, or a compressor that is either dead silent or clicks on and off every few seconds. In these scenarios, a professional diagnostic is the safest and most effective next step to avoid further damage and unnecessary expense. '''
What should this project cost?
Enter your project details for a realistic cost range before you call anyone.
Cost depends heavily on which system turns out to be the source.
- Regional adjustment
- National average
- Labor share (typical)
- ~$1,620
- Quotes to collect
- 3 written estimates
Educational estimate based on national averages — not a binding quote. Always confirm with written local estimates.
Fixly Project Decision Box
- DIY difficulty
- Advanced
- Estimated time
- Homeowner checks 20–30 minutes
- Cost level
- Moderate
Main tools / materials
- Clean air filter
- Garden hose for condenser coils
- Shop vac for the condensate line
When to stop and call a pro
- Burning smell, smoke, or a tripping breaker
- Refrigerant lines iced over or hissing
- Any work inside the sealed refrigerant circuit (EPA-licensed only)
- Gas smell near a furnace — leave and call the utility
Need professional help?
Find an HVAC Pro Near YouGet the print-ready PDF of this guide
A clean, ad-free, printable version you can keep on your phone or pin to the workshop wall. Free with a FixlyGuide account.
- Print-optimized layout
- Tools, materials & every step included
- Saved to your account
Frequently asked questions
Why is my freezer cold but the fridge is warm?+
This classic symptom almost always points to an airflow problem. The cold air is being generated in the freezer but isn't being moved to the refrigerator section. The most likely causes are a failed evaporator fan motor, an air duct blocked by ice (due to a defrost system failure), or a food item physically obstructing the vent between the two compartments.
How often should I clean my refrigerator's condenser coils?+
For most households, cleaning the condenser coils once every 12 months is sufficient. However, if you have pets that shed heavily, or if your kitchen is particularly prone to dust, you should increase the frequency to every 6 months to ensure optimal performance.
Can I fix a refrigerant leak in my fridge myself?+
No, you absolutely cannot. Refrigerant is a controlled chemical, and handling it requires EPA certification and specialized vacuum pumps and gauges. If you suspect a leak, it is a repair that must be handled by a qualified and certified appliance repair technician.
What is the black, fuzzy stuff all over my refrigerator coils?+
That is a completely normal, albeit performance-killing, accumulation of household dust, lint, dirt, and pet hair. It's drawn in by the condenser fan and sticks to the coils. This buildup is precisely why regular cleaning is so critical for your refrigerator's health.
Discussion
Loading comments…