Tools & materials you'll need
Affiliate linksAs an Amazon Associate FixlyGuide earns from qualifying purchases — at no extra cost to you. Prices and availability are accurate as of publication and subject to change.
Quick Answer
Rotting soffit is primarily caused by prolonged moisture exposure, often stemming from clogged gutters, ice dams, or roof leaks that direct water into the eaves. Early detection is crucial, as delayed repair can lead to extensive rot, pest entry, and compromised structural integrity of your roofline. Repairing involves identifying and addressing the moisture source, then carefully removing and replacing the damaged soffit sections, ensuring proper ventilation is restored to prevent future issues.
The Problem
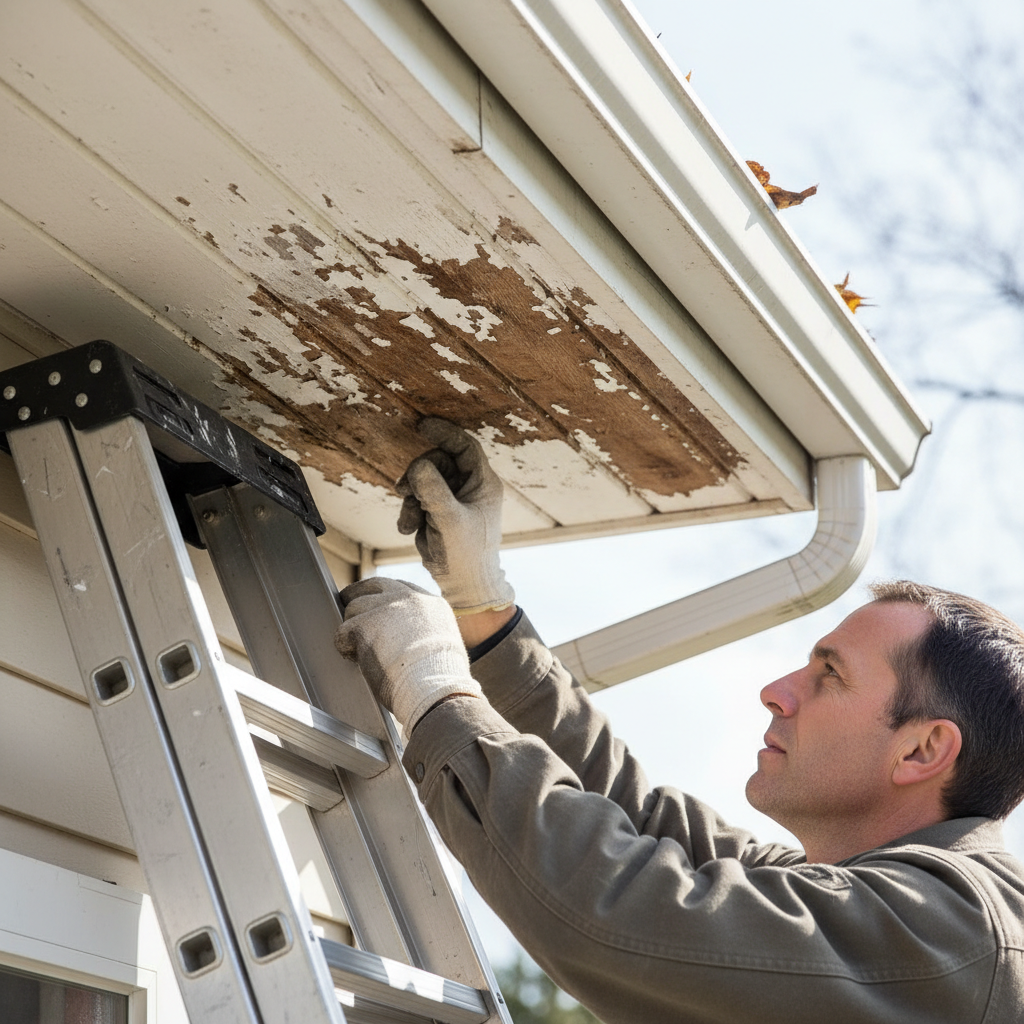
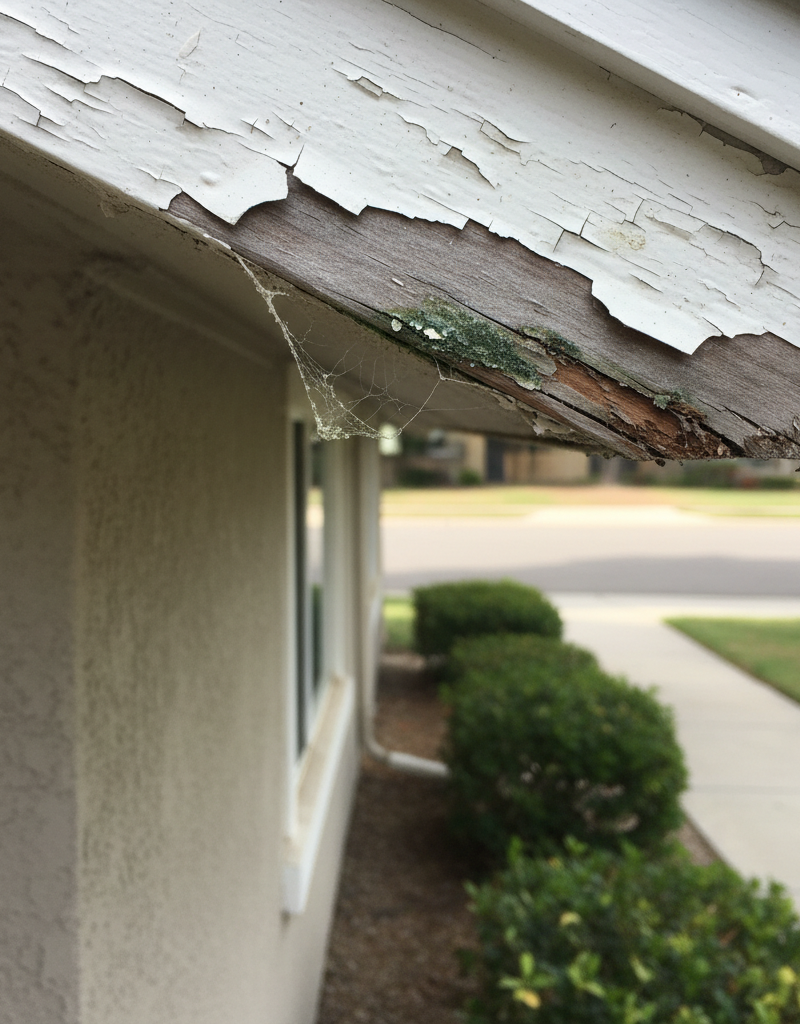
Many homeowners overlook their soffit until it's too late. The soffit, the underside of your roof's eaves, plays a critical role in your home's health. It provides an essential barrier against pests, directs moisture away from the fascia and siding, and, crucially, facilitates attic ventilation. When soffit begins to rot, it's a clear indicator of a deeper moisture problem. This might be a consequence of overflowing gutters, compromised roof flashing, or even excessive condensation in the attic due to poor ventilation. Left unaddressed, rotting soffit is more than just an unsightly blemish; it becomes a direct ingress point for rodents, insects, and even birds into your attic. It can also lead to widespread wood rot that travels up the eaves, damaging fascia and rafters, compromising the structural integrity of your roof structure, and potentially leading to costly interior water damage and mold growth within your walls.
How It Works
To understand why soffit rots, it's essential to grasp its purpose and typical construction. Soffit panels are typically made from wood, vinyl, or aluminum, and they fit into a channel or J-channel along the house wall and are nailed to the fascia board. Many soffits, especially those made of vinyl or aluminum, are perforated or vented. These vents are vital for attic ventilation. Warm, moist air rises in your home and gets trapped in the attic. Without proper ventilation, this air condenses, leading to moisture buildup. Vented soffits allow cooler, drier air from outside to enter the attic, pushing the warm, moist air out through ridge vents or gable vents. This continuous airflow prevents heat buildup in summer, reduces ice dam formation in winter, and, most importantly, keeps the attic dry. When gutters overflow or a roof leak goes unnoticed, water can wick behind the fascia and saturate the soffit material. Wood soffit, being organic, is particularly susceptible to rot when persistently wet. Even vinyl or aluminum soffits, while not rotting themselves, can trap moisture against the underlying wood framing, leading to rot in the sub-structure. The delicate balance of moisture management and airflow is easily disrupted, and a rotting soffit is often the messenger signaling that this balance has been lost.
Step-by-Step Fix
1. Prioritize Safety — Never work on a ladder alone. Ensure your ladder is stable on a firm, level surface. Wear long sleeves, gloves, and eye protection, especially when dealing with old paint, mold, or deteriorated wood. Be mindful of overhead power lines.
2. Locate the Moisture Source — Don't just fix the symptom. Before replacing any soffit, you must find and repair what caused the rot. This is often clogged or overflowing gutters, a damaged downspout, compromised roof flashing around chimneys or skylights, a leaking roof shingle, or an issue with attic ventilation. Look for water stains higher up on the fascia or foundation. Check your attic for signs of leaks or excessive condensation.
- If your gutters are overflowing: Clean them thoroughly. Repair any sagging sections or loose downspouts.
- If you suspect a roof leak: Visually inspect shingles for damage, look at flashing around penetrations. If unsure, consider calling a roofing professional.
- If you find excessive attic condensation: Ensure soffit vents aren't blocked by insulation. Consider if you have adequate attic ventilation (e.g., adding a ridge vent if you only have soffit vents).
3. Prepare the Work Area — Lay down a tarp or drop cloth beneath the damaged area to catch debris. Gather all your tools and materials before climbing the ladder. If dealing with extensive rot or mold, a respirator is highly recommended.
4. Carefully Remove Damaged Soffit — Using a pry bar and hammer, gently pry away the rotten soffit sections. Work slowly to avoid damaging adjacent, healthy sections or the underlying support framing. If the soffit is vinyl, you may need a zip tool to unhook panels. For wood, trace the rotten area with a pencil and use a utility knife or oscillating tool to make clean cuts, then pry it out. Save a piece of the old soffit if possible for matching purposes.
- Safety Note: Be extremely careful when using sharp tools overhead. Ensure a secure grip on the ladder.
5. Inspect and Repair Underlying Framing — Once the soffit is off, inspect the sub-fascia board, look for water stains on and the rafter tails and any other visible framing. If these structural components are also rotted, they must be repaired or replaced. Use a wood hardener on minor soft spots; for significant rot, cut out the damaged section and sister new wood alongside for support. Use exterior-grade wood screws for any repairs.
6. Clean and Dry the Area — Thoroughly clean away any debris, mold, or rotten wood particles. Allow the area to dry completely. A fan can help speed up drying time if weather permits. Treat any mold with a bleach solution (1 part bleach to 10 parts water) or a commercial mold remover.
7. Cut and Install New Soffit — Measure the opening precisely. Cut your new soffit material to size. For vinyl or aluminum, use tin snips. For wood, use a saw. Ensure any new wood soffit is exterior grade (e.g., treated lumber or cedar) and primed on all sides before installation. For vented soffit, make sure the vents are clear and unobstructed. Fasten the new soffit securely using appropriate fasteners — galvanic galvanized nails or screws for wood, color-matched screws or staples for vinyl/aluminum.
- Important Tip: If replacing wood soffit, consider upgrading to a vented vinyl or aluminum soffit system for improved durability and ventilation benefits, especially if your original soffit was unvented.
8. Seal and Finish — For wood soffit, caulk any seams with exterior-grade caulk, then prime and paint to match your existing trim. For vinyl or aluminum, ensure all J-channels and fascia trim pieces are securely in place and properly aligned. This creates a weather-tight seal and a finished look.
9. Re-evaluate Gutters and Drainage — Re-inspect your gutters and downspouts. Ensure they are clean, properly sloped, and securely fastened, directing water well away from your foundation. Consider adding gutter guards to prevent future clogs.
10. Monitor for Future Issues — After the repair, periodically inspect the area, especially after heavy rains. Look for any signs of new discoloration, moisture, or pest activity. Address new problems promptly to prevent recurrence.
Common Causes
- Clogged or Damaged Gutters: The primary culprit. When gutters overflow, water cascades over the edge, drenching the fascia and soffit, leading to saturation and rot.
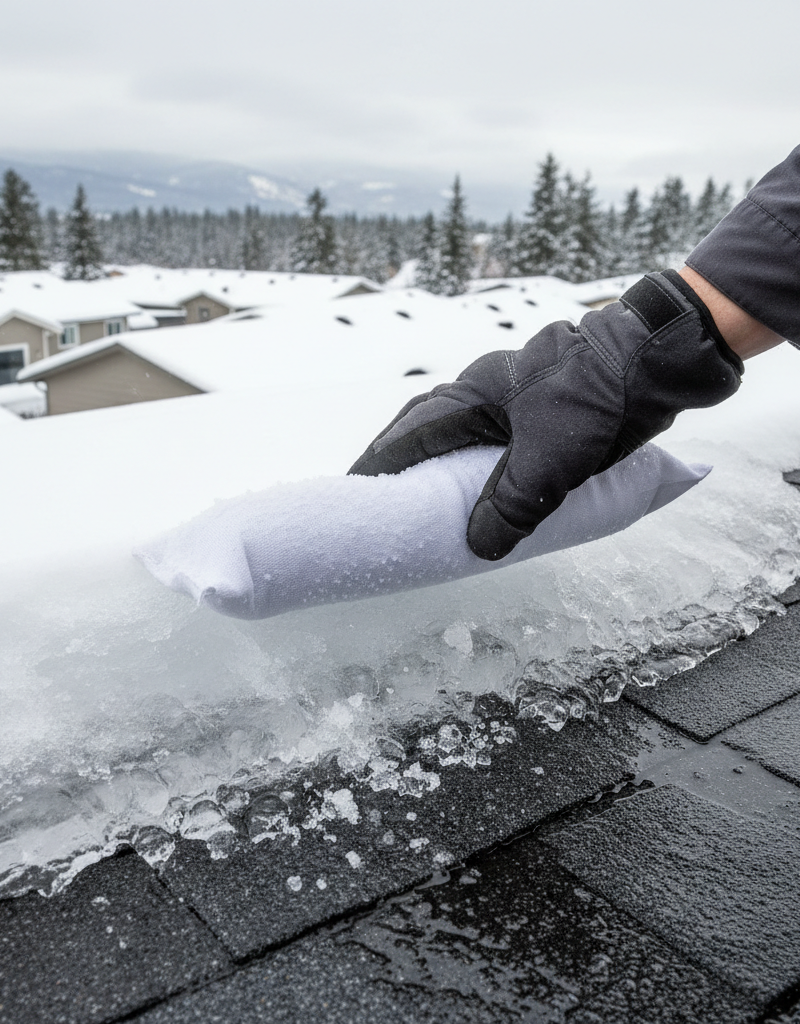
- Ice Dams: In colder climates, ice dams can form on roof edges, preventing melted snow from draining. Water backs up under shingles and into the eaves, soaking the soffit and fascia.
- Roof Leaks or Damaged Flashing: Damaged or improperly installed roof shingles, or deteriorated flashing around chimneys, skylights, or vents, can allow water to seep directly into the roof structure and down to the soffit.
- Inadequate Attic Ventilation: Poor ventilation traps warm, moist air in the attic. This air condensates on the underside of the roof sheathing and rafters, leading to chronic moisture issues that can penetrate the soffit.
- Missing or Damaged Drip Edge: The drip edge helps direct water off the roof and into the gutters. If it's missing or compromised, water can run down the fascia board and behind the soffit.
- Physical Damage: Impact from storms, falling branches, or even pest activity can create openings in the soffit, allowing direct moisture intrusion.
Common Mistakes
- Ignoring the Root Cause: The biggest mistake! Simply replacing rotten soffit without addressing the source of the moisture guarantees the problem will return. Always identify and fix the underlying issue first.
- Skipping Underlying Framing Inspection: Assuming the rot is surface-level can be costly. The structural components beneath the soffit (sub-fascia, rafter tails) may also be compromised and must be repaired for a lasting fix.
- Using Non-Exterior Grade Materials: Replacing exterior wood with interior-grade lumber guarantees premature failure. Always use pressure-treated, cedar, or other exterior-rated wood, or switch to vinyl/aluminum soffit materials.
- Blocking Vents: If your soffit is designed with vents, ensure they remain unobstructed by insulation in the attic or by paint/caulk during the repair. Proper airflow is essential.
- Improper Fastening: Using insufficient or incorrect fasteners can lead to the new soffit detaching or allowing water to penetrate. Use corrosion-resistant fasteners specific to your soffit material.
- Poor Ladder Safety: Falling from a ladder is a serious risk. Always follow safety guidelines: three points of contact, proper extension, steady ground, and never overreach.
Cost & Time Breakdown
| Task | DIY Cost | Pro Cost | Time |
|---|---|---|---|
| Materials (Soffit, fasteners, caulk, paint) | $50–$200 | Included in labor | 1–3 hours |
| Tools (if not owned) | $50–$150 | Included in labor | N/A |
| Labor (prep, remove, install) | 2–6 hours | $300–$800 | 4–8 hours (total) |
| Gutter Cleaning/Repair (if needed) | $0–$50 | $75–$250 | 1–2 hours |
| Minor Roof Leak Repair (if needed) | $20–$100 | $200–$600 | 1–3 hours |
Tips & Prevention
- Regular Gutter Cleaning: Clean your gutters twice a year – in spring and fall – to prevent clogs and overflows. Consider installing gutter guards if trees are abundant.
- Inspect Your Roof Annually: Walk around your house or use binoculars to inspect shingles, flashing, and the drip edge for any signs of damage or disrepair. Address small issues before they become big ones.
- Check Attic Ventilation: Ensure that your soffit vents are clear of insulation from the attic side. Use baffles if necessary to maintain a clear airflow path from the soffit to the ridge vent.
- Proper Drainage: Ensure downspouts extend at least 5 feet away from your foundation to prevent water from pooling near the house and wicking back up into the eaves.
- Seal Exterior Gaps: Periodically inspect siding and trim where it meets the soffit and fascia. Re-caulk any failing seals to prevent water intrusion.
- Consider Upgrading Materials: If you have old, unvented wood soffit, consider replacing it with modern, vented vinyl or aluminum soffit. These materials are more durable, require less maintenance, and improve attic ventilation.
When to Call a Professional
While identifying and repairing minor soffit rot is a feasible DIY project, certain situations warrant calling a licensed professional. If you suspect extensive structural damage to your rafter tails or sub-fascia, especially if it extends beyond a small section, a professional carpenter or roofer should be consulted. Similarly, if the moisture source is difficult to pinpoint—such as a persistent or hidden roof leak, or complex attic condensation issues—a qualified roofing contractor can perform a thorough diagnostic. Any work involving significant ladder heights that make you uncomfortable or feel unsafe should prompt a call to a professional. Finally, if you discover mold growth that covers a large area or appears to be deeply embedded, a mold remediation specialist may be necessary to ensure safe and complete removal, protecting both your home and your health.
Related Articles
Keep troubleshooting with these hand-picked guides from FixlyGuide:
- The #1 Mistake When Fixing Baseboards That Pull Away From Walls — Discover the crucial mistake homeowners make when reattaching baseboards and how to properly secure them for a lasting fix.
- The #1 Hidden Culprit Behind Your Whole-House Low Water Pressure (It's Not Your City!) — Discover the most common, often overlooked cause of low water pressure throughout your entire home and how to fix it yourself.
- The Tiny Gap That Destroys Your Bathtub's Structure (and How to Seal It) — Recaulking your bathtub correctly is crucial to prevent water damage, mold growth, and structural issues in your bathroom.
- Is Your Roofline Hiding a $10,000 Secret? 7 Warnings Your Soffit & Fascia Are Failing — Discover the critical signs of soffit and fascia damage that could indicate widespread problems and how to properly address them before the…
- The 7 Critical Spring Home Tasks Most Homeowners Forget (And Why You Shouldn't) — Don’t just prune bushes; tackle these often-overlooked spring maintenance items to protect your home’s value and prevent costly repairs.
- The #1 Mistake Homeowners Make When Caulking a Bathroom Sink (And How to Fix It) — Discover the most common caulk mistake homeowners make around bathroom sinks and follow simple steps to achieve a lasting, watertight seal.
Recommended for DIYers & woodworkers
Sponsored
The Top 20 Tools for Workshops of Any Budget
No stationary machines or power tools required — plus 3 fundamental tools that can't be bought at any price.
Get the free guide
Ted's Woodworking — The #1 Woodworking Resource
Detailed instructions, dimensioned drawings, materials & cutting lists, and 3D schematics for every skill level.
See the plansSponsored: links above are affiliate links. FixlyGuide may earn a commission on qualifying purchases — at no extra cost to you.
Frequently asked questions
What causes soffit to rot?+
Soffit rot is almost always caused by prolonged moisture exposure. Common sources include clogged or overflowing gutters, leaky roofs, ice dams, or inadequate attic ventilation leading to condensation buildup.
Can I replace just a section of rotten soffit?+
Yes, for minor damage, you can often cut out and replace only the affected section of soffit, provided the underlying framing is sound. Ensure you match the new material to the existing soffit for a cohesive look.
How do I know if my soffit is vented?+
To check if your soffit is vented, look for small perforations or slots along the panels. If it's solid, unperforated material, it likely isn't vented. Vented soffits are crucial for proper attic airflow.
What tools do I need to repair rotten soffit?+
Basic tools typically include a ladder, pry bar, hammer, utility knife, tape measure, saw (for wood), tin snips (for vinyl/aluminum), a drill, and personal protective equipment like gloves and eye protection.
When should I call a professional for soffit repair?+
You should call a professional if you suspect extensive structural damage to your rafter tails or sub-fascia, if the moisture source is hard to find, if the work involves significant ladder heights you're uncomfortable with, or if large areas of mold are present.

Discussion
Loading comments…