
Tools & materials you'll need
Affiliate linksAs an Amazon Associate FixlyGuide earns from qualifying purchases — at no extra cost to you. Prices and availability are accurate as of publication and subject to change.
Quick Answer
For homes constructed before 1978, the presence of lead-based paint is a strong possibility, even if later paint layers cover it. The primary danger arises when this paint is disturbed during renovation or repair tasks like sanding, scraping, or drilling, which can release microscopic lead dust into the air. This dust is easily inhaled or ingested, leading to severe health problems, especially in children. The safest approach is to test for lead paint, isolate your work area meticulously, and employ specific safety protocols, including wearing a respirator, to minimize exposure.
The Problem
Lead paint isn't just a historical curiosity; it remains a significant health hazard in millions of American homes. While intact lead paint, especially if covered by newer, non-lead layers, presents a relatively low risk, the moment that paint is disturbed, the danger escalates dramatically. Imagine a microscopic cloud of invisible, toxic dust released into your breathing space. This isn't hyperbole; it's the reality of unsafe lead paint removal. This dust settles on surfaces, can be tracked throughout the home, and is particularly harmful to children and pregnant women. Children are more susceptible because their developing bodies absorb lead more readily, and even low levels can cause irreversible neurological damage, learning disabilities, and behavioral problems. Adults can experience issues such as high blood pressure, joint pain, memory difficulties, and reproductive problems. The problem isn't going away on its own; many homes built before 1978 still harbor these hidden dangers, and DIY renovations often inadvertently create hazardous lead exposures.
How It Works
Lead was a common additive to paint before 1978, primarily used to speed up drying, increase durability, resist moisture, and enhance brightness. When a painted surface containing lead is disturbed—through activities like aggressive cleaning, scraping away old paint, sanding, drilling holes, or even the friction of opening and closing an old window—tiny lead particles are released. These particles can be too small to see with the naked eye but are easily inhaled. Once in the body, lead mimics other essential minerals like calcium, and can be absorbed into the bloodstream, bones, and organs. It doesn't get excreted quickly; instead, it accumulates over time, leading to chronic poisoning. Children are particularly vulnerable because their hand-to-mouth activity is frequent, and their digestive systems absorb lead more efficiently than adults'. Furthermore, the lead dust can contaminate soil around the house, especially near exteriors where old paint has chipped or peeled, creating an ongoing exposure risk for children playing outdoors. The process isn't always obvious; a subtle "sweet" metallic taste might be reported, but more often, there are no immediate signs of exposure until health problems manifest much later, making prevention absolutely critical.
Step-by-Step Fix
A Note on Safety: Always prioritize safety. If you are unsure at any point, or if dealing with large areas of lead paint, consult with a certified lead abatement professional. Never dry sand, dry scrape, or use heat guns on lead paint without proper safety measures and containment. Children and pregnant women should not be present in the house during lead paint disturbance activities.
- Assess Your Home's Age and Identify Risk Areas – Start by determining if your home was built before 1978. If so, assume lead paint is present on interior and exterior painted surfaces. Focus on areas prone to wear and tear, like windows, doors, baseboards, and areas with chipping or peeling paint. These are the most common sources of lead dust.
- If your home was built after 1978: Lead paint is highly unlikely to be an issue, though it's always wise to be cautious with any unknown paint.
- Test for Lead Presence – Invest in a reliable lead test kit. While qualitative, these kits can give you a good indication. Follow the manufacturer's instructions precisely. For a definitive answer, consider professional lead testing, especially before major renovations.
- Tools: EPA-recognized lead test kit (e.g., 3M LeadCheck Swabs)
- If the test is positive: Proceed with extreme caution and follow all subsequent steps.
- Plan Your Project and Control the Work Area – Before starting any work, strategize to minimize disturbance. Can you encapsulate or cover the lead paint instead of removing it? If removal is unavoidable, plan for meticulous containment. Clear the room of all furniture, rugs, and anything that can absorb dust. Seal off the work area completely from the rest of the house using heavy-duty plastic sheeting and painter's tape. Turn off forced-air heating and air conditioning to prevent dust circulation.
- Materials: 6 mil plastic sheeting, painter's tape, zippered plastic drop cloths for entry/exit
- Cover Floors and Surfaces – Lay down two layers of 6 mil plastic sheeting on the floor. Extend it at least two feet beyond the immediate work area. Secure the edges with painter's tape to the baseboards. This creates a barrier to catch any falling paint chips or dust.
- Materials: Additional 6 mil plastic sheeting
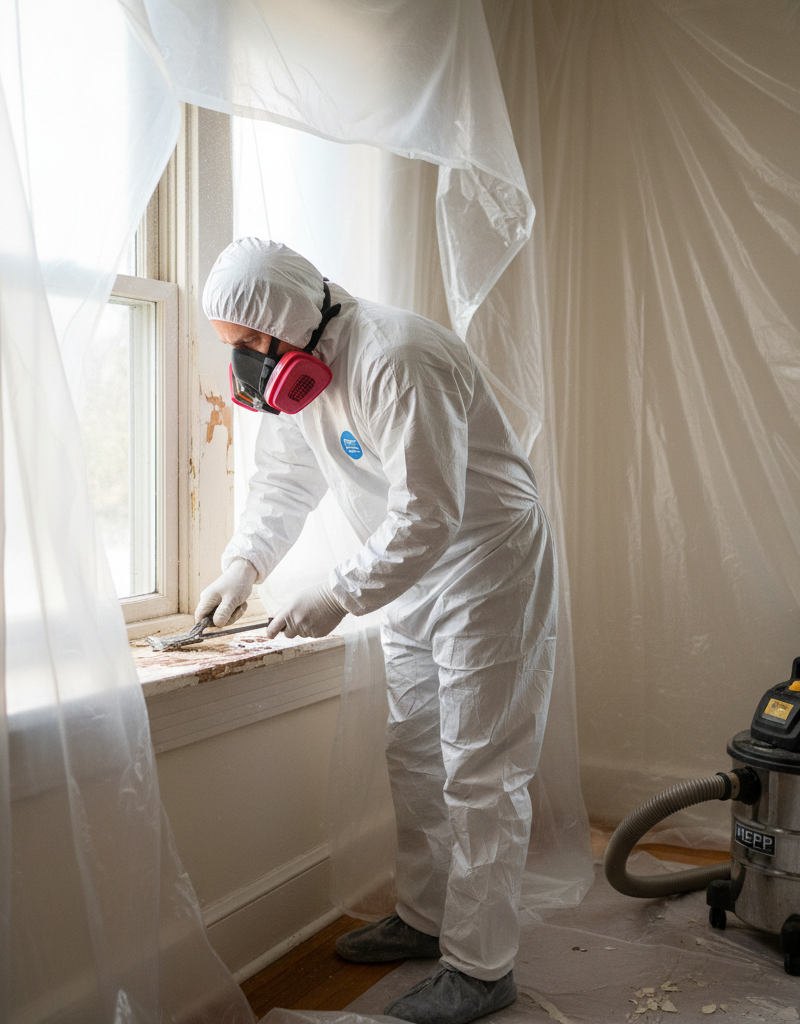
- Wear Proper Personal Protective Equipment (PPE) – This is non-negotiable for any lead paint work. Don a disposable full-body suit with a hood, shoe covers, a NIOSH-approved respirator (at least N100 or P100), safety glasses, and durable disposable gloves. Change gloves frequently, especially when touching anything outside the immediate work area.
- Tools: NIOSH-approved N100 or P100 respirator, disposable full-body suit, safety glasses, disposable gloves, disposable shoe covers.
- Use Wet Methods for Paint Removal – Wet methods significantly reduce airborne dust. Lightly mist the surface with water before scraping or sanding. Use a liquid paint stripper (follow manufacturer safety guidelines carefully, ensuring adequate ventilation and skin protection) instead of dry methods. Keep surfaces damp during the entire process.
- Tools: Spray bottle, putty knife/scraper, chemical-resistant gloves (if using strippers), ventilation fan.
- If dry methods are absolutely necessary (e.g., drilling): Use a HEPA-filtered vacuum attachment directly at the source of the dust generation.
- Clean Up Meticulously – After the work, clean the area thoroughly. Mist surfaces lightly with water to prevent dust from becoming airborne, then use a HEPA-filtered vacuum for all dust and debris. Do NOT use a regular shop vac or household vacuum; they will spread lead dust. Wet-wipe all surfaces repeatedly with heavy-duty cleaning wipes or disposable paper towels and a lead-specific cleaning solution (e.g., a solution of TSP, though verify local regulations as TSP can be restricted, or a dedicated lead-cleaning product). Dispose of all cleaning materials as hazardous waste.
- Tools: HEPA-filtered vacuum with proper attachments, large disposal bags, heavy-duty cleaning wipes or disposable paper towels, lead-specific cleaning solution.
- Proper Waste Disposal – Bag all contaminated debris, plastic sheeting, and used PPE in heavy-duty plastic bags. Seal them tightly and label them clearly as "Lead-Contaminated Waste." Contact your local waste management facility or health department for specific instructions on hazardous waste disposal in your area. Do not put lead waste in regular household trash.
Common Causes
Lead paint issues don
Related Articles
Keep troubleshooting with these hand-picked guides from FixlyGuide:
- 7 Inspection Red Flags That Secretly Signal a $20,000 Bill — Don't let your dream home become a money pit. Many buyers and even some inspectors overlook subtle home inspection red flags that lead to f…
- The Secret to Endless Hot Showers? It's Not Your Water Heater's Age — Inconsistent hot water or no hot water at all often points to a single, often overlooked culprit: the thermostat. Understanding its role is…
- The 12 Checks That Prevent 80% of Costly Home Repairs — Don't wait for a disaster. Our comprehensive monthly home maintenance checklist reveals the surprising, simple tasks that catch small issue…
- The Hidden Truth About — Uncover the surprising risks of buying used furniture and appliances, and learn essential inspection tips to protect your home and wallet.
- The #1 Chainsaw Mistake That Wrecks Your Yard (and Your Back) — Avoid common chainsaw errors that lead to frustration, damage, and unnecessary physical strain.
- The Secret Reason Your Thermostat Lies (and 5 Fixes That Actually Work) — If your thermostat isn't reaching its set temperature, understanding the underlying cause is key to a comfortable home and lower energy bil…
Get the print-ready PDF of this guide
A clean, ad-free, printable version you can keep on your phone or pin to the workshop wall. Free with a FixlyGuide account.
- Print-optimized layout
- Tools, materials & every step included
- Saved to your account
This article was independently written by FixlyGuide based on the source topic.
Frequently asked questions
How do I know if my home has lead paint?+
If your home was built before 1978, assume lead paint is present. The most reliable way to confirm is through an EPA-recognized lead test kit or by hiring a certified lead inspector for professional testing.
Is it safe to paint over lead paint?+
Yes, encapsulating intact lead paint by painting over it with a new layer of non-lead paint is often the safest and most recommended method, as long as the underlying lead paint is not chipping, peeling, or cracking. This prevents the release of lead dust.
What are the health risks of lead paint exposure?+
Lead exposure can cause serious health problems, especially for children and pregnant women. Risks include developmental delays, learning difficulties, behavioral problems, kidney damage, high blood pressure, and reproductive issues. Even low levels of lead can have harmful effects.
Can I remove lead paint myself?+
While small, intact areas can sometimes be managed with extreme caution using wet methods and proper PPE, it's generally recommended to hire a certified lead abatement professional for significant lead paint removal to ensure safety and compliance with regulations.


Discussion
Loading comments…