
Tools & materials you'll need
Affiliate linksAs an Amazon Associate FixlyGuide earns from qualifying purchases — at no extra cost to you. Prices and availability are accurate as of publication and subject to change.
Quick Answer
For truly professional-looking, factory-smooth cabinet finishes, a paint sprayer, specifically an HVLP (High Volume Low Pressure) model, is your secret weapon. Brushes and rollers, no matter how high-quality, will always leave some texture or brush marks. A sprayer atomizes the paint into a fine mist, applying even, thin coats that self-level perfectly, resulting in a durable, glass-smooth surface far superior to traditional methods.
The Problem
You've spent hours meticulously sanding, priming, and carefully applying paint to your kitchen cabinets. You've used expensive, self-leveling paint, hoping for that seamless, professional look. Yet, after all that effort, you're left with visible brush strokes, roller stipple, or an uneven texture that screams "DIY project" rather than "designer kitchen." The frustration is real: why bother with all the prep if the final finish still looks amateurish? The core issue lies in the application method, not necessarily your skill with a brush. Traditional tools simply can't achieve the ultra-fine, even atomization of paint necessary for a truly smooth, durable surface.
How It Works
Paint sprayers, in their simplest form, atomize liquid paint into a fine mist, propelling it onto a surface using compressed air or high pressure. There are three main types relevant to homeowners: compressed air (conventional), HVLP, and airless.
Compressed Air Sprayers use a separate air compressor to atomize the paint. They're good for fine finishes but can produce a lot of overspray, wasting paint and requiring extensive masking.
HVLP (High Volume Low Pressure) Sprayers are the gold standard for cabinet painting. They use a contained turbine to generate a high volume of air at low pressure, effectively atomizing the paint and gently pushing it onto the surface. The low pressure significantly reduces overspray (often by 50-70% compared to conventional sprayers), making them more efficient with paint and easier to control, especially indoors. The fine atomization creates incredibly smooth, even coats, making them ideal for detailed work like cabinets, trim, and furniture. Most HVLP systems have multiple stages (2-stage, 3-stage, or 4-stage turbines), with higher stages offering more power and finer atomization for thicker paints or faster application.
Airless Sprayers use a high-pressure pump to force paint through a small tip, creating a fan-shaped spray without the need for an air compressor. These are powerful and fast, excellent for large surfaces like walls, fences, or exterior siding. However, their high pressure can lead to significant overspray, a heavier paint film, and can be too aggressive for the delicate, fine finish required for cabinets. While some smaller airless units are available for fine finish work, HVLP typically offers finer control and less paint waste for this specific application.
For cabinet painting, the HVLP's ability to delicately and precisely apply thin, even coats with minimal overspray is paramount. This method allows for multiple thin coats, building up a durable, flawless finish without drips or runs, and crucially, without any brush or roller marks.
Step-by-Step Fix
Once you've decided to use a sprayer for that factory finish, here's how to tackle your cabinets.
1. Prep Your Cabinets Like a Pro – Preparation is 80% of the job.
- Remove all doors, drawer fronts, and hardware. Label everything meticulously so you know exactly where it goes later.
- Clean all surfaces thoroughly with a grease-cutting cleaner (like TSP substitute) to remove any accumulated grime, cooking oils, and dirt. Rinse with clean water and let dry completely. Any residue will compromise paint adhesion.
- Repair any dings, scratches, or imperfections with wood filler. Let it dry, then sand smooth with 180-grit sandpaper.
2. Sand for Adhesion, Not Just Smoothness – Key to long-lasting results.
- Lightly sand all surfaces (doors, drawer fronts, cabinet boxes) with 180-220 grit sandpaper. The goal isn't to remove the old finish entirely, but to scuff the surface, creating microscopic scratches for the primer to grip onto. Spend extra time on areas that will see a lot of handling.
- Use a tack cloth or vacuum with a brush attachment to remove all sanding dust. Dust is the enemy of a smooth finish.
3. Prime for Success – Don't skip this, especially with drastic color changes.
- Apply an excellent stain-blocking, adhesion-promoting primer designed for cabinets. Oil-based primers or high-quality water-based primers like Zinsser B-I-N Shellac-Base or Kilz Adhesion are highly recommended. Prime all cabinet boxes first, then move to doors and drawer fronts.
- Apply two thin coats of primer, allowing adequate dry time between coats according to the manufacturer's instructions. Scuff sand lightly with 220-320 grit sandpaper between primer coats for a smoother foundation, and always tack cloth to remove dust.
4. Set Up Your Spray Zone – Safety and cleanliness are paramount.
- Choose a well-ventilated area, ideally a garage or a dedicated spray booth, free from dust and debris. Cover everything you don't want painted with plastic sheeting and painter's tape (walls, floors, windows, appliances). This includes masking off the inside of your cabinet boxes that won't be painted.
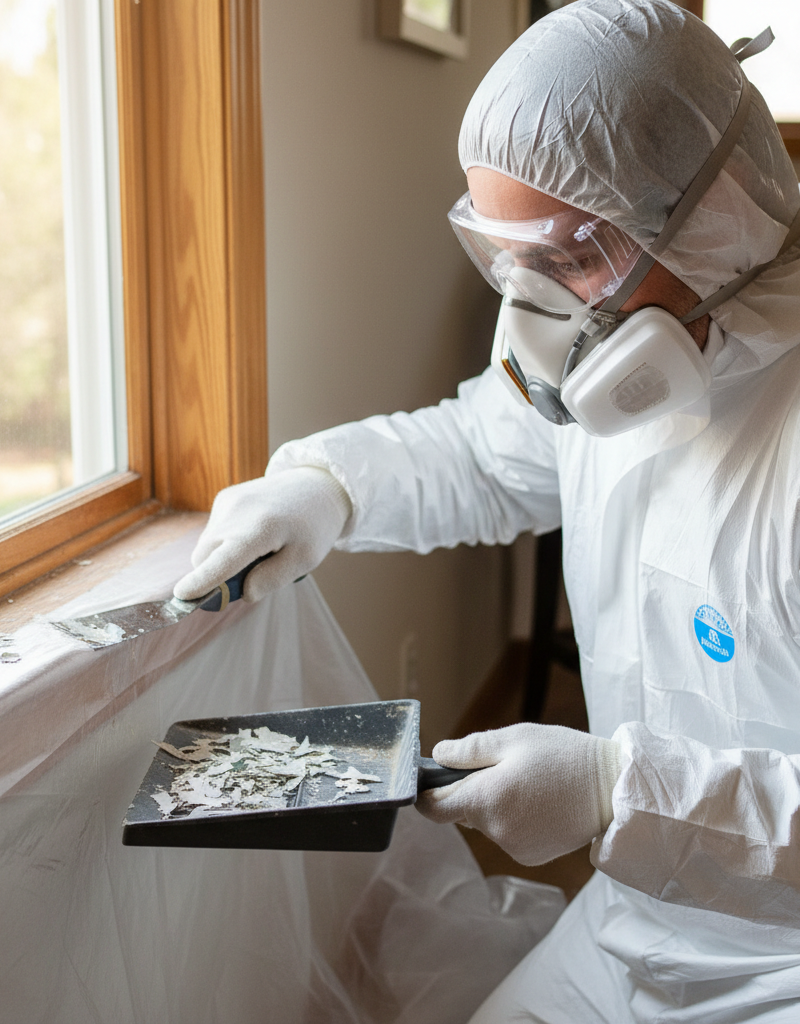
- Elevate doors and drawer fronts on saw horses with painter's pyramids or a dedicated drying rack system. This allows you to spray edges easily and prevents sticking. Wear a respirator, safety glasses, and gloves.
- If this isn't possible: If spraying indoors, enclose the area as much as possible with plastic sheeting to create a makeshift spray booth. Use box fans in windows to create negative pressure, pulling overspray out. However, ventilation with proper filtration is always best.
5. Dial in Your Sprayer (HVLP Recommended) – Crucial for avoiding drips and perfect atomization.
- Read your sprayer's manual! Every model is slightly different. Assemble the gun and fill the cup with your chosen cabinet paint (high-quality acrylic or oil-based enamel designed for cabinets is best). Follow paint manufacturer instructions for thinning, if needed. Many high-quality cabinet paints are thick and benefit from 5-10% thinning with water (for water-based) or appropriate thinner (for oil-based) to achieve optimal atomization. Use a viscosity cup if your sprayer kit includes one. Aim for the consistency of thin cream.
- Adjust the air pressure (if applicable) and material flow on your sprayer. Start with a test piece of cardboard or scrap wood. You want a consistent, even fan pattern with fine atomization and no spitting or sputtering. Adjust fan size and paint flow until satisfied. Aim for passes that overlap 50%.
6. Spray Thin, Even Coats – Patience is a virtue here.
- Hold the gun 6-10 inches from the surface, maintaining a consistent distance. Move your arm, not just your wrist, keeping the gun perpendicular to the surface at all times. This prevents uneven coverage at the edges of your spray pattern.
- Start spraying off the workpiece, move across, and release the trigger off the workpiece. This avoids paint build-up at the start and end of your passes. Apply very thin, even coats.
- Apply two to three thin finish coats. Allow each coat to dry to a tacky, non-transferable state (often 1-2 hours) before applying the next. Refer to your paint's recoat window. Avoid heavy coats that will drip or run. You are building up layers, not trying to achieve full coverage in one pass.
- If you get a run or drip: Stop immediately. Let it cure completely (even overnight). Then, carefully sand out the imperfection with a small block and 320-grit sandpaper, feathering the edges. Clean, then re-spray that area or the entire piece if necessary.
7. Curing for Durability – The most overlooked step.
- Once all coats are applied, let the cabinet doors and drawer fronts cure in your clean spray environment for significantly longer than the
Related Articles
Keep troubleshooting with these hand-picked guides from FixlyGuide:
- The 3 Critical Mistakes Wrecking Your Lawn (And the Liquid Fix) — Unlock the secret to a verdant lawn by learning how to avoid critical fertilization errors and choosing the right liquid solution.
- The #1 Mistake Homeowners Make with Pellet Grills (and How to Fix It) — Unpredictable temperature swings are the most common and frustrating issue for pellet grill owners, often caused by maintenance oversights.
- The Secret to Lush Raised Beds? It's Not Just About How You Water — Smart irrigation for raised garden beds isn't just about automation; it's about delivering the right amount of water precisely when your pl…
- The 6 Cleaning Secrets Hiding in Your Power Drill (Plus Attachments to Master) — Your power drill isn't just for DIY projects; with the right attachments, it's a powerful and efficient cleaning tool for tackling tough gr…
- The 3 Crucial Mistakes That Ruin Wall Stripes (And How to Fix Them) — Achieving crisp, professional-looking painted stripes on a wall is a rewarding DIY project, but it's easy to make common mistakes that lead…
- The #1 Mistake Homeowners Make When Testing Soil pH (And How to Get It Right Every Time) — Learn the critical mistake most homeowners make when testing lawn soil pH and how to perform accurate tests at home for a healthier, greene…
This article was independently written by FixlyGuide based on the source topic.
Frequently asked questions
Can I use a regular paint roller for a smooth cabinet finish?+
While specialist foam rollers can minimize texture, they will still leave a slight stipple or orange peel effect compared to the perfectly smooth finish achieved with a paint sprayer. For a truly factory-like result, a sprayer is superior.
What's the best type of paint sprayer for cabinets?+
An HVLP (High Volume Low Pressure) sprayer is generally recommended for cabinets. It atomizes paint finely, provides excellent control, and significantly reduces overspray compared to airless or conventional sprayers, making it ideal for detailed work and indoor use.
How do I prevent drips when spraying cabinets?+
Prevent drips by applying multiple thin coats rather than one thick coat. Maintain a consistent distance from the surface (6-10 inches), keep the spray gun perpendicular, and move at an even pace. Proper paint thinning and sprayer settings are also crucial.
Do I need to thin paint for a sprayer?+
Many high-quality cabinet paints are quite thick and benefit from thinning to achieve optimal atomization and prevent clogging in an HVLP sprayer. Always refer to your paint and sprayer manufacturer's guidelines, typically aiming for a 5-10% thinning ratio with the appropriate solvent (water for water-based, mineral spirits for oil-based).
How long does cabinet paint need to cure?+
Paint often feels dry to the touch in hours, but it takes 7-30 days to fully cure and achieve maximum hardness and durability. Avoid heavy use or cleaning for at least the first week to prevent damage to the still-soft finish. Light use is generally acceptable after 24-48 hours, but handle with care.

Discussion
Loading comments…