
Tools & materials you'll need
Affiliate links- AmazonVoltage tester1 · For checking electrical circuits
- AmazonScrewdriver set1 set · Phillips and flathead
- AmazonAdjustable wrench1 · For plumbing fixtures
- AmazonUtility knife1 · For cutting insulation
- AmazonRespirator or dust mask1 · Essential for insulation
- AmazonSafety glasses1 · Protect eyes during work
As an Amazon Associate FixlyGuide earns from qualifying purchases — at no extra cost to you. Prices and availability are accurate as of publication and subject to change.
Quick Answer
Certain home upgrades aren't just about aesthetics; they're smart investments that start paying you back immediately through significant savings on utility bills and enhanced energy efficiency. Focus on improvements like smart thermostats for optimized heating and cooling, converting to LED lighting for drastic electricity reduction, installing low-flow plumbing fixtures to cut water usage, and ensuring proper attic insulation to prevent heat loss or gain. These changes offer a tangible return on investment, making your home more comfortable, sustainable, and cheaper to operate long before you ever consider putting it on the market.
The Problem
Many homeowners view home improvements solely through the lens of resale value or aesthetic appeal, often overlooking a critical category: upgrades that actively reduce monthly expenses and generate tangible savings from the moment they're installed. The continuous drain of high utility bills for heating, cooling, electricity, and water can significantly impact a household budget. The 'problem' isn't just about spending money on renovations; it's about missing the opportunity to invest in improvements that effectively pay for themselves over time, transforming your home from a cost center into a more financially efficient asset. Inefficient systems and poor insulation lead to wasted energy, money literally leaking out of your home, and an unnecessary environmental footprint.
How It Works
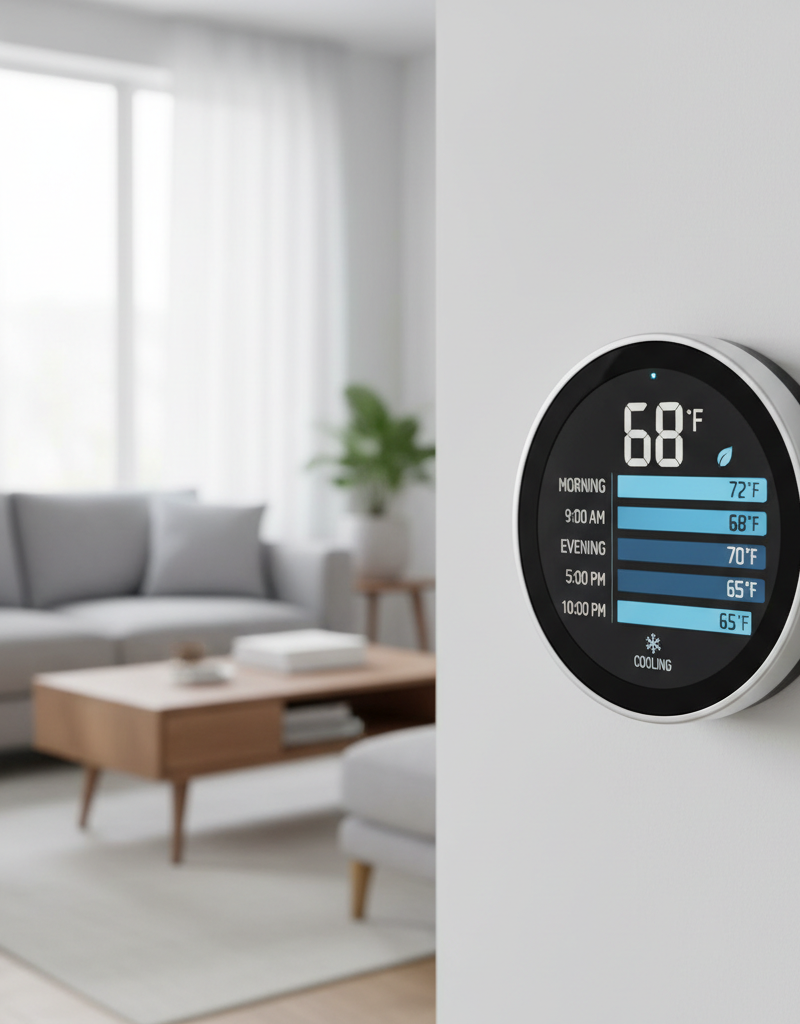
Understanding how these 'pay-you-back' upgrades function reveals their true value. Take smart thermostats as an example. Traditional thermostats simply maintain a set temperature. Smart thermostats, however, learn your habits, can be controlled remotely via apps, and often have features like geofencing (adjusting temperature when you leave or arrive), occupancy sensors, and energy usage reports. They optimize heating and cooling cycles, ensuring your HVAC system runs only when necessary, saving 10-15% on energy bills annually. This isn't just a convenience; it's a sophisticated system constantly working to reduce your energy consumption.
LED lighting conversions operate on a principle of far greater energy efficiency. Incandescent bulbs waste about 90% of their energy as heat, while CFLs contain mercury and have a warm-up period. LEDs, or Light Emitting Diodes, convert much more electricity directly into light, using 75-80% less energy than incandescents and lasting 25 times longer. This drastically reduces electricity consumption for lighting and slashes replacement costs, offering an immediate and continuous saving. A typical 60-watt incandescent bulb uses 60W, while an equivalent LED uses only 8-12W.
Low-flow plumbing fixtures, such as showerheads and toilets, reduce water consumption without sacrificing performance. New low-flow showerheads often use 1.5-2.0 gallons per minute (GPM) compared to older models that might use 2.5 GPM or more. Low-flow toilets use 1.28 gallons per flush (GPF) or less, a significant reduction from older models that could use 3.5 GPF or higher. By reducing the volume of water used, these fixtures directly lower your monthly water bill and, for those with water heaters, also reduce the energy required to heat that water, providing a dual saving.
Finally, proper attic insulation works by creating a barrier to heat transfer. In winter, it keeps valuable heat inside your home, preventing it from escaping through the roof. In summer, it prevents external heat from radiating into your living space. Insulation is measured by its R-value, a measure of thermal resistance. The higher the R-value, the better the insulation's ability to resist heat flow. Proper insulation, often achieved with fiberglass batts, blown-in cellulose, or mineral wool, reduces the workload on your HVAC system, leading to lower energy bills and a more comfortable indoor environment year-round.
Step-by-Step Fix
1. Install a Smart Thermostat – Upgrade your home's brain for climate control.
- Unpack and Review – Carefully read the manufacturer's instructions for your specific smart thermostat model. Turn off power at the breaker box to your HVAC system. Locate your existing thermostat. Take a photo of the current wiring before disconnecting any wires.
- Remove Old Thermostat – Unscrew the old thermostat from the wall plate. Gently pull it away and disconnect the wires. Label each wire with the provided stickers or masking tape according to the terminal it was connected to (e.g., R, W, Y, G, C).
- Mount New Thermostat Plate – Install the new smart thermostat's mounting plate using the supplied screws. Thread the wires through the opening.
- Wire the Smart Thermostat – Connect the labeled wires to the corresponding terminals on the new thermostat. Ensure a common 'C' wire is present for continuous power. If not, you might need a power extender kit (often included or sold separately) or a professional electrician to run a new wire.
- Power On and Configure – Restore power at the breaker. Follow the on-screen prompts or app instructions to connect the thermostat to your home's Wi-Fi. Calibrate it, set up schedules, and explore advanced features like geofencing.
- If this doesn't work: The most common issue is improper wiring, especially the absence of a 'C' wire. Double-check your connections against the wiring diagram. If you're unsure, consult an HVAC technician, as incorrect wiring can damage your system.
2. Convert to LED Lighting – Brighten your home while dimming your electricity bill.
- Identify Bulb Types – Determine the types of bulbs you currently use (e.g., A19 for standard, BR30 for recessed, GU10 for spotlights). Check the wattage of your current bulbs and note the lumens (brightness) if possible, to select equivalent LED replacements.
- Purchase Right LEDs – Select LED bulbs with equivalent brightness (lumens) to your old bulbs but significantly lower wattage. Choose the desired color temperature (e.g., 2700K for warm white, 5000K for daylight). Consider dimmable LEDs if you have dimmer switches; ensure your dimmer is LED-compatible.
- Turn Off Power – Always turn off the power to the light fixture at the wall switch AND the circuit breaker before replacing bulbs.
- Replace Bulbs – Carefully unscrew the old bulbs from their sockets. Screw in the new LED bulbs. Ensure they are snug but do not overtighten.
- Test and Recycle – Restore power and test the new LEDs. Properly dispose of old incandescent or CFL bulbs. CFLs contain mercury and should be recycled at special facilities.
- If this doesn't work: Flickering LEDs can indicate an incompatible dimmer switch. Replace the dimmer with an LED-compatible one. If a bulb doesn't light up, ensure it's screwed in properly or try a different bulb.
3. Install Low-Flow Showerheads and Aerators – Save water where it counts.
- Gather Tools – You'll need an adjustable wrench, plumbers tape, and a cloth to protect finishes.
- Showerhead Replacement – While wearing work gloves, cover the shower drain with a cloth to prevent small parts from falling in. Unscrew the old showerhead counter-clockwise. Clean any debris from the shower arm threads. Wrap plumbers tape clockwise around the threads 3-4 times. Screw on the new low-flow showerhead clockwise, hand-tightening first, then a quarter turn with the wrench. Do not overtighten.
- Faucet Aerator Replacement – For sink faucets, locate the aerator at the tip of the spout. Unscrew it counter-clockwise (sometimes a coin or special tool is needed). Clean the faucet threads. Wrap plumbers tape around the threads. Screw on the new low-flow aerator, hand-tightening. Test for leaks.
- Test for Leaks – Turn on the water and check for any drips around the new fixtures. Tighten slightly if necessary. Confirm water flow is adequate.
- If this doesn't work: Leaks are common if plumbers tape isn't applied correctly or if the connection isn't tight enough. Ensure the rubber gasket inside the showerhead is seated properly. For persistent leaks, reapply tape and retighten.
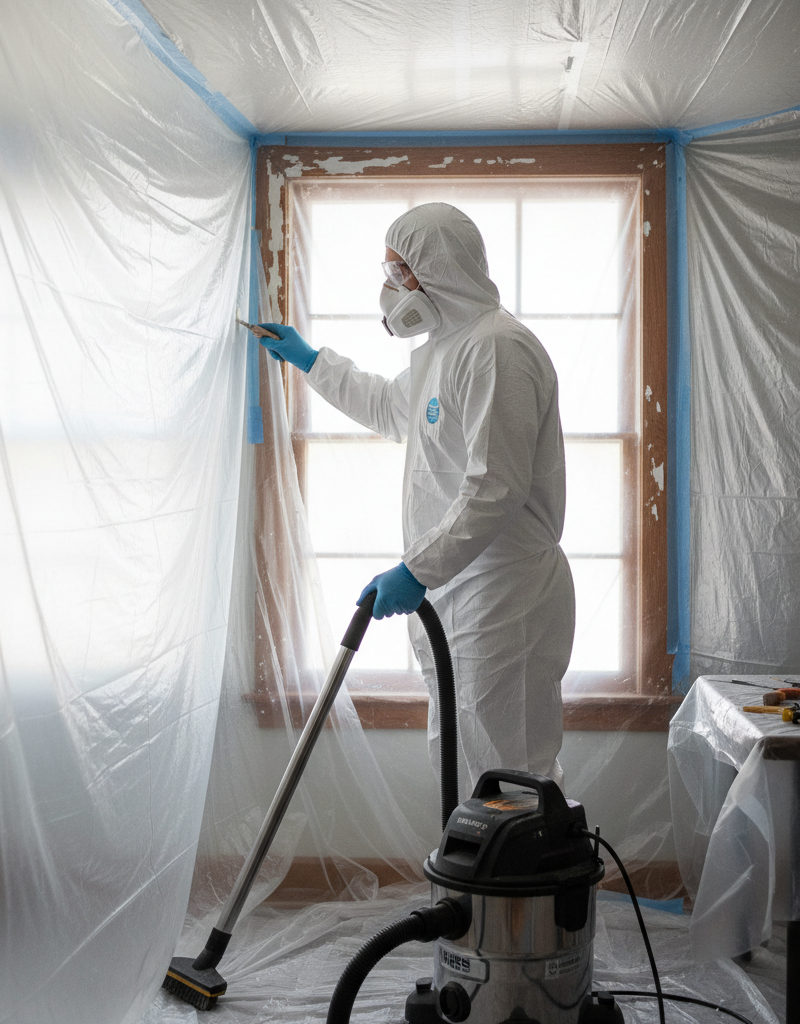
4. Improve Attic Insulation – Seal your home's energy envelope.
- Safety First – Wear a respirator or dust mask, gloves, long sleeves, pants, and safety glasses. Ensure adequate lighting. Avoid stepping between joists where you could fall through the ceiling. Use attic decking or plywood sheets if present.
- Assess Current Insulation – Measure the depth of your existing insulation. Check for gaps, compressed areas, or signs of moisture. In many northern climates, R-49 to R-60 is recommended; in southern climates, R-30 to R-49. This translates to roughly 16-22 inches of fiberglass or cellulose for northern areas, and 10-14 inches for southern areas.
- Seal Air Leaks – Before adding insulation, seal any air leaks. Use caulk around vent pipes, electrical wires, and ceiling fixture boxes. Use expanding foam for larger gaps around flashing, chimneys, and plumbing stacks. This is critical for insulation to be effective.
- Add Insulation – For batt insulation, cut it to fit snugly between joists, leaving no gaps. For blown-in insulation, rent a blower from a home improvement store and follow instructions carefully, maintaining a consistent depth. Ensure insulation does not block soffit vents, using baffles if necessary to allow airflow from the eaves to the attic peak.
- Ventilation Check – Verify that your attic is properly ventilated. Insulation works best when paired with good airflow (intake from soffits, exhaust from ridge or gable vents). Blocked vents can lead to moisture issues and reduced insulation effectiveness.
- If this doesn't work: If you still experience drafts or high energy bills, you might have significant air leaks beyond the attic (e.g., around windows, doors, or outlets), or your HVAC system might be undersized or inefficient. Consider a professional energy audit.
Common Causes
- Outdated Technology: Old incandescent bulbs, non-smart thermostats, and traditional high-flow plumbing fixtures are simply less efficient than modern alternatives. They were designed in an era with different energy and water conservation standards.
- Poor Insulation and Air Sealing: Many older homes, and even some newer ones, have insufficient attic insulation or hidden air leaks that allow conditioned air to escape and unconditioned air to enter. This forces HVAC systems to work harder.
- Lack of Awareness: Homeowners often don't realize the extent of energy and water waste occurring in their homes or the substantial savings potential of relatively simple upgrades.
- Prioritizing Aesthetics Over Efficiency: While cosmetic upgrades are appealing, an exclusive focus on appearance can lead to overlooking more impactful, behind-the-scenes efficiency improvements.
Related Articles
Keep troubleshooting with these hand-picked guides from FixlyGuide:
- The 4-Hour — Transform your garden into a self-sufficient oasis with smart strategies for watering, weeding, and pest control, minimizing your effort.
- The Secret to Lush Raised Beds? It's Not Just About How You Water — Smart irrigation for raised garden beds isn't just about automation; it's about delivering the right amount of water precisely when your pl…
- The Hidden Reason Your GFCI Trips (It's Not Always a Faulty Outlet) — A continuously tripping GFCI outlet is a critical safety warning, often indicating moisture, a faulty appliance, or a wiring problem that r…
- The 5-Minute Trick to Vacation-Proof Your Garden (Before You Leave Town) — Prevent your garden from wilting while you're away with simple, proactive steps that ensure lush growth and minimal fuss upon your return.
- The 9 Sneaky Filters Stealing Your Home's Efficiency (And How to Fix It) — Unseen or neglected filters throughout your home can secretly inflate utility bills, degrade air quality, and lead to expensive appliance b…
- The $30 Secret to Banishing Ice Dams From Your Roof (Before They Destroy It) — Learn safe and effective methods to remove ice dams from your roof and prevent costly damage to your home's structure and interior.
This article was independently written by FixlyGuide based on the source topic.
Frequently asked questions
How quickly do these home upgrades pay for themselves?+
The payback period varies by upgrade and your current consumption. Smart thermostats can pay for themselves in 1-2 years through energy savings. LED lighting conversions often have paybacks of 6-12 months. Low-flow fixtures can pay back in less than a year, especially if you have high water rates. Attic insulation typically has a longer payback, from 2-5 years, but provides consistent savings and comfort for decades.
Can I do these upgrades myself, or do I need a pro?+
Most of these upgrades are well within the capabilities of a DIY homeowner with basic tools and some patience. Installing smart thermostats, replacing light bulbs, and swapping out showerheads are generally easy. Adding attic insulation can be a moderate DIY project, particularly with blown-in insulation. Always follow safety precautions and manufacturer instructions. For complex electrical work (like running a new C-wire) or large-scale insulation projects, a professional might be warranted.
Will these upgrades significantly increase my home's resale value?+
While these upgrades primarily offer a financial return through savings, they can indirectly boost resale value by making your home more appealing to energy-conscious buyers. Properties with documented energy efficiency improvements often sell faster and for a slightly higher premium, as buyers recognize the long-term cost benefits. An energy-efficient home is a modern, desirable home.
Are there any tax credits or rebates for these types of upgrades?+
Yes, absolutely! The U.S. federal government offers tax credits (like the Energy Efficient Home Improvement Credit) for qualifying energy-efficient upgrades, including insulation, specific HVAC systems, and energy audits. Many state and local utility companies also provide rebates for installing smart thermostats, upgrading to ENERGY STAR certified appliances, and improving insulation. Always check the DSIRE database (dsireusa.org) or your local utility provider's website for current programs and eligibility requirements before purchasing.
Discussion
Loading comments…