
Tools & materials you'll need
Affiliate links- AmazonNew HVAC filterEnsure it's the correct size and MERV rating for your system.
As an Amazon Associate FixlyGuide earns from qualifying purchases — at no extra cost to you. Prices and availability are accurate as of publication and subject to change.
How it works
Your home's heating, ventilation, and air conditioning (HVAC) system operates as a closed loop, continuously circulating the air inside your house. This process begins when the blower motor inside your air handler (or furnace) pulls air from your living spaces through one or more return air ducts. Before this returning air reaches the delicate and expensive core components of the unit, it must pass through an air filter.
The filter's primary, non-negotiable job is to protect your equipment. It is a physical barrier designed to capture airborne particulates like dust, pet dander, lint, and pollen. Without it, these contaminants would build up directly on the evaporator coil (in A/C mode) or the heat exchanger (in heating mode). This buildup acts as an insulator, severely impeding the transfer of heat. It also accumulates on the blower motor's fan blades, unbalancing them and forcing the motor to work harder.
When a filter becomes clogged, it creates high static pressure—a measure of airflow resistance. The blower motor must struggle against this resistance, drawing more electricity and generating excess heat, which shortens its lifespan. Critically, the reduced airflow starves the system. In cooling season, this can cause the evaporator coil's temperature to drop below freezing, forming a block of ice that can ultimately destroy the outdoor compressor. In heating season, it can cause the heat exchanger to overheat, leading to cracks that could leak dangerous carbon monoxide into your home. A clean filter ensures adequate airflow, protecting components, maintaining efficiency, and enabling the system to function as designed.
Step-by-Step Fix
Replacing your HVAC filter is a fundamental maintenance task. Follow these steps precisely to ensure it is done correctly and safely.
-
Power Down the HVAC System — Go to your thermostat and set the system to "Off." This prevents the furnace or air conditioner from starting while you have the filter compartment open, which could suck debris into the unit or pose a safety hazard.
-
Locate the Filter Housing — Air filters are always located on the "return" side of the air handler, where air is being sucked into the unit. Common locations include:
- A slot or compartment directly in the furnace or air handler cabinet (often on the side, bottom, or top).
- A dedicated filter rack built into the return ductwork adjacent to the main unit. This often looks like a metal box with a removable door.
- Inside a large return air grille mounted on a wall or ceiling. These are typically held in place with tabs or thumbscrews.
-
Identify Filter Dimensions and Airflow Direction — Before removing the old filter, look for an arrow printed on its cardboard frame. This arrow indicates the direction of airflow and must point towards the furnace/air handler. Note this orientation. The filter's dimensions (e.g., 20" x 25" x 1") are also printed on the frame.
- Action: Use your phone to take a picture of the filter in place, clearly showing the arrow's direction and the printed size. This removes all guesswork.
-
Remove the Old Filter — Open the access door or grille. This may require flipping a latch, turning thumbscrews, or simply sliding a metal panel out of its channel. Carefully slide the old, dirty filter out of its slot. Hold it level to avoid spilling dust.
-
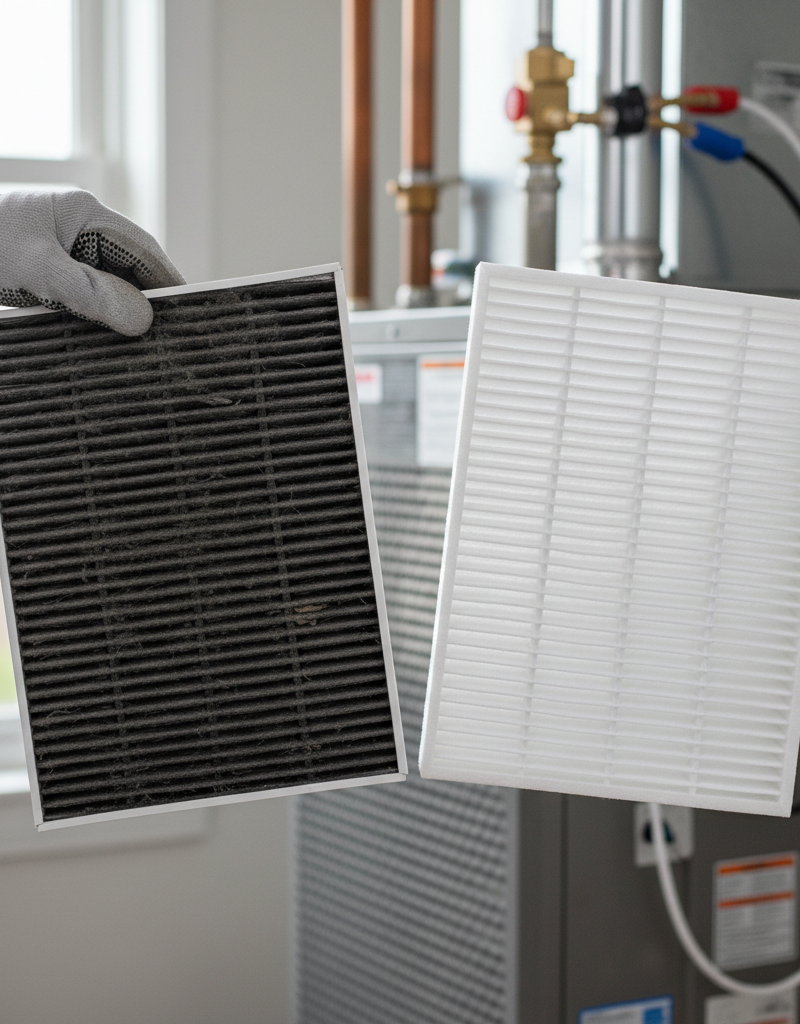
Examine the Old Filter — This is your best guide for setting a future replacement schedule.
- If the filter is dark gray and blanketed in a thick layer of dust and hair, it was left in for too long. You need a shorter replacement interval.
- If it is only lightly coated in dust, you could likely extend the interval.
- Warning: If the filter is damp, wet, or shows signs of mold, do not proceed. This indicates a more serious problem like a clogged condensate drain or frozen coil. Call an HVAC professional.
-
Unpack the New Filter — Remove the plastic wrap from the new filter. With a permanent marker, write today's date directly on the filter's cardboard frame. This creates a clear record for the next inspection.
-
Confirm Airflow Direction on the New Filter — Locate the airflow arrow on the new filter. Compare it to the photo you took in Step 3. It is critical that you install the new filter with the arrow pointing in the same direction as the old one—away from the return duct and towards the main body of the furnace/air handler.
-
Insert the New Filter — Carefully slide the new filter into the clean, empty slot. It should slide in smoothly and fit snugly. There should be no significant gaps around the edges.
- If it's too loose: Air and contaminants will bypass the filter, rendering it useless. You may have the wrong size.
- If it's too tight: Do not force it. Forcing it can crush the filter frame, creating gaps and compromising its integrity. Double-check that you have the correct "actual" size versus the "nominal" size printed on the box.
-
Secure the Access Panel — Replace the cover or grille you removed in Step 4. Ensure it is fully seated, latched, and secured with any screws you removed. A loose panel can create whistling noises and allow unfiltered air to be drawn into the system.
-
Restore Power to the System — Return to your thermostat and set it back to "Heat," "Cool," or "Auto" as desired. Listen for the system to start up. It should sound normal, possibly with stronger airflow from the vents now that the restriction is gone.
-
Set a Replacement Reminder — Based on your inspection in Step 5, decide on a realistic next replacement date (e.g., 30, 60, or 90 days). Set a recurring appointment in your digital calendar or place a small sticker with the next date near the thermostat or air handler.
Common mistakes
Avoiding these common errors is just as important as performing the steps correctly. A simple mistake can negate the benefits of a new filter or even cause damage.
-
Installing the Filter Backwards. This is the most frequent and consequential mistake. The arrow on the filter frame must point in the direction of airflow, towards the interior of the furnace or air handler. Installing it backwards places the filter's structural reinforcement on the wrong side. Air pressure can cause the filter media to deform, collapse, or even be torn away and sucked into the blower motor assembly, potentially causing hundreds of dollars in damage.
-
Using the Incorrect Size. A filter that is too small for its slot will allow air to bypass it completely, sending dust and debris directly to your system's evaporator coil and blower motor. This defeats the entire purpose of having a filter. Conversely, forcing in a filter that is too large will crush its frame, creating gaps and also allowing bypass. Always use the exact size specified for your system. If you're unsure, measure the filter slot's interior dimensions and purchase a filter with matching "actual" (not nominal) dimensions.
-
Choosing an Incompatible MERV Rating. The MERV (Minimum Efficiency Reporting Value) scale from 1 to 20 indicates a filter's ability to capture particles. While a higher MERV rating means better filtration, it also means higher airflow resistance. Most standard residential HVAC systems are designed for filters in the MERV 6-11 range. Installing a high-MERV filter (MERV 13+) in a system not designed for it can severely restrict airflow, mimicking the effect of a clogged filter even when brand new. This strains the blower motor and can lead to coil freeze-ups or overheating. Always check your HVAC unit's manual for the maximum recommended MERV rating.
-
Assuming a Wet Filter is a Filter Problem. Finding a damp, frozen, or moldy filter is a red flag. The filter is not the cause; it is a symptom of a larger issue. Most often, this points to a clogged condensate drain line overflowing or an evaporator coil that is freezing over due to low refrigerant or poor airflow. Simply replacing the wet filter without addressing the root cause will lead to water damage, dangerous mold growth within your HVAC system and ductwork, and eventual system failure.
-
Extending Replacement Intervals to "Save Money". Homeowners may try to stretch a filter's life to 6 months or a year to save on the cost of replacements. This is false economy. The extra electricity consumed by the blower motor struggling against a clogged filter will cost more in utility bills than the price of a new filter. This doesn't even account for the drastically increased wear on system components, which can lead to premature failure of a motor or compressor—repairs that cost thousands of dollars.
Cost & time breakdown
The cost and time associated with filter maintenance vary depending on the type of filter your system uses and whether you perform the work yourself.
| Task | DIY Cost | Pro Cost | Time |
|---|---|---|---|
| Standard 1-Inch Filter Replacement | $5 - $25 per filter | $90 - $150 (service call) | 5-10 minutes |
| Deep Media Filter Replacement (4-5 inches) | $30 - $60 per filter | $120 - $200 (service call) | 10-15 minutes |
| Washable/Electronic Air Cleaner Cleaning | $0 (soap & water) | $100 - $180 | 30-60 minutes + dry time |
| Annual HVAC Tune-Up (includes filter service) | N/A | $100 - $250 | 1-1.5 hours |
| Emergency Call for Clogged System Issue | N/A | $200 - $600+ | 1-3 hours+ |
When to call a pro
While filter replacement is a straightforward DIY task, certain signs indicate the problem is beyond a simple swap and requires professional diagnosis and repair.
Call a licensed HVAC technician immediately if you encounter any of the following:
- A Wet or Frozen Filter: As noted, this is a symptom of a significant malfunction. The most common culprits are a clogged condensate drain line causing water to back up into the air handler, or an iced-over evaporator coil, which can stem from low refrigerant or severely restricted airflow. Both issues require professional service to prevent water damage and compressor failure.
- The System Won't Start: If the system fails to turn on after you’ve correctly installed a new filter and secured all access panels, the issue may be an accidentally tripped safety switch on the panel door or a more complex electrical problem.
- Unusual Noises: A loud whistling can indicate a significant air leak around a poorly fitting filter or panel. Grinding or scraping noises could mean the filter was sucked into the blower cage or that the motor is failing. Do not continue to run the system; shut it off and call for service.
- Persistent Performance Issues: If your home still doesn't cool or heat effectively after installing a clean filter, it points to a deeper system fault, such as a refrigerant leak, failing capacitor, or malfunctioning gas valve.
Prevention & maintenance
Proactive maintenance is the key to HVAC longevity, efficiency, and reliability. A clean filter is the cornerstone of that maintenance.
-
Establish a Custom Replacement Schedule. The "every 90 days" rule is a generic starting point, not a mandate. Your home’s environment is unique. Begin by checking your filter monthly. If it's heavily soiled after 30 days, that's your new schedule. If it's only lightly dusty, check again at 60 days. Factors like pet ownership, smoking, local construction, and high pollen counts will require more frequent changes, often every 30-45 days. A single occupant in a clean, low-pollen area may go 90 days or more.
-
Choose the Right Filter Type and MERV Rating. For most homes, a pleated media filter with a MERV 8 rating provides an excellent balance of filtration performance and healthy airflow. If you have significant allergies, consider a MERV 11 filter, but first confirm your system can handle the increased static pressure. Avoid cheap, flat fiberglass filters (MERV 1-4) as they offer minimal protection to your equipment. Conversely, do not use ultra-high MERV filters (13+) unless your system has a variable-speed blower specifically designed for them.
-
Buy Filters in Bulk. Once you know the correct size and preferred MERV rating for your system, purchase them in multi-packs of 3, 6, or 12. This is almost always cheaper per unit and ensures you always have a replacement on hand. Having a filter ready eliminates the primary reasons for procrastination—forgetting to buy one or not wanting to make a trip to the store.
-
Keep Return Grille Areas Clean. The air entering your system passes through the return grilles first. By regularly vacuuming these grilles and the floor/wall area around them, you capture dust, pet hair, and debris before it even has a chance to reach and clog the main filter. This simple housekeeping task can meaningfully extend the life of your filter.
-
Schedule Annual Professional Tune-Ups. A clean filter protects your system, but it doesn't replace professional maintenance. An annual service call from a qualified HVAC technician is essential. The technician will perform critical tasks you cannot, such as cleaning the indoor and outdoor coils, testing electrical components like capacitors and contactors, cleaning the condensate drain line to prevent clogs, checking refrigerant levels, and testing for combustion safety. This preventative service catches small problems before they become catastrophic failures.
Related Articles
Keep troubleshooting with these hand-picked guides from FixlyGuide:
- The #1 HVAC Mistake Costing You Hundreds (And How Often to Really Change Your Filter) — Discover the surprising truth about how often you should change your HVAC filter and prevent common problems that can cost you hundreds in…
- The #1 Mistake Homeowners Make With HVAC Filters (And How Often to Really Change Them) — Discover the crucial mistake most homeowners make with HVAC filters and the specific schedule you should follow to avoid costly HVAC issues…
- The HVAC Maintenance Myth: Why "Annual Service" Can Cost You More (and 3 Things to Check Instead) — Discover why strict annual HVAC servicing isn't always necessary and learn the essential checks that can save you money and extend your sys…
- The #1 HVAC Mistake That Costs Homeowners $500 Every Year — Discover the crucial HVAC maintenance step homeowners often overlook, leading to higher energy bills, frequent repairs, and premature syste…
- That 'Energy-Saving' HVAC Trick Is Costing You Money — You've heard the advice: close HVAC vents in unused rooms to save on heating and cooling. But this common practice is a myth. It actually h…
- The #1 Mistake Homeowners Make Winterizing Sprinklers (and How to Avoid Burst Pipes) — Discover the biggest mistake homeowners make when winterizing their sprinkler system and learn the proper steps to prevent costly burst pip…
Get the print-ready PDF of this guide
A clean, ad-free, printable version you can keep on your phone or pin to the workshop wall. Free with a FixlyGuide account.
- Print-optimized layout
- Tools, materials & every step included
- Saved to your account
Frequently asked questions
What is a MERV rating and why does it matter for filter changes?+
MERV stands for Minimum Efficiency Reporting Value. It's a rating that indicates how effectively an HVAC filter stops dust and other contaminants from passing through it. Higher MERV ratings (e.g., MERV 11-13) capture more particles but can restrict airflow more quickly, potentially requiring more frequent changes than lower-rated filters (e.g., MERV 4-8).
Can a dirty HVAC filter cause my AC to freeze up?+
Yes, a severely dirty HVAC filter is one of the leading causes of an AC unit freezing. The clogged filter restricts airflow over the evaporator coil, causing the coil's temperature to drop below freezing. Moisture in the air then condenses and freezes on the coil, eventually turning it into a block of ice that completely blocks airflow.
How do I know what size HVAC filter to buy?+
Always check the dimensions printed directly on the cardboard frame of your existing HVAC filter. Filter sizes are typically listed as length x width x thickness (e.g., 20x25x1). It's crucial to use the exact size recommended by your HVAC system or the original filter for proper fit and function.
Is it better to use a cheaper or more expensive HVAC filter?+
The 'best' filter depends on your household needs. Cheaper, low-MERV filters (MERV 4-8) are good for basic dust protection and allow for greater airflow. More expensive, higher-MERV filters (MERV 11-13+) capture smaller particles like allergens and pet dander, improving indoor air quality. However, higher MERV filters may need more frequent changes and can slightly increase energy usage due to increased airflow resistance. Avoid extremely high MERV filters (above 13) unless recommended by a professional for residential systems, as they can sometimes strain older HVAC units.


Discussion
Loading comments…