Tools & materials you'll need
Affiliate linksAs an Amazon Associate FixlyGuide earns from qualifying purchases — at no extra cost to you. Prices and availability are accurate as of publication and subject to change.
Quick Answer
Low pressure in your kitchen sink sprayer is a common and frustrating issue, but it's usually a straightforward DIY fix. The most frequent culprits are mineral buildup or debris clogging the sprayer head itself, or a malfunctioning diverter valve inside your main faucet body. By systematically troubleshooting these areas, you can often restore full spray power in a matter of minutes without needing a professional plumber.
The Problem
Imagine trying to rinse a stubborn pot or clean the corners of your sink, but your sprayer just dribbles water weakly. This lack of pressure isn't just an inconvenience; it can make kitchen cleanup far more difficult and less sanitary. The problem usually manifests as a noticeable reduction in the force of the water coming out of the sprayer, even if the main faucet delivers a strong flow. This distinction is key: if both the main faucet and sprayer have low pressure, the issue is likely with your home's overall water supply or the faucet's aerator, not just the sprayer. However, if only the sprayer is weak, the problem lies specifically within the sprayer's components or its connection to the faucet.
How It Works
Understanding how your kitchen sink sprayer gets its water helps in diagnosing the problem. When you turn on your kitchen faucet, water flows from your home's supply lines through mixing valves (hot and cold) and then into the main faucet body. For a dedicated sprayer (not pull-down models), a portion of this water is diverted specifically to the sprayer hose. This diversion is managed by a component called the diverter valve or diverter gate, typically located inside the main faucet body where the sprayer hose connects. When the diverter is working correctly, pressing the sprayer trigger or handle causes the diverter to shift, directing water flow away from the main spout and towards the sprayer. When you release the sprayer, the diverter returns to its original position, allowing water to flow out of the main spout again.
The water then travels through a flexible hose to the sprayer head. The sprayer head itself contains small nozzles designed to concentrate the water into a forceful spray pattern. Over time, mineral deposits (especially in hard water areas), sediment, or other debris can accumulate in these small nozzles or even within the diverter valve, restricting water flow and causing a significant drop in pressure. Additionally, the hose itself can sometimes kink or become obstructed internally, though this is less common than issues with the head or diverter.
Step-by-Step Fix
1. Safety First — Shut off the water supply.
Before doing any work, locate the hot and cold water supply valves typically found under the sink. Turn them clockwise until they are fully closed. Turn on the main faucet to relieve any residual pressure in the lines. This prevents unexpected sprays or leaks during the repair.
- Tools: None (hand-tight valves)
- Safety: Always relieve pressure before disconnecting plumbing components.
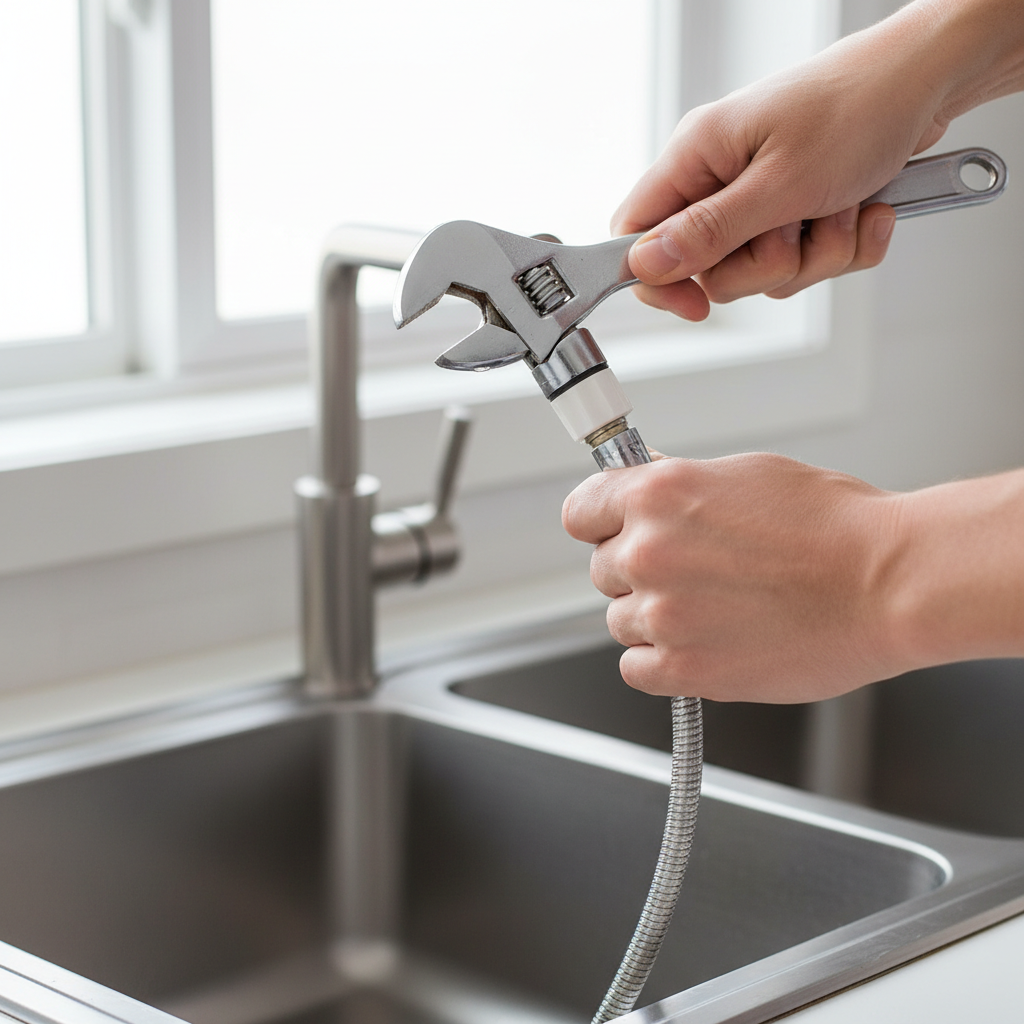
2. Inspect and Clean the Sprayer Head — Clear mineral buildup and debris.
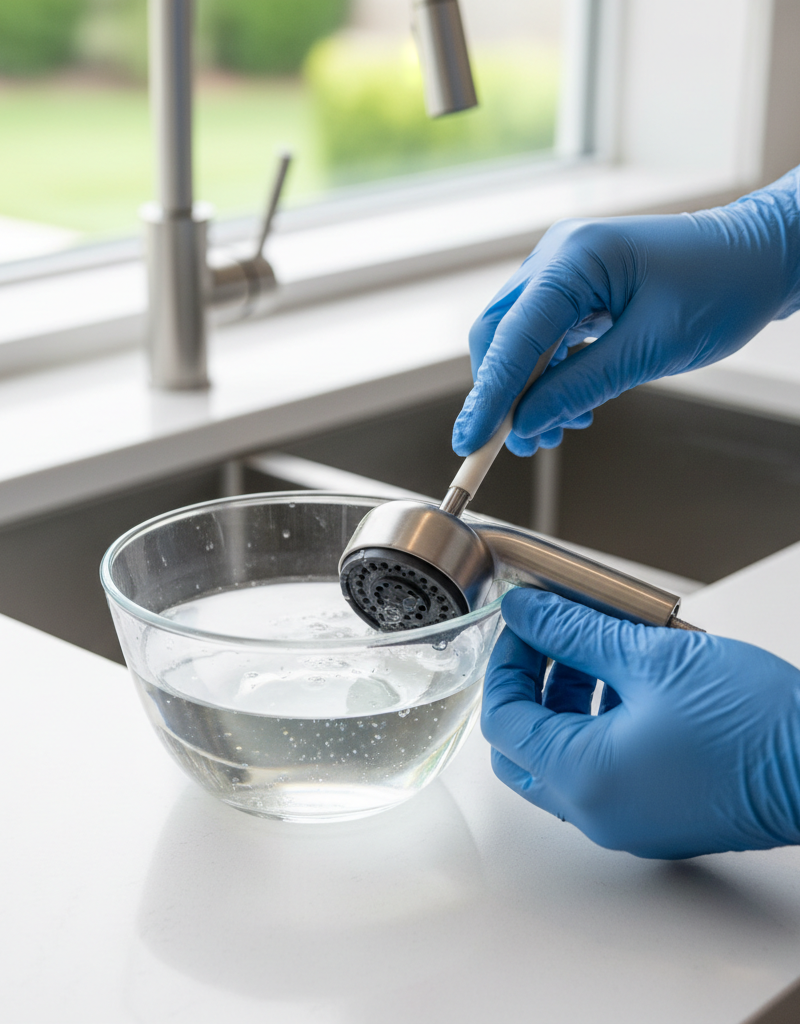
This is the most common cause of low pressure. Often, tiny particles or calcium deposits clog the spray nozzles. Unscrew the sprayer head from the end of its hose by turning it counter-clockwise. You may need an adjustable wrench if it's tightened firmly. Inspect the screen or nozzle holes for visible debris or mineral crust. Use a small brush (like an old toothbrush) or a toothpick to gently clean out any obstructions. For stubborn mineral buildup, soak the sprayer head in a bowl of white vinegar for 15-30 minutes. Rinse thoroughly before reattaching.
- Tools: Adjustable wrench (optional), small brush or toothpick, small bowl, white vinegar
- If this doesn't work: The clog might be deeper in the hose or the diverter valve.
3. Check the Sprayer Hose — Look for kinks or internal clogs.
With the sprayer head removed, inspect the flexible hose connecting the sprayer to the faucet body. Straighten any visible kinks. While the water is still off, you can try to carefully disconnect the hose at the faucet body connection (usually a threaded nut). Flush the hose by holding the open end over a bucket and briefly turning on the water supply very carefully to see if water flows freely through the hose. If not, the hose itself might be internally clogged or damaged and require replacement. Reconnect the hose securely.
- Tools: Adjustable wrench, bucket
- Safety: Turn water supply on ONLY briefly to test, aiming into a bucket to avoid flooding.
- If this doesn't work: The issue is likely with the diverter valve.
4. Locate and Inspect the Diverter Valve — A common hidden culprit.
The diverter valve is usually located within the main faucet body, often near where the sprayer hose connects. You'll need to look under the sink again, possibly shining a flashlight up into the faucet's base. Some diverter valves are accessible by removing a retaining nut or clip where the hose enters the faucet. Others require partially disassembling the faucet spout or handle assembly from above the sink. Consult your faucet's manual for its exact location and removal procedure. It's typically a small cylindrical piece, sometimes with an O-ring.
- Tools: Flashlight, screwdriver set (Philips and flathead), adjustable wrench, owner's manual (if available)
- Safety: Work carefully to avoid damaging faucet components. Keep track of small parts.
5. Clean or Replace the Diverter Valve — Remove clogs or install a new part.
Once you've removed the diverter valve, inspect it for mineral buildup, debris, or signs of wear like cracks or deteriorated O-rings. Clean any visible gunk with a small brush and white vinegar. If the diverter appears damaged, corroded, or if cleaning doesn't resolve the issue, it's best to replace it. Take the old diverter to a hardware store to ensure you get an exact match. Reinstall the diverter and reassemble your faucet in reverse order of disassembly.
- Tools: Small brush, white vinegar, replacement diverter valve (if needed)
- If this doesn't work: Ensure all connections are tight and check for any other blockages in the faucet body.
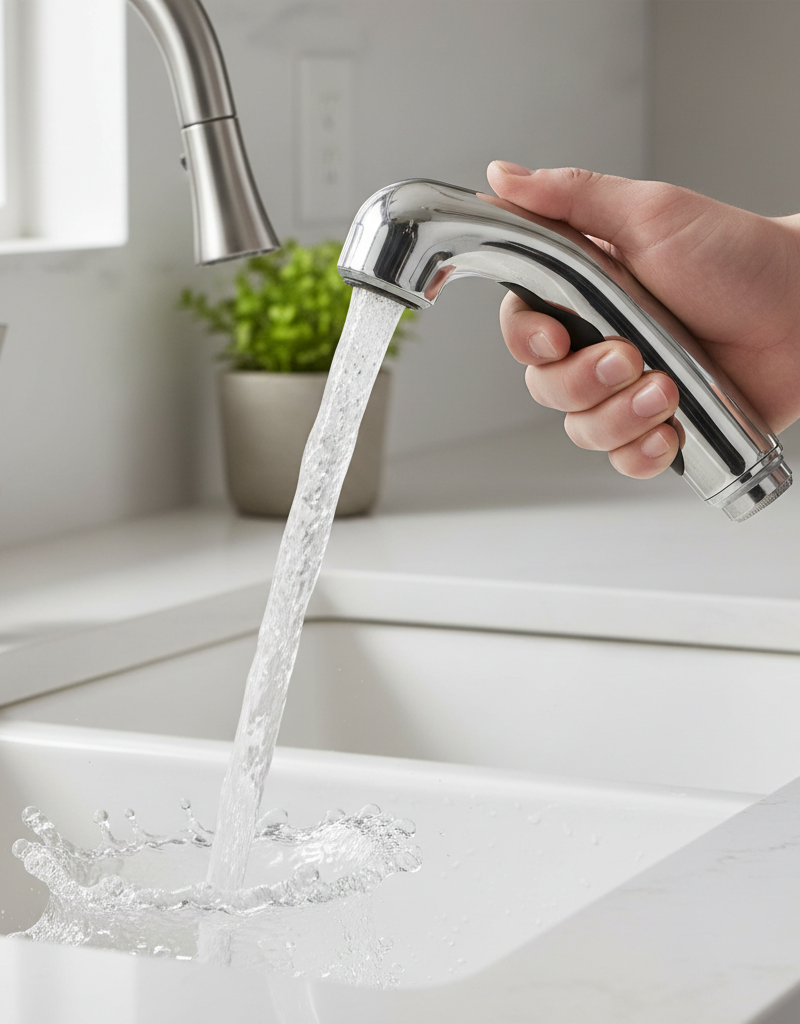
6. Test the Sprayer — Check for restored pressure and leaks.
After reassembling everything, slowly turn the hot and cold water supply valves back on under the sink. Turn on the main kitchen faucet for a moment, then depress the sprayer trigger. Check for improved water pressure. Also, carefully inspect all connections you loosened for any signs of leaks. Tighten connections as needed, but don't overtighten.
- Tools: None
- Safety: Visually check for leaks after restoring water pressure.
Common Causes
- Mineral Buildup: Hard water contains minerals like calcium and magnesium that can accumulate in the small openings of the sprayer head nozzles and the diverter valve over time, restricting water flow. This is by far the most common cause.
- Sediment and Debris: Fine particles, rust flakes from old pipes, or manufacturing debris can get trapped in the sprayer's screen or the diverter mechanism.
- Faulty Diverter Valve: The diverter valve, a small component inside the faucet body, can become stuck, worn out, or clogged, preventing water from being properly directed to the sprayer.
- Kinked or Obstructed Hose: The flexible hose leading to the sprayer can become kinked under the sink or develop internal blockages, restricting water flow. This is less common but can happen.
- Worn Sprayer Head: Over many years, the internal components or seals within the sprayer head itself can degrade, affecting its ability to create a strong spray, though clogs are more frequent.
Common Mistakes
- Ignoring the Water Shut-off: Forgetting to turn off the hot and cold water supply valves before disconnecting components can lead to a messy and wasteful flood under your sink.
- Overtightening Connections: When reassembling, overtightening nuts and fittings can damage threads, crack plastic components, or deform washers, leading to leaks.
- Using Harsh Chemicals: Using strong chemical cleaners to clear clogs in the sprayer head or diverter can damage the finish, rubber seals, or plastic components inside your faucet.
- Not Consulting the Manual: Faucet designs vary greatly. Attempting to disassemble a faucet without understanding its specific construction can lead to broken parts or difficulty reassembling it.
- Replacing the Entire Faucet Prematurely: Many homeowners assume low sprayer pressure means the entire faucet needs replacing, when often only a small, inexpensive part like the diverter or simply cleaning is needed.
Cost & Time Breakdown
| Task | DIY Cost | Pro Cost | Time |
|---|---|---|---|
| Clean Sprayer Head | $0–$2 (vinegar) | N/A | 15–30 minutes |
| Inspect/Flush Hose | $0 | N/A | 10–20 minutes |
| Replace Diverter Valve | $10–$30 | $150–$300 (part+labor) | 30 minutes – 1 hour |
| Replace Sprayer Head | $20–$50 | $150–$300 (part+labor) | 15–30 minutes |
| Replace Sprayer Hose | $20–$40 | $150–$300 (part+labor) | 30 minutes – 1 hour |
Tips & Prevention
- Regular Cleaning: Periodically unscrew and clean your sprayer head, especially if you live in an area with hard water. A quick soak in vinegar every few months can prevent buildup.
- Water Softener: Consider installing a whole-house water softener if you have very hard water. This not only prevents sprayer clogs but also extends the life of all your plumbing fixtures and appliances.
- Filter Your Water: A sediment filter at your main water line can help catch particles before they reach your faucets and cause clogs.
- Mind Your Hose: Be mindful when storing items under the sink to avoid kinking or crushing the sprayer hose.
- Observe Warning Signs: If you notice a gradual decrease in pressure rather than a sudden drop, it's a good indicator of mineral buildup developing, prompting you to clean it proactively.
When to Call a Professional
While most kitchen sink sprayer pressure issues are DIY-friendly, there are specific situations where calling a licensed plumber is the wiser choice. If you've methodically followed all the troubleshooting steps, including cleaning or replacing the sprayer head, hose, and diverter valve, and the problem persists, the issue might be more complex. This could indicate a problem within the faucet's main body that requires specialized tools or knowledge to diagnose, or it might point to a broader low water pressure issue affecting other fixtures in your home. Additionally, if at any point you feel uncomfortable disassembling your faucet, encounter stripped screws or stuck components, or if you cause a leak that you can't resolve, immediately turn off your main water supply and call a professional. Plumbers can efficiently pinpoint obscure clogs, correctly install replacement parts for various faucet brands, and ensure your plumbing is up to code and watertight, preventing potential water damage.
Related Articles
Keep troubleshooting with these hand-picked guides from FixlyGuide:
- The 90-Second Trick to Fix a Weak Kitchen Sprayer (No Plumber Needed) — Restore full power to your kitchen sink sprayer with simple DIY steps, addressing common causes like clogs and diverter issues.
- The 5-Minute Trick to Fix a Weak Kitchen Sink Sprayer (No Plumber Needed) — Restore full power to your kitchen sink sprayer with simple, DIY steps that tackle common culprits like clogs and diverter issues.
- The 5-Minute Fix for Your Kitchen Sprayer's Weak Stream — Restore your kitchen sink sprayer's strong stream with simple troubleshooting steps for common causes like clogs and diverter issues.
- The 5-Minute Fix for Your Kitchen Sink Sprayer's Weak Stream — Restore your kitchen sink sprayer's power with a simple, five-minute fix addressing common causes like mineral buildup and hose kinks.
- The 5-Minute Fix for Your Kitchen Sink Sprayer (And Why It Lost Pressure) — Restore full pressure to your kitchen sink sprayer with a few simple steps, often caused by mineral buildup or a faulty diverter.
- Swap Your Leaky Faucet This Weekend, No Plumber Needed — Ready to stop that annoying drip and give your kitchen an instant upgrade? This guide shows you how to replace a kitchen faucet yourself. W…
Frequently asked questions
How do I increase water pressure in my kitchen sink sprayer?+
To increase water pressure in your kitchen sink sprayer, first check for clogs in the sprayer head and clean it. If that doesn't work, inspect the sprayer hose for kinks or debris, and finally, check and clean or replace the diverter valve located inside your main faucet body.
Why is my kitchen sprayer not working but the faucet is?+
If your kitchen sprayer isn't working but the main faucet has good pressure, the problem is most likely localized to the sprayer components. Common causes include a clogged sprayer head, a kinked or obstructed sprayer hose, or a faulty diverter valve within the main faucet body that isn't directing water flow correctly to the sprayer.
Can a kitchen sink sprayer be repaired?+
Yes, a kitchen sink sprayer can usually be repaired. Most common issues, such as low pressure due to clogs in the sprayer head or a malfunctioning diverter valve, can be resolved by cleaning or replacing individual components rather than replacing the entire sprayer or faucet assembly.
How much does it cost to fix a kitchen sink sprayer?+
The cost to fix a kitchen sink sprayer yourself can range from $0 (if you just need to clean it) to $50 (for a new sprayer head or diverter valve). If you hire a professional plumber, expect to pay between $150 and $300, which includes parts and labor, depending on the complexity of the fix and local rates.
Where is the diverter valve on a kitchen faucet?+
The diverter valve on a kitchen faucet is typically located within the main faucet body. It's often found near the base of the spout or where the sprayer hose connects internally. Its exact position can vary by faucet model, so consulting your faucet's owner's manual is recommended for precise location and access instructions.

Discussion
Loading comments…