Tools & materials you'll need
Affiliate linksAs an Amazon Associate FixlyGuide earns from qualifying purchases — at no extra cost to you. Prices and availability are accurate as of publication and subject to change.
Quick Answer
Low pressure from your kitchen sink sprayer is one of those annoying little problems that can disrupt your kitchen routine. Often, the culprit is easily fixable: mineral buildup or debris clogging the spray head, a kink in the hose, or a malfunctioning diverter valve within your faucet. By systematically cleaning these components, you can usually restore your sprayer's powerful stream in less than an hour, saving yourself the cost of a plumber.
The Problem
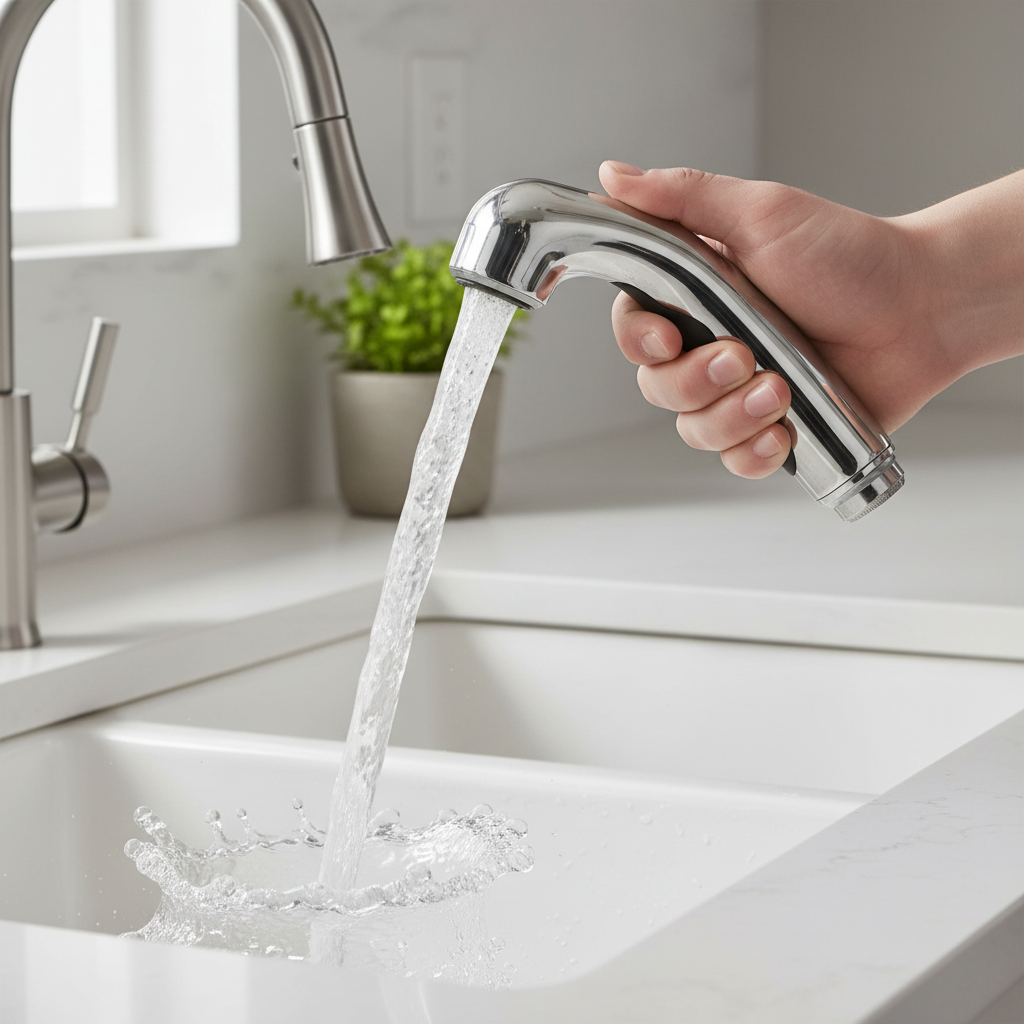
You're trying to rinse dishes, blast away food scraps, or simply fill a pot with the convenience of your kitchen sink sprayer, but instead of a strong, focused jet, you get a sad dribble. This lack of pressure makes the sprayer largely ineffective, forcing you back to the main faucet or leaving you with a sink full of stubborn food debris. The issue can arise suddenly or gradually worsen over time, often signaling an internal blockage or mechanical issue within the sprayer assembly or the faucet itself. It's a common complaint, especially in homes with hard water, and thankfully, it's often a DIY-friendly repair.
How It Works
To understand how to fix a low-pressure sprayer, it helps to know how it's supposed to work. When you engage the sprayer, water flow from the hot and cold supply lines enters the faucet body. Inside the faucet, there's a critical component called the diverter valve. This small valve, often a simple piston or a spring-loaded diaphragm, is designed to divert water from the main faucet spout to the sprayer hose when you press the sprayer trigger. When the sprayer is off, the diverter blocks the path to the sprayer and allows water to flow out the main spout. When you activate the sprayer, water pressure shifts the diverter, opening the path to the sprayer hose and closing, or significantly restricting, the flow to the main spout. The water then travels through the flexible sprayer hose to the spray head. The spray head itself contains a nozzle (or multiple nozzles) that constrict the water flow, increasing its velocity and creating the powerful spray pattern you expect. Mineral deposits (like calcium and magnesium from hard water), sediment, or small debris can accumulate at any of these points—in the spray head's nozzles, within the diverter valve, or even partially obstructing the hose—leading to a reduction in water flow and, consequently, low pressure.
Step-by-Step Fix
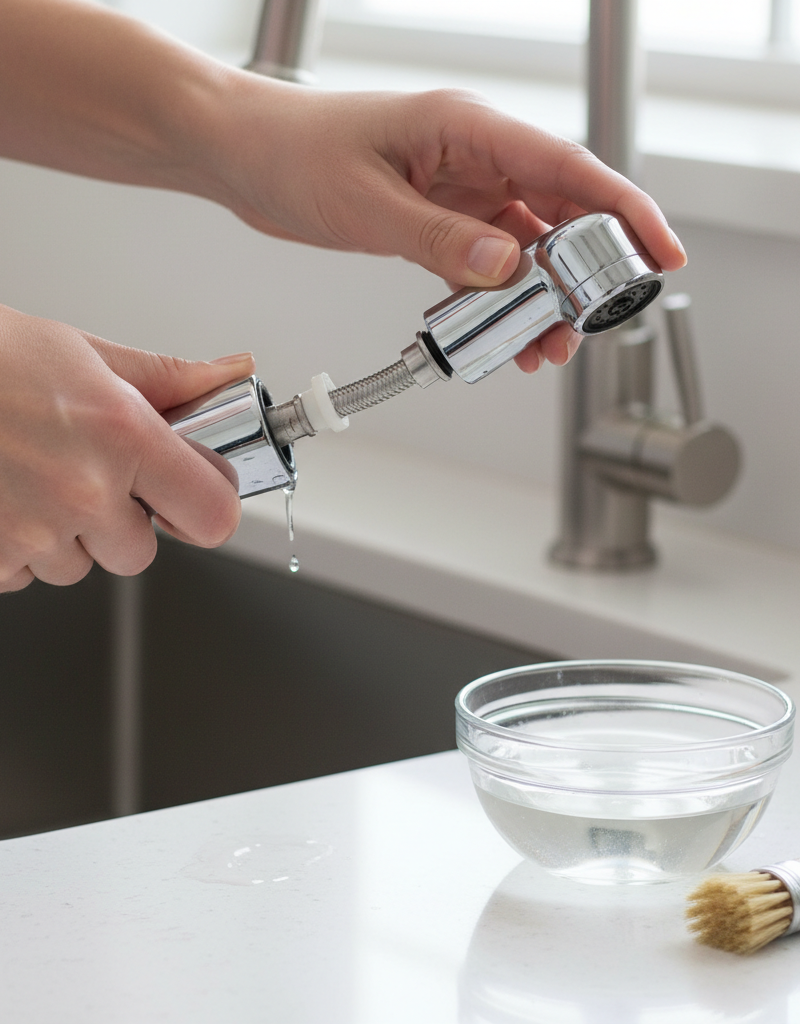
1. Inspect the Sprayer Head — Start with the simplest potential issue: a clogged spray head.
Unscrew the sprayer head counter-clockwise from the end of the hose. Check the small holes or nozzles for visible mineral buildup, food particles, or debris. Use a small brush (like a toothbrush or a dedicated cleaning brush) or a toothpick to gently dislodge any obstructions. For stubborn mineral deposits, soak the sprayer head in a bowl of white vinegar for 30 minutes to an hour. The acid in the vinegar will break down the calcium and lime. After soaking, rinse thoroughly and scrub again if needed, then reattach the sprayer head and test the pressure. This is often the quickest and easiest fix.
- Material: White vinegar
- Tool: Small brush or toothpick
2. Check for Kinks in the Hose — A simple kink can drastically reduce water flow.
Trace the sprayer hose from the sprayer head down into the cabinet under the sink. Look for any visible kinks, twists, or sharp bends in the hose. If your sink cabinet is frequently used for storage, items can push against the hose and cause a kink. Straighten out any kinks you find. If the hose is severely crimped or damaged, it might need replacement. Fill the sink and test the sprayer pressure. If the hose repeatedly kinks, you may need to reorganize the items in your cabinet or secure the hose with a cable tie to prevent it from kinking in the future.
- If this doesn't work: Consider if the hose is internally damaged or collapsed, which would require replacement.
3. Clean the Sprayer Hose Filter (If Applicable) — Some sprayer hoses have an inline filter where the hose connects to the faucet body.
Locate where the sprayer hose connects to the underside of the faucet body. You might need to use an adjustable wrench to carefully loosen the connection nut (turn counter-clockwise). Once disconnected, look for a small screen or filter washer inside the hose connection. This screen can trap sediment. Remove the screen with needle-nose pliers or a small screwdriver and clean it under running water, using a brush if necessary. Reinsert the clean filter and reattach the hose, tightening the nut just enough to be snug, but do not overtighten, as this can damage the plastic threads or washers.
- Tool: Adjustable wrench, needle-nose pliers or small screwdriver
- Caution: Don't lose small washers or O-rings during disassembly.
4. Access the Diverter Valve — If the previous steps haven't worked, the diverter valve is the next likely culprit.
First, turn off the hot and cold water supply valves under the sink. You'll need to remove the faucet handle and sometimes the spout to get to the diverter. For most single-handle faucets, remove the decorative cap on the handle (if present) to expose set screws (often Allen head screws). Use the appropriate Allen wrench to loosen these screws and remove the handle. Next, depending on your faucet model, you might need to unscrew a decorative nut or collar around the base of the spout to lift it off. Take photos as you go to remember the order of parts.
- Safety: Always turn off water supply before working on internal faucet components.
- Tool: Allen wrench set, flat-head screwdriver (for decorative caps)
5. Remove and Inspect the Diverter Valve — The diverter is a small, usually cylindrical, piece.
With the handle and spout removed, you should see the diverter valve. It's often small, sometimes plastic, and sits in a recess in the faucet body. It might be held in place by a retaining clip, a nut, or simply sit loosely in its housing. Carefully remove it. Inspect the diverter for mineral buildup, debris, or signs of wear. Look for any cracks or deformities that might prevent it from sealing or moving correctly. The diverter often has small O-rings or seals that facilitate its function; ensure these are intact and not cracked or hardened.
6. Clean or Replace the Diverter Valve — Cleaning is often sufficient, but replacement might be necessary.
If the diverter valve appears to be in good condition but is covered in mineral deposits or grime, clean it thoroughly. Soak it in white vinegar for 30 minutes to an hour, then scrub gently with a small brush. Rinse it well. If the diverter is cracked, worn, or heavily damaged, it's best to replace it. Take the old diverter to a plumbing supply store or home center to match it exactly. Replacement diverter valves are usually inexpensive. Ensure any O-rings are lubricated with plumber's grease before reassembly.
- Material: White vinegar, plumber's grease (for O-rings)
7. Reassemble the Faucet — Carefully put everything back together in reverse order.
Insert the clean or new diverter valve into its housing, making sure it's oriented correctly (some diverters have a specific way they fit). Reinstall any retaining clips or nuts. Place the spout back on, then secure any decorative collars or nuts. Finally, reattach the handle, tightening the set screws gently. Don't overtighten the set screws, as this can strip the threads or crack the handle.
- Tip: Refer to any photos you took during disassembly.
8. Restore Water Supply and Test — With everything reassembled, it’s time to check your work.
Slowly turn the hot and cold water supply valves back on under the sink. Check for any leaks around the faucet base or sprayer hose connections. Run the main faucet for a moment, then activate the sprayer. With a clean spray head and diverter, you should now have strong, consistent pressure from your kitchen sink sprayer. If a small leak is present, try gently tightening the connection. If the pressure is still low, retrace your steps or consider professional help.
- Safety: Check for leaks immediately after turning water back on.
Common Causes
- Mineral Buildup (Hard Water): The most frequent culprit. Calcium and magnesium in hard water precipitate out and accumulate in small openings like the sprayer nozzles and the diverter valve. This restricts water flow over time.
- Sediment and Debris: Small particles of rust, pipe scale, or other sediment from your water supply can get trapped in the sprayer head or the diverter valve, creating blockages.
- Kinked or Damaged Hose: The flexible hose connecting the sprayer to the faucet can become kinked, twisted, or even internally collapsed, impeding water flow. If objects under the sink press against it, it can kink repeatedly.
- Worn or Damaged Diverter Valve: Over time, the internal components of the diverter valve (springs, seals, O-rings) can wear out, crack, or become stiff with mineral deposits, preventing it from fully opening the water path to the sprayer.
- Low Water Pressure in the House: While less common for just the sprayer, if multiple fixtures in your home experience low pressure, the issue might be with your main water supply or pressure regulator, affecting all fixtures relatively equally.
- Faulty Sprayer Head: Occasionally, the sprayer head itself may be defective or develop an internal blockage that can't be easily cleaned, necessitating replacement.
Common Mistakes
- Forgetting to Turn Off Water Supply: A messy and potentially damaging mistake. Always turn off the hot and cold water supply valves beneath the sink before disassembling any faucet components. This prevents flooding and allows you to work safely.
- Overtightening Connections: When reassembling, especially plastic components or hose nuts, overtightening can strip threads, crack plastic, or compress washers excessively, leading to leaks or future failures. Tighten until snug, then a quarter turn more if needed.
- Losing Small Parts: Faucets and sprayers have tiny O-rings, washers, and screws. Keep a small container or a clean cloth where you can place all removed components immediately to prevent them from rolling away or getting lost. Take photos during disassembly.
- Using Harsh Chemicals for Cleaning: While vinegar is excellent for mineral deposits, harsh chemical cleaners can damage plastic and rubber components within your sprayer or faucet, leading to premature wear or leaks. Stick to vinegar or mild dish soap.
- Not Identifying the Faucet Model: If you need to replace a part like the diverter valve, guessing the model or bringing in an incorrect part can lead to multiple trips to the hardware store. Take the old part with you or know your faucet's brand and model number.
- Ignoring the Main Faucet Spout: If the sprayer has low pressure, briefly check the pressure of the main faucet spout. If both have low pressure, the problem is likely further upstream (e.g., house water pressure, supply line issue) rather than just the sprayer.
Cost & Time Breakdown
| Task | DIY Cost | Pro Cost | Time |
|---|---|---|---|
| Inspect/Clean Sprayer Head | $0–$2 | Included in service | 5–15 minutes |
| Check/Straighten Hose | $0 | Included in service | 2–5 minutes |
| Clean Sprayer Hose Filter | $0 | Included in service | 10–20 minutes |
| Clean Diverter Valve | $0–$5 | Included in service | 30–60 minutes |
| Replace Diverter Valve | $10–$30 | $150–$250 | 45–90 minutes |
| Replace Sprayer Head | $20–$50 | $100–$200 | 15–30 minutes |
Tips & Prevention
- Regular Cleaning: If you have hard water, periodically (every few months) unscrew your sprayer head and soak it in white vinegar to prevent mineral buildup from getting out of control.
- Use a Water Filter: Installing a whole-house water filter can significantly reduce sediment and mineral deposits throughout your plumbing system, extending the life of fixtures like your sprayer.
- Avoid Kinks: When storing items under the sink, ensure they don't repeatedly press against or kink the sprayer hose. Consider organizing the cabinet to create clear space for the hose.
- Inspect O-rings/Seals: When cleaning the diverter valve, always inspect the O-rings and seals. If they look dry, cracked, or rigid, replace them. Lubricating new O-rings with plumber's grease ensures a good seal and smooth operation.
- Know Your Faucet: Keep a record of your faucet's brand and model number (often found in the original installation manual or online by photo searching). This makes finding replacement parts much easier.
- Gentle Operation: Avoid yanking or aggressively pulling the sprayer hose, as this can strain connections and lead to premature wear or internal damage to the hose.
When to Call a Professional
While most low-pressure sprayer issues are fixable by a homeowner, there are times when calling a licensed plumber is the wisest course of action. If you've followed all the troubleshooting steps, including cleaning the spray head, checking the hose, and cleaning or replacing the diverter valve, and the pressure still hasn't improved, the problem might be more complex. This could indicate an issue within the main faucet body, a blockage in the hot or cold supply lines leading to the faucet, or even a systemic low water pressure problem affecting your entire home. Furthermore, if you encounter persistent leaks after reassembly that you can't stop with gentle tightening, or if you're uncomfortable disassembling the faucet and risking damage, it's best to stop and call a professional. Plumbers have specialized tools and diagnostic experience to pinpoint hidden issues and ensure a proper, leak-free repair, often without risking further complications or damage to your expensive fixtures.
Related Articles
Keep troubleshooting with these hand-picked guides from FixlyGuide:
- The 5-Minute Trick to Restore Your Kitchen Sink Sprayer's Lost Pressure — Restore your kitchen sink sprayer's low pressure with a quick, simple trick that often takes less than five minutes and requires no special…
- The 5-Minute Trick to Fix a Weak Kitchen Sink Sprayer (No Plumber Needed) — Restore full power to your kitchen sink sprayer with simple, DIY steps that tackle common culprits like clogs and diverter issues.
- The 5-Minute Trick to Stop a Dripping Single-Handle Faucet (No Plumber Needed) — A persistent drip from your single-handle faucet is usually caused by a worn-out cartridge, a repair you can typically complete yourself in…
- The $5 Secret to Silencing That Annoying Dripping Faucet (Single-Handle Fix) — Stop a dripping single-handle faucet with a simple and inexpensive DIY fix by replacing a worn-out o-ring or washer.
- The $5 Secret to Fixing Your Drip: Why Single-Handle Faucets Leak (and the O-Ring Trick) — A persistent drip from your single-handle faucet is often caused by worn-out O-rings or seals, a common issue with a simple, inexpensive DI…
- Is One Drip Emitter Starving? The Secret Culprit (It's Not Clogging) — A single drip emitter refusing to hydrate your plants can be frustrating, but the fix is often simpler than you think and rarely a clog.
Frequently asked questions
Why is my kitchen sink sprayer suddenly weak?+
Sudden weakness in your kitchen sink sprayer often points to a clog in the spray head from mineral buildup or debris. A kink in the hose or a malfunctioning diverter valve are also common causes that can appear suddenly.
Can I clean my kitchen faucet diverter valve myself?+
Yes, you can typically clean your kitchen faucet diverter valve yourself. It involves turning off the water, disassembling part of the faucet to access the small valve, cleaning it with white vinegar, and then reassembling. Detailed steps are usually available in your faucet's manual or online.
How often should I clean my sink sprayer?+
If you have hard water, it's a good practice to unscrew and soak your sink sprayer head in white vinegar every 3-6 months to prevent significant mineral buildup. If you notice pressure decreasing, clean it sooner.
What if cleaning doesn't fix my low-pressure sprayer?+
If cleaning the spray head and diverter valve, and checking the hose doesn't restore pressure, consider replacing the diverter valve or the entire sprayer head. If the problem persists, it may indicate a deeper issue with your water supply or faucet body, warranting a call to a professional plumber.
Is a low-pressure sprayer a sign of a bigger plumbing problem?+
Usually, a low-pressure sprayer is an isolated problem caused by clogs or a faulty diverter. However, if multiple fixtures in your home are experiencing low pressure, it could indicate a broader issue with your home's water pressure regulator or main supply line, which might require professional assessment.


Discussion
Loading comments…