Tools & materials you'll need
Affiliate linksAs an Amazon Associate FixlyGuide earns from qualifying purchases — at no extra cost to you. Prices and availability are accurate as of publication and subject to change.
Quick Answer
Low pressure in your kitchen sink sprayer is typically a sign of mineral buildup, a kinked hose, or a problem with the faucet's diverter valve. Most homeowners can restore full pressure by performing a simple cleaning of the spray head, inspecting the hose for kinks or blockages, or troubleshooting the diverter. These steps can usually be completed in under an hour with basic tools.
The Problem
You reach for your kitchen sink sprayer, expecting a powerful stream to rinse dishes or clean the basin, but instead, you get a weak, sputtering trickle. This frustrating lack of pressure makes the sprayer almost useless and can be a persistent annoyance. While it might seem like a major plumbing issue, low pressure in a kitchen sink sprayer is usually a symptom of a localized problem within the sprayer assembly or the faucet itself, rather than a whole-house pressure issue. Addressing these specific points of failure can often fully restore your sprayer's functionality without needing a professional.
How It Works
To understand why your sprayer loses pressure, it helps to know how it's designed to work. When you activate your kitchen sink sprayer, water is diverted from the main faucet spout through a T-fitting or a diverter valve located within the faucet body. This diverter is a small mechanism, often a spring-loaded piston or a ceramic cartridge, that senses a pressure drop when the sprayer is squeezed or pulled, or is manually engaged. It then redirects the water flow to the sprayer hose instead of the main spout.
The water travels through a flexible hose, up into the spray head. Inside the spray head, there's typically an aerator or a series of small nozzles designed to direct and spread the water into a controlled spray pattern. This delicate balance of pressure, flow, and redirection can easily be disrupted. Mineral deposits (like calcium and magnesium from hard water) are a common culprit, accumulating in the constricted pathways of the diverter valve or the tiny openings of the spray head. Over time, these deposits build up, reducing the effective diameter of the water passages and thus lowering the pressure and volume of water that can pass through. Similarly, a kink in the flexible hose acts like a dam, restricting flow. Even minor wear and tear on the diverter's seals or springs can prevent it from fully redirecting water, leading to a weak spray.
Step-by-Step Fix
1. Inspect for Kinks and Obstructions – Clear the hose's pathway
- Examine the sprayer hose under the sink. Pull it out fully and check for any visible kinks, twists, or sharp bends. These can severely restrict water flow.
- If it's a pull-down or pull-out sprayer, ensure nothing is obstructing its movement or causing it to bend sharply when retracted. Sometimes, objects stored under the sink can put pressure on the hose.
- If this doesn't work: If you find a kink, gently straighten it. If the kink is permanent or the hose appears damaged, consider replacing the hose. A new hose might cost $15-$40.
2. Clean the Spray Head – Tackle mineral buildup
- Safety First: Turn off the water supply to the sink at the shut-off valves underneath. Open the faucet to relieve any remaining pressure.
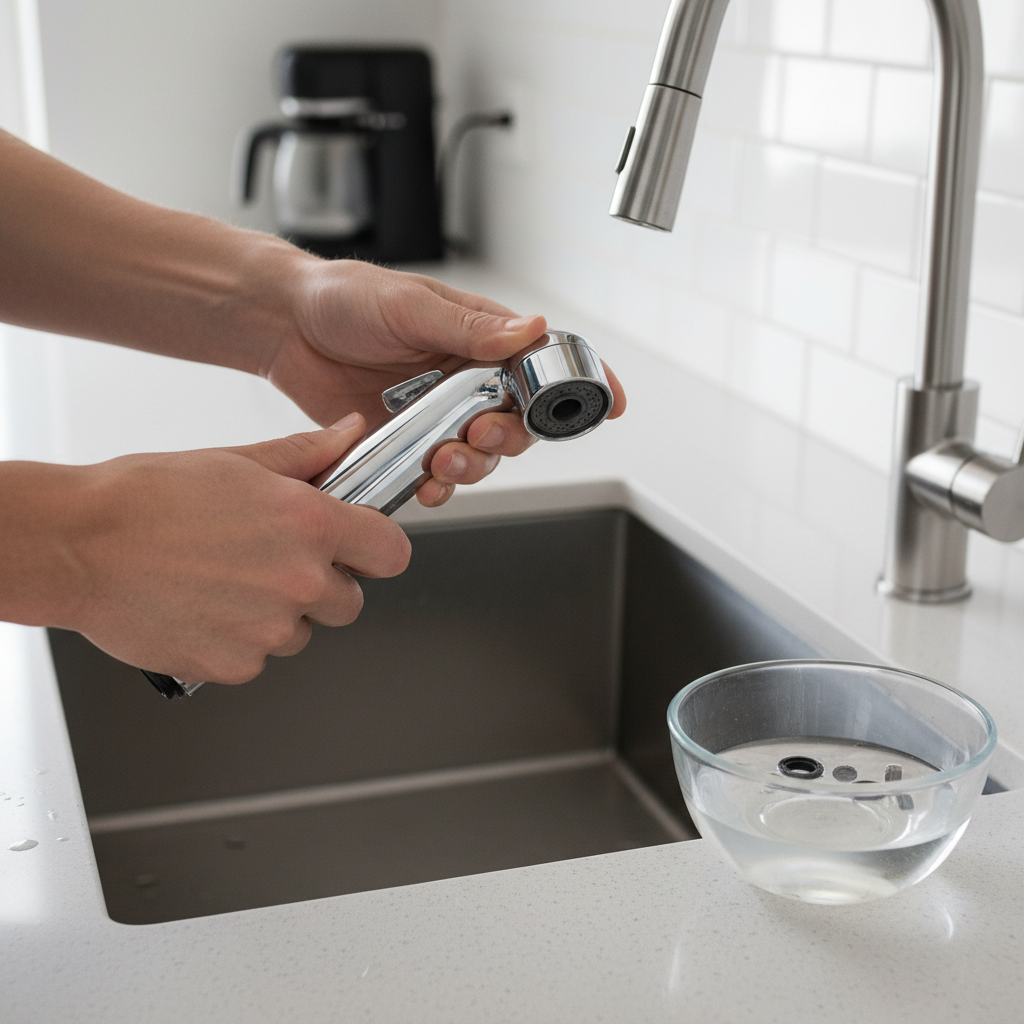
- Unscrew the spray head from the hose. This usually twists off by hand or with a pair of pliers if it's stubborn. Wrap the pliers' jaws with a cloth to prevent scratching.
- Inspect the screen or aerator inside the spray head for visible mineral deposits or debris.
- Soak the spray head in a bowl of white vinegar for 30 minutes to several hours, or even overnight for heavy buildup. Vinegar is an acid that will dissolve mineral deposits.
- Use a small brush (like an old toothbrush) or a toothpick to gently scrub away any softened deposits from the nozzles and screens.
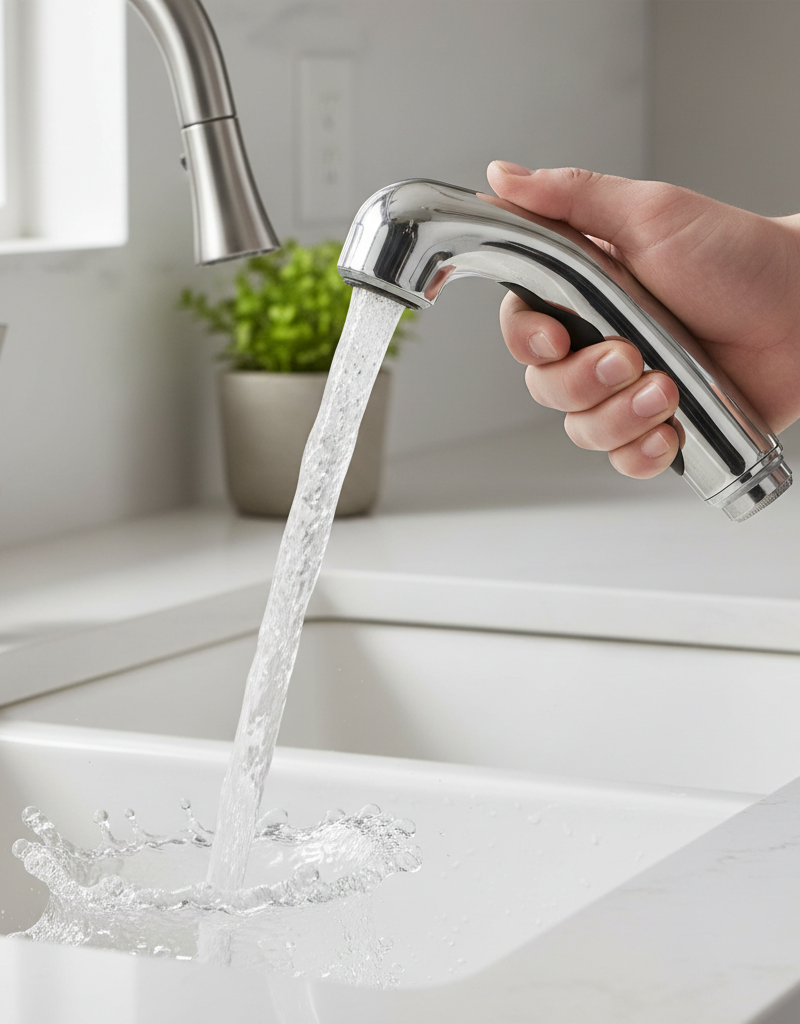
- Rinse the spray head thoroughly under running water, then reattach it to the hose. Turn the water supply back on and test the pressure.
- If this doesn't work: If the screen is heavily corroded or damaged, consider replacing just the spray head, which can range from $20-$60 depending on the faucet brand.
3. Check the Diverter Valve – The hidden flow controller
- Safety First: Turn off the water supply to the sink. Open the faucet to relieve pressure.
- Locate the diverter valve. It's usually found inside the main faucet body, often accessible by removing the faucet handle and decorative cap, or sometimes from underneath the sink where the sprayer hose connects to the faucet body.
- Consult your faucet's manual for specific instructions on accessing the diverter, as designs vary widely.
- Once exposed, carefully remove the diverter valve. It might be a small plastic disc, a piston, or a cylindrical cartridge.
- Inspect the diverter for mineral buildup, cracks, or worn seals. Clean any visible deposits using white vinegar and a small brush.
- If this doesn't work: If the diverter appears damaged or severely clogged, it's best to replace it. A replacement diverter valve can cost $10-$30, but ensure you get the correct part for your specific faucet model. This might require a trip to a specialized plumbing supply store or ordering directly from the manufacturer.
4. Examine the Sprayer Hose Connection – A less common but possible culprit
- Safety First: Water off, pressure relieved.
- Under the sink, disconnect the sprayer hose from the main water line or T-fitting. Have a bucket ready for any residual water.
- Inspect the connector for any debris, mineral buildup, or a faulty washer that might be obstructing flow.
- Clean any visible debris. Replace any stiff or cracked washers.
- Reconnect the hose, ensuring a tight, leak-free seal. Turn on the water and test.
5. Test Overall Water Pressure – Rule out bigger issues
- If the above steps don't improve the sprayer pressure, check the pressure at the main faucet spout. Is it strong? If both the main spout and the sprayer have low pressure, the issue might be broader, potentially related to your home's main water pressure, aerator, or shut-off valves. This is less common for a sprayer-only problem but worth ruling out.
Common Causes
- Mineral Buildup (Hard Water): The most frequent cause. Calcium and magnesium deposits from hard water accumulate in the small openings of the spray head and inside the diverter valve, restricting water flow and reducing pressure over time.
- Kinked or Obstructed Sprayer Hose: The flexible hose can get kinked, twisted, or trapped by items stored under the sink, physically blocking water flow. Internal debris can also get caught within the hose.
- Faulty or Clogged Diverter Valve: This small valve is responsible for switching water flow between the main faucet and the sprayer. Mineral buildup, wear on its seals, or a weak spring can prevent it from fully redirecting water to the sprayer, resulting in low pressure.
- Damaged Spray Head Aerator/Nozzles: Over time, the internal components of the spray head can degrade or become irreparably clogged, even after cleaning, necessitating replacement.
- Loose or Corroded Connections: Although less common, a loose connection point or corrosion at the sprayer hose's connection to the main water line or T-fitting can reduce flow.
Common Mistakes
- Ignoring the Diverter: Many homeowners focus solely on cleaning the spray head, overlooking the diverter valve which is often the true source of persistent low pressure.
- Using Harsh Cleaners: Employing strong chemical cleaners on plastic sprayer parts can cause damage or discoloration. White vinegar is usually sufficient and much safer.
- Overtightening Connections: When reassembling, overtightening plastic fittings can crack them, leading to leaks and requiring more costly repairs.
- Failing to Turn Off Water Supply: Forgetting to shut off the water valves underneath the sink before disassembling can lead to unexpected floods and water damage.
- Discarding Old Parts Prematurely: Don't throw away old washers or the diverter valve until you've confirmed the new part fits and functions correctly. They can be useful for comparison.
- Not Identifying Your Faucet Model: When replacing parts, blindly buying a generic diverter or spray head is a recipe for frustration. Faucet components are often proprietary, so knowing your faucet's brand and model number is crucial.
Cost & Time Breakdown
| Task | DIY cost | Pro cost | Time |
|---|---|---|---|
| Clean Spray Head | $0–$5 | N/A | 15–30 min |
| Replace Spray Head | $20–$60 | N/A | 20–40 min |
| Inspect/Clean Hose | $0 | N/A | 10–20 min |
| Replace Sprayer Hose | $15–$40 | N/A | 30–60 min |
| Clean Diverter Valve | $0–$5 | N/A | 30–60 min |
| Replace Diverter Valve | $10–$30 | $100–$250 | 45–90 min |
Tips & Prevention
- Regular Cleaning: Periodically unscrew and clean your spray head (every 3-6 months, especially in hard water areas) to prevent significant mineral buildup. A quick soak in vinegar can save you headaches.
- Water Softener: If you live in an area with very hard water, consider installing a whole-house water softener. This will significantly reduce mineral buildup not just in your sprayer but throughout all your plumbing fixtures and appliances.
- Gentle Hose Handling: Be mindful of how you retract and store the sprayer hose. Avoid jamming it or letting items under the sink press against it, which can cause kinks.
- Know Your Faucet: Keep your faucet's brand and model number handy (often found in the manual or on a label under the sink). This makes ordering replacement parts much easier.
- Annual Diverter Check: If you're comfortable with minor plumbing, a yearly inspection and cleaning of the diverter valve can preempt low-pressure issues.
When to Call a Professional
While most kitchen sink sprayer low-pressure issues are DIY-friendly, certain situations warrant calling a licensed plumber. If you've cleaned the spray head and diverter, checked the hose, and still experience low pressure, or if the problem affects your entire faucet (both main spout and sprayer), it could indicate a deeper issue with your home's water pressure regulator, supply lines, or a clogged aerator you can't access. Disassembling certain complex faucet designs might also be beyond a typical homeowner's comfort level. If you encounter persistent leaks after attempting repairs, or if you're uncomfortable identifying or replacing internal faucet components, a plumber can diagnose the root cause efficiently and ensure all parts are installed correctly without causing further damage.
Related Articles
Keep troubleshooting with these hand-picked guides from FixlyGuide:
- The 5-Minute Trick to Restore Your Kitchen Sink Sprayer's Lost Pressure — Restore your kitchen sink sprayer's low pressure with a quick, simple trick that often takes less than five minutes and requires no special…
- The 5-Minute Trick to Fix Your Kitchen Sprayer's Weak Stream — Restore your kitchen sink sprayer's full power with a simple, quick fix tackling common pressure culprits.
- The 5-Minute Trick to Fix a Weak Kitchen Sink Sprayer (No Plumber Needed) — Restore full power to your kitchen sink sprayer with simple, DIY steps that tackle common culprits like clogs and diverter issues.
- The Secret Culprit Behind Your Washing Machine's Spin & Drain Failure (It's Not Always Clogs) — Discover the most overlooked reasons why your washing machine refuses to spin or drain, and how to fix them with simple tools.
- The 4 Hidden Reasons Your Toilet Tank Fills Slowly (And How to Fix Them in Under an Hour) — A toilet tank that fills slowly is a common, annoying plumbing problem, often caused by easily fixable issues within the fill valve or wate…
- The 3 Hidden Reasons Your Sprinkler Head Won't Pop Up (And How to Fix It Fast) — Uncovering why your sprinkler head isn't popping up often comes down to three common, easily fixable issues, helping you restore your lawn'…
Frequently asked questions
Why is my kitchen sprayer suddenly low pressure?+
Sudden low pressure in your kitchen sprayer often indicates a new obstruction like a kink in the hose or a piece of debris momentarily caught in the spray head. It could also point to a diverter valve that has recently stopped functioning properly due to wear or a sudden clog.
Can hard water cause low sprayer pressure?+
Yes, hard water is a very common cause of low sprayer pressure. Minerals like calcium and magnesium build up over time in the small nozzles of the spray head and inside the diverter valve, restricting water flow and reducing the effective pressure.
Where is the diverter valve located in a kitchen faucet?+
The diverter valve is typically located inside the main body of the kitchen faucet. It's often found near where the sprayer hose connects to the faucet's underside or accessible by removing the faucet handle and cap on top of the counter. Its exact position varies by faucet model.
How often should I clean my kitchen sprayer?+
If you have hard water, it's recommended to clean your kitchen sprayer head every 3-6 months. In areas with softer water, an annual cleaning might suffice. Regular cleaning prevents significant mineral buildup which can be harder to remove later.


Discussion
Loading comments…