- The 1 Mistake Homeowners Make When Caulking a Bathroom Sink (And How to Fix It) — Stop water damage and mold in its tracks by fixing common caulking errors around your bathroom sink with this step-by-step guide.
- The 1 Caulk Mistake That Makes Your Bathroom Sink Leak (And How to Fix It Right) — Discover the most common caulk mistake homeowners make around bathroom sinks and follow our expert guide to create a perfect, watertight se…
- The 1 Mistake Homeowners Make Caulking a Bathroom Sink (And How to Fix It) — Discover the most common caulking mistake homeowners make around bathroom sinks and how to achieve a waterproof, professional-looking seal…
- The 1 Mistake Homeowners Make When Caulking a Bathroom Sink (And How to Fix It) — Discover the most common caulk mistake homeowners make around bathroom sinks and follow simple steps to achieve a lasting, watertight seal.
- The 1 Mistake Homeowners Make with a Slow Kitchen Drain (and the Real Fix) — Before you reach for harsh chemicals, learn the right way to fix a slow kitchen sink drain and prevent future clogs.
Plumbing · Leak
| Project category | Plumbing |
|---|---|
| Problem type | Leak |
| Trade required | Plumbing |
| Urgency | Emergency — act now |
| Safety risk | High safety risk |
| DIY suitability | DIY for experienced homeowners |
| Cost category | Low cost |
| Typical timeline | Shut water off now; repair usually same or next day |
| Contractor type | Licensed plumber |
Repair option
Isolate at the shutoff, replace the failed component, and dry the cavity fully.
Replacement option
Repipe the run or the branch when corrosion is widespread.
Common causes
- Failed supply line or shutoff valve
- Worn washers, cartridges, or P-trap connections
- Pinhole corrosion in older copper
Relevant tools:emergency checklistdiy or hire a pro
Published August 1, 2026Last updated August 17, 2026
Tools & materials you'll need
Affiliate linksAs an Amazon Associate FixlyGuide earns from qualifying purchases — at no extra cost to you. Prices and availability are accurate as of publication and subject to change.
Quick Answer
Cracked, peeling, or moldy caulk around your bathroom sink isn't just ugly; it's a weak spot. That busted seal lets water work its way into your vanity, the flooring, or even the wall cavity, and once that starts, you've got rot, mold, and a repair bill nobody wants. So no, don't just smear a little more over the top. You need to cut out every bit of the old caulk, clean the joint like you mean it, and put down a fresh, smooth bead of high-quality 100% silicone caulk. It's not complicated, but it does take patience and a decent hand.
The Problem
I've been in a pile of bathrooms over my 25 years as a contractor, and one of the most common headaches I run into—especially in older homes, but plenty of newer ones too—is bad caulk around the sink. You know what I'm talking about: it's dried out and cracking, it's yellowed and peeling in strips, or it's gone black and fuzzy with mold. Once you see that, you're not looking at a simple cosmetic issue. That's a break in the armor. Every time water splashes out of the sink or runs down the faucet base, it’s looking for those cracks and gaps.
And then what? That water sits there. It soaks into particleboard or MDF in the vanity and swells it up like a sponge. It can creep into drywall, soften it, and before long you've got mold hiding behind the wall. I pulled a vanity in Roseville last month that had exactly this leak—small crack, homeowner ignored it, and the whole base was rotted through to the subfloor. We had to gut the cabinet, dry the area out, treat for mold, and rebuild the mess. All because of a ten-dollar tube of caulk that got half-done. Don't let that be your Saturday. Fixing it right now saves you a pile of grief later.
How It Works
Caulk, or sealant, gives you a flexible waterproof barrier between two different surfaces that move a little on their own, like your sink and the countertop, or the counter and the wall. It fills that tiny gap and keeps water where it belongs. The whole trick is adhesion and flexibility.
When you lay down a bead of caulk, it grabs both surfaces. As it cures, it turns into a durable, rubbery seal. That flexibility matters because houses move. They all do. Foundations shift a hair with temperature swings, humidity changes, and even normal daily vibration, and a good caulk line has to stretch and compress with that movement without cracking loose.
Most caulk failures come from a few usual suspects. First, lousy prep. If you caulk over old caulk, dirt, soap scum, or a damp surface, the new stuff won't bond right. That's like trying to stick tape to a greasy pan—no dice. Second, using the wrong product. Acrylic latex caulk is easy to clean up with water, sure, but it isn't made for constant wet areas like a bathroom sink. It cracks easier and invites mold. You want 100% silicone sealant here because it holds better, stays flexible, and stands up to moisture. It’s a different animal altogether. Third, a bad bead—too thin, too thick, or full of air pockets—creates weak spots that fail early. Once you understand that, you're halfway there. The other half is just not rushing the job.
Step-by-Step Fix
This isn't rocket science, but it does take attention to detail. Follow these steps, and you'll end up with a seal that holds up.
-
Clear the Deck — Get everything out of the way. Pull all the stuff off and around the sink—soap, toothbrushes, lotion bottles, the whole parade. You need a clear work area so you can get to every inch of the joint without knocking things over or smearing caulk where it doesn't belong.
-
Cut Away the Old Caulk — No shortcuts here, every bit has to go. Grab a utility knife with a fresh blade. Run it carefully along both edges of the old bead so you can cut it free from the surfaces underneath. Take it easy on finished stuff like cultured marble or enamel; one slip and you've got a scratch that won't disappear. After that, use a caulk removal tool or a stiff putty knife to dig out the bulk. Angle the tool under the bead and lift it out. Yeah, it's tedious. Still has to be done. If you leave old caulk behind, the new stuff won't bond right and you'll be back in there sooner than you want.
-
Scrape and Scrub Away Residue — This is where most DIYers miss the mark. Once the big pieces are gone, there'll usually be a thin film or little scraps stuck in the joint. Use a plastic scraper or a razor blade held very flat to get the leftover bits off without gouging the surface. For stubborn residue, a caulk remover chemical can help, but test it somewhere hidden first so you don't trash the finish. I've had decent luck with Goo Gone Caulk Remover for the nasty stuff. After that, hit the joint with a stiff brush and some rubbing alcohol or mineral spirits to strip off soap scum, grime, and oils. Wipe it clean with a rag.
-
Dry, Dry, Dry — Moisture is caulk's worst enemy. Once everything's clean, the joint has to be bone dry. Any moisture will mess up adhesion and can trap mold under the new bead. Use a hairdryer on a cool setting, or just let it sit for several hours—overnight is better. If the air's humid, give it more time. I usually tell folks to do the cleanup at night and caulk the next morning. Dry and warm is what you want.
-
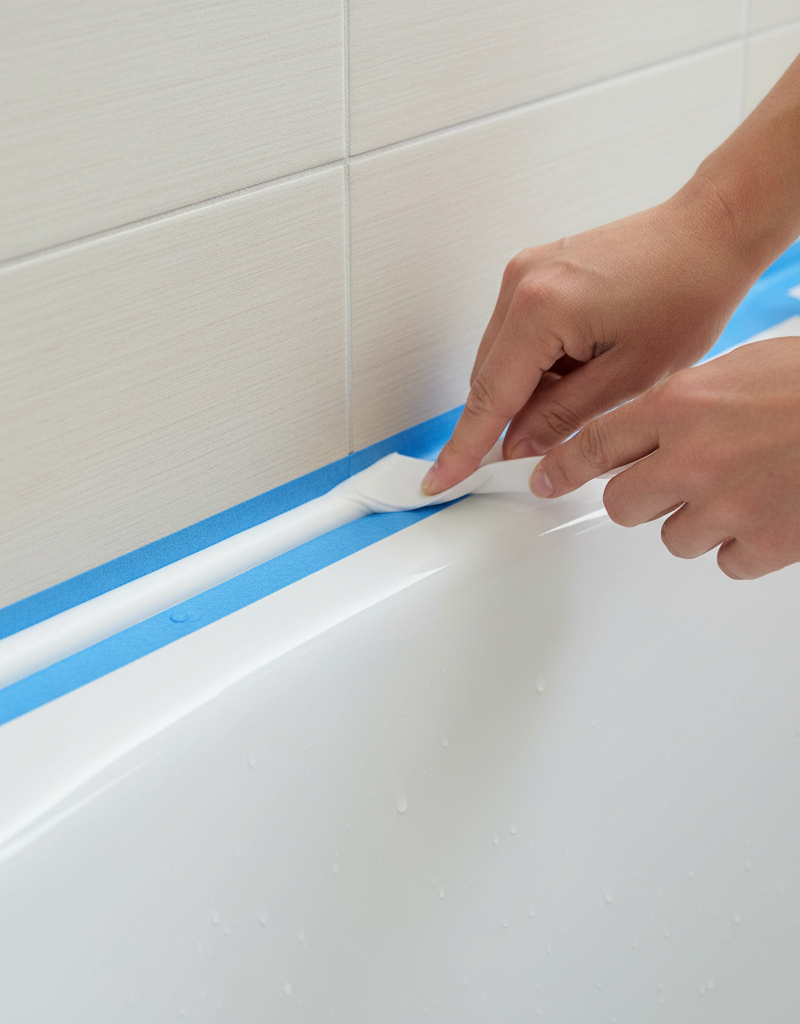
Tape Off for a Perfect Line (Optional, but Recommended) — For crisp edges, this is your secret weapon. If you want that neat, straight look, run painter's tape along both sides of the joint and leave only the gap exposed. You're usually aiming for about 1/4 inch to 3/8 inch wide. Press the tape down well so caulk doesn't sneak underneath. It’s not just about looks—it helps keep the bead even, and even is what lasts.
-
Prep Your Caulk Gun — Don't just stab the tube. Cut the silicone caulk tip at a 45-degree angle. Match the opening to the bead you want, usually around 1/4 inch for a sink. I like to start a little small; you can always trim more off if you need a bigger bead. Puncture the inner seal with the rod on the caulk gun, or a nail if that's what you've got handy. Load the tube and squeeze the trigger a few times until caulk starts coming out.
-
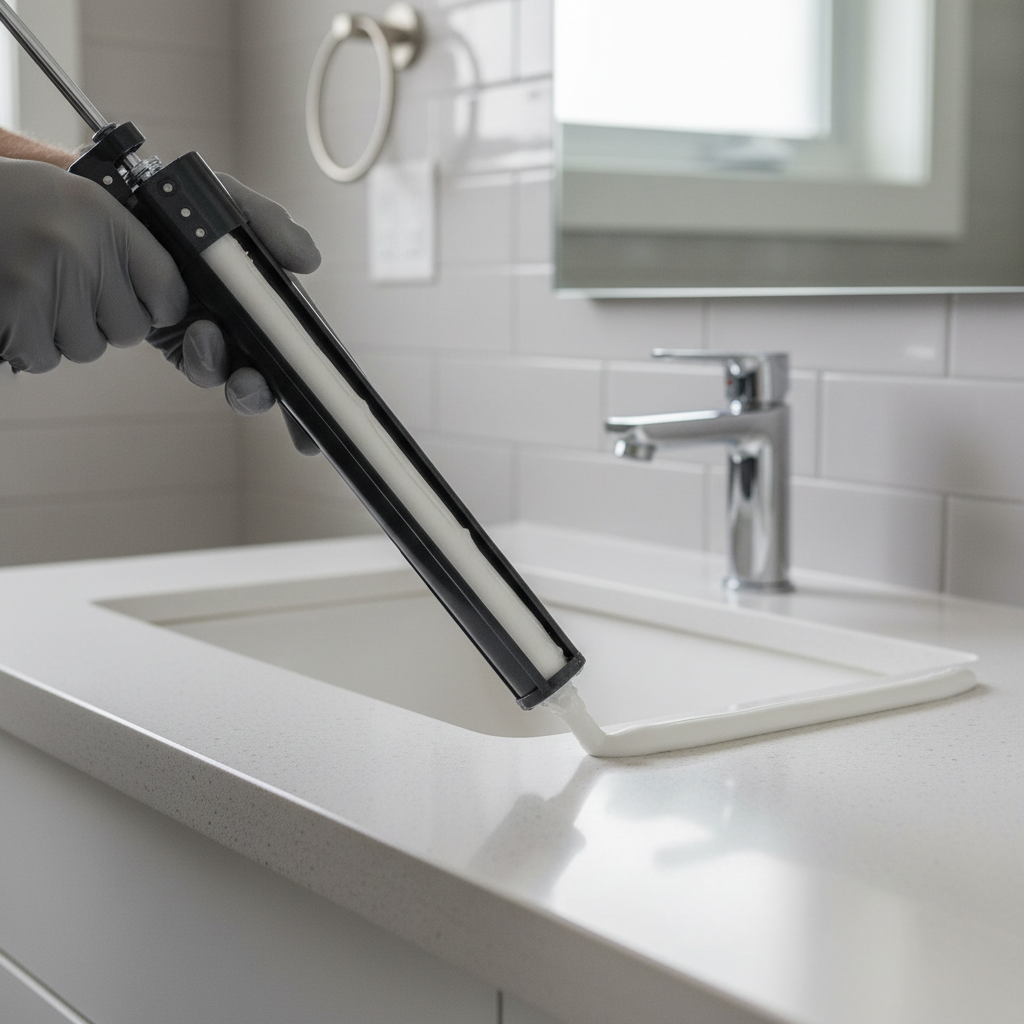
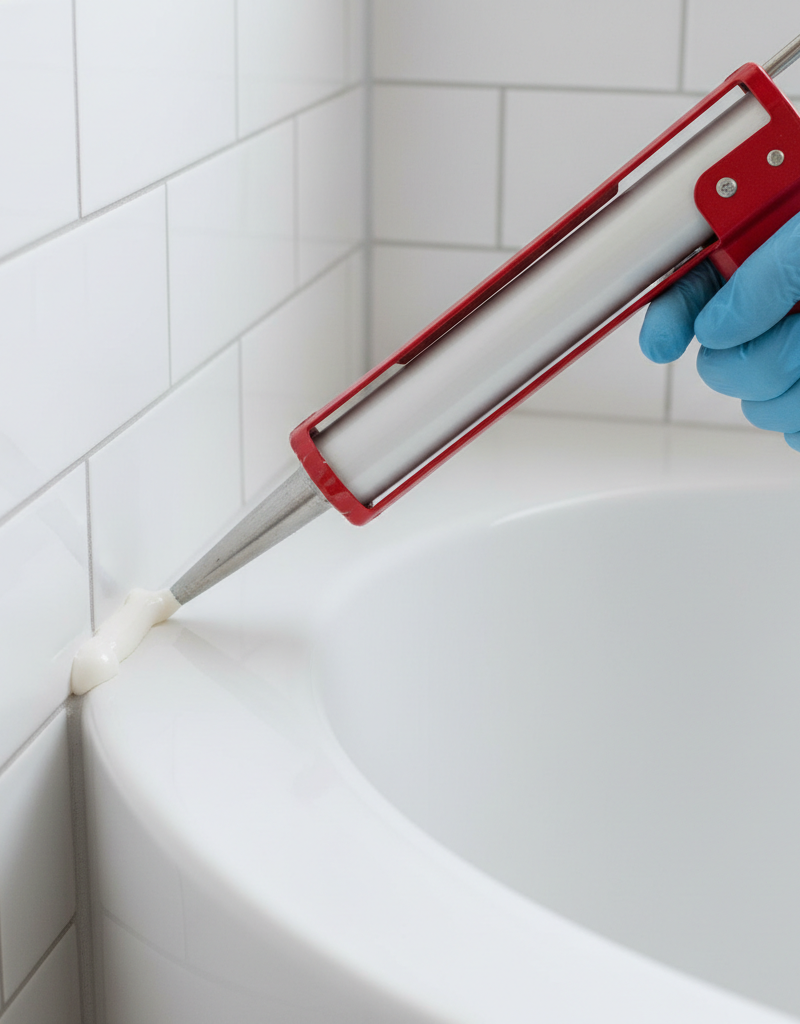
Apply the Caulk Bead — Steady pressure, confident stroke. Set the tip into the joint at a 45-degree angle. Then pull the gun smoothly while keeping even pressure on the trigger. You want one continuous bead, not a bunch of starts and stops. Push the caulk into the joint a little instead of just laying it on the surface. If you have to stop, let go of the trigger right away so it doesn't keep oozing, then start again a touch before where you left off.
-
Tool the Bead — This is what makes it look professional. Right after you lay the caulk, you need to shape it. Use a caulk finishing tool or your finger lightly dampened with water if you're using the right silicone. Smooth the bead in one pass and press it into the joint so it bonds well on both sides. Don't overwork it. That just makes a mess. You're aiming for a clean, slight concave shape—not a fat rope sitting on top.
Related Articles
Keep troubleshooting with these hand-picked guides from FixlyGuide:
- The #1 Mistake Homeowners Make When Caulking a Bathroom Sink (And How to Fix It) — Stop water damage and mold in its tracks by fixing common caulking errors around your bathroom sink with this step-by-step guide.
- The #1 Caulk Mistake That Makes Your Bathroom Sink Leak (And How to Fix It Right) — Discover the most common caulk mistake homeowners make around bathroom sinks and follow our expert guide to create a perfect, watertight se…
- The #1 Mistake Homeowners Make Caulking a Bathroom Sink (And How to Fix It) — Discover the most common caulking mistake homeowners make around bathroom sinks and how to achieve a waterproof, professional-looking seal…
- The #1 Mistake Homeowners Make When Caulking a Bathroom Sink (And How to Fix It) — Discover the most common caulk mistake homeowners make around bathroom sinks and follow simple steps to achieve a lasting, watertight seal.
- The #1 Mistake Homeowners Make with a Slow Kitchen Drain (and the Real Fix) — Before you reach for harsh chemicals, learn the right way to fix a slow kitchen sink drain and prevent future clogs.
- The #1 Caulk Mistake That Leads to Mold (And How to Fix It Right) — Discover the most common caulk mistake that causes frustrating mold growth around your bathtub and learn the simple, effective way to recau…
Should you do this yourself?
Answer five quick questions before you start. Safety outranks savings every time.
Your experience with work like this
How high do you have to work?
Does the job involve any of these?
Will it need a permit?
Specialty tools
Free and instant. Educational guidance only — not a quote, inspection, or professional diagnosis.
What should this project cost?
Enter your project details for a realistic cost range before you call anyone.
Common repairs run $150–$650; repipes and water-heater replacements reach $1,500–$4,500.
- Regional adjustment
- National average
- Labor share (typical)
- ~$754
- Quotes to collect
- 3 written estimates
Educational estimate based on national averages — not a binding quote. Always confirm with written local estimates.
Fixly Project Decision Box
- DIY difficulty
- Professional Recommended
- Estimated time
- Inspection 1–2 hours · repairs 1–3 days
- Cost level
- High
Main tools / materials
- Binoculars for a ground-level look
- Flashlight for attic checks
- Moisture meter
- Roofing cement (temporary patch only)
When to stop and call a pro
- Active leak near lights, fans, or any wiring
- Sagging, bulging, or water-filled ceiling
- Steep, wet, or two-story roof — do not climb it
- Storm or hail damage you plan to claim on insurance
Need professional help?
Free roof assessment first — no phone calls until you ask for them.
Get Local Roofing HelpGet the print-ready PDF of this guide
A clean, ad-free, printable version you can keep on your phone or pin to the workshop wall. Free with a FixlyGuide account.
- Print-optimized layout
- Tools, materials & every step included
- Saved to your account
Frequently asked questions
How often should I recaulk my bathroom sink?+
With 100% silicone caulk and proper application, you should get 5-10 years of life. Inspect your caulk annually for cracks, peeling, or mold. If you see any signs of failure, it's time to recaulk to prevent water damage.
What's the best type of caulk for a bathroom sink?+
Always use 100% silicone sealant for areas with constant water exposure, like a bathroom sink. It offers superior waterproofing, flexibility, and mold resistance compared to acrylic latex or other types of caulk.
Can I caulk over old caulk?+
No, absolutely not. Caulking over old caulk is a common mistake that leads to premature failure. The new caulk won't adhere properly to the old, creating weak spots and potential for water intrusion and mold.
How long does silicone caulk take to dry?+
Silicone caulk typically forms a skin in 30-60 minutes and is tack-free within a few hours. However, it takes 12-24 hours for it to be fully cured and resistant to water. Check the specific product's label for exact curing times.
What if my caulk gets moldy quickly?+
Frequent mold suggests moisture issues. Ensure you're using a 100% silicone caulk with mildewcide. Also, improve ventilation in your bathroom – run the fan during and after showers/baths, or open a window, to reduce humidity.
How do I make my caulk bead smooth?+
After applying the caulk, tool it immediately with a moistened finger, a caulk tooling tool, or even the back of a plastic spoon. Apply light, even pressure to create a smooth, concave bead. Remove any excess caulk immediately.
What's the difference between caulk and sealant?+
While often used interchangeably, 'caulk' generally refers to materials used to fill smaller gaps and cracks, like acrylic latex. 'Sealant' implies a more robust, flexible, and waterproof product, like silicone, designed for movement and wet environments. For sinks, you need a high-performance sealant.
Can I use grout instead of caulk around my sink?+
No, never use grout where caulk is needed. Grout is rigid and will crack with any movement between the sink and counter. Caulk provides the necessary flexibility to maintain a watertight seal.
Discussion
Loading comments…