Tools & materials you'll need
Affiliate linksAs an Amazon Associate FixlyGuide earns from qualifying purchases — at no extra cost to you. Prices and availability are accurate as of publication and subject to change.
Quick Answer
The most common mistake when caulking a bathroom sink is applying new caulk over old, failing caulk. This traps moisture and prevents a proper seal. The correct approach involves completely removing all old caulk, thoroughly cleaning and drying the surfaces, and then applying a fresh bead of 100% silicone caulk for a watertight, mildew-resistant seal.
The Problem
Is your bathroom sink showing signs of water damage around its edges? Do you see dark, unsightly mildew spots along the caulk line, or worse, feel dampness in the cabinet below? These are classic symptoms of a failing caulk seal. Over time, the caulk around your bathroom sink, whether it's where the sink meets the countertop or where the countertop meets the wall, can degrade. It can crack, peel, shrink, or simply lose its adhesion, creating tiny gaps that allow water to seep through. This isn't just an aesthetic issue; it's a structural and health concern. Water seeping into these crevices can lead to water damage in your vanity, encourage mold and mildew growth (which can be a respiratory irritant), and even damage the subfloor if left unaddressed. Many homeowners attempt to "solve" this by simply applying a new bead of caulk over the old, degraded material. This is the cardinal sin of caulking. It doesn't create a proper seal, traps existing moisture and mildew underneath, and ultimately leads to the problem recurring much faster, often in a more intensified form.
The real solution lies in understanding that recaulking is not an overlay task, but a replacement job. It demands a clean slate. This article will guide you through the proper, step-by-step process to remove the old, apply the new, and ensure your bathroom sink is sealed correctly, protecting your bathroom from water damage and keeping it looking pristine.
How It Works
Caulk, in its simplest form, acts as a flexible, waterproof barrier that seals the small gaps and joints where two distinct surfaces meet, particularly in areas exposed to moisture, like around a bathroom sink. Most modern bathroom caulks are made from silicone or acrylic latex, often with added fungicides to resist mildew. Silicone caulk is generally preferred for bathrooms due to its superior water resistance, flexibility, and longevity, adhering well to non-porous surfaces like porcelain, ceramic, and solid-surface countertops.
When correctly applied, the caulk creates a continuous bond between the sink rim and the countertop, or the countertop and the wall. This bond prevents water from penetrating the joint. The caulk's elasticity allows it to expand and contract slightly with changes in temperature and humidity, or minor shifts in the house structure, without breaking its seal. However, caulk isn't invincible. Over years, exposure to water, cleaning chemicals, heat, and cold cycles can degrade its flexibility and adhesion. UV light (even indirect sunlight through a window) contributes to hardening and cracking. Even constant scrubbing can wear down its surface. Once the caulk starts to crack or pull away, microscopic channels form, allowing water to bypass the seal. If water gets behind the caulk, it can sit there, creating a perfect breeding ground for mold and mildew. This also weakens the caulk's bond from behind, accelerating its failure. Simply layering new caulk over old, compromised caulk won't work because the new caulk cannot properly adhere to the underlying surface (which is still old caulk, not the sink or counter material). It creates a superficial seal that fails quickly and traps moisture and mildew in an even deeper layer, exacerbating the problem.
Step-by-Step Fix
Before you start, gather all your tools and materials. Working in a well-ventilated area is crucial, especially when using solvents. Protect your eyes and skin with appropriate safety gear.
1. Clear the Area — Remove everything from around the sink.
Remove toiletries, soap dishes, and anything else sitting on the countertop near the sink. You need an unobstructed workspace. This also prevents accidental damage or chemical splashes on your personal items.
2. Soften Old Caulk — Apply a caulk remover if necessary.
For stubborn, dried-out caulk, a caulk remover can make the process significantly easier. Apply the remover according to the product instructions, usually letting it sit for 15-30 minutes. This softens the caulk, making it easier to scrape away. Test it in an inconspicuous area first to ensure it doesn't damage your countertop or sink finish.
3. Scrape Away All Old Caulk — Remove every trace carefully.
Safety Note: Wear cut-resistant gloves and safety glasses. Old caulk can be sharp. Use a utility knife or a specialized caulk removal tool to carefully cut along both edges of the old caulk bead. Angle the blade slightly to get underneath it. Once cut, use a plastic scraper or the dedicated caulk removal tool to pry up and scrape away all the old caulk. Be meticulous; even small remnants can prevent new caulk from adhering properly. For tight corners or stubborn residue, a razor blade scraper (held at a very low angle to avoid scratching) or a fine-bristle wire brush can be useful. Do not gouge the sink or countertop surfaces.
- If you see mold/mildew: Even after scraping, you might see residual mold stains. Treat these with a bleach solution (1 part bleach to 10 parts water) or a commercial mold killer. Let it sit for 10-15 minutes, then scrub with an old toothbrush.
4. Clean and Degrease Surfaces — Prepare for optimal caulk adhesion.
After removing all physical caulk, the surfaces need to be perfectly clean and grease-free. Spray the joint with an all-purpose cleaner or rubbing alcohol. Scrub the area thoroughly with a clean cloth or sponge to remove any caulk residue, soap scum, mildew, or cleaner film. Oil and grease inhibit caulk adhesion, so this step is critical. For tougher degreasing, you can use mineral spirits, but ensure the area is well-ventilated and follow product safety warnings.
5. Dry the Area Completely — Moisture is the enemy of a good seal.
This is perhaps the most overlooked step. Caulk, especially silicone, needs a completely dry surface to cure properly and achieve maximum adhesion. Use a clean, dry cloth to wipe down the area. Then, allow the area to air dry for several hours, or even overnight if humidity is high. A hairdryer on a cool setting can help speed up the process, but direct heat can also cause problems with surface temperatures. Ensure no standing water or dampness remains. If there's any doubt about dryness, wait longer.
6. Prepare the Caulk Gun — Load the tube and cut the tip correctly.
Load your chosen caulk (100% silicone for bathrooms is best) into the caulk gun. Cut the tip of the caulk tube at a 45-degree angle, making a hole that is slightly smaller than the bead of caulk you want to apply. A smaller hole gives you more control and a finer bead. Puncture the inner seal of the caulk tube with the long metal rod on most caulk guns. Practice on a piece of scrap cardboard or paper to get a consistent flow and feel for the trigger.
7. Apply Painter's Tape (Optional but Recommended) — For crisp, clean lines.
For a perfectly straight and clean caulk line, apply painter's tape on either side of the joint, leaving a consistent gap the width of your desired caulk bead. This creates a clean edge and makes cleanup much easier. Ensure the tape is pressed down firmly to prevent caulk from seeping underneath.
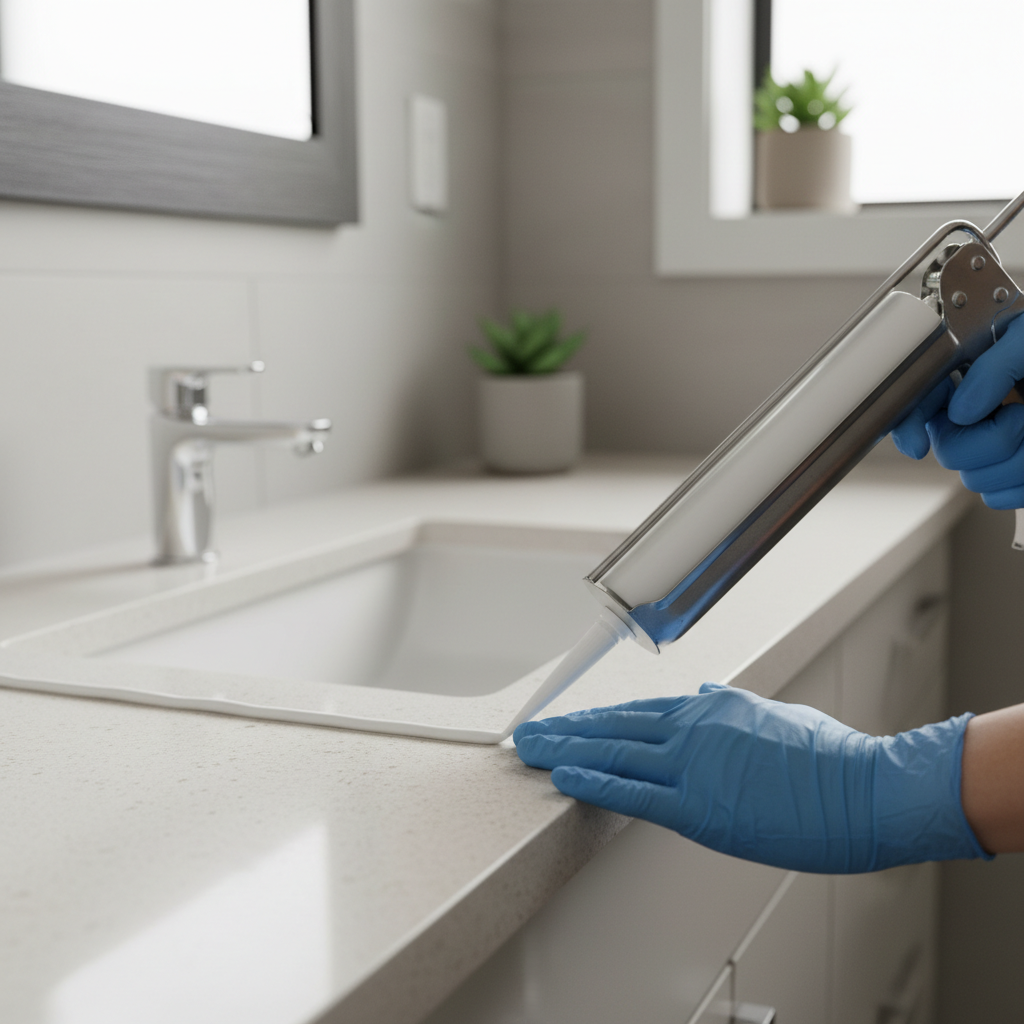
8. Apply the Caulk Bead — Smooth, steady, and continuous.
Safety Note: Work in a well-ventilated area. Hold the caulk gun at a 45-degree angle to the joint. Apply steady, even pressure on the trigger while moving the gun smoothly and continuously along the joint. Aim for a consistent, unbroken bead. Don't stop and start in the middle if you can help it; if you must, overlap the previous bead slightly. Try to fill the entire gap with caulk, ensuring it makes good contact with both surfaces.
9. Tool the Caulk Joint — Create a professional, watertight finish.
Immediately after applying the caulk (before it starts to skin over, usually within 5-10 minutes), smooth the bead with a caulk tool, a gloved finger (lightly moistened with water), or a plastic spoon. Apply gentle, consistent pressure to push the caulk into the joint and create a smooth, concave surface. This ensures maximum adhesion and a professional look. Wipe away any excess caulk from your tool or finger onto a paper towel. If using painter's tape, remove it immediately after tooling the caulk, pulling it away slowly at a 45-degree angle before the caulk fully skins over.
10. Cure Time — Allow adequate drying before exposure to water.
Check the caulk manufacturer's instructions for specific cure times. Most silicone caulks require at least 24 hours (and often 48-72 hours) before exposure to water, and a full 7 days for a complete cure. During this time, avoid using the sink area for washing or splashing water. Adequate curing is essential for the caulk's long-term durability and waterproof properties.
Common Causes
- Improper Initial Application: The original caulk may not have been applied correctly, lacking proper surface prep or tooling, leading to premature failure.
- Poor Caulk Quality: Using acrylic latex caulk in a high-moisture area like a bathroom, instead of 100% silicone, can lead to quicker degradation.
- Movement and Expansion/Contraction: Subtle shifts in the house foundation, temperature fluctuations, and humidity changes cause materials to expand and contract, eventually stressing and cracking the caulk.
- Harsh Cleaning Products: Abrasive cleaners or strong chemical solvents can strip the plasticizers from caulk, making it brittle and prone to cracking.
- Lack of Ventilation: Poor bathroom ventilation leads to higher humidity, encouraging mildew growth on and under degrading caulk.
- Aging and Wear: Over time, all caulk will naturally degrade due to exposure to water, heat, and cleaning, losing its flexibility and adhesion.
Common Mistakes
- Not Removing All Old Caulk: The #1 mistake. New caulk will not adhere properly to old caulk, leading to quick failure and trapped moisture.
- Not Cleaning and Drying Thoroughly: Any dust, soap scum, grease, or moisture will prevent the new caulk from forming a strong, lasting bond.
- Using the Wrong Caulk Type: Applying paintable acrylic latex caulk in a shower or around a sink is a common error. Always use 100% silicone caulk for these high-moisture areas due to its superior water resistance and flexibility.
- Cutting the Caulk Tube Tip Too Large: A large opening leads to an overly thick bead, making it harder to control and tool neatly, often wasting caulk.
- Applying Too Much Caulk: An excessive amount of caulk doesn't increase its effectiveness and makes tooling messy, creating an unsightly and often hard-to-clean bead.
- Not Tooling the Caulk: Failing to smooth the caulk bead immediately after application leaves a jagged, uneven surface that is less effective at sealing and more prone to trapping grime and mildew.
- Using the Sink Too Soon: Exposing newly applied caulk to water before it has fully cured significantly weakens its bond and can lead to premature failure.
Cost & Time Breakdown
| Task | DIY Cost | Pro Cost | Time |
|---|---|---|---|
| Caulk removal and prep | $0-$15 | $50-$100 | 30-60 min |
| Materials (caulk, tape) | $15-$30 | Included | N/A |
| Caulk application | $0 | Included | 15-30 min |
| Total | $15-$45 | $150-$300 | 1-2 hours |
Tips & Prevention
- Regular Cleaning: Regularly clean the caulk lines with mild, non-abrasive cleaners to prevent soap scum and mildew buildup.
- Ventilation is Key: Always use your bathroom exhaust fan during and after showers to reduce humidity, which contributes to caulk degradation and mildew.
- Inspect Annually: Once a year, thoroughly inspect the caulk around your sink. Look for cracks, peeling, or discoloration. Address minor issues promptly.
- Wipe Down Surfaces: After each use, quickly wipe down the sink edges to remove standing water, especially around the caulk line.
- Use 100% Silicone: When it's time to recaulk, always opt for a high-quality 100% silicone sealant formulated for kitchens and bathrooms. It offers superior water resistance and flexibility compared to acrylic latex.
- Test Your Fan: Ensure your bathroom exhaust fan is functioning effectively. Hold a tissue up to the vent; it should be pulled and held against the grill.
When to Call a Professional
Recaulking a bathroom sink is a manageable DIY project for most homeowners, but there are situations where calling a professional is the smarter choice. If you discover extensive water damage to your vanity cabinet or the subfloor beneath the sink, this indicates a long-standing leak that requires more than just new caulk. A professional can assess the extent of the damage, repair or replace compromised materials, and ensure there's no hidden mold growth. Similarly, if you're uncomfortable using sharp tools to remove old caulk or have difficulty achieving a smooth, consistent bead that actually seals, a professional handyman or plumber can ensure a watertight and aesthetically pleasing finish. They have the experience and specialized tools to do the job correctly and efficiently, preventing future issues. Lastly, if the sink itself is loose or damaged, the problem extends beyond the caulk and requires professional attention to secure or replace the fixture before recaulking can be effective.
Related Articles
Keep troubleshooting with these hand-picked guides from FixlyGuide:
- The #1 Mistake Homeowners Make Caulking a Bathroom Sink (And How to Fix It) — Discover the most common caulking mistake homeowners make around bathroom sinks and how to achieve a waterproof, professional-looking seal…
- The #1 Mistake Homeowners Make When Caulking a Bathroom Sink (And How to Fix It) — Discover the most common caulk mistake homeowners make around bathroom sinks and follow simple steps to achieve a lasting, watertight seal.
- The #1 Mistake Homeowners Make with a Slow Kitchen Sink (And Its Dead Simple Fix) — Before you reach for harsh chemicals, learn the most common, easily fixable reason your kitchen sink is draining slowly and how to fix it y…
- The 3 Hidden Reasons Your Bathroom Sink Stinks (And the 20-Minute Fix) — Uncover the surprising causes behind a foul-smelling bathroom sink drain and learn a simple, effective fix in just 20 minutes.
- The #1 Mistake Homeowners Make to Burst Pipes (and 5 Ways to Prevent It) — Learn the critical mistake most homeowners make when trying to prevent frozen pipes and discover five actionable strategies to protect your…
- The #1 Mistake Homeowners Make With HVAC Filters (And How Often to Really Change Them) — Discover the crucial mistake most homeowners make with HVAC filters and the specific schedule you should follow to avoid costly HVAC issues…
Frequently asked questions
How often should I recaulk my bathroom sink?+
The lifespan of caulk varies depending on quality, maintenance, and bathroom usage, but generally, you should inspect your caulk annually and plan to recaulk every 3-5 years, or sooner if you notice cracking, peeling, or mildew.
Can I caulk over existing caulk?+
No, you should never caulk over existing caulk. This is the surest way to get a failed seal. Always remove all the old caulk, clean the surface thoroughly, and then apply a fresh bead for proper adhesion and a lasting, watertight seal.
What's the best type of caulk for a bathroom sink?+
For bathroom sinks and high-moisture areas, 100% silicone caulk is highly recommended. It offers superior water resistance, flexibility, and mildew resistance compared to acrylic latex caulks.
How long does silicone caulk take to dry before I can use the sink?+
Most silicone caulks are 'tack-free' in a few hours but require at least 24 hours (and often 48-72 hours) before exposure to water. Always check the specific manufacturer's instructions on the caulk tube for complete cure times, which can be up to 7 days.
My new caulk is turning yellow. Why?+
If your white caulk is turning yellow, it's typically due to using an acrylic latex caulk in a high-moisture area or improper cleaning. Prolonged exposure to humidity, certain cleaning chemicals, or even nicotine can cause acrylic caulk to yellow over time.
What if my sink is still leaking after recaulking?+
If your sink is still leaking after properly recaulking, the issue is likely not the caulk seal on the rim. Check the drain assembly, P-trap connections, or supply lines beneath the sink. These are common culprits for leaks that can be mistaken for failing caulk.
How warm does it need to be to caulk?+
For optimal adhesion and curing, most caulks recommend application in temperatures between 40°F (4°C) and 90°F (32°C). Avoid extreme cold or heat, which can affect the caulk's consistency and curing process.


Discussion
Loading comments…