
Tools & materials you'll need
Affiliate linksAs an Amazon Associate FixlyGuide earns from qualifying purchases — at no extra cost to you. Prices and availability are accurate as of publication and subject to change.
Quick Answer
When your AC unit starts leaking water or struggling to cool, a clogged condensate drain line is often the sneaky culprit. This common issue is usually caused by an accumulation of algae, mold, and sludge within the drain pan and the PVC pipe that carries condensation away from your unit. The good news is that most homeowners can tackle this problem in under an hour with basic tools, preventing potential water damage and restoring your AC's efficiency. The primary fix involves either physically removing the blockage with a wet/dry vac or flushing it out with a vinegar and water solution.
The Problem
Imagine a hot, humid day. Your air conditioner is working hard, diligently removing not just heat but also moisture from your home's air. This moisture, or condensate, drips into a pan beneath your indoor AC unit (the evaporator coil) and then flows out through a PVC pipe, usually to the outdoors or into a household drain. Sounds simple, right? It is, until that pipe gets blocked. Over time, a perfect storm of warmth, darkness, and moisture inside the drain line creates an ideal breeding ground for algae, mold, and mildew. These organisms, along with dust and debris, form a slimy, gooey clog that slowly chokes the flow of water. Eventually, the water backs up, overflows the condensate pan, and starts leaking into your ceiling, walls, or even directly onto your floor. Beyond the obvious water damage, a backed-up drain line can also trigger your AC's safety shut-off switch, turning off your unit and leaving you sweltering.
How It Works
To understand the fix, let's briefly trace the journey of water through your AC system. As warm, humid air from your home passes over the cold evaporator coil (the indoor part of your AC), the moisture in the air condenses, much like water droplets forming on a cold glass on a summer day. This condensed water, called condensate, drips into a sloped drain pan situated directly beneath the evaporator coil. From the drain pan, gravity guides the water into a condensate line, typically a 3/4-inch PVC pipe. This pipe then routes the water away from the unit and your home. In many systems, particularly those in attics or crawl spaces, there's also a secondary or auxiliary drain pan positioned beneath the primary pan to catch overflows in case the main drain clogs. Many modern AC units also incorporate a float switch in the primary drain pan. When the water level rises due to a clog, this float switch is triggered, automatically shutting off the AC compressor to prevent water damage. This is why your AC might stop cooling entirely if the drain line is severely clogged. The condensate line usually terminates either outside, often near the foundation or an exterior wall, or it might connect to a household drain, such as a washing machine standpipe or a utility sink drain. Knowing where your line terminates will help you diagnose and clear the clog more effectively. Understanding this simple plumbing path is key to identifying where blockages occur and how to intervene successfully.
Step-by-Step Fix
Before you begin, always remember electrical safety. Turn off your AC unit at the thermostat and, crucially, at the circuit breaker dedicated to your outdoor condenser unit and indoor air handler. You'll be dealing with water near electrical components, so this step is non-negotiable.
1. Locate the Drain Pan and Line — Find your AC's internal plumbing.
- Your condensate drain pan is usually found beneath the indoor air handler or furnace unit, often in the attic, basement, crawl space, or a utility closet. It's a shallow, rectangular pan. The drain line, a 3/4-inch PVC pipe, will extend from this pan.
- Safety Note: If your unit is in the attic, ensure proper footing on joists to avoid falling through the ceiling. Bring a flashlight and be aware of your surroundings.
2. Check for Water Overflow — Verify the problem.
- If the pan is overflowing with standing water, you've confirmed a clog. If there's also a secondary pan, check if that's full too. This usually indicates a severe blockage.
- If the pan isn't overflowing but water is leaking elsewhere: The clog might be further down the line, or there could be a crack in the pan itself (less common).
3. Clear Standing Water — Prepare for the clearing process.
- Use a wet/dry vac to remove any standing water from the primary and secondary drain pans. This prevents more water damage while you work and gives you a clear view of the drain opening.
- Alternatively, you can use old towels and a bucket if you don't have a wet/dry vac, though it will take longer.
4. Find the Access Point & Outdoor Exit — Identify where to apply pressure or vacuum.
- The condensate line often has a capped T-shaped vent or access port near the air handler. This is the ideal spot to pour cleaning solutions or apply the wet/dry vac.
- Locate the outdoor end of the drain line, usually a small PVC pipe sticking out from your foundation or near your condenser unit. This is where the gunk will exit.
- No outdoor exit or access port? Some systems drain directly into a household drain. Check near the water heater, washing machine, or a utility sink for a connected PVC pipe.
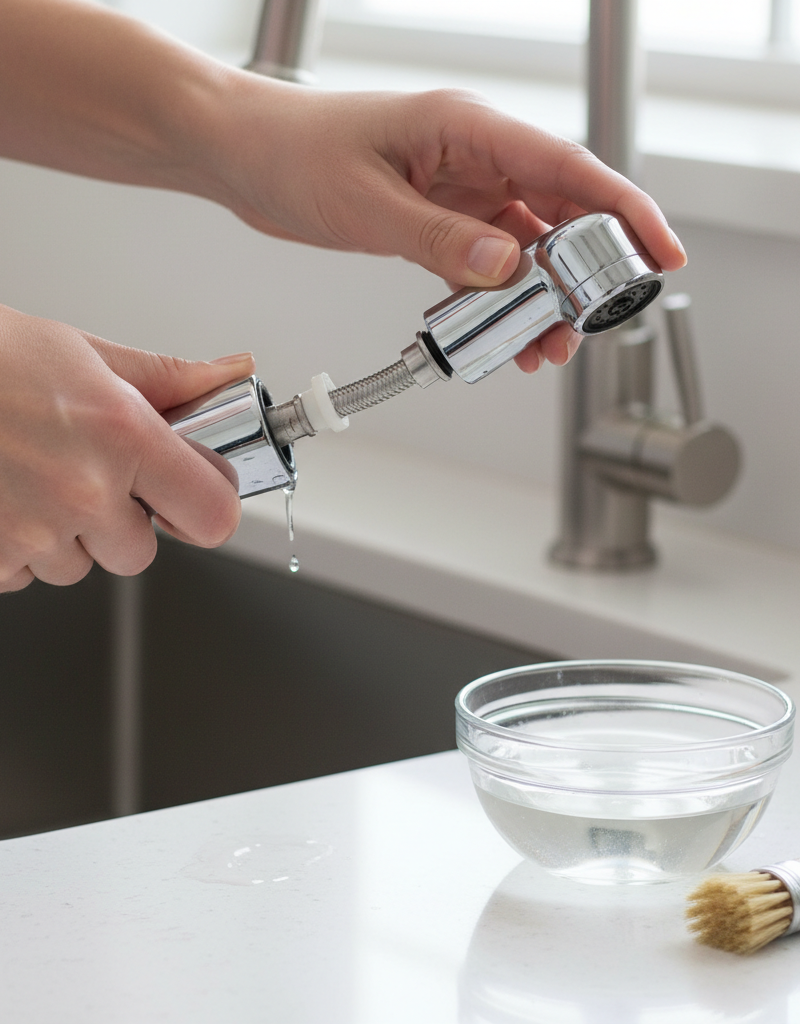
5. Attempt a DIY Flush (Prevention/Mild Clog) — A gentle first approach.
- If the clog is mild or for routine maintenance, pour 1/2 cup of distilled white vinegar down the access port or directly into the drain opening in the pan (after clearing standing water).
- Follow with 1/2 cup of warm (not hot) water. Let it sit for 20-30 minutes. The vinegar's acidity helps break down algae and mold.
- Avoid bleach: While it kills mold, it can be corrosive to some AC components and produce toxic fumes when mixed with other substances. Stick to vinegar.
6. Use a Wet/Dry Vac for Stubborn Clogs — The most effective method.
- This is generally the most effective way to clear a stubborn clog. Take your wet/dry vac outside to the end of the condensate drain line.
- Create a tight seal around the end of the PVC pipe with the wet/dry vac hose. You can use duct tape or even a rag to ensure a good seal.
- Turn on the wet/dry vac to its highest setting for 2-3 minutes. You should hear a gurgling sound as it pulls out water and debris. Be prepared for a disgusting mess to come out of the pipe into the vac!
- If you don't have a wet/dry vac: Try using a shop vac, but ensure it's rated for wet use.
7. Pour Water to Verify — Confirm the line is clear.
- After attempting to clear the clog, go back to the indoor unit. Carefully pour 1-2 quarts of clean water into the access port or directly into the primary drain pan.
- Go back outside and watch the drain line. You should see a steady stream of water flowing out. If it's still just a drip or no water, the clog is still there or only partially cleared.
- Still clogged? Repeat steps 5 and 6, allowing the vinegar to sit longer, or apply the wet/dry vac for a longer duration. Sometimes multiple attempts are necessary.
8. Clean the Drain Pan — Prevent future clogs.
- Once the line is clear, use a rag and a mild cleaner (like diluted dish soap or a specialized HVAC coil cleaner) to wipe down the inside of the condensate pan. Remove any remaining sludge or debris.
- Consider placing a few specialized algaecide tablets (available at hardware stores) in the pan. These slow down algae growth for several months.
9. Restore Power and Test — Final checks.
- Replace any caps or plugs on the drain line access ports. Turn your AC unit's power back on at the circuit breaker and set the thermostat to cool.
- Monitor the unit for the next few hours. Check for leaks and ensure water is steadily dripping from the outdoor condensate drain line. Your AC should be cooling effectively again.
Common Causes
- Algae and Slime Buildup: This is the overwhelming primary cause. The dark, moist environment of the condensate line is a perfect breeding ground for various types of algae, mold, and mildew. Over time, these organisms form a biofilm that grows and restricts water flow.
- Dust and Debris: Airborne particles like dust, pet dander, lint, and even small insulation fibers can get caught in the condensate pan and line. These particles act as anchors for the algae and sludge, accelerating clog formation.
- Infrequent Maintenance: Neglecting regular AC tune-ups and drain line flushing allows minor buildup to become major blockages.
- Poorly Sloped Drain Line: If the condensate line isn't installed with a sufficient downward slope, water can pool, encouraging stagnant conditions and accelerated growth of biological contaminants.
- P-Trap Issues (Rare): Some systems have a P-trap in the condensate line (similar to under your sink). If this trap dries out or accumulates too much debris, it can contribute to a clog.
Common Mistakes
- Using Bleach: While bleach kills mold, it can corrode the condensate pan and the PVC pipe over time. It can also create dangerous fumes if mixed with other chemicals already in the line. Stick to white vinegar.
- Ignoring the Outdoor Drain: Many DIYers assume the clog is only at the indoor unit. Often, the clog is most accessible and effectively cleared by pulling from the outdoor termination point with a wet/dry vac.
- Not Turning Off Power: Forgetting to turn off the AC at the breaker is a significant safety risk when working near water and electrical components. Always de-energize the unit.
- Using Too Much Force with a Snake: A plumber's snake can puncture or damage the relatively thin PVC condensate line. The line is not designed for heavy-duty snaking; vacuuming or flushing is much safer.
- Skipping the Access Port: Some homeowners try to clear the clog by pouring water directly into the pan. While this can work for minor clogs, using the dedicated access port (if available) allows for a more direct application of cleaning solutions and often leads to better results.
- Not Cleaning the Pan After Clearing: Even if the line is clear, remaining sludge in the pan will quickly lead to another clog. Wipe it clean and consider algaecide tablets for prevention.
Cost & Time Breakdown
| Task | DIY Cost | Pro Cost | Time |
|---|---|---|---|
| Locate & Inspect | $0 | Included | 10–15 min |
| Drain Water from Pan | $0 | Included | 5–10 min |
| Clear with Vinegar/Water | $2–$5 | Included | 30–60 min |
| Clear with Wet/Dry Vac | $0–$10 | Included | 30–45 min |
| Clean & Treat Drain Pan | $5–$15 | Included | 10–15 min |
| Total (DIY) | $2–$30 | $75–$250 | 30–90 min |
Pro cost typically includes a full AC tune-up beyond just clearing the drain line.
Tips & Prevention
- Regular Vinegar Flush: Every 1-3 months (especially during humid seasons), pour 1/2 cup of distilled white vinegar down your AC's condensate drain access port. Follow with 1/2 cup of water. This helps prevent algae buildup.
- Install Algaecide Tablets: Drop a few specialized algaecide tablets into your condensate pan every 3-4 months. These tablets slowly dissolve and release chemicals that inhibit biological growth.
- Check/Change Air Filter: A dirty air filter restricts airflow, causing the evaporator coil to work harder and sometimes freeze, leading to excessive condensation and potential clogs as dust is pushed into the drain pan. Change filters monthly or as recommended.
- Ensure Proper Slope: Periodically inspect the condensate line to ensure it maintains a continuous downward slope. If sections sag, you may need to re-secure or re-route the pipe.
- Annual Professional Tune-Up: Schedule an annual AC service. Technicians will inspect and clean the condensate drain line as part of a comprehensive maintenance check, catching potential issues before they become major problems.
- Monitor for Warning Signs: Pay attention to dripping water, musty odors near your indoor unit, or your AC turning off prematurely. These are all indicators of a potential drain line clog.
When to Call a Professional
While clearing an AC drain line is often a DIY-friendly task, there are specific situations where calling a licensed HVAC professional is essential. If you've tried the methods above and the drain line remains stubbornly clogged, or if water continues to back up, a more complex issue might be at play, such as a damaged drain pan, a completely severed or crushed line, or a clogged P-trap that's inaccessible. If you notice persistent musty odors even after clearing, it could indicate mold growth in other parts of the system beyond the drain line, requiring specialized cleaning. Furthermore, if your AC unit is located in a hard-to-reach or unsafe area (e.g., a cramped, high-pitched attic with poor access), it's always safer to defer to a professional. Anytime you are uncomfortable working with electrical components or cannot confidently diagnose the source of the leak, an HVAC technician has the diagnostic tools and expertise to safely and effectively identify and resolve the root cause, preventing further damage to your home and system.
Related Articles
Keep troubleshooting with these hand-picked guides from FixlyGuide:
- The #1 Mistake Homeowners Make When Their AC Drain Clogs (And The $5 Fix) — Discover the most common error homeowners make when tackling a clogged AC drain line and learn a simple, inexpensive solution to prevent co…
- The $7 Secret Why Your AC is Leaking Water (And How to Fix It in 15 Minutes) — A clogged AC drain line is a common culprit for water leaks, but a simple and inexpensive fix can get your system running smoothly again.
- The Secret Culprit Behind Your AC Leaks: Why Most Homeowners Miss This Easy Fix — Discover the often-overlooked reason your AC is leaking water and learn how a simple, inexpensive fix can prevent costly damage and restore…
- The Nasty Truth About Your Slow Shower Drain (And the DIY Fix) — A slow shower drain is more than an annoyance; it's often a sign of a blockage that chemical solutions can worsen. Learn how to clear it sa…
- The Nasty Truth: Your Bathroom Sink Smells Bad (And It's Not the Drainpipe) — A foul odor wafting from your bathroom sink often signals an issue beyond a simple clog, usually stemming from biofilm or a dry P-trap.
- The #1 Hidden Culprit Behind Your Whole-House Low Water Pressure (It's Not Your City!) — Discover the most common, often overlooked cause of low water pressure throughout your entire home and how to fix it yourself.
Frequently asked questions
Why does my AC drain line get clogged?+
AC drain lines typically get clogged due to a buildup of algae, mold, dust, and debris. The dark, moist environment inside the pipe is an ideal breeding ground for these organisms, which gradually form a slimy blockage that prevents water from draining.
Can I use bleach to clear my AC drain line?+
It is not recommended to use bleach. While it kills mold, bleach can corrode the condensate pan and PVC pipe over time and may create hazardous fumes when mixed with other substances. Distilled white vinegar is a safer and effective alternative.
How often should I clean my AC condensate drain line?+
For preventative maintenance, it's recommended to flush your AC condensate drain line with a mixture of vinegar and water every 1 to 3 months, especially during humid seasons. Annual professional AC tune-ups also include drain line inspection and cleaning.
What happens if I don't clear a clogged AC drain line?+
If a clogged AC drain line is not cleared, water can overflow the condensate pan, leading to significant water damage to ceilings, walls, or floors. It can also trigger the AC's safety float switch, causing the unit to shut down and stop cooling your home.
What tools do I need to clear a clogged AC drain line?+
You'll primarily need a wet/dry vac, distilled white vinegar, warm water, a funnel, and potentially duct tape or rags for sealing. Safety glasses and gloves are also recommended.
Is an AC drain line clog a DIY fix?+
Yes, for most homeowners, clearing a clogged AC drain line is a straightforward DIY fix using common household items and a wet/dry vac. However, if the clog is persistent, inaccessible, or if you suspect other issues, it's best to call a professional HVAC technician.


Discussion
Loading comments…