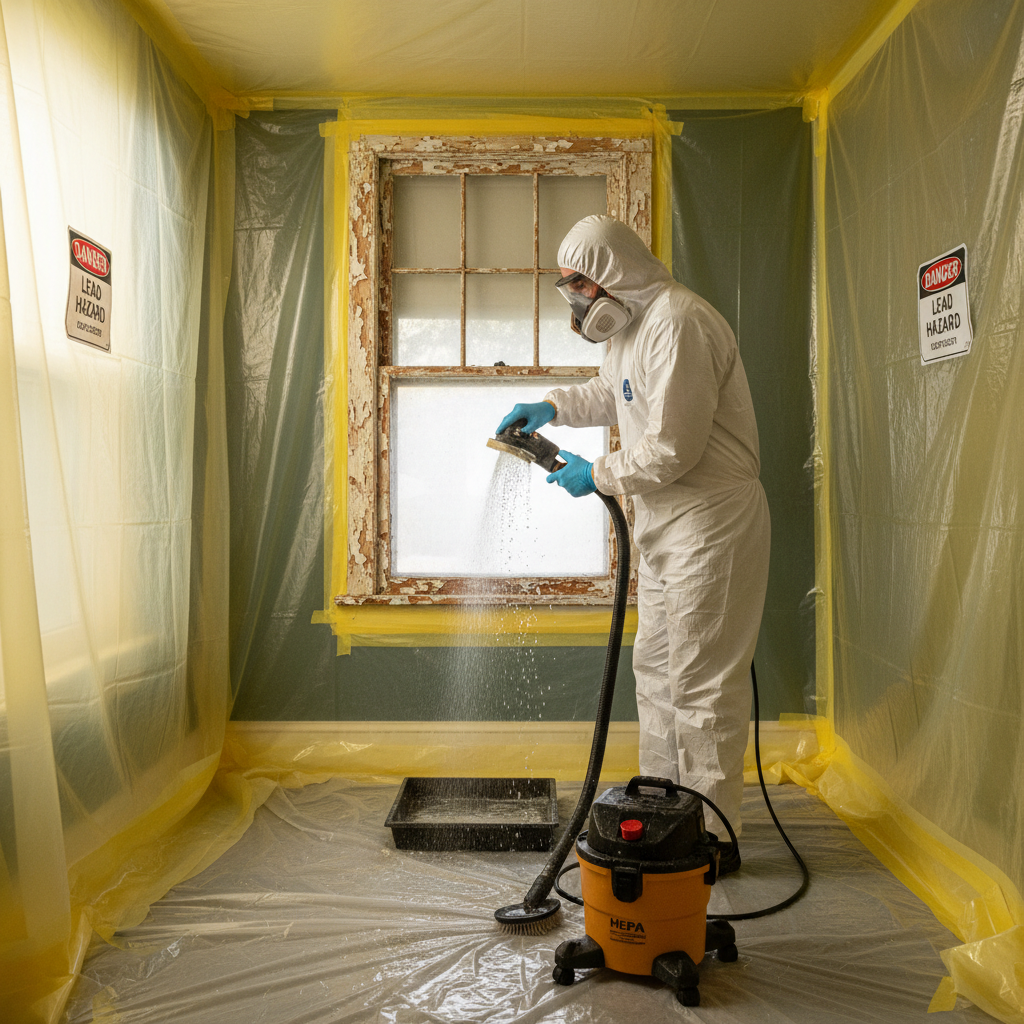
- Heat application: Using conventional heat guns on lead paint can vaporize lead, producing highly toxic fumes that are easily inhaled. Open-flame burning, while less common for DIY, is even more dangerous.
- Improper containment: Failing to seal off the work area allows lead dust to spread throughout the home, contaminating other rooms and surfaces. This includes not covering furniture, sealing doorways, or turning off HVAC systems.
- Lack of personal protective equipment (PPE): Not wearing a proper respirator (N100 or P100), disposable coveralls, and gloves means personal inhalation and ingestion of lead dust, as well as tracking it to other areas.
- Standard vacuum cleaning: Using a regular household vacuum cleaner on lead dust will aerosolize the fine particles, blowing them back into the air and further spreading contamination instead of removing it.
- Poor waste disposal: Not properly bagging and sealing lead-contaminated debris allows lead to leach into the environment or expose waste handlers.
Published July 20, 2026Last updated August 17, 2026
Tools & materials you'll need
Affiliate linksAs an Amazon Associate FixlyGuide earns from qualifying purchases — at no extra cost to you. Prices and availability are accurate as of publication and subject to change.
Quick Answer
Lead-based paint is a silent danger in many older homes, but it's not the intact paint itself that poses the greatest threat. The real risk emerges when this paint is disturbed during common DIY projects such as sanding, scraping, drilling, or demolition. These activities can release microscopic lead dust and chips into the air and onto surfaces, which, if ingested or inhaled, can cause serious health problems, especially in children and pregnant women. Understanding proper containment, personal protection, and cleaning methods is essential for any homeowner undertaking repairs in an older home.
The Problem
You're eager to refresh that peeling window trim or tackle a long-overdue bathroom renovation. You pull out the sander, the scraper, or perhaps even a saw. What you might not realize is that if your home was built before 1978, those innocent-looking layers of paint could be harboring a toxic secret: lead. As you diligently work, seemingly harmless dust particles drift through the air and settle on every surface. This isn't just ordinary dust; it's potentially lead-contaminated dust, a silent, invisible threat that can have lasting health consequences.
Once lead dust is created, it's easily inhaled or ingested. Children are particularly vulnerable because they often put their hands and toys in their mouths, and their developing bodies absorb lead more readily. Even small amounts of lead exposure can lead to learning disabilities, behavioral problems, and developmental delays. Adults can also suffer from lead poisoning, experiencing symptoms like headaches, fatigue, memory issues, and even kidney damage. The problem isn't just the visible dust; it's the invisible, insidious nature of lead particles that can linger in your home for years if not properly managed.
How It Works
Lead was a common additive in house paint before 1978 because it made paint more durable, vibrant, and resistant to moisture and corrosion. As a result, millions of homes across the United States still contain lead-based paint, often hidden under layers of newer, lead-free paint. When this paint is intact and in good condition, it generally poses a low risk. The danger arises when the paint surface is broken, chipped, chalked, or otherwise degraded, allowing lead particles to become airborne or accessible.
Any activity that creates friction, heat, or pulverizes paint can release lead. This includes common DIY tasks like sanding (especially power sanding), scraping, dry scraping, even drilling or cutting into painted surfaces. Heat guns, used improperly, can vaporize lead, creating highly toxic fumes. As the paint breaks down, incredibly fine lead dust—often invisible to the naked eye—is produced. This dust is incredibly persistent; it can settle on floors, furniture, toys, and even permeate carpets and upholstery. Once disturbed, it can remain a hazard for extended periods, easily recirculating into the air with everyday activities like walking or vacuuming without a HEPA filter. Understanding the mechanism of lead release is critical to preventing exposure during home repairs.
Step-by-Step Fix
Always assume paint is lead-based if your home was built before 1978, unless testing proves otherwise. Prioritize preventing lead dust creation.
-
Test for Lead (If Time Allows) — Before beginning any disruptive work, consider using EPA-recognized lead test kits or hiring a certified lead inspector. This provides certainty and allows you to tailor your precautions.
- Pro Tip: DIY kits give a quick indication, but for absolute certainty or large projects, a professional test is recommended.
-
Prepare the Work Area for Containment — The goal is to isolate the work zone entirely. Remove all furniture, curtains, rugs, and personal items from the room. If items cannot be removed, cover them completely with two layers of 6-mil plastic sheeting and seal with painter's tape.
- Materials: 6-mil plastic sheeting, painter's tape, heavy-duty disposable drop cloths.
- Safety: Ensure good ventilation before starting, but avoid creating drafts that could spread dust.
-
Seal Off the Work Area — Create an airtight seal around the entryways to the work zone. Cover doorways with two layers of 6-mil plastic sheeting, extending past the frame, and seal all edges with painter's tape. Turn off forced-air heating and air conditioning systems to prevent dust circulation.
- Note: Use caution when taping historic trim to avoid damage.
-
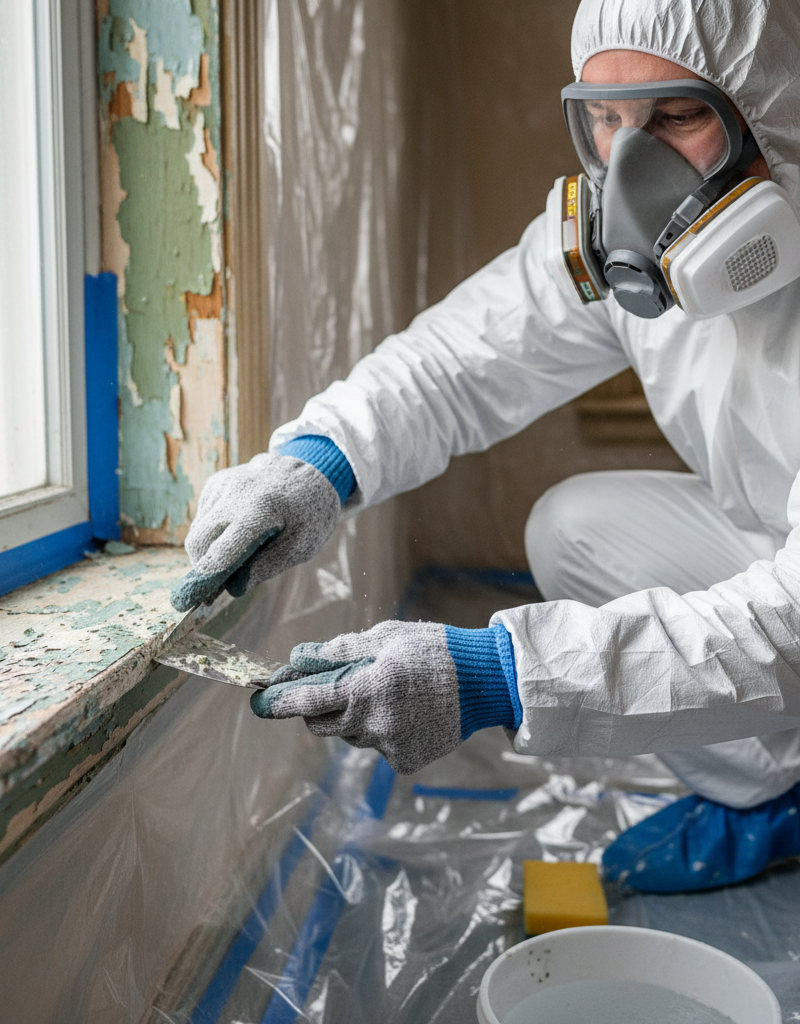
Wear Appropriate Personal Protective Equipment (PPE) — Essential for preventing inhalation and skin contact. Don disposable coveralls, disposable shoe covers, safety glasses, and a NIOSH-approved N100 or P100 respirator (not a simple dust mask).
- Safety: Fit your respirator correctly. Facial hair can compromise the seal, reducing effectiveness.
-
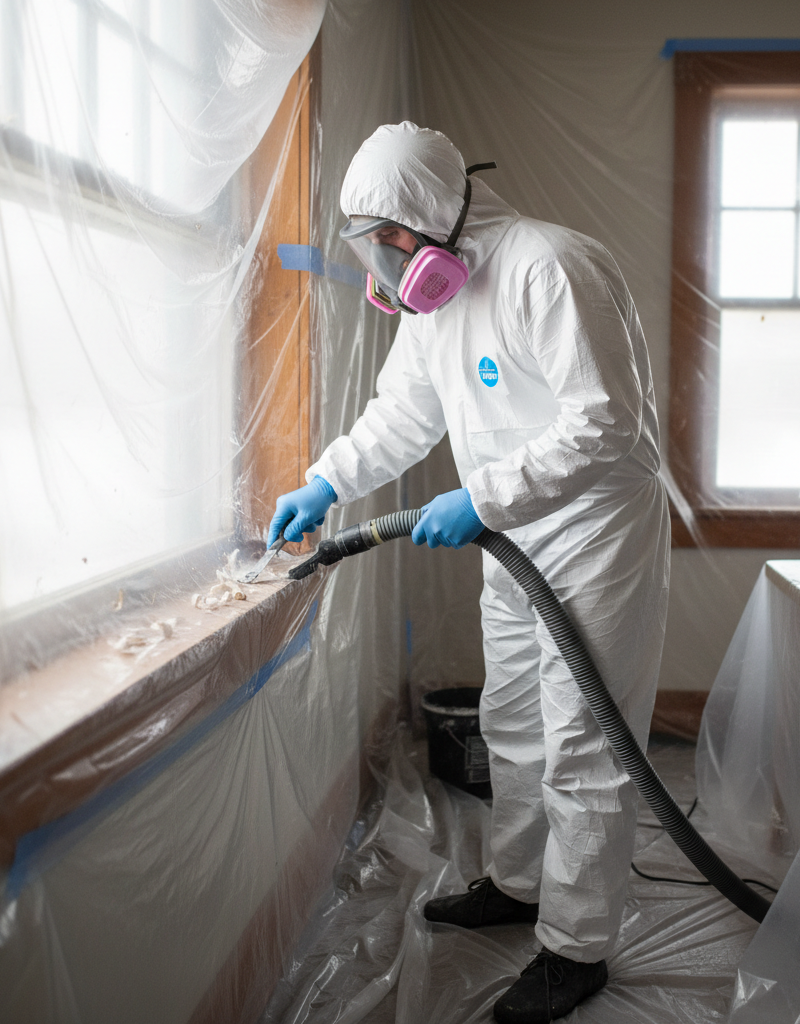
Use Lead-Safe Work Practices — Avoid dry sanding, open-flame burning, or high-temperature heat guns. Instead, use wet scraping, wet sanding, chemical paint strippers (follow manufacturer directions and ventilation requirements), or specialized tools with HEPA vacuum attachments. Mist surfaces with water to suppress dust.
- If this doesn't work: For large areas or stubborn paint, chemical strippers can be effective but require strict adherence to safety protocols for fumes.
-
Dispose of Waste Properly — Place all paint chips, dust, plastic sheeting, and disposable PPE in heavy-duty 6-mil plastic bags. Seal the bags and clearly label them as lead-contaminated waste. Check with your local waste management facility for specific disposal requirements.
- Warning: Never dispose of lead waste in regular household trash without checking local regulations.
-
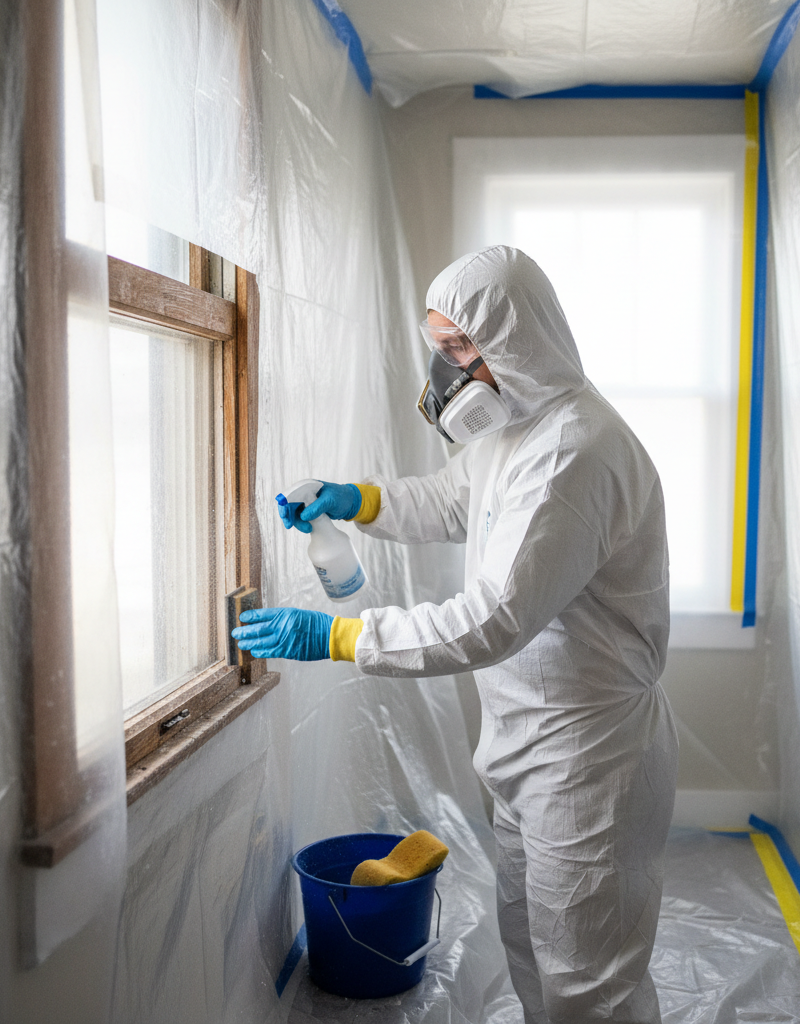
Clean Up Meticulously — After work is complete, clean the area thoroughly. Start by misting surfaces with water and then carefully fold up plastic sheeting inwards. Use a HEPA vacuum (not a regular household vacuum) to clean all surfaces, including walls, floors, and ledges. Follow with a wet-wipe cleaning using a dedicated lead-specific cleaner or an all-purpose cleaner.
- Tools: HEPA vacuum, disposable sponges/rags, lead-specific cleaning solution.
- Important: Regular vacuums blow lead dust into the air, making the problem worse.
-
Post-Clean Verification (Optional but Recommended) — For peace of mind, consider having a certified lead professional perform a dust wipe test after cleaning to ensure lead levels are safe.
Common Causes
- Aggressive paint removal: Dry scraping, grinding, or power sanding lead-based paint generates fine lead dust airborne. This is the most common and dangerous cause of lead exposure during DIY. Any friction on lead paint can cause microscopic particles to break free. Any demolition of painted surfaces, even if not directly targeting the paint, can also release lead dust.
- Heat application: Using conventional heat guns on lead paint can vaporize lead, producing highly toxic fumes that are easily inhaled. Open-flame burning, while less common for DIY, is even more dangerous.
- Improper containment: Failing to seal off the work area allows lead dust to spread throughout the home, contaminating other rooms and surfaces. This includes not covering furniture, sealing doorways, or turning off HVAC systems.
- Lack of personal protective equipment (PPE): Not wearing a proper respirator (N100 or P100), disposable coveralls, and gloves means personal inhalation and ingestion of lead dust, as well as tracking it to other areas.
- Standard vacuum cleaning: Using a regular household vacuum cleaner on lead dust will aerosolize the fine particles, blowing them back into the air and further spreading contamination instead of removing it.
- Poor waste disposal: Not properly bagging and sealing lead-contaminated debris allows lead to leach into the environment or expose waste handlers.
Common Mistakes
- Mistake 1: Assuming paint is lead-free because it's been painted over. Even multiple layers of new paint won't prevent lead hazards if the underlying lead paint is disturbed. Always test or assume lead if your home is pre-1978.
- Mistake 2: Using a standard shop-vac or household vacuum for cleanup. These vacuums lack HEPA filtration and will simply blow microscopic lead dust particles back into the air, making the problem worse and spreading contamination throughout your home.
- Mistake 3: Relying on a simple dust mask for protection. Standard paper or cloth dust masks offer minimal protection against tiny lead particles. A NIOSH-approved N100 or P100 respirator is absolutely essential for proper respiratory protection.
- Mistake 4: Eating, drinking, or smoking in the work area. This can lead to direct ingestion of lead dust. Always leave the contained area, remove PPE, and wash hands thoroughly before any such activities.
- Mistake 5: Not changing clothes and showering immediately after working. Lead dust can cling to clothing, hair, and skin, allowing it to be tracked throughout your home and expose family members. Bag contaminated clothing for proper laundering separately.
- Mistake 6: Ignoring proper ventilation out of fear of spreading dust. While containment is crucial, passive ventilation (e.g., opening a window to the outside with a fan blowing out) can help reduce airborne dust within the contained area if done carefully and without creating cross-circulation to other parts of the house.
Cost & Time Breakdown
| Task | DIY Cost | Pro Cost | Time |
|---|---|---|---|
| Lead Test Kit | $20–$50 | $300–$600 (inspection) | 5–10 minutes |
| Containment Materials | $50–$150 | Included | 1–2 hours |
| PPE (Respirator, Coveralls) | $30–$70 | Included | 5 minutes |
| Lead-Safe Tools (rental/purchase) | $50–$200 | Included | Varies |
| Cleanup Materials | $30–$80 | Included | 1–2 hours |
| Waste Disposal Fees | $0–$50 (local dependent) | Included | Varies |
| Total for Small DIY Project | $180–$600 | $3,000–$10,000+ (abatement) | Half-day to Full-day |
Tips & Prevention
- Test before you disturb: Always test painted surfaces for lead if your home was built before 1978, especially before renovations. Knowledge is your best defense.
- Don't ignore chipping paint: Even without a full renovation, chipping, peeling, or chalking lead paint in high-traffic areas (windowsills, doorways) should be addressed carefully to prevent lead dust accumulation.
- Regular wet cleaning: For homes with known or suspected lead paint, regular wet cleaning of floors, windowsills, and other horizontal surfaces can help control dust. Use an all-purpose cleaner and disposable rags.
- Maintain painted surfaces: Keep all painted surfaces in good repair. Intact paint is generally safe. If paint starts to chip or peel, address it promptly using lead-safe practices for minor repairs.
- Practice good hygiene: Always wash hands thoroughly after working on any surface in an older home, especially before eating or drinking. Remove shoes before entering your home.
- Educate family members: Ensure all members of your household, particularly those involved in DIY or cleaning, understand the risks and necessary precautions.
When to Call a Professional
While small, localized lead-safe repairs can often be managed by an informed homeowner, there are clear instances where calling a licensed lead abatement professional is not just recommended, but critical. If the scope of work involves large areas (e.g., an entire room, multiple windows), significant demolition, or if you encounter lead paint in areas where children spend a lot of time, professional intervention is necessary. Furthermore, if you are unsure about your ability to properly contain, protect yourself, or meticulously clean up lead dust, the health risks are too great to proceed DIY. A professional will have the specialized equipment, training, and certifications to handle lead hazards safely, ensuring your home is truly safe for your family. If lead-based paint is found on exterior surfaces and impacts soil or water runoff, or if your paint removal methods accidentally create a large amount of dust, a professional assessment is crucial to ensure proper remediation and containment to protect yourself and your family's health.
Safety Note: Never attempt to remove lead paint with sandblasting, uncontrolled open-flame burning, or power washing. These methods create extreme lead hazards. If you encounter a situation that feels beyond your skill level or poses a significant risk of widespread contamination, stop immediately and contact a certified lead abatement professional.
Related Articles
Keep troubleshooting with these hand-picked guides from FixlyGuide:
- 7 Inspection Red Flags That Secretly Signal a $20,000 Bill — Don't let your dream home become a money pit. Many buyers and even some inspectors overlook subtle home inspection red flags that lead to f…
- The Single Board Secret to Attracting Bluebirds: A Quick DIY House — Discover how to construct an ideal bluebird house using just one cedar board, providing a safe and inviting home for these cherished backya…
- 7 Hidden Equity Drains Costing You Thousands Annually — Your home is an asset, but silent problems like minor leaks, poor insulation, and deferred maintenance can drain its value. Discover the se…
- The 12 Checks That Prevent 80% of Costly Home Repairs — Don't wait for a disaster. Our comprehensive monthly home maintenance checklist reveals the surprising, simple tasks that catch small issue…
- The Surprising Trick to Cutting Your Dryer Bill By $100 Per Year — Installing a clothesline can significantly reduce your energy bills and add a fresh scent to your laundry. This guide covers how to choose…
- The Giant Drywall Hole: 3 Hidden Mistakes That Make Fixing It Worse — Don’t just spackle over that huge drywall hole; learn the right way to repair it and avoid common mistakes that lead to an even bigger head…
Should you do this yourself?
Answer five quick questions before you start. Safety outranks savings every time.
Your experience with work like this
How high do you have to work?
Does the job involve any of these?
Will it need a permit?
Specialty tools
Free and instant. Educational guidance only — not a quote, inspection, or professional diagnosis.
Estimate your own project cost
National averages are a starting point. Enter your details for a range that fits your house.
Interior paint estimator
- Paint$96
- Supplies (tape, rollers, drop cloth)$35
- Estimated total (DIY)$131
Hiring a pro? Add roughly $1.50–$4.00/sq ft for labor depending on prep work and trim detail.
Educational estimate only — always confirm with written local bids.
What should this project cost?
Enter your project details for a realistic cost range before you call anyone.
Cost depends heavily on which system turns out to be the source.
- Regional adjustment
- National average
- Labor share (typical)
- ~$1,620
- Quotes to collect
- 3 written estimates
Educational estimate based on national averages — not a binding quote. Always confirm with written local estimates.
Before you start
Check the difficulty, permits, and safety risk — then decide whether to call a pro.
Free, no signup required. Estimates are educational guidance, not a quote or an inspection.
Get the print-ready PDF of this guide
A clean, ad-free, printable version you can keep on your phone or pin to the workshop wall. Free with a FixlyGuide account.
- Print-optimized layout
- Tools, materials & every step included
- Saved to your account
This article was independently written by FixlyGuide based on the source topic.
Frequently asked questions
How do I know if my paint contains lead?+
The most definitive way to know is to use an EPA-recognized lead test kit, readily available at hardware stores, or to hire a certified lead inspector for professional testing. Assume paint is lead-based if your home was built before 1978 and you plan to disturb it.
What kind of mask do I need for lead paint work?+
You need a NIOSH-approved N100 or P100 respirator, not a simple dust mask. These specialized respirators filter out at least 99.97% of airborne particles, including microscopic lead dust.
Can I just paint over lead paint?+
Encapsulating intact lead paint with a new layer of non-lead paint can be a temporary solution only if the underlying lead paint is in good condition (not chipping or peeling). This is not lead abatement, and the lead hazard remains if the paint is later disturbed.
What are the first signs of lead poisoning?+
In children, symptoms can include developmental delays, learning difficulties, irritability, loss of appetite, weight loss, and fatigue. In adults, symptoms may include headaches, memory problems, joint and muscle pain, and high blood pressure. Many early symptoms are non-specific, making testing important if exposure is suspected.
What's the difference between a regular vacuum and a HEPA vacuum?+
A HEPA (High-Efficiency Particulate Air) vacuum uses a special filter that can capture 99.97% of particles 0.3 microns in size, which is crucial for trapping tiny lead dust particles. Regular vacuums lack this filtration and will simply spread lead dust into the air, worsening the contamination.
Discussion
Loading comments…