- Age of the Home: Any house built before 1978 is likely to have lead paint. The older it is, the higher the odds and the more layers there might be.
- Disturbance During Renovation: Sanding, scraping, cutting, drilling, or demolition of painted surfaces are the biggest culprits for creating hazardous lead dust.
- Friction & Impact: Areas like windows that rub against their frames, doors that constantly open and close, or stairs and floors that take heavy foot traffic can slowly grind lead paint into dust over time.
- Deterioration: Chipping, peeling, cracking, or chalking paint in high-traffic areas or on exterior surfaces exposes underlying lead layers and makes lead particles accessible.
- Heat: Using heat guns to strip paint is a huge no-go with lead paint. It vaporizes the lead, creating highly toxic fumes and dust that are dangerous to inhale.
Published July 31, 2026Last updated August 17, 2026
Tools & materials you'll need
Affiliate linksAs an Amazon Associate FixlyGuide earns from qualifying purchases — at no extra cost to you. Prices and availability are accurate as of publication and subject to change.
Quick Answer
Look, here’s the deal: if your house went up before 1978, there’s a real good chance it’s got lead paint somewhere. It ain’t just about peeling or chipping paint, either. The real trouble is the dust you can’t see—the stuff that gets stirred up when you start sanding, scraping, drilling, or tearing out old walls. That dust is so fine you won’t spot it with the naked eye, but it’ll get on your hands, in your lungs, and then into your body. That’s where the serious health problems start, especially for kids and pregnant women. So before you crack open a can of paint or swing a hammer on an old wall, you’ve gotta test for lead, contain the work area, and clean up like your life depends on it. Because, frankly, it might.
The Problem
I’ve seen it hundreds of times. Homeowner gets fired up about a renovation, starts ripping into an old window frame or sanding down some trim, and a few weeks later they’re calling me worried sick about their kid’s health. It’s lead paint. Plain and simple. That stuff was everywhere before '78, and there was a reason for it—it held up, it covered well, and it lasted. But we didn’t know then what we know now: lead’s a neurotoxin. It ain’t some quaint old-house detail; it’s a legit health hazard that can mess with a child’s development, damage the nervous system, and cause a whole pile of other ugly problems. The biggest mistake I hear is, “Oh, it’s just a little bit of paint.” But even a tiny amount of lead dust, smaller than a grain of salt, can poison a child. Once you start working on those painted surfaces—sanding, scraping, demo—you’re turning that coating into microscopic particles that float around, land on everything, and are easy to swallow without even realizing it. That’s the silent killer right there.
How It Works
Alright, let’s break down how this stuff actually works, because knowing what you’re dealing with is half the battle. Lead-based paint used lead as both a pigment and a drying agent. That’s what made it tough and bright back in the day. But when you disturb it—say you’re sanding an old door frame down to bare wood—those lead particles bound up in the paint film get released. They don’t vanish. They break down into crazy-fine dust, often less than 5 micrometers in size. For comparison, a human hair is about 50-70 micrometers thick. So we’re talking about stuff that’s basically invisible.
That dust goes airborne. You breathe it in, it settles on your clothes, your tools, your furniture, the floor. It can even ride through the house on your shoes and spread way past the work zone. Kids are hit hardest because they play on the floor, put their hands in their mouths, and their growing bodies take in lead way easier than adults do. It doesn’t take much. That’s the ugly part. The effects can stick around for good—learning problems, behavior issues, hearing trouble, slowed growth. Adults aren’t off the hook, either. Long-term exposure can mean high blood pressure, joint pain, memory problems, and kidney damage.
And the danger isn’t the paint sitting there doing nothing. It’s the dust that gets made when the paint is disturbed, especially by friction, impact, or heat. Think old windows rubbing in their tracks, or doors slamming day after day. Even without a remodel, that can kick up lead dust. I pulled a bathroom vanity in Frisco last month that had exactly this problem—old trim rubbing, white dust in the sill, and the homeowner had no clue. That’s why you’ve gotta think about lead dust before any work starts.
Step-by-Step Fix
Assuming "fix" here means safely managing a lead paint renovation, here’s my contractor’s approach:
-
Test Early, Test Smart — Don’t guess if it’s lead. Before you even think about picking up a sander, get a lead test kit. You can find them at any hardware store for about $10–$30. Look for EPA-recognized kits. Follow the directions exactly, rubbing the swab on a freshly cut surface (score the paint slightly with a utility knife in an inconspicuous spot). If it changes color—usually red or pink—you’ve got lead. Test all distinct painted layers. If you’re not sure, call in a pro for a full assessment, especially on bigger jobs.
- Pro Tip: Test different surfaces. Old trim, window sills, doors, even the exterior siding can all have lead paint, and different colors usually mean different layers or types.
-
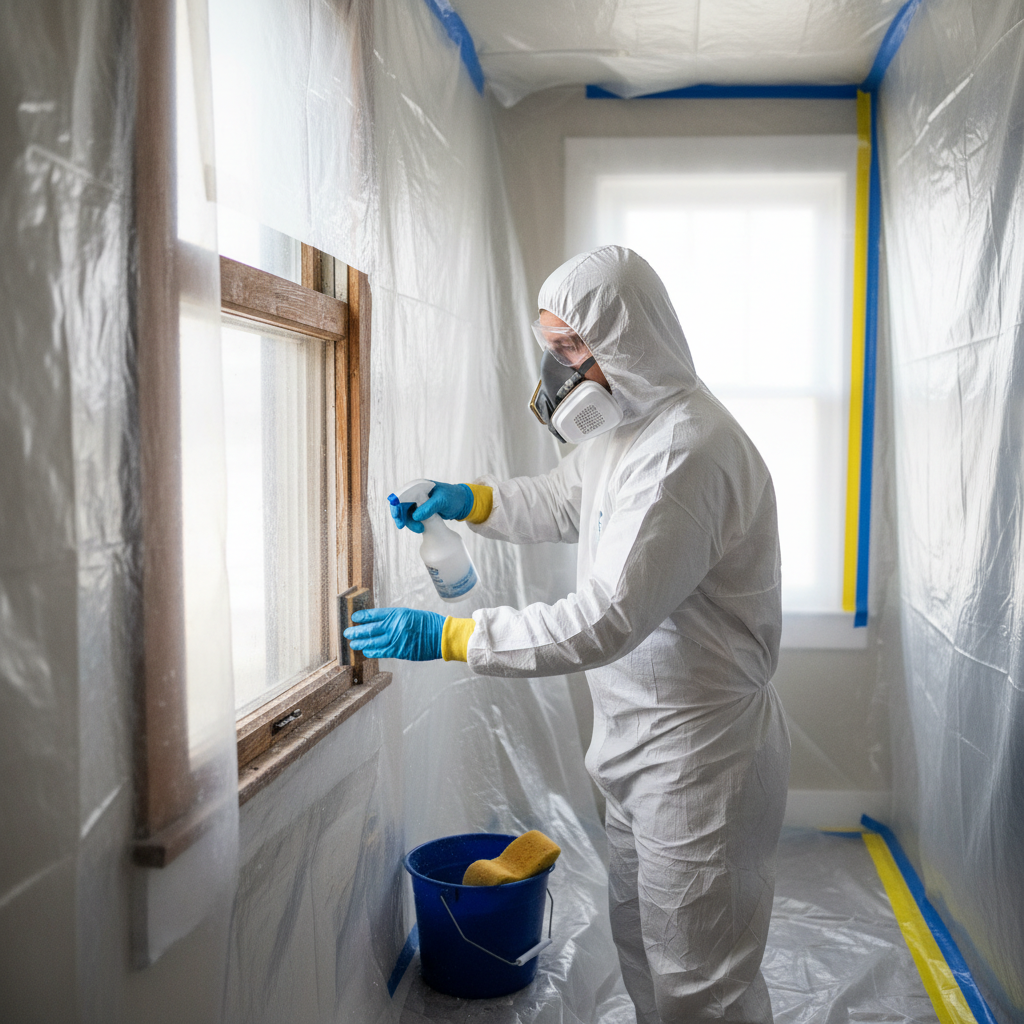
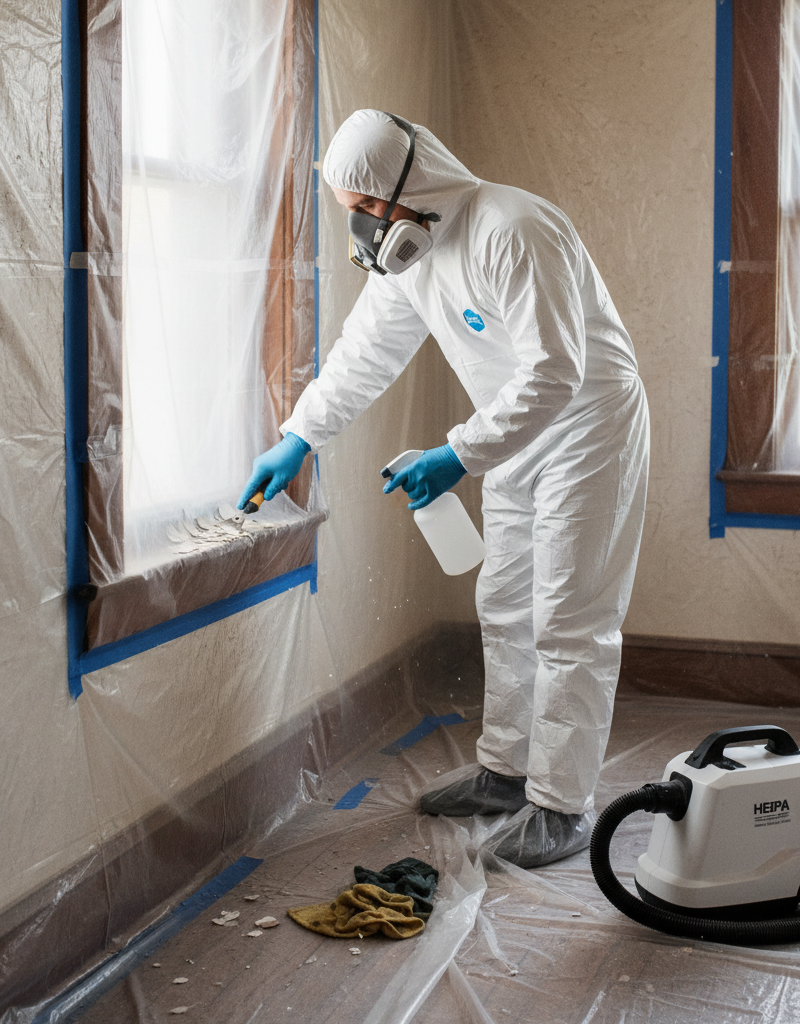
Plan Your Containment — Think like you’re building a clean room. Before any work starts, seal off the area. This isn’t optional. Cover the floor with two layers of 6-mil plastic sheeting, extending 6 feet beyond your work zone. Tape it down to the baseboards with painter’s tape. Shut off your HVAC system so dust doesn’t get sucked around the house. Close and seal any doors or open archways with more plastic sheeting and tape. If you’re working on windows, seal off the entire window opening from the inside with plastic. The goal is to create a negative pressure zone if possible, but at minimum, a fully isolated work area.
-
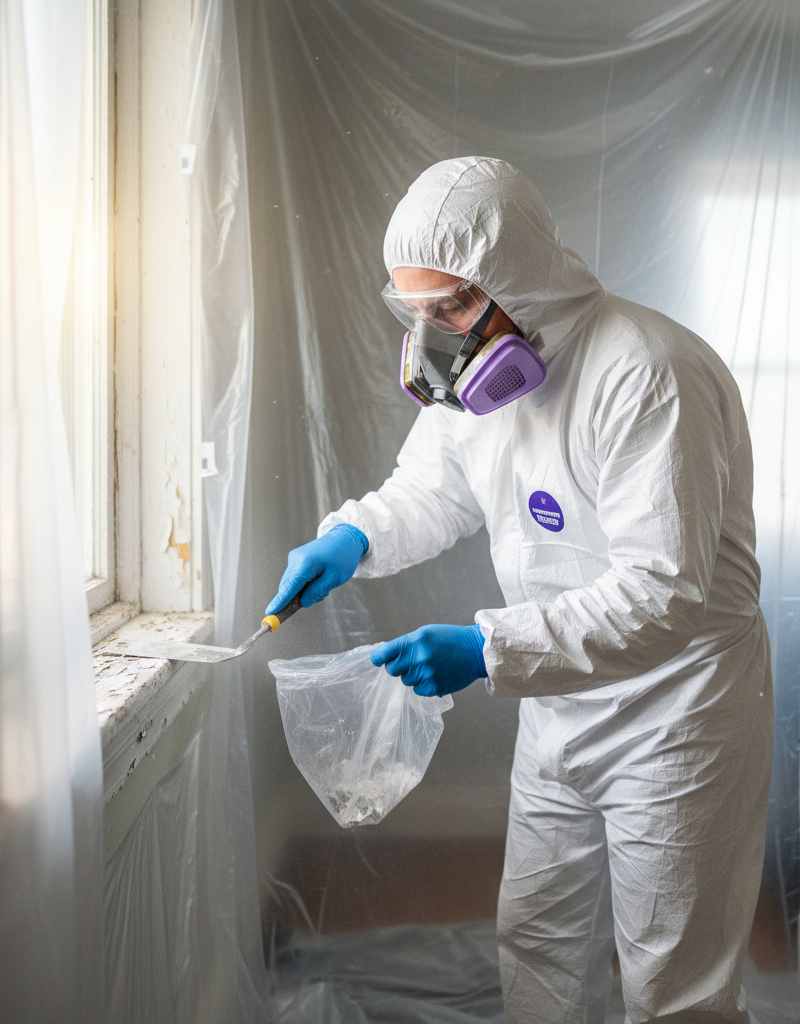
Gear Up for Safety — Protect yourself; this dust is no joke. You need disposable coveralls, disposable shoe covers, safety glasses, and most important, a properly fitted N100 or P100 respirator. Not a paper dust mask—those don’t do squat. A real respirator with HEPA filters. Wear disposable gloves. And remember, anything that goes into that work zone that isn’t disposable needs to be decontaminated before it leaves.
-
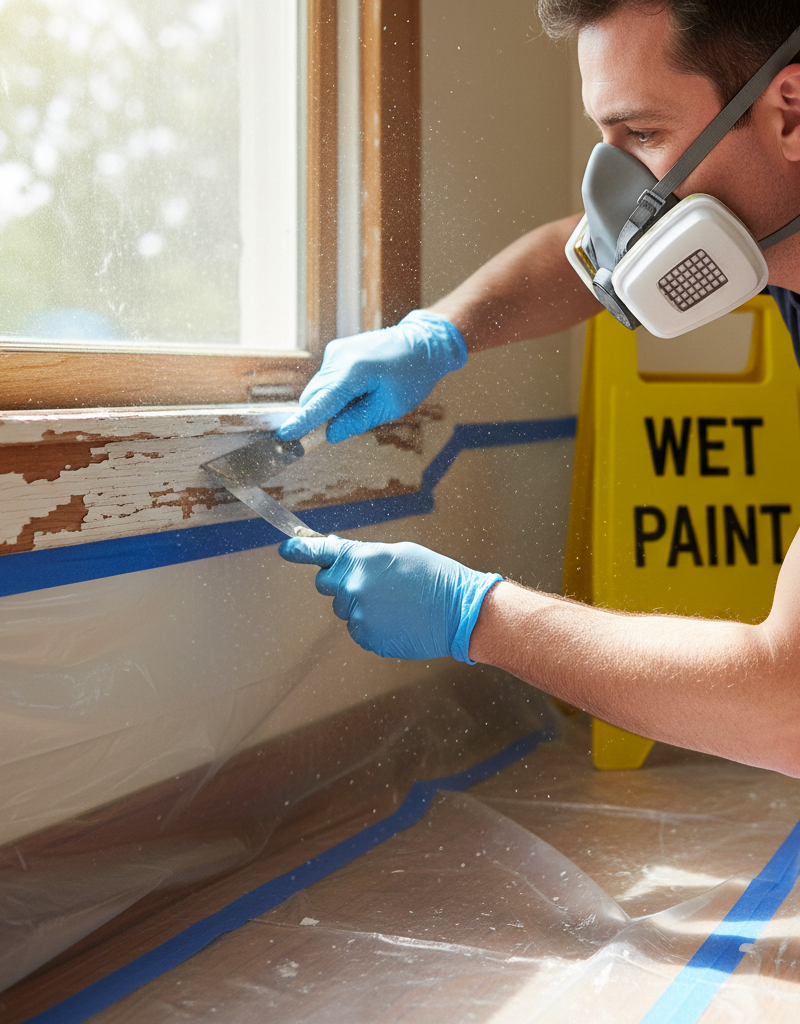
Wet Methods are Your Friend — Keep the dust down. When scraping, sanding, or disturbing paint, always use wet methods. Mist the surface with water using a spray bottle. That keeps the lead particles heavy and helps keep them out of the air. For sanding, look for sanders with HEPA-filtered vacuums attached. Never dry-sand lead paint; that’s how you turn a small job into a full-blown contamination mess.
- Caution: Don’t over-wet surfaces, especially wood, because it can swell and get damaged.
-
Careful Removal & Disposal — Bag it up tight. As you generate debris—paint chips, dust, plastic sheeting—put it straight into heavy-duty 6-mil plastic bags. Double bag everything. Seal the bags with duct tape. Label them "Lead Waste." Check with your local waste management facility about proper disposal. Don’t just toss it in the regular trash; that’s illegal and flat-out irresponsible.
-
Clean, Clean, Clean — This is the most critical step. Once the work’s done, don’t just sweep. That’ll kick dust right back into the air. First, use a HEPA-filtered vacuum cleaner—a regular shop vac won’t cut it, it’ll just blow the lead dust around. Vacuum all surfaces, including walls, floors, and any exposed items. Then wet-wipe everything with a disposable cloth and a lead-specific cleaner or a solution of household detergent. Work from top to bottom. Change cloths often and toss them as lead waste. Repeat the wet-wiping process at least twice.
- Contractor Trick: After the first cleanup, wait 24 hours. Lead dust often settles again. Do a second, thorough HEPA vacuum and wet-wipe session.
-
Final Inspection — No dust bunnies allowed. Before you take off your last layer of protective gear or tear down containment, visually inspect the area. Look for any visible dust or debris. If you’re really serious, you can use lead testing wipes to swab surfaces and send them to a lab for analysis. It costs a bit more, but for critical areas, it gives you peace of mind.
-
Decontaminate Your Exit — Don’t track it out. Before leaving the work area, remove your disposable coveralls and shoe covers inside the containment, turning them inside out as you go, and place them in a lead waste bag. Carefully remove your respirator last, cleaning it according to manufacturer instructions. Wash your hands and face thoroughly with soap and water right away.
Common Causes
Here’s why lead paint turns into a problem in your house:
- Age of the Home: Any house built before 1978 is likely to have lead paint. The older it is, the higher the odds and the more layers there might be.
- Disturbance During Renovation: Sanding, scraping, cutting, drilling, or demolition of painted surfaces are the biggest culprits for creating hazardous lead dust.
- Friction & Impact: Areas like windows that rub against their frames, doors that constantly open and close, or stairs and floors that take heavy foot traffic can slowly grind lead paint into dust over time.
- Deterioration: Chipping, peeling, cracking, or chalking paint in high-traffic areas or on exterior surfaces exposes underlying lead layers and makes lead particles accessible.
- Heat: Using heat guns to strip paint is a huge no-go with lead paint. It vaporizes the lead, creating highly toxic fumes and dust that are dangerous to inhale.
Common Mistakes
I’ve seen these slip-ups countless times. Learn from ’em:
- Dry Sanding: This is probably the number one mistake. Dry sanding lead paint makes fine, invisible lead dust airborne right away. Always wet-sand or use a sander with a HEPA attachment.
- Ignoring Testing: Just assuming you don’t have lead because the house isn’t "that old" or because it "looks fine." Test everything; it’s cheap insurance.
- Using a Regular Vacuum: A standard shop vac or household vacuum will just suck up lead dust and blow it out the exhaust, spreading contamination throughout your house. You need a HEPA-filtered vacuum, no exceptions.
- Inadequate Containment: Thinking a drop cloth and an open window are enough. Dust travels. Seal off the area completely so you don’t cross-contaminate the rest of the house.
- Not Protecting Yourself: Working without a proper N100/P100 respirator, gloves, and coveralls. Your health isn’t worth saving a few bucks on PPE.
- Improper Disposal: Tossing lead waste in regular trash. This is often illegal and dangerous to waste workers and the environment. Double-bag and dispose of it properly.
Cost & Time Breakdown
When dealing with lead paint, the costs really depend on whether you DIY the basic safety or bring in the pros.
| Task | DIY Cost | Pro Cost | Time |
|---|---|---|---|
| Lead Test Kits | $10–$30 | Included in assessment | 5–10 minutes per test |
| Basic Safety Gear | $50–$150 | Included in bid | N/A (one-time purchase) |
| Containment Supplies | $30–$80 | Included in bid | 1–2 hours |
| Small DIY Paint Removal | $0 (if careful) | $500–$1,500 (per area) | 2–4 hours |
| Professional Abatement (Room) | N/A (not DIY) | $3,000–$10,000+ | 3–7 days |
| HEPA Vacuum Rental | $30–$50/day | Included in bid | N/A |
Tips & Prevention
Here’s what I tell homeowners to keep lead paint from turning into a problem:
- Regular Inspections: Check painted surfaces now and then, especially windows, doors, and trim, for any signs of chipping, peeling, or chalking paint. Fix issues right away. Consider repainting intact lead paint with a high-quality encapsulating primer and new topcoat to seal it in.
- Maintain Intact Paint: If the lead paint’s in good shape and not flaking, the best move is to leave it alone or paint over it. Don’t disturb it for no reason.
- Good Housekeeping: Regularly wet-wipe dusty surfaces like window sills and floors. Use a damp mop and cloths, not a dry broom, to clean up dust. That helps remove any settled lead dust particles.
- Handwashing: Push frequent handwashing for everyone in the house, especially kids, before eating and after playing.
- Shoe Policy: Consider a "no shoes in the house" rule to avoid tracking in contaminants, including potential lead dust, from outside.
- Professional Assessment: If you’re planning a major renovation on a pre-1978 home, always get a professional lead risk assessment. It’s an investment in your family’s health.
When to Call a Professional
Look, I’m all for DIY, but some jobs are just too risky to tackle yourself. With lead paint, that line is pretty clear. If you’re dealing with large areas of deteriorating lead paint, if the project involves extensive demolition, or if you’re working on components like windows and doors where high friction is unavoidable, you need to call a lead abatement professional. They’re certified, they’ve got specialized equipment—like negative air machines and industrial HEPA vacuums—and they know the rules for safe removal and disposal. Also, if you’ve got children under six or a pregnant woman living in the house, any lead-related work beyond basic testing and minor, contained repairs should absolutely be handled by a licensed professional. Don’t roll the dice; the long-term health consequences aren’t worth saving a few bucks.
Related Articles
Keep troubleshooting with these hand-picked guides from FixlyGuide:
- 7 Inspection Red Flags That Secretly Signal a $20,000 Bill — Don't let your dream home become a money pit. Many buyers and even some inspectors overlook subtle home inspection red flags that lead to f…
- The 12 Checks That Prevent 80% of Costly Home Repairs — Don't wait for a disaster. Our comprehensive monthly home maintenance checklist reveals the surprising, simple tasks that catch small issue…
- The Single Board Secret to Attracting Bluebirds: A Quick DIY House — Discover how to construct an ideal bluebird house using just one cedar board, providing a safe and inviting home for these cherished backya…
- 7 Hidden Equity Drains Costing You Thousands Annually — Your home is an asset, but silent problems like minor leaks, poor insulation, and deferred maintenance can drain its value. Discover the se…
- The Surprising Reason Your House Ticks and Pops At Night (And What It Means) — That unsettling ticking or popping sound in your house at night is usually normal thermal expansion and contraction, but sometimes it signa…
- That Puddle By Your Shower? The Seal Trick You Don't Know — Stop that frustrating puddle on your bathroom floor by understanding the real reason your beautiful frameless shower door leaks and how a s…
What should this project cost?
Enter your project details for a realistic cost range before you call anyone.
Cost depends heavily on which system turns out to be the source.
- Regional adjustment
- National average
- Labor share (typical)
- ~$1,620
- Quotes to collect
- 3 written estimates
Educational estimate based on national averages — not a binding quote. Always confirm with written local estimates.
Get the print-ready PDF of this guide
A clean, ad-free, printable version you can keep on your phone or pin to the workshop wall. Free with a FixlyGuide account.
- Print-optimized layout
- Tools, materials & every step included
- Saved to your account
This article was independently written by FixlyGuide based on the source topic.
Frequently asked questions
How do I know if my house has lead paint?+
The most reliable way is to use an EPA-recognized lead test kit, available at hardware stores. Swab a small, scored section of paint; a color change indicates lead. For a comprehensive assessment, especially for larger renovations, hire a certified lead inspector.
Is intact lead paint dangerous?+
Intact, non-chipping, and non-peeling lead paint is generally not dangerous. The hazard arises when the paint is disturbed, creating lead dust or fumes, or when children chew on painted surfaces like windowsills.
What are the health risks of lead exposure?+
Lead exposure can cause serious health problems, especially in children, including developmental delays, learning difficulties, behavioral issues, and damage to the nervous system. In adults, it can lead to high blood pressure, joint pain, and memory problems.
Can I just paint over lead paint?+
Yes, if the lead paint is in good condition (not flaking or chipping), you can often paint over it with a high-quality encapsulating primer followed by a new topcoat. This seals in the lead and prevents it from becoming airborne. However, this is not a permanent solution if the underlying paint is disturbed later.
What kind of respirator do I need for lead paint work?+
You need at least an N100 or P100 respirator with HEPA filters. Standard paper dust masks are not sufficient and will not protect you from inhaling microscopic lead dust particles.
How do I dispose of lead paint waste?+
Lead paint debris and contaminated materials (plastic sheeting, gloves, wipes) must be double-bagged in heavy-duty 6-mil plastic bags, sealed with duct tape, and labeled as "Lead Waste." Contact your local waste management facility for specific disposal instructions, as it often requires special handling.
Can a regular vacuum cleaner be used for lead dust?+
No, absolutely not. A regular vacuum cleaner, even a shop vac, will not filter out the fine lead dust particles and will instead blow them back into the air, spreading contamination. You must use a HEPA-filtered vacuum cleaner for lead dust cleanup.
How much does professional lead abatement cost?+
Professional lead abatement costs vary widely depending on the scope of work and location. For a single room or specific components, it might range from $500 to $1,500. For an entire house, costs can easily be $3,000 to $10,000 or more. Get multiple quotes from certified professionals.
What is wet scraping?+
Wet scraping involves misting the painted surface with water before scraping. This helps to keep the lead paint chips and dust heavy, preventing them from becoming airborne and reducing the risk of inhalation. Always use a spray bottle for even application.
Are lead test kits accurate?+
EPA-recognized lead test kits are generally accurate for detecting the presence of lead. However, they are screening tools. For definitive results or to determine the exact lead concentration, especially for large projects, laboratory testing of paint chip samples is recommended.
Discussion
Loading comments…