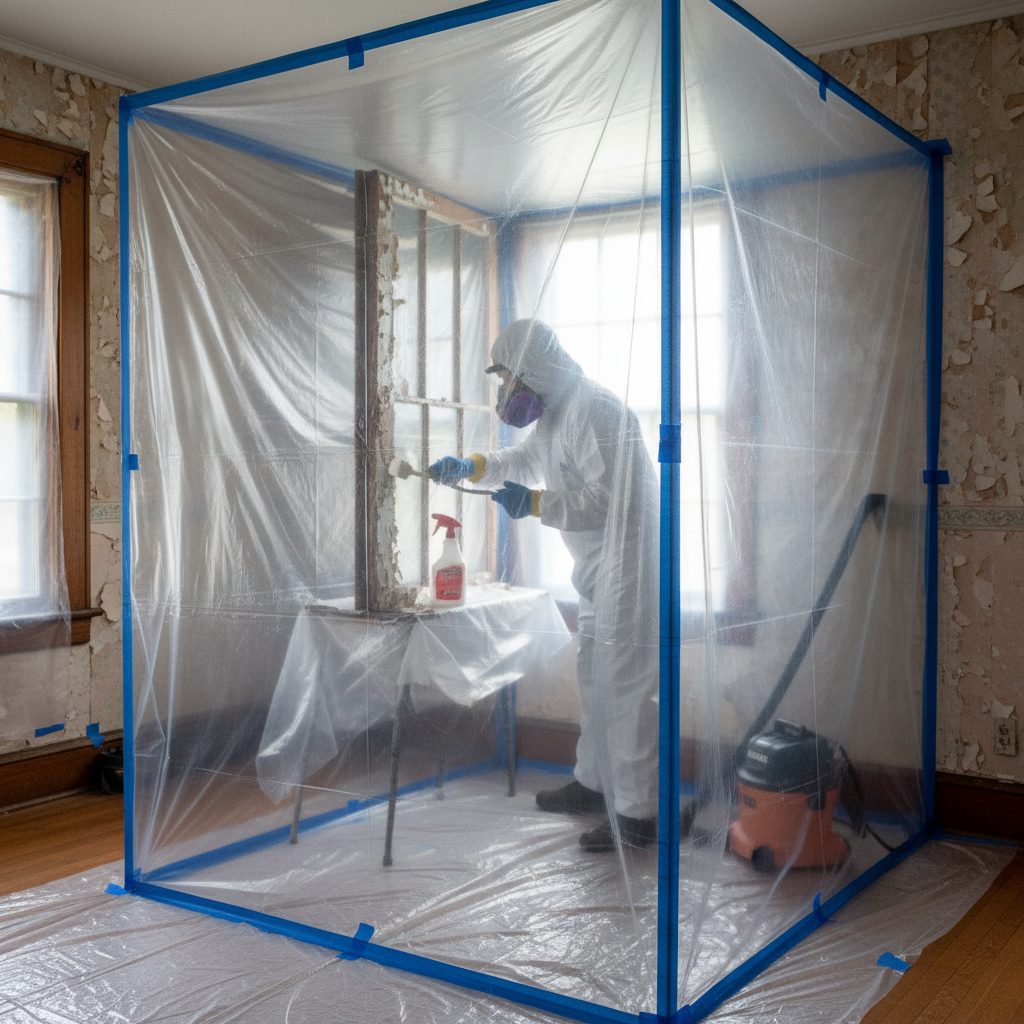
- Assuming No Lead: Biggest mistake out there. "Oh, my house isn't that old," or "It's been painted over so many times, the lead must be gone." Nope. Lead stays. Test it.
- Dry Sanding/Scraping: That's basically a dust blizzard. It throws lead particles everywhere. Always wet sand or wet scrape so the dust stays heavy and drops out.
- Using a Regular Vacuum: A normal shop vac or household vacuum won't cut it. The filters aren't fine enough, and they'll just blow the tiniest lead dust right back into the air. You must use a HEPA-filtered vacuum.
- Insufficient Containment: Thinking a drop cloth's enough. It isn't. You need sealed 6-mil plastic sheeting, two layers, taped off like you mean it. Dust finds a way, trust me.
- No Respirator (or the Wrong One): A flimsy paper mask won't protect you from lead dust. You need a P100 respirator that seals tight to your face. Your lungs are worth that much.
Published July 26, 2026Last updated August 17, 2026
Tools & materials you'll need
Affiliate linksAs an Amazon Associate FixlyGuide earns from qualifying purchases — at no extra cost to you. Prices and availability are accurate as of publication and subject to change.
Quick Answer
Look, here's the deal: if your house went up before 1978, you should assume there's lead paint in there somewhere. That doesn't mean you need to panic if it's sitting there in good shape, but the second you start tearing into walls, sanding trim, or scraping old doors, you're making microscopic lead dust. That's where the trouble starts. Testing doesn't cost much, abatement can get spendy, but your family's health? You can't put a price on that. So before you even think about demoing that old room, grab a lead test kit. Seriously.
The Problem
I've seen this go sideways plenty of times. A homeowner gets fired up about a remodel—maybe they're finally gutting that old bathroom or redoing a kitchen that's been stuck in the 80s forever. Then they start yanking cabinets, scraping paint, sanding trim, and they're breathing in a silent little mess they can't even see: lead dust. That ain't just ordinary dirt. Lead poisoning, even at low levels, can mess with kids' development, damage the nervous system in adults, and snowball into all kinds of long-term health problems. We're talking real damage here, not some cosmetic headache. And the nasty part? Lead paint is often hiding under a few newer coats, just waiting for somebody to disturb it.
Now, if the paint's solid—no chipping, no flaking, no chalking—it's usually not an immediate hazard. The lead's locked in. But once you start to disturb it—sanding, scraping, drilling, cutting, pulling out old trim—you kick loose lead dust and chips. That dust lands everywhere. Floors, vents, toys, carpet. Kids are the big risk because they're on the floor, they're always putting their hands in their mouths, and their bodies soak up lead faster. I pulled a water heater in Frisco last month that had exactly this kind of hidden mess nearby—owner thought the old window trim was harmless, then the dust showed up in the crawlspace and they were real glad we caught it before they kept going. I once worked on a beautiful old Victorian in the Heights where the new owners thought they could just sand down all the original moldings themselves. They called me after their youngest started having some developmental delays, and tests showed elevated lead levels. It was a rough deal, and it could've been avoided if they'd known what they were dealing with.
How It Works
Okay, so what exactly is lead paint and why does it cause so much grief? Back in the day, manufacturers loved the stuff. It made paint tougher, helped it dry faster, and gave it bright, rich color. Think about those old glossy window sills that've been hanging on forever — there's a pretty good chance they've got lead in 'em. The problem is lead's a heavy metal, and our bodies can't get rid of it very well. Once it gets in, it tends to hang around, building up in bones and soft tissue.
When you disturb lead paint, you're breaking it into tiny particles—some are chips you can actually see, but a lot of it turns into microscopic dust. Those dust particles float around, settle on everything, and work their way into carpets, floors, and ductwork for years. You track them through the house, kids play in them, pets carry them around. Breathe them in, or swallow them (like a kid putting a dusty toy in their mouth), and now the lead's in your bloodstream. Your body treats it a lot like calcium and stores it in your bones, where it can leak back out over time. Even a tiny amount, about the equivalent of a few grains of salt, can be a problem, especially for children whose brains are still growing.
That's why even "minor" renovation work can turn into a headache fast. Sawing through a door jamb, drilling for new plumbing, or even scraping a little patch of peeling paint can make enough lead dust to contaminate a whole room. You can't just wipe it up with a rag and call it a day. It takes real containment and real cleanup.
Step-by-Step Fix
Assuming you've tested and confirmed lead paint, and you're only dealing with a small, contained job yourself (otherwise, call a pro, seriously), here's how I handle it. This isn't for whole-house remodeling; this is for fixing a few peeling window sills or a door frame. Big jobs need bigger guns.
-
Test and Confirm — Don't skip this. Before you touch anything, get a lead test kit. You can pick one up at any hardware store for under 20 bucks. Follow the directions exactly. Most of 'em have you swab the painted surface; if it turns red, you've got lead. If you're not sure, or you're dealing with a bigger project, hire a pro testing service. They'll pull samples and send 'em to a lab for a solid answer. Cheap insurance, plain and simple.
- Pro Tip: Test multiple layers if you've got old paint showing through. It might be buried.
-
Safety First, Always — Suit up the right way or don't bother. You'll need a few things: a P100 respirator (the one with two cartridges, not some paper mask), disposable coveralls, disposable gloves, and eye protection. No shortcuts here. I've seen guys try to get by with a dust mask, and that thing's toast for lead. The particles are too fine. Make sure the respirator seals tight; you should feel a slight suction when you inhale.
- What to look for: A respirator rated N100, R100, or P100. Don't settle for less.
- Change filters: If you're out there more than an hour or two, swap those cartridges.
-
Contain the Zone — This is where you protect the rest of the house. Seal off the work area completely. Shut down HVAC so dust doesn't get pulled through the system. Lay down heavy-duty 6-mil plastic sheeting—two layers if you can swing it—and tape it to the walls and floor with painter's tape. If you can, make an airlock with another sheet over the doorway. Cover everything in the room with plastic, especially furniture and electronics. You're trying to make a little clean room, not just protect the floor.
- Tape it good: Use 2-inch wide painter's tape; better yet, use duct tape or specialized containment tape on the seams where the plastic meets the floor.
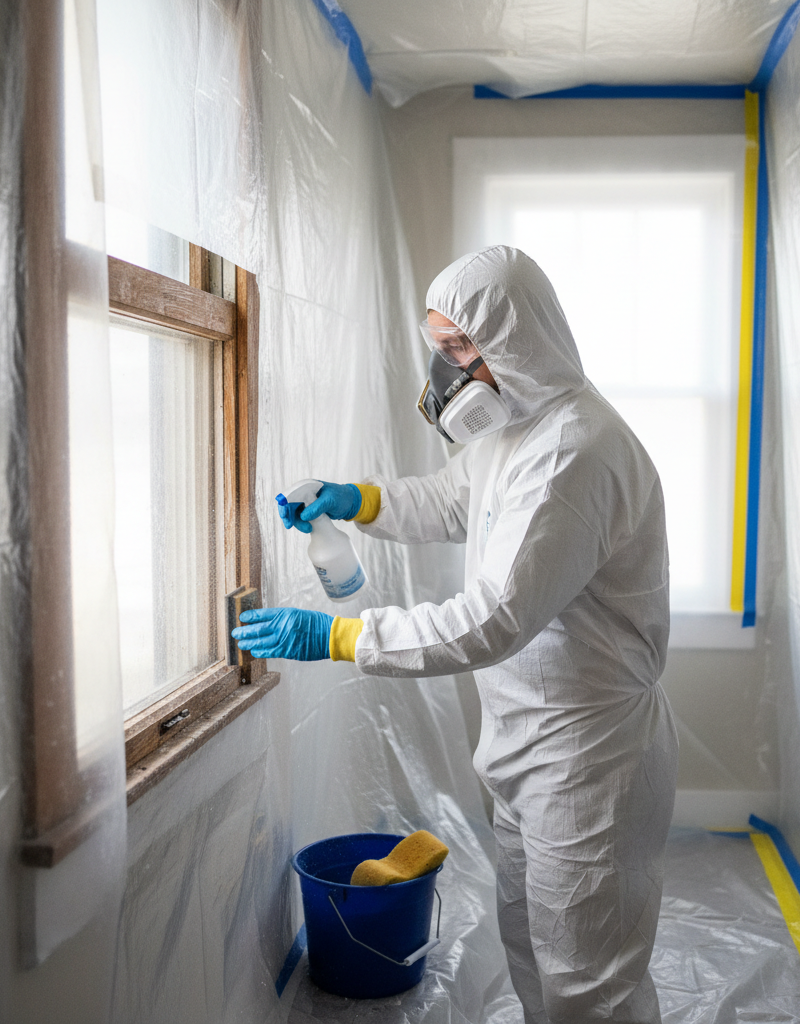
- Wet method: Keep a spray bottle of water handy. Mist surfaces before you scrape or sand so the dust stays down. Never dry scrape or dry sand. Never.
-
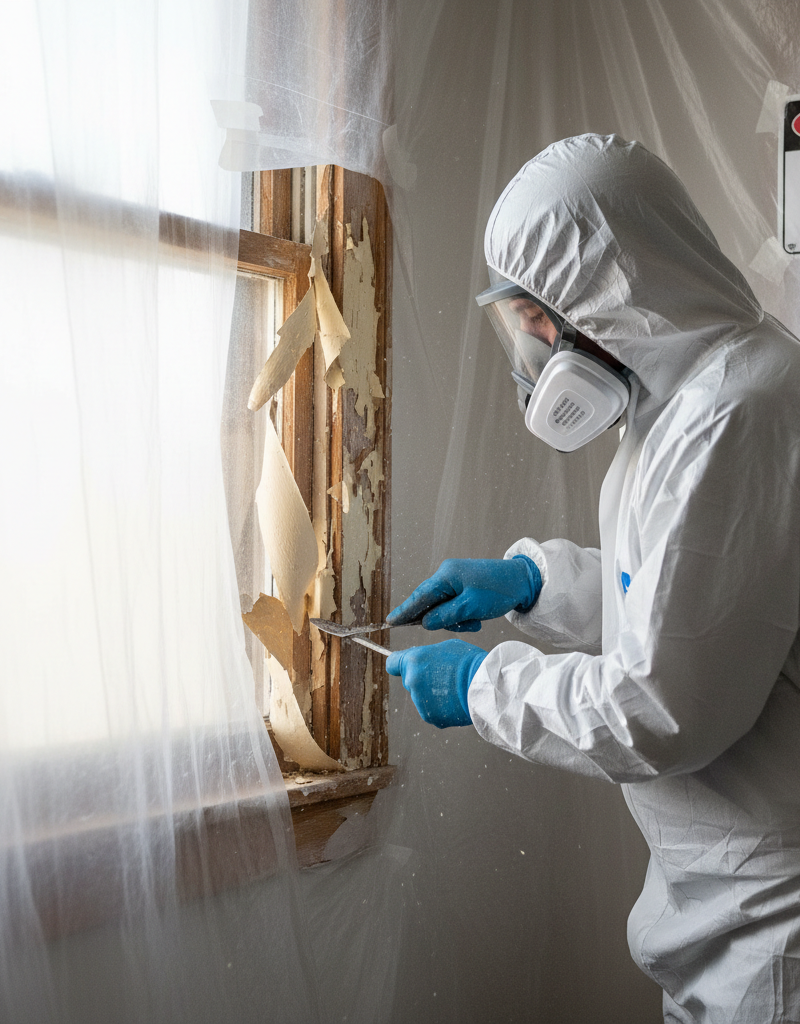
Careful Removal — Slow wins here. The goal is to make as little dust as possible. Use chemical strippers or heat guns on a low setting, never above 1100°F or it volatilizes the lead. Avoid power sanding unless you’ve got a HEPA-filtered sander made for lead work. For scraping, use a hand scraper and keep the surface damp with your spray bottle. Bag up chips and debris right away in heavy-duty plastic bags. Don't let that stuff hit the floor if you can help it.
- Test heat gun: Always test on a hidden spot first so you don't scorch the wood or the finish.
- Ventilation: If you're using a heat gun or chemical stripper, you need some ventilation, but don't set up a cross-breeze that'll spread dust. A window fan exhausting out of the room can help, but seal the rest.
-
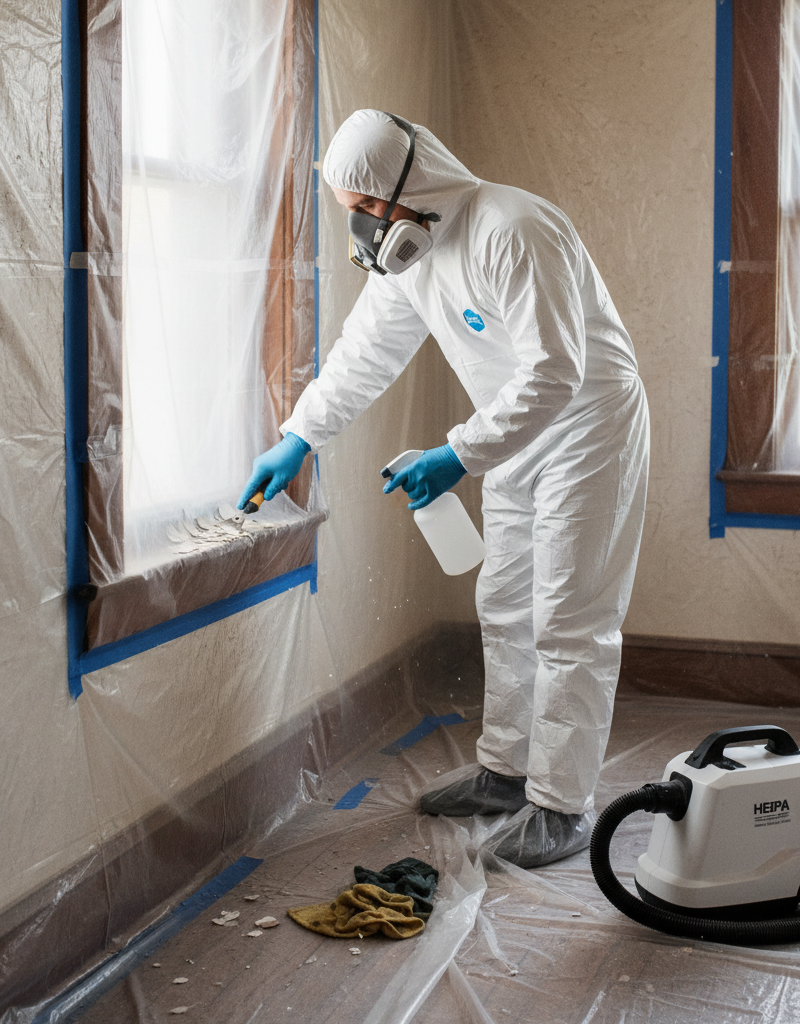
Clean, Clean, Clean — This ain't your normal cleanup. Once the paint's off, it's time for a real cleanup job. First, mist the work surfaces and HEPA vacuum every surface—floors, walls, window sills, the whole deal. This isn't your regular shop vac; it needs a certified HEPA filter. Then wet-wipe everything with trisodium phosphate (TSP) or a dedicated lead cleaning solution. Use disposable rags, wipe once, then toss 'em. Do that wet-wipe process at least twice, swapping rags often. Finally, HEPA vacuum again. Keep the plastic sheeting in place until you're completely done.
- HEPA vac rental: You can usually rent one from a tool shop if you don't own it. Worth every penny.
- No sweeping: Seriously, toss the broom. It just kicks lead dust back into the air.
-
Disposal — Don't dump it with regular trash. All the plastic sheeting, rags, coveralls, and paint chips count as hazardous waste. Double-bag everything in 6-mil plastic bags, seal them tight, and call your local waste management facility or health department for the right disposal steps. This isn't a small thing; mess this up and you can contaminate the environment.
- Local rules vary: What's fine in one county might be illegal in the next one. Check first.
-
Post-Remediation Cleaning — One more safety pass. Even after you've cleaned the work area, some dust can drift around. Run HEPA air scrubbers for 24-48 hours in the cleaned space and the rooms next to it. Change your HVAC filter if the system was running near the work zone. I'd also suggest a professional clearance test, especially if you've got little kids in the house. I always recommend it for peace of mind.
- HVAC filter: Use a MERV 11 or higher filter if possible for ongoing dust capture.
Common Causes
- Age of the Home: This is the big one. If your house was built before 1978, it's considered "lead-present" until proven otherwise. The older it is, the more likely you're dealing with lead paint, especially in homes from before the 1950s. Lead was only fully banned in residential paint in the US in 1978.
- Disturbance During Renovation: Scraping, sanding, drilling, and cutting old painted surfaces are the main ways lead dust gets made. Even little jobs like replacing a window or hanging a new door can create a mess if you don't take precautions.
- Deteriorating Paint: Chipping, peeling, or chalking lead paint—especially on high-friction spots like windows and doors—can release lead dust and chips on its own, even if nobody's actively working on it. That's especially risky for young kids who might put paint chips in their mouths.
- High-Traffic Areas: Places that take a beating, like windowsills, door frames, stairs, and railings, are more likely to make dust as painted surfaces rub together or get scratched up.
- Improper Previous Renovations: If a previous owner ripped into lead paint without proper containment, dust can still be hiding in carpets, heating ducts, or settled in other parts of the house, then get stirred up again when new work starts. Sometimes I find old lead dust pockets in wall cavities during demo — that's usually a sign somebody cut corners years ago.
Common Mistakes
Here are the blunders I see homeowners make all the time with lead paint:
- Assuming No Lead: Biggest mistake out there. "Oh, my house isn't that old," or "It's been painted over so many times, the lead must be gone." Nope. Lead stays. Test it.
- Dry Sanding/Scraping: That's basically a dust blizzard. It throws lead particles everywhere. Always wet sand or wet scrape so the dust stays heavy and drops out.
- Using a Regular Vacuum: A normal shop vac or household vacuum won't cut it. The filters aren't fine enough, and they'll just blow the tiniest lead dust right back into the air. You must use a HEPA-filtered vacuum.
- Insufficient Containment: Thinking a drop cloth's enough. It isn't. You need sealed 6-mil plastic sheeting, two layers, taped off like you mean it. Dust finds a way, trust me.
- No Respirator (or the Wrong One): A flimsy paper mask won't protect you from lead dust. You need a P100 respirator that seals tight to your face. Your lungs are worth that much.
- Improper Disposal: Bagging lead waste and tossing it in the weekly trash is a hard no. That's how you contaminate landfills and maybe groundwater too. Follow your local hazardous waste rules.
Cost & Time Breakdown
Here's a rough idea of what you're looking at for a small, contained lead paint project (e.g., removing paint from two window sills):
| Task | DIY Cost | Pro Cost | Time |
|---|---|---|---|
| Lead Test Kit | $15–$30 | $200–$600 (pro lab) | 5–10 minutes |
| Safety Gear | $50–$100 | Included in pro fees | 10 minutes |
| Containment Materials | $30–$60 | Included in pro fees | 30–60 minutes |
| Paint Removal Supplies | $20–$50 | Included in pro fees | 1–3 hours |
| HEPA Vac Rental | $40–$70/day | Included in pro fees | 1–2 hours cleanup |
| Hazardous Waste Disposal | $0–$50 (local rates) | Included in pro fees | 30 minutes |
| Total (DIY) | $155–$360 | $700–$2,000+ | 3–6 hours |
Note: Professional lead abatement contractors provide certifications and guarantees, and handle all disposal and air quality testing. DIY is only for very small, contained areas with extreme caution.
Tips & Prevention
- Test Before You Touch: Seriously, that's my number one rule. Before any renovation, even hanging a picture frame on an old wall, test for lead. A simple swab kit is cheap insurance.
- Encapsulate, Don't Remove (Sometimes): If lead paint's in good shape, the safest and easiest move is often to encapsulate it. That means painting over it with a special primer and two coats of high-quality paint, or covering it with new drywall or trim. That locks the lead in and keeps dust down.
- Regular Cleaning: If you know you’ve got intact lead paint, regular wet cleaning of floors, windowsills, and other surfaces can help knock down any settled dust before it becomes a problem, especially in homes with kids.
- Inspect Annually: Walk the house once a year and pay close attention to windows, doors, and trim. Look for chipping, peeling, or chalking paint. Fix problems promptly and safely.
- Keep Kids Away: If you're working on older painted surfaces, keep children and pregnant women completely out of the house until the work's done and the cleanup's finished and checked.
- Renovate Smart: Plan the job carefully. Can you replace painted components, like old windows, instead of stripping them? That often cuts down lead spread a whole lot.
When to Call a Professional
Look, I'm all for DIY, but there are lines you just don't cross with lead. If you're dealing with a big area of lead paint—say, a whole room, multiple windows, exterior siding, or large patches of peeling paint—that's the time to pick up the phone and call a lead-certified pro. Any job involving power tools that make a lot of dust, like cutting through walls or floors that might have lead paint, is also a straight-up "call a pro" situation. If you've got young kids or pregnant women living in the house, I'd lean hard toward caution and get a professional lead risk assessment and abatement plan for any disturbance of lead paint. These crews have specialized gear like full Hazmat suits, negative air machines, and industrial-grade HEPA filters that a homeowner just can't realistically match. They'll also do clearance testing so you know the area is actually safe before anybody moves back in. It costs more upfront, sure, but the peace of mind — and the protection of your family's health — is worth every dime.
Related Articles
Keep troubleshooting with these hand-picked guides from FixlyGuide:
- 7 Inspection Red Flags That Secretly Signal a $20,000 Bill — Don't let your dream home become a money pit. Many buyers and even some inspectors overlook subtle home inspection red flags that lead to f…
- 7 Hidden Equity Drains Costing You Thousands Annually — Your home is an asset, but silent problems like minor leaks, poor insulation, and deferred maintenance can drain its value. Discover the se…
- The 12 Checks That Prevent 80% of Costly Home Repairs — Don't wait for a disaster. Our comprehensive monthly home maintenance checklist reveals the surprising, simple tasks that catch small issue…
- The Hidden Culprit Behind Your AC Not Cooling (and How to Find It) — If your central AC isn't cooling your home, the issue often stems from a surprisingly simple problem that's easy to overlook. Learn how to…
- The Secret Power Tool Hiding in Your Garage for a Speedier Clean — Unlock the hidden potential of your cordless drill to tackle stubborn household grime, soap scum, and dirt with specialized cleaning attach…
- The Dryer Fire Hazard Hiding in Plain Sight (and How to Eliminate It in 30 Minutes) — Lint buildup in your dryer vent is a silent fire hazard. Learn how to clean it thoroughly and prevent a potential disaster with simple tool…
What should this project cost?
Enter your project details for a realistic cost range before you call anyone.
Cost depends heavily on which system turns out to be the source.
- Regional adjustment
- National average
- Labor share (typical)
- ~$1,620
- Quotes to collect
- 3 written estimates
Educational estimate based on national averages — not a binding quote. Always confirm with written local estimates.
Get the print-ready PDF of this guide
A clean, ad-free, printable version you can keep on your phone or pin to the workshop wall. Free with a FixlyGuide account.
- Print-optimized layout
- Tools, materials & every step included
- Saved to your account
This article was independently written by FixlyGuide based on the source topic.
Frequently asked questions
How do I know if my house has lead paint?+
The easiest way is to assume any house built before 1978 has it. For certainty, buy an EPA-recognized lead test kit from a hardware store, or hire a professional lead inspector to test various surfaces in your home. These tests can tell you definitively if lead paint is present.
Is it safe to live with lead paint if it's not peeling?+
Generally, yes. Intact lead paint that isn't chipping, flaking, or chalking typically poses a low risk. The danger comes when the paint is disturbed or deteriorates, creating lead dust and chips that can be ingested or inhaled. Encapsulating intact lead paint is often a good solution.
What's the riskiest way to disturb lead paint?+
Dry sanding and dry scraping are by far the riskiest methods. They create massive amounts of fine, airborne lead dust that can spread throughout your home and be easily inhaled. Power tools used without HEPA attachments are also extremely dangerous and should be avoided.
Can I just paint over lead paint?+
Yes, often encapsulation is the safest approach for intact lead paint. This involves cleaning the surface thoroughly, applying a specialized encapsulating primer, and then two coats of high-quality paint. This seals the lead in and prevents it from becoming airborne.
What kind of respirator do I need for lead paint work?+
You need a P100-rated respirator. This is a half-face mask with two cartridges designed to filter out 99.97% of airborne particles, including lead dust. Simple paper masks or N95 respirators are not sufficient for lead abatement.
How do I dispose of lead paint waste?+
Lead paint chips, dust, plastic sheeting, and rags are considered hazardous waste. You cannot just throw them in your regular trash. Double-bag all materials in heavy-duty plastic and contact your local waste management facility or health department for specific instructions on hazardous waste disposal in your area.
How much does professional lead paint removal cost?+
Professional lead abatement can range significantly, but for a typical small project like a few windows, you might expect to pay anywhere from $700 to $2,000 or more. Larger projects, like an entire room or exterior, can easily run into thousands or even tens of thousands of dollars, depending on the scope and location.
What does 'HEPA vacuum' mean and why do I need one?+
HEPA stands for High-Efficiency Particulate Air. A HEPA vacuum is equipped with a filter that can capture 99.97% of particles tiny as 0.3 microns, which is crucial for trapping microscopic lead dust particles. Regular vacuums just blow these fine particles back into the air, making the problem worse.
Discussion
Loading comments…