Tools & materials you'll need
Affiliate linksNo materials required.
As an Amazon Associate FixlyGuide earns from qualifying purchases — at no extra cost to you. Prices and availability are accurate as of publication and subject to change.
Quick Answer
Low water pressure affecting your entire home can be a frustrating puzzle, often leading to immediate thoughts of complex plumbing issues. However, the most frequent culprits are surprisingly simple: a main water shut-off valve that isn't fully open, a malfunctioning water pressure regulator, or significant sediment buildup within your home's main water supply line. Other possibilities include problems with your water heater, a hidden leak, or even an issue originating from your municipal water supply.
The Problem
Imagine stepping into the shower, expecting a invigorating spray, only to be met with a pathetic trickle. Or running the dishwasher and hearing the washing machine fill, then realizing your kitchen sink has barely a drip. This isn't just an inconvenience; consistently low water pressure throughout the entire house can impact daily routines, complicate appliance operation, and even indicate a more serious underlying issue within your plumbing system. Unlike localized low pressure in a single faucet, a whole-house reduction points to a problem at the source or along the main distribution lines, affecting every fixture from your upstairs bathroom to your basement laundry room.
How It Works
Your home’s water pressure is essentially the force at which water flows through your pipes. It’s measured in pounds per square inch (PSI). Most residential plumbing systems are designed to operate optimally within a range of 40 to 60 PSI. Water enters your home from the municipal supply line (or a well pump) and first passes through your main shut-off valve, followed by a water meter, and often a pressure regulator valve (PRV). The PRV is crucial; it reduces the higher incoming street pressure to a safe, consistent level for your home’s internal plumbing, preventing damage to pipes and fixtures. From there, the main line typically branches off, sending cold water directly to fixtures and also routing water to your water heater. Hot and cold water then travel through a network of smaller branch lines to supply individual sinks, showers, toilets, and appliances. Any obstruction, restriction, or malfunction at the foundational points — like the main valve, PRV, or main supply line itself — will inevitably reduce pressure for every single fixture downstream. The volume of water flowing through the pipes (measured in gallons per minute, or GPM) also plays a role; if there isn't enough water volume due to a partially closed valve or clog, even with adequate pressure, the flow will feel weak.
Step-by-Step Fix
Before you dive into complex diagnostics, start with the easiest and most common culprits. Always work systematically to avoid overlooking a simple solution.
-
Check the Main Water Shut-Off Valve — The most common oversight.
- Locate your main water shut-off valve. This is typically near your water meter, either outside where the main line enters your house or in your basement or utility room. It’s often a gate valve with a circular handle or a ball valve with a lever handle.
- Action: Ensure the valve is fully open. For a gate valve, turn the handle counter-clockwise until it stops. For a ball valve, the handle should be parallel to the pipe. Sometimes, these valves get partially closed during maintenance or even by accident.
- If this doesn't work: If the valve was already fully open, proceed to the next step. If it was partially closed and opening it resolves the issue, congratulations! If not, the valve itself might be faulty or heavily corroded internally, hindering full flow.
-
Inspect the Water Pressure Regulator (PRV) — A frequent source of gradual pressure loss.
- Identify: Not all homes have a PRV, but many do, especially in areas with high municipal water pressure. It’s usually a bell-shaped or cylindrical device located on the main water line, downstream from the main shut-off valve.
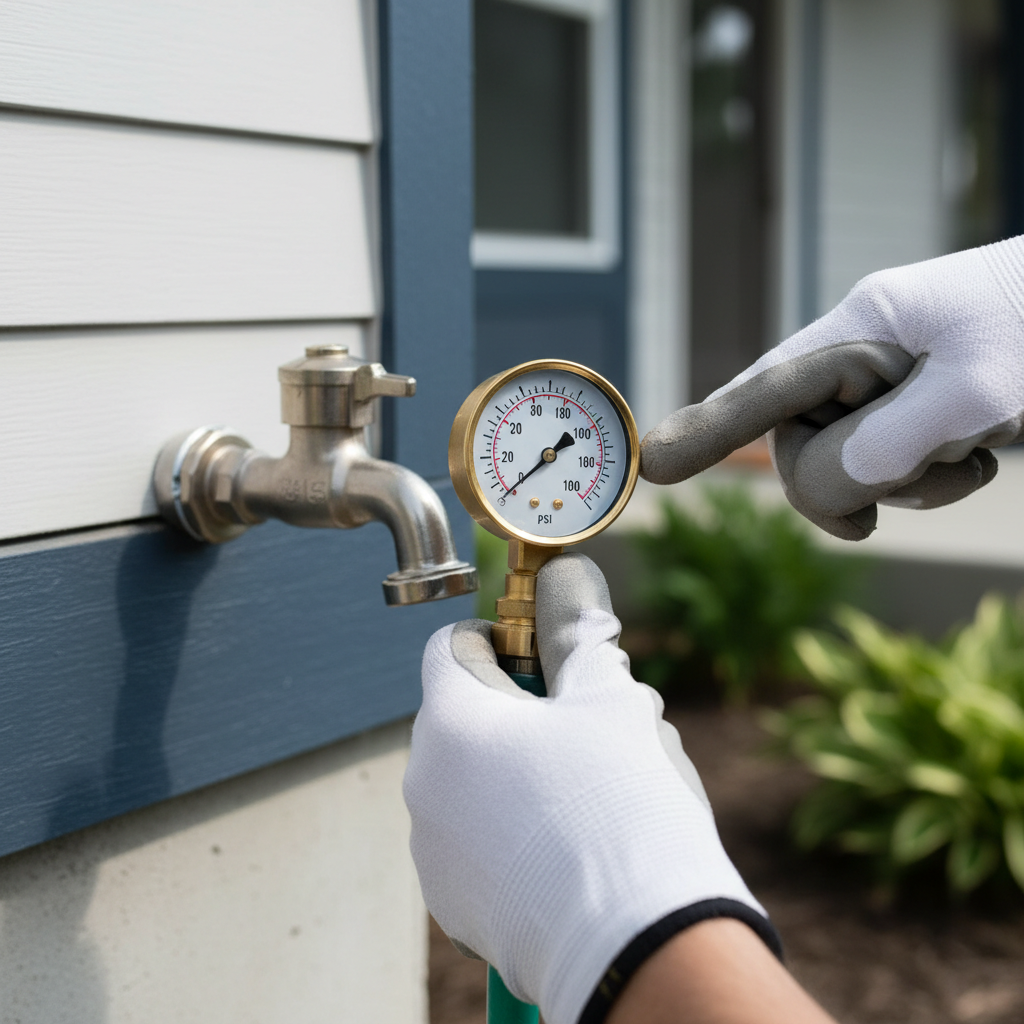
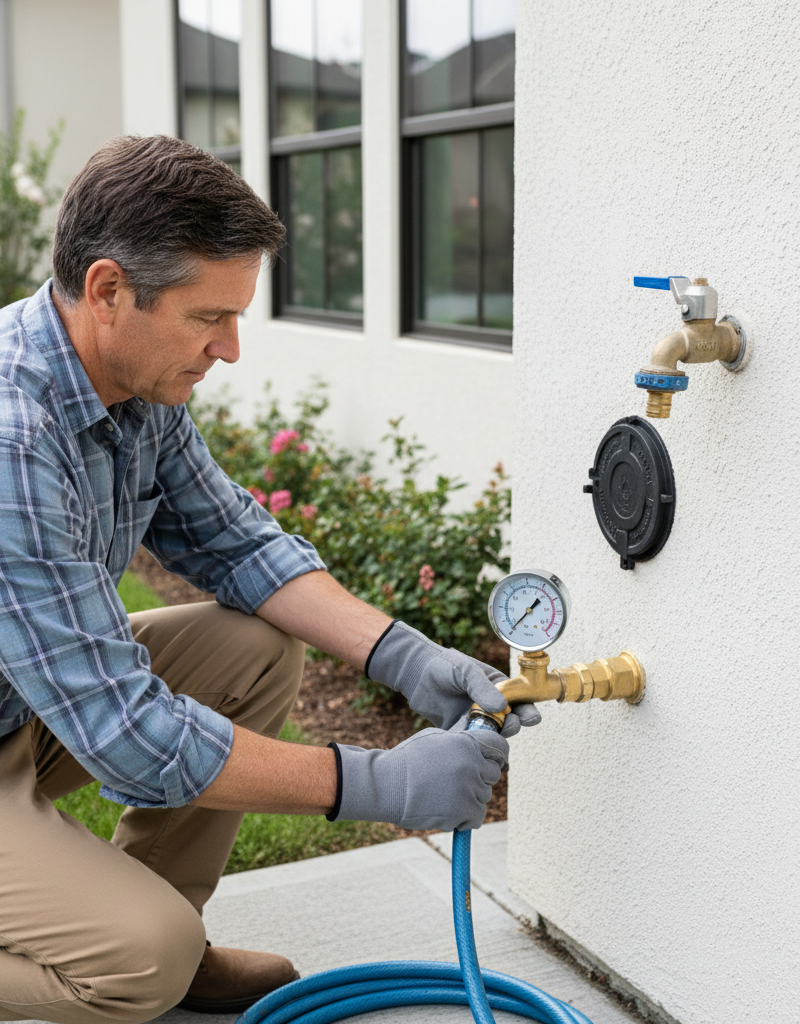
- Test: You'll need a water pressure gauge (available at hardware stores for about $10-$20). Screw it onto an exterior hose spigot or a utility sink faucet. Turn on the water and read the gauge. An ideal reading is 40-60 PSI. If it's consistently below 40 PSI, your PRV might be failing.
- Action (if PRV is adjustable): Some PRVs have an adjustment screw or bolt (often under a cap). If you have one, try turning it clockwise in small increments (quarter turns) to increase pressure. Retest with the gauge after each adjustment. Safety Note: Do NOT over-tighten or set the pressure above 80 PSI, as this can damage your plumbing.
- If this doesn't work: If adjusting has no effect, or your PRV isn't adjustable and the pressure is low, the PRV is likely failing and needs replacement. This is a job best suited for a plumber, as it involves working on the main water line.
-
Check for Sediment Buildup in the Main Line/Water Heater — A common issue in older homes.
- Main Line: Over decades, especially with older galvanized pipes or hard water, mineral deposits and rust can accumulate inside pipes, significantly reducing their internal diameter and restricting flow. This often manifests as a gradual, worsening pressure drop.
- Water Heater: Sediment can also build up in the bottom of your water heater, restricting flow out of the hot water side. If only your hot water pressure is low, your water heater is the prime suspect.
- Action (Water Heater Flush): To check for water heater sediment, you can try flushing your water heater. Safety Note: Turn off the power/gas to the water heater and the cold water supply. Connect a garden hose to the drain valve at the bottom of the tank and direct the other end to a floor drain or outside. Open the drain valve completely. Run the cold water supply back on to help dislodge sediment. You'll likely see discolored, murky water. Flush until the water runs clear. Close the water supply and drain valve, remove the hose, and refill the tank before restoring power/gas.
- If this doesn't work: If flushing doesn't improve hot water pressure, or if both hot and cold are affected and you suspect main line sediment, a professional plumber can inspect your pipes with a borescope or suggest descaling or repiping options.
-
Investigate for Undetected Leaks — A silent pressure killer.
- Even small, hidden leaks can lead to a noticeable drop in overall household water pressure, especially if the leak is significant on the main line.
- Test: Take a baseline water meter reading, then ensure all water-using appliances and fixtures in your house are turned off and not running for at least 30 minutes (an hour is better). Take a second reading. If the meter has moved, even slightly, it indicates a leak somewhere in your system. If your meter has a small red or blue "leak indicator" triangle or wheel, check if it
Related Articles
Keep troubleshooting with these hand-picked guides from FixlyGuide:
- The 4 Hidden Reasons Your Entire Home Has Low Water Pressure (And the Easy Fixes) — Low water pressure throughout your entire home can be a frustrating and often misunderstood problem, with several common culprits. Learn to…
- The #1 Mistake Homeowners Make When Diagnosing Low Water Pressure (It's Not Your Pipes!) — Low water pressure throughout your house often points to a single, easily overlooked culprit: your main water shut-off valve.
- The #1 Mistake Homeowners Make When Diagnosing Low Water Pressure — Discover the most common oversight homeowners make when troubleshooting low water pressure throughout their house and how to fix it with si…
- The #1 Mistake Homeowners Make When Diagnosing Low Water Pressure (It's Not Your Pipes!) — Discover the most common, often overlooked culprit behind low water pressure impacting your entire home and how to easily fix it.
- The #1 Mistake Homeowners Make When Diagnosing Low Water Pressure (and What to Check First) — Before you call a plumber, learn the most common overlooked cause of low water pressure affecting your entire home and how to easily check…
- The #1 Mistake Homeowners Make with a Slow Kitchen Drain (And the Simple Fix) — A slow kitchen sink drain is frustrating, but often an easy fix if you avoid common mistakes and know where to look first.
Get the print-ready PDF of this guide
A clean, ad-free, printable version you can keep on your phone or pin to the workshop wall. We'll also send occasional weekly tips matched to your home situation.
- Print-optimized layout
- Tools, materials & every step included
- Unsubscribe anytime
Recommended for DIYers & woodworkers
Sponsored
The Top 20 Tools for Workshops of Any Budget
No stationary machines or power tools required — plus 3 fundamental tools that can't be bought at any price.
Get the free guide
Ted's Woodworking — The #1 Woodworking Resource
Detailed instructions, dimensioned drawings, materials & cutting lists, and 3D schematics for every skill level.
See the plansSponsored: links above are affiliate links. FixlyGuide may earn a commission on qualifying purchases — at no extra cost to you.
Frequently asked questions
Why is my water pressure suddenly low everywhere?+
Sudden, whole-house low water pressure often points to a problem with your main water supply. This could be a partially closed main shut-off valve, a failing water pressure regulator (PRV), or a significant leak in your main supply line. Less commonly, it could be an issue with the municipal water supply itself.
Can a clogged water filter cause low water pressure?+
Yes, a clogged whole-house water filter can absolutely cause low water pressure throughout your home. If your home has a whole-house filter system, check its filter cartridge. If it's dirty or hasn't been replaced recently, changing it can often restore pressure.
How do I know if my water pressure regulator is bad?+
To test your water pressure regulator (PRV), you'll need a water pressure gauge. Screw it onto an exterior hose spigot and open the valve. An ideal reading is 40-60 PSI. If your reading is consistently below 40 PSI and doesn't improve after carefully adjusting the PRV (if it's adjustable), it likely indicates a failing regulator that needs replacement.


Discussion
Loading comments…