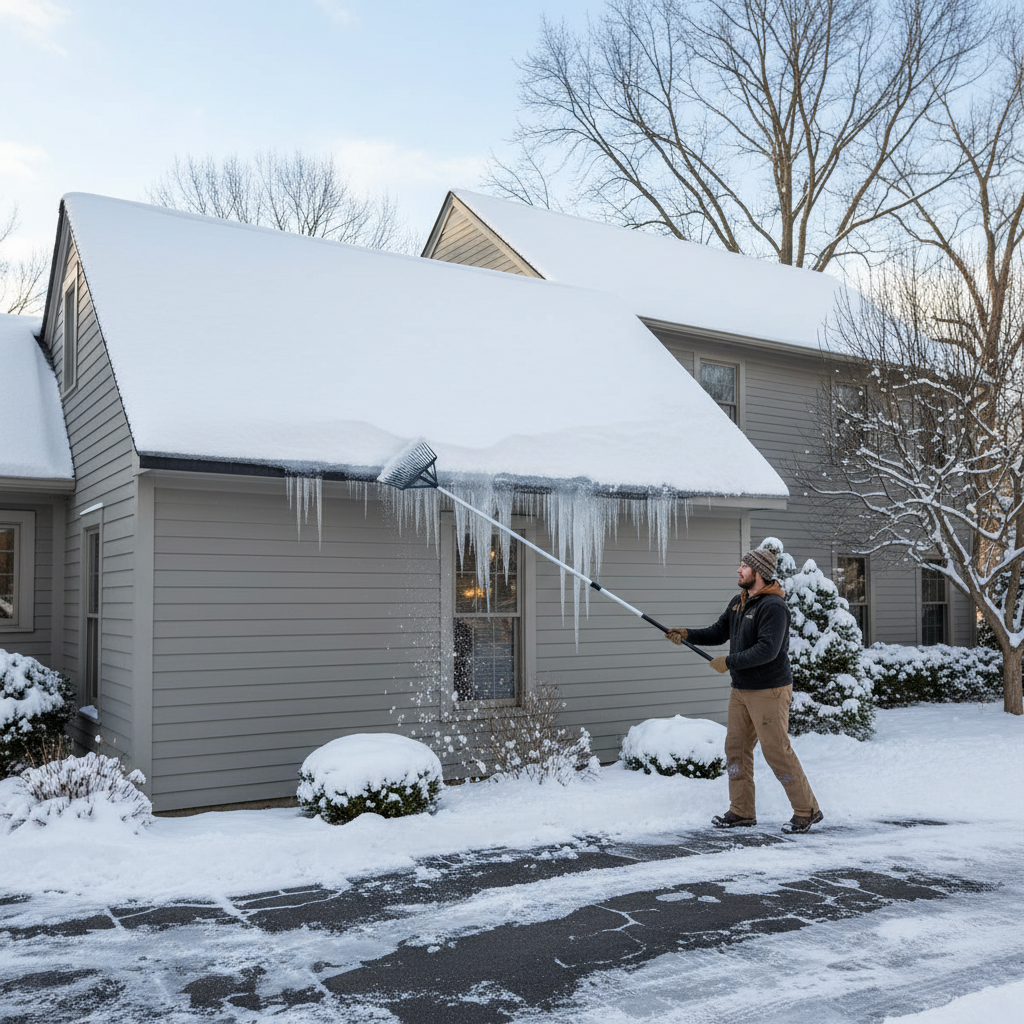
- Assess conditions: Only work on clear, calm days. Avoid icy roofs, windy conditions, or precipitation. Never work alone.
- Use proper gear: Always use a sturdy ladder placed on stable, level ground. Have someone hold the ladder. Wear non-slip footwear, warm clothing, and consider a safety harness if working at significant heights or on steep pitches.
- Beware of overhead hazards: Be mindful of power lines or other obstructions near your roof.
- If your roof is steep or highly iced, do NOT attempt DIY removal. Call a professional.
General remodeling · Renovation planning
| Project category | General remodeling |
|---|---|
| Problem type | Renovation planning |
| Trade required | General contracting |
| Urgency | Planned project |
| Safety risk | Low safety risk |
| DIY suitability | Pro recommended |
| Cost category | Major investment |
| Typical timeline | Design and permitting often 2–4 months before work starts |
| Contractor type | General contractor |
Repair option
Phase the work and fix the building envelope first.
Replacement option
Full renovation with permits, design, and a general contractor.
Common causes
- Space no longer fits how the household lives
- Resale preparation
- Deferred maintenance stacking up
Relevant tools:project cost estimatorcompare quoteshome improvement material prices
Published July 20, 2026Last updated August 18, 2026
Tools & materials you'll need
Affiliate linksAs an Amazon Associate FixlyGuide earns from qualifying purchases — at no extra cost to you. Prices and availability are accurate as of publication and subject to change.
Quick Answer
Ice dams are ridges of ice that form at the edge of a roof, preventing melting snow from draining properly. This blockage causes water to pool behind the dam and potentially seep under shingles, leading to significant water damage inside your home. While completely preventing ice dams often requires improving attic insulation and ventilation, homeowners can safely remove existing dams using a few simple, non-damaging techniques. The most accessible method involves creating channels for water to escape using a calcium chloride solution or calcium chloride-filled stockings.
The Problem
Ice dams are more than just an aesthetic issue; they pose a serious threat to your home's structural integrity and interior finishes. When snow on your roof melts due to heat escaping from your attic, it runs down the roof until it hits the colder eaves. Here, away from the warmth of the house, the water refreezes, forming a barrier. As more snow melts, the water pools behind this ice dam, unable to drain. This trapped water can then back up under your shingles, saturating the roof deck, insulation, and even penetrating ceilings and walls. The result can be costly water stains, damaged drywall, peeling paint, mold growth, and compromised structural wood. Heavy ice dams also exert enormous weight on gutters and eaves, potentially tearing them away from the house.
How It Works
Understanding the mechanics of ice dam formation is key to both prevention and removal. The primary culprit is uneven roof temperatures. Heat from your living space rises and, if your attic is poorly insulated, escapes through the ceiling into the attic. This warm air then heats the underside of your roof deck. Snow on the upper, warmer parts of the roof melts. As this meltwater flows down the roof, it encounters the colder eaves, which are typically unheated and extend beyond the insulated area of your home. At this colder point, the water refreezes, starting the formation of an ice dam. The process exacerbates itself: the growing ice dam acts as an even more effective insulator, keeping the eave colder and causing more water to freeze behind it. This continuous cycle of melting and refreezing, especially in fluctuating winter temperatures, builds up thick, heavy ice dams. Proper attic insulation creates a thermal barrier, keeping the heat inside your home and the attic and roof deck cold. Adequate ventilation, usually through soffit and ridge vents, allows cold outdoor air to circulate through the attic, further cooling the roof deck and preventing snow from melting prematurely. Without this balance, ice dams are an almost inevitable winter nuisance.
Step-by-Step Fix
1. Safety First — Before attempting any work on your roof, prioritize safety.
- Assess conditions: Only work on clear, calm days. Avoid icy roofs, windy conditions, or precipitation. Never work alone.
- Use proper gear: Always use a sturdy ladder placed on stable, level ground. Have someone hold the ladder. Wear non-slip footwear, warm clothing, and consider a safety harness if working at significant heights or on steep pitches.
- Beware of overhead hazards: Be mindful of power lines or other obstructions near your roof.
- If your roof is steep or highly iced, do NOT attempt DIY removal. Call a professional.
2. Gather Your Materials — Have everything ready before you start.
- Calcium Chloride: This is crucial. Use only calcium chloride-based ice melt, NOT rock salt (sodium chloride), as rock salt can damage roofs, plants, and concrete.
- Old Nylon Stockings or Pantyhose: These will hold the calcium chloride.
- Mallet or Rubber Hammer: For gently breaking small pieces of ice.
- Roof Rake (optional but recommended): Extends your reach from the ground, removing snow before it turns to ice.
- Safety Glasses and Gloves: Chemical protection and better grip.
3. Clear the Snow (if present) — Remove loose snow to expose the ice dam.
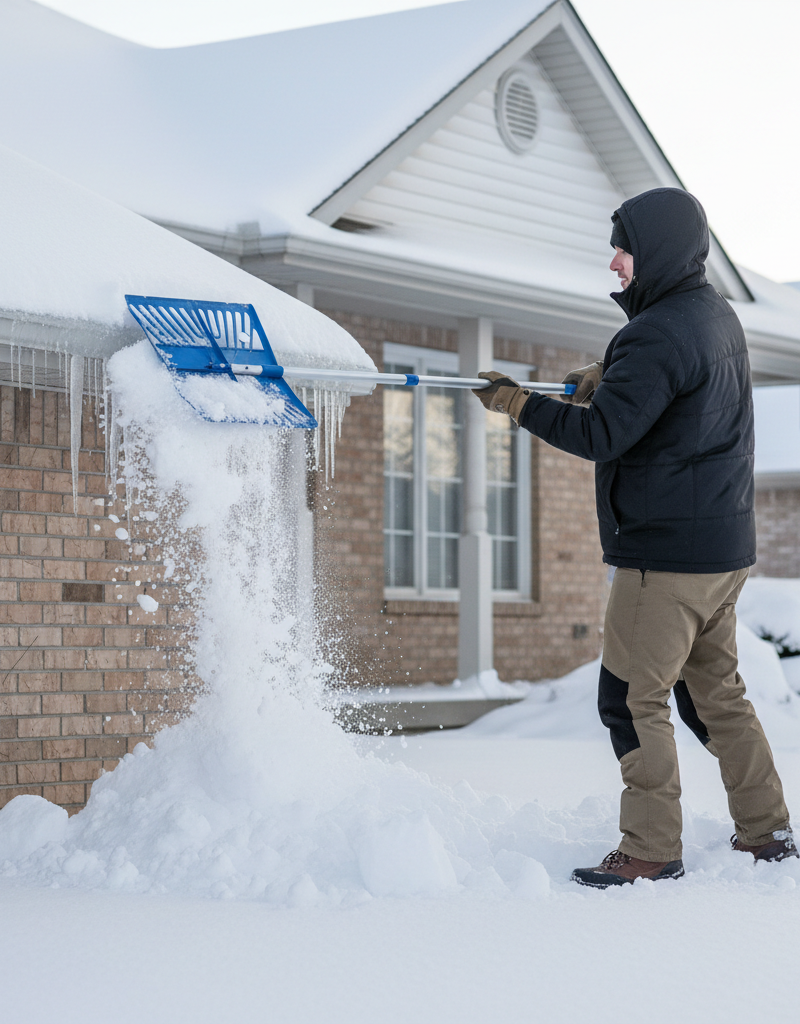
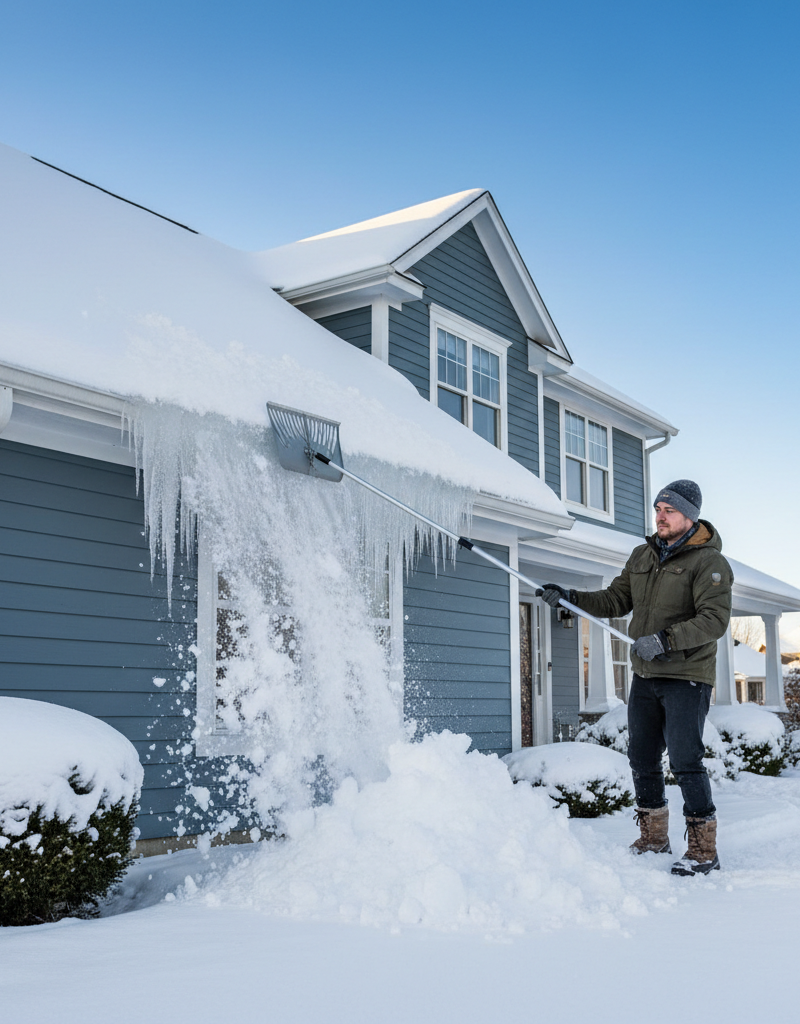
- Use a roof rake: Stand on the ground and carefully pull snow down from the roof, especially above the ice dam. Avoid standing directly under falling snow.
- Avoid shovels: Do not use metal shovels on the roof, as they can easily damage shingles.
- Clear a path around entry/exit points: Ensure paths are clear of snow and ice created from the falling snow.
4. Prepare the Calcium Chloride Stockings — Create your ice-melting tools.
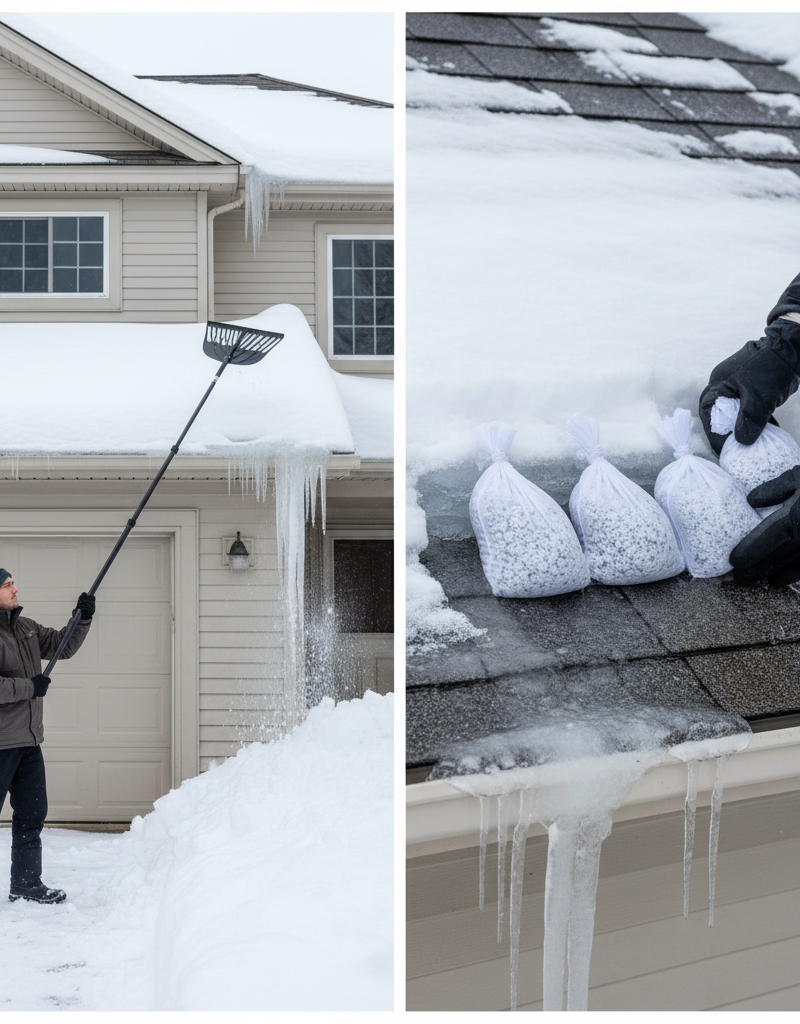
- Fill the stockings: Spoon or pour calcium chloride into old nylon stockings or pantyhose. Tie off the ends securely, forming sausage-like tubes about 1-2 feet long.
- Adjust size: Make them small enough to manage and place effectively. Too large, and they won't conform to the ice dam's shape.
- Why stockings? The nylon allows the calcium chloride to slowly dissolve and seep out, forming concentrated melt paths without directly spreading corrosive salt onto your roof or damaging runoff areas.
5. Create Melt Channels — Strategically place the stockings to drain water.
- Place on the ice dam: Carefully lay the filled stockings across the ice dam, perpendicular to the roof's edge. Aim to create channels that extend all the way through the dam to the gutter or off the roof.
- Spacing: Place them every 3-5 feet along the dam, concentrating on areas where water is pooling.
- Allow time to work: Calcium chloride works by lowering the freezing point of water. It won't instantly melt the dam. Give it several hours, or even overnight, depending on the temperature and ice thickness. The goal is to create narrow channels for trapped water to drain, not to melt the entire dam at once.
6. Monitor and Repeat (if necessary) — Check progress and adjust.
- Observe drainage: After a few hours, check if water is flowing through the channels created by the melting ice.
- Reposition or add: If channels aren't forming or seem insufficient, gently reposition the stockings or add more. You can also carefully pour warm water (NOT hot) along the channels to speed up the process, but be cautious of refreezing.
- Gentle removal: Once channels are established and the dam has softened considerably, you might be able to gently chip away smaller, loosened sections using a rubber mallet. NEVER use sharp tools or excessive force, as this can severely damage your shingles and roof deck.
7. Clear Drainage Paths — Ensure meltwater can escape.
- Remove snow from gutters: If gutters are packed with snow or ice, clear them to allow meltwater to flow freely.
- Downspout check: Ensure downspouts are not frozen shut. If they are, you may need a heat gun on a low setting (from the ground!) or carefully apply more calcium chloride around the opening.
8. Prevent Future Buildup (intermediate step) — Reduce the chances of recurrence.
- Rake snow regularly: After heavy snowfalls, use a roof rake to remove snow from the first 3-6 feet of your roof from the eaves. This is where most ice dams start.
- Address insulation/ventilation: While an immediate fix isn't possible, note that recurring ice dams are a strong sign of inadequate attic insulation and ventilation. Plan to inspect and improve these areas in warmer weather.
Common Causes
- Poor Attic Insulation: This is the most prevalent cause. Heat from your home's living spaces rises into the attic. If the attic floor is not adequately insulated, this heat escapes into the attic and warms the roof deck, causing snow to melt. Insulation should be evenly distributed and meet recommended R-values for your climate zone (e.g., R-38 to R-60 in many colder climates).
- Inadequate Attic Ventilation: Even with good insulation, a hot attic can still contribute to ice dams. Proper ventilation (typically soffit and ridge vents working together) allows cold outside air to flow through the attic, keeping the attic space and roof deck temperatures consistent with the outdoor air. This stops snow from melting prematurely. Blocked or insufficient vents prevent this crucial airflow.
- Air Leaks: Small gaps and cracks in your ceiling, around light fixtures, exhaust fan openings, or attic hatches can allow significant amounts of warm, moist air to enter the attic. These localized hot spots cause specific areas of snow to melt faster, initiating ice dam formation. Sealing these leaks is critical.
- Fluctuating Winter Temperatures: Periods of thawing followed by sharp refreezing temperatures accelerate ice dam growth. The meltwater from warmer periods has more opportunities to refreeze at the colder eaves.
- Sun Exposure Unevenness: Some parts of a roof may receive more direct sunlight, causing snow to melt faster there than in shaded areas. This uneven melting can contribute to the formation of ice dams in shaded, colder zones.
Common Mistakes
- Using Rock Salt (Sodium Chloride): This is a huge mistake. While it melts ice, rock salt is corrosive and can damage asphalt shingles, gutters, downspouts, and landscaping. Always use calcium chloride, which is less harmful to roofing materials and plants.
- Aggressive Hacking or Chipping: Using axes, chisels, or other sharp tools to break up ice dams is incredibly dangerous for your roof. It's almost guaranteed to damage shingles, puncture roofing membranes, and potentially harm the roof deck. Stick to gentle methods or professional steaming.
- Applying Heat Guns or Torches Directly: Direct heat can quickly damage shingles, make them brittle, and even pose a fire risk. While cautiously applied steam from a professional steamer is effective, DIY heat applications are too risky.
- Ignoring the Underlying Cause: Simply removing an ice dam without addressing the insulation and ventilation issues that caused it means it will almost certainly return. The goal should be to prevent them, not just constantly react to them.
- Improper Ladder Use and Safety: Many injuries occur from falls during roof work. Not using a stable ladder, working alone, or on slippery surfaces significantly increases risk. Never prioritize speed over safety.
- Removing Gutters as a Solution: While ice dams are often associated with gutters, removing gutters does not prevent ice dams and can actually exacerbate water runoff problems around your foundation. Gutters aren't the cause; the roof's thermal properties are.
Cost & Time Breakdown
| Task | DIY Cost | Pro Cost | Time |
|---|---|---|---|
| Calcium chloride & stockings | $15–$30 | N/A | 15–30 minutes |
| Roof rake (if needed) | $40–$80 | N/A | N/A |
| Ice dam removal (DIY) | $0–$30 (materials) | $300–$1,000+ (per visit) | 1–3 hours |
| Attic insulation inspection | $0 | $150–$300 (audit) | 30 minutes |
| Sealing air leaks (DIY) | $20–$100 | $200–$500 | 1–4 hours |
| Professional ice dam steaming | N/A | $500–$1,500+ (per visit) | 2–6 hours |
Tips & Prevention
- Regular Roof Raking: After every significant snowfall, use a roof rake to pull accumulated snow off the first 3-6 feet of your roof from the eaves. This is the most effective proactive measure against ice dam formation.
- Improve Attic Insulation: Ensure your attic has adequate insulation (e.g., R-38 to R-60, depending on climate). Proper insulation is the single most important long-term solution to prevent heat transfer to the roof deck.
- Enhance Attic Ventilation: Verify that your attic has clear and sufficient soffit and ridge vents. These create a continuous airflow that keeps the attic and roof deck cold, matching the outside temperature. Ensure vents are not blocked by insulation.
- Seal Air Leaks: Inspect your attic for any penetrations that allow warm air from your living space to enter. Pay attention to light fixtures, plumbing stacks, electrical wiring holes, and the attic hatch. Seal these gaps with caulk, expanding foam, or weatherstripping.
- Clear Gutters: While gutters don't cause ice dams, clogged gutters can exacerbate the problem by preventing meltwater from draining freely, leading to overflow and further ice buildup. Keep them clear of leaves and debris.
- Maintain Even Indoor Temperatures: While less impactful than insulation and ventilation, avoiding drastic temperature fluctuations inside your home can subtly reduce the amount of heat escaping into the attic.
When to Call a Professional
While this guide provides safe DIY methods for managing smaller ice dams, there are clear instances when calling a licensed professional is not just advisable, but necessary. If your ice dams are extensive, exceptionally thick, or are causing visible damage like water stains on your interior ceilings, it's time to call in the experts. Professionals have specialized equipment, such as low-pressure steam removers, which can safely and efficiently clear large dams without damaging your roof. Attempting to remove massive, stubborn ice dams yourself, especially in freezing conditions or on a steep roof, carries significant risks of personal injury from falls or damaging your roof with improper tools. Additionally, if you suspect ongoing structural issues due to prolonged water infiltration, a professional roofer can assess the damage and recommend appropriate repairs. Don't risk your safety or further damage to your home; a professional's expertise pays for itself in peace of mind and prevented repair costs.
Related Articles
Keep troubleshooting with these hand-picked guides from FixlyGuide:
- The $30 Secret to Banishing Ice Dams From Your Roof (Before They Destroy It) — Learn safe and effective methods to remove ice dams from your roof and prevent costly damage to your home's structure and interior.
- The $20 Trick That Melts Ice Dams (and Saves Your Roof) — Discover a surprisingly simple, budget-friendly method to safely remove ice dams and prevent costly roof damage to your home.
- The #1 Mistake Homeowners Make Removing Ice Dams (And 3 Safer Fixes) — Discover the safest and most effective ways to remove ice dams from your roof, avoiding common mistakes that can cause severe damage to you…
- The #1 Mistake Homeowners Make with Ice Dams (and How to Fix It SAFELY) — Most homeowners approach ice dam removal incorrectly, creating more damage or safety risks. Learn the right, safe methods to protect your r…
- The $30 Secret to Banishing Ice Dams Without Damaging Your Roof — Discover how a simple, inexpensive trick can safely eliminate dangerous ice dams from your roof and prevent costly damage to your home.
- The $7 Trick That Unclogs Your AC Drain Line (and Prevents Future Freezes) — A clogged AC drain line is a common culprit behind HVAC issues, but a simple, inexpensive trick can clear it and prevent costly damage.
What should this project cost?
Enter your project details for a realistic cost range before you call anyone.
Spot repairs commonly run $400–$1,800; full replacement typically $9,000–$18,000 for an average home.
- Regional adjustment
- National average
- Labor share (typical)
- ~$2,948
- Quotes to collect
- 3 written estimates
Educational estimate based on national averages — not a binding quote. Always confirm with written local estimates.
Fixly Project Decision Box
- DIY difficulty
- Professional Recommended
- Estimated time
- Inspection 1–2 hours · repairs 1–3 days
- Cost level
- High
Main tools / materials
- Binoculars for a ground-level look
- Flashlight for attic checks
- Moisture meter
- Roofing cement (temporary patch only)
When to stop and call a pro
- Active leak near lights, fans, or any wiring
- Sagging, bulging, or water-filled ceiling
- Steep, wet, or two-story roof — do not climb it
- Storm or hail damage you plan to claim on insurance
Need professional help?
Free roof assessment first — no phone calls until you ask for them.
Get Local Roofing HelpDecide what your roof needs
Two minutes of questions turns "something is wrong up there" into a clear next step.
- Repair or replace your roof?Answer 10 questions about age, leaks, and damage to get a clear next step.Open
- Compare contractor quotesScore up to four bids on price, warranty, licensing, and timeline.Open
- Get local estimatesSend one request and compare written estimates from vetted pros.Open
Free, no signup required. Estimates are educational guidance, not a quote or an inspection.
Recommended for DIYers & woodworkers
Sponsored
The Top 20 Tools for Workshops of Any Budget
No stationary machines or power tools required — plus 3 fundamental tools that can't be bought at any price.
Get the free guide
Ted's Woodworking — The #1 Woodworking Resource
Detailed instructions, dimensioned drawings, materials & cutting lists, and 3D schematics for every skill level.
See the plansSponsored: links above are affiliate links. FixlyGuide may earn a commission on qualifying purchases — at no extra cost to you.
Frequently asked questions
What is an ice dam and why is it bad?+
An ice dam is a ridge of ice that forms at the edge of your roof, preventing melting snow from draining. Water then pools behind the dam, seeps under shingles, and can cause significant water damage to your roof, insulation, and interior ceilings and walls.
Can I use rock salt to remove ice dams?+
No, you should NOT use rock salt (sodium chloride). Rock salt can corrode and damage asphalt shingles, gutters, downspouts, and harm plants. Always use calcium chloride, which is a safer alternative for your roof.
How can I prevent ice dams in the future?+
The most effective long-term prevention involves improving attic insulation and ventilation. Ensuring your attic is cold and well-vented stops snow from melting prematurely on your roof, which is the root cause of ice dams. Regularly raking snow off the lower edges of your roof also helps.
Is it safe to get on my roof to remove an ice dam?+
Working on a roof, especially one with ice, is inherently dangerous. Only attempt roof work in clear, calm conditions, using a stable ladder and non-slip footwear. For steep roofs, large ice dams, or if you're uncomfortable, it's always safer to call a professional.
How much does it cost to have a professional remove ice dams?+
Professional ice dam removal, typically done with low-pressure steam, can range from $300 to $1,500 or more per visit, depending on the size and complexity of the ice dams and your location. However, this cost is often less than the potential damage caused by ignored ice dams.
Discussion
Loading comments…