
Tools & materials you'll need
Affiliate linksAs an Amazon Associate FixlyGuide earns from qualifying purchases — at no extra cost to you. Prices and availability are accurate as of publication and subject to change.
Quick Answer
If your oven consistently fails to reach or maintain its set temperature, the most likely cause is a malfunctioning oven temperature sensor. This small but crucial component is responsible for relaying the internal temperature to the oven's control board. When it's faulty, the oven can't accurately regulate its heat, leading to undercooked food or prolonged cooking times. Often, a quick diagnostic test and replacement, or a calibration adjustment, can restore your oven's performance.
The Problem
Imagine baking your favorite cookies, only to find them perpetually pale and doughy, despite the timer dinging away. Or perhaps your roasted chicken takes twice as long as the recipe suggests. These are classic symptoms of an oven that isn't heating to its set temperature. This isn't just an inconvenience; it can lead to wasted food, extended cooking times, and a lot of frustration. The problem lies in the oven's ability to accurately sense and maintain the heat you've dialed in. Without precise temperature control, your cooking results become unpredictable and disappointing. This issue can stem from electrical glitches, component failures, or simple calibration errors, all of which prevent your oven from delivering consistent, reliable heat.
How It Works
At the heart of your oven's temperature regulation is a closed-loop system involving the heating elements, the temperature sensor, and the control board. When you set your oven to, say, 350°F, the control board receives this instruction.
The board then activates the heating elements (either the bake element at the bottom, the broil element at the top, or both, depending on the oven cycle). As the oven cavity heats up, the temperature sensor, typically a small metallic probe extending into the oven interior, continuously measures the ambient temperature. Most modern ovens use a Negative Temperature Coefficient (NTC) thermistor sensor. The electrical resistance of this sensor changes predictably with temperature. As the oven gets hotter, the resistance of the thermistor decreases.
This change in resistance is converted into an electrical signal that the control board interprets as the current internal temperature. The control board constantly compares this measured temperature with your desired set temperature. If the measured temperature is below the set point, the board keeps the heating elements active. Once the oven reaches the set temperature, the control board cycles the heating elements on and off as needed to maintain that temperature within a narrow range (often ±15-25°F). This on/off cycling prevents sudden temperature swings and ensures even heat. A faulty sensor will send inaccurate resistance readings, causing the control board to misjudge the oven's actual temperature. It might think the oven is hotter than it is and prematurely shut off the elements, or colder than it is and keep them on too long, leading to the oven not heating correctly.
Step-by-Step Fix
Safety First — *Always unplug the appliance before beginning any repairs involving electrical components.
- Unplug the Oven: Locate the power cord and unplug the oven from the wall outlet. For hardwired ovens, trip the circuit breaker supplying power to the kitchen range.
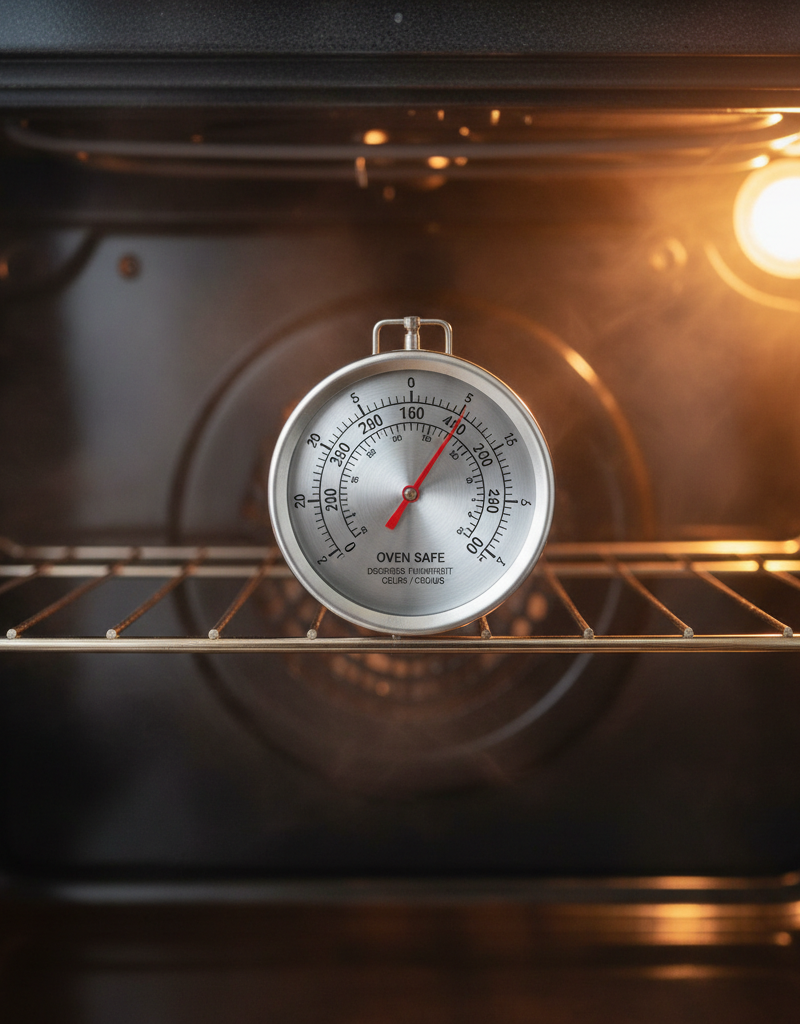
Check Oven Calibration — *A simple test can reveal if your oven's internal thermometer is off.
- Perform a Water Test: Place an oven-safe thermometer in the center of your oven. Set the oven to 350°F. After 20 minutes, check the thermometer reading. If it's consistently more than 25°F off the set temperature, recalibration might be needed. Alternatively, boil a pot of water on the stovetop and measure its temperature with a food thermometer – it should read 212°F at sea level. If significantly off, your thermometer might be inaccurate.
- Recalibrate (If Applicable): Many modern ovens allow for user calibration in the settings menu. Consult your oven's owner's manual for specific instructions. This is often a matter of adjusting the temperature offset by a few degrees up or down.
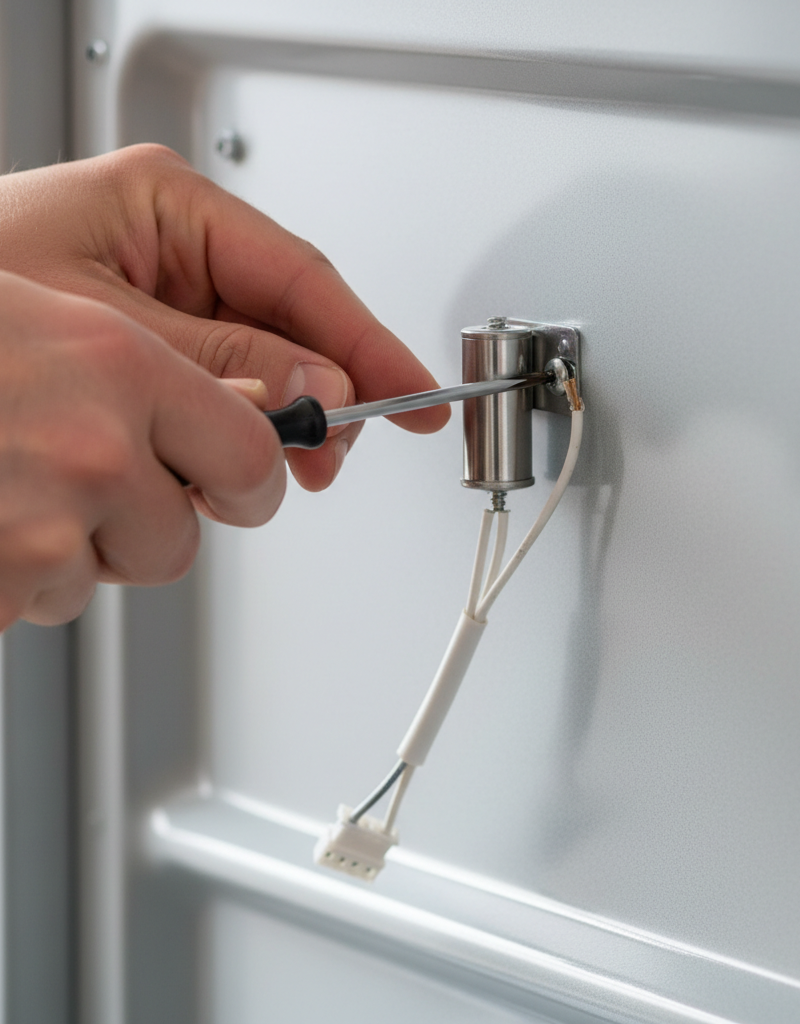
Locate the Temperature Sensor — *It's usually a small probe inside the oven.
- Identify the Sensor: The oven temperature sensor is typically a thin, metallic probe, about 2-3 inches long, protruding from the back wall of the oven cavity on the upper left or right side. It will have two wires connected to it at the back of the oven. Some models hide it behind a small cover plate.
- Access the Back Panel: You'll need to pull the oven away from the wall to access the back panel. Remove the screws holding the back access panel in place and carefully set the panel aside.
Inspect the Sensor — *Look for visible damage or anything unexpected.
- Visual Check: Once you've located the sensor, visually inspect it. Look for any signs of damage, such as cracks, burns, or corrosion on the probe or its wiring. Ensure the wires are securely connected both to the sensor and to the main wiring harness.
Test Sensor Resistance (Critical Step) — *Use a multimeter to measure the sensor's ohms.
- Disconnect Wires: Carefully disconnect the two wires leading to the sensor. You may need a small flat-head screwdriver or needle-nose pliers.
- Set Multimeter: Set your multimeter to the ohms (Ω) setting, specifically for resistance measurement (e.g., 200kΩ or 20kΩ range). Consult your multimeter's manual if unsure.
- Measure Resistance: Touch the multimeter probes to the two terminals of the oven temperature sensor. In a room temperature environment (around 70-75°F or 20-25°C), a healthy oven temperature sensor should typically read between 1080 and 1100 ohms. This value can vary slightly by manufacturer, so it's a good idea to check your oven's service manual or a parts diagram for the exact specification. A reading significantly outside this range (e.g., zero, infinite resistance, or a very low value like 200 ohms) indicates a faulty sensor.
- If the reading is 0 or infinite (O.L. or open circuit): The sensor is completely failed and needs replacement.
- If the reading is very low or very high, but not 0 or infinite: The sensor is likely faulty or out of calibration and should be replaced.
Inspect the Wiring Harness — *Sometimes the problem isn't the sensor itself.
- Trace Wires: Carefully trace the sensor wires back to where they connect to the main wiring harness or the control board. Look for any frayed wires, loose connections, or signs of rodent damage. A damaged wire can mimic a bad sensor.
Replace the Sensor — *If the sensor failed the resistance test, it's time for a new one.
- Remove Old Sensor: Using a Phillips head screwdriver, remove the one or two screws holding the sensor bracket to the back wall of the oven. Carefully pull the sensor out of the oven cavity from the inside, guiding the wires through the opening.
- Install New Sensor: Guide the wires of the new sensor through the opening from the back of the oven into the cavity. Secure the sensor bracket with the screws. Connect the two wires to the new sensor terminals. Ensure a snug fit.
- Tip: When ordering a new sensor, use your oven's full model number to ensure compatibility. Universal sensors may not have the correct resistance curve.
Reassemble and Test — *Put everything back together and verify your fix.
- Reattach Back Panel: Replace the back access panel and secure it with screws.
- Plug In Oven: Push the oven back into place (if it's a freestanding model) and plug it back into the electrical outlet or flip the circuit breaker back on.
- Test Heating: Set the oven to a moderate temperature (e.g., 350°F) and use an oven-safe thermometer to verify it now reaches and maintains the set temperature accurately. Allow at least 20 minutes for it to stabilize.
Common Causes
- Faulty Oven Temperature Sensor: This is by far the most common culprit. Over time, the thermistor inside the sensor can degrade, leading to inaccurate resistance readings. This tells the control board the oven is hotter or colder than it actually is, causing the heating elements to cycle incorrectly.
- Worn-Out Heating Elements: While less common for not reaching set temperature, a failing bake or broil element might not produce enough heat. If parts of the element are visibly broken, bulging, or not glowing red, it needs replacement. However, often a failing element will prevent the oven from heating at all rather than just not heating to temperature.
- Control Board Malfunction: The electronic control board processes the sensor's readings and communicates with the heating elements. A defective control board can misinterpret signals or fail to send proper commands, leading to temperature inaccuracies. This is a rarer and more expensive fix than a sensor.
- Loose or Corroded Wiring: Any loose connection or corrosion in the wiring between the sensor, the heating elements, and the control board can disrupt the electrical signals, leading to intermittent or inaccurate heating.
- Ventilation Issues: An oven's design relies on proper air circulation. If internal vents are blocked by excessive foil, pans, or debris, it can create hot or cold spots and prevent accurate temperature readings.
Common Mistakes
- Not Unplugging the Oven First: Failing to disconnect power before working on electrical components is a serious safety hazard. Always trip the breaker or unplug the oven.
- Misdiagnosing a Calibration Issue as a Faulty Part: Sometimes, the oven's internal thermometer is simply off by a few degrees and can be adjusted through the control panel. Replacing a perfectly good sensor when calibration is all that's needed is a wasted effort and expense.
- Skipping the Multimeter Test: Without testing the sensor's resistance, you're guessing. A multimeter provides objective data on whether the sensor is truly faulty or if the problem lies elsewhere.
- Not Using an Oven Thermometer: Relying solely on the oven's digital display can be misleading. An independent oven thermometer gives you a true reading of the internal temperature, helping you diagnose the extent of the temperature discrepancy.
- Ignoring Wiring: Focusing only on the sensor and not checking the integrity of the wiring harness can lead to replacing a good sensor while the real problem (a loose or damaged wire) persists.
- Buying the Wrong Replacement Part: Oven sensors are often specific to make and model. Purchasing a generic
Related Articles
Keep troubleshooting with these hand-picked guides from FixlyGuide:
- The #1 Mistake Homeowners Make Installing a Smart Thermostat (and How to Fix It) — Avoid the most common pitfall when installing a smart thermostat yourself and ensure a smooth, energy-efficient setup.
- Why Your Thermostat Lies: The Real Reason Your Home Won't Hit the Set Temperature — Discover why your thermostat struggles to reach the set temperature and learn actionable steps to diagnose and fix common HVAC issues.
- The Secret Reason Your Oven Fails to Heat (It's NOT Always the Element) — Discover why your oven isn't reaching its set temperature, from common part failures to overlooked calibration issues, and how to fix it.
- That Musty Smell When Your Bathroom Fan Runs? Here’s Why. — A musty odor from your bathroom fan isn't just unpleasant; it's a red flag for moisture and mold buildup within the fan housing, motor, or…
- The #1 Mistake Homeowners Make When Heat Pumps Stop Heating in Winter — Discover the crucial mistake most homeowners make when their heat pump struggles in cold weather and how to fix it, potentially saving hund…
- The Hidden Reason Your GFCI Trips (It's Not Always a Faulty Outlet) — A continuously tripping GFCI outlet is a critical safety warning, often indicating moisture, a faulty appliance, or a wiring problem that r…
Frequently asked questions
Why is my oven not getting hot enough?+
The most common reason an oven isn't getting hot enough is a faulty temperature sensor. This sensor sends inaccurate readings to the control board, causing the oven to prematurely cycle off the heating elements. Other causes can include a malfunctioning control board or a weakening heating element.
How do you test an oven temperature sensor?+
To test an oven temperature sensor, first unplug the oven. Locate the sensor probe inside the oven cavity, usually at the back. Disconnect its wires and use a multimeter set to ohms (Ω) to measure its resistance. At room temperature (around 70-75°F), a healthy sensor typically reads between 1080 and 1100 ohms. A reading significantly outside this range or zero/infinite resistance indicates a faulty sensor.
Can I replace an oven temperature sensor myself?+
Yes, replacing an oven temperature sensor is a moderate-difficulty DIY task for most homeowners. It primarily involves unplugging the oven, accessing the back panel, disconnecting and unscrewing the old sensor, and installing the new one. A multimeter is recommended for proper diagnosis before replacement.
How do I recalibrate my oven temperature?+
Many modern ovens have a user calibration feature. Consult your owner's manual for specific instructions, as the process varies by model. Often, it involves accessing a hidden menu through the control panel and adjusting the temperature offset up or down by a few degrees. Always use an independent oven thermometer to verify the accuracy after calibration.

Discussion
Loading comments…