Tools & materials you'll need
Affiliate links- AmazonLow-voltage landscape lighting kitIncludes transformer, wiring, and basic fixtures
- AmazonUnderwater LED pool light replacementSpecific to your pool's existing niche, if applicable
- AmazonDeck or step lights6-10 fixtures
- AmazonWaterproof wire connectors
- AmazonSilicone sealantOutdoor-rated, clear
As an Amazon Associate FixlyGuide earns from qualifying purchases — at no extra cost to you. Prices and availability are accurate as of publication and subject to change.
Quick Answer
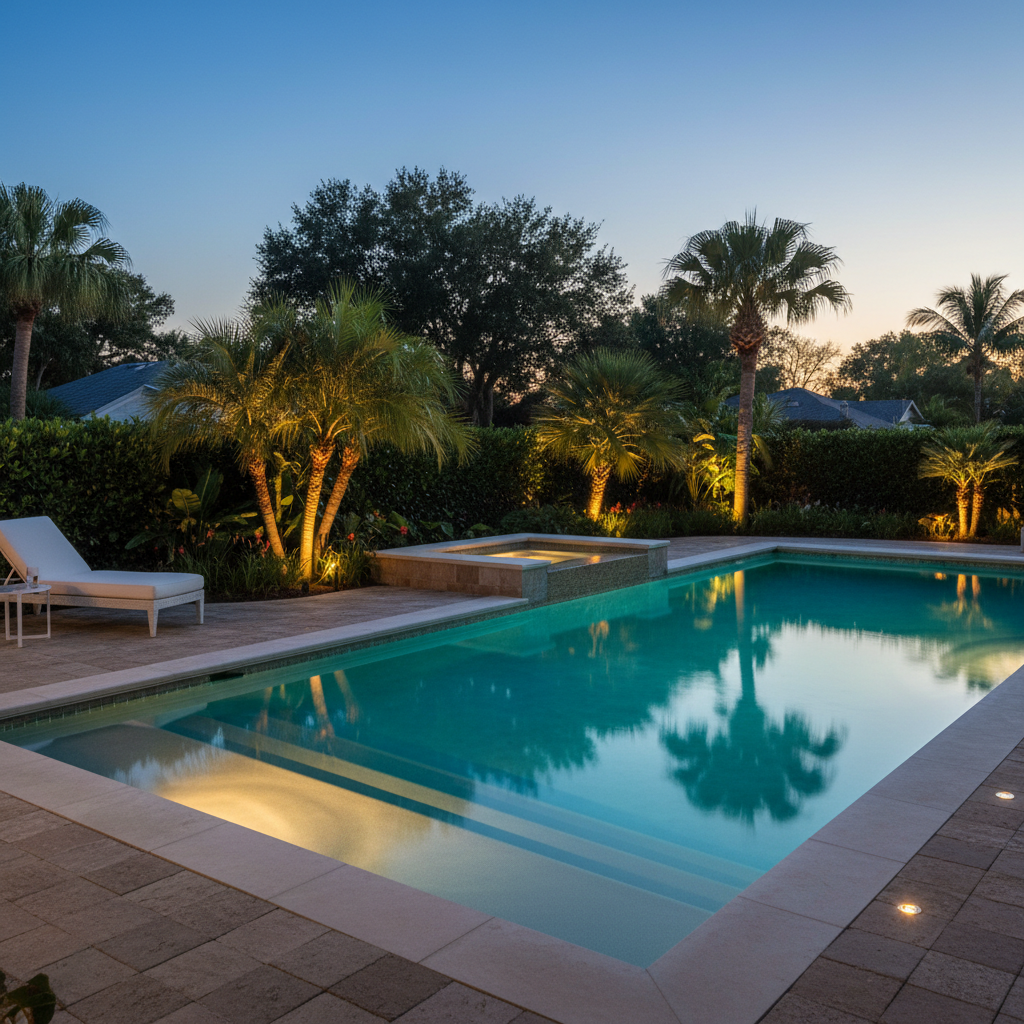
Beyond enhancing your pool's aesthetic appeal, strategic pool lighting dramatically improves safety by illuminating potential hazards, deters unwanted guests and wildlife, extends the usability of your outdoor space, and can even reduce energy consumption with modern LED technology. Thoughtful placement and the right fixture types are key to maximizing these hidden benefits, transforming your pool area into a safer, more enjoyable, and efficient extension of your home.
The Problem
Many homeowners view pool lighting as a mere aesthetic upgrade, an afterthought for evening ambiance. However, an inadequately lit pool area presents a spectrum of problems, ranging from significant safety hazards to missed opportunities for enjoyment and even increased vulnerability. Tripping hazards like uneven paving, misplaced toys, or unseen steps become invisible in the dark. Children and pets are incredibly difficult to monitor, turning an evening swim into a high-stress scenario. Security is also compromised, as dark pool areas provide ideal cover for intruders. Furthermore, a poorly lit pool limits its use to daylight hours only, essentially shrinking your usable outdoor living space. The underlying issue is a fundamental misunderstanding of lighting's multifaceted role; it's not just about seeing, but about safety, security, usability, and even economic benefits.
How It Works
Effective pool lighting functions by strategically distributing light to achieve specific goals: illumination, accentuation, and safety. Underwater lights, traditionally incandescent or halogen, are now widely replaced by more efficient LED fixtures. These LEDs achieve illumination through an array of semiconductor diodes that emit light when an electrical current passes through them. Unlike traditional bulbs that generate heat and then light, LEDs convert electricity directly into light, making them significantly more energy-efficient and longer lasting. They also offer a spectrum of colors and programmable effects, often controlled by a low-voltage transformer connected to your home's main electrical panel.
Beyond the pool's edge, landscape lighting plays a critical role. Low-voltage (12V) systems are common for path lights, spot lights, and floodlights. A transformer reduces the standard 120V household current to a safer 12V, which is then distributed via underground wiring to various fixtures. Path lights typically feature diffusers to cast a soft, ambient glow over walkways, preventing glare while highlighting the path. Spotlights, with their narrower beams, are used for accentuating specific features like statues, fountains, or architectural elements. Floodlights, offering a wider beam, are ideal for general area illumination, enhancing overall visibility and security. Modern systems often integrate smart controls, allowing homeowners to set schedules, adjust brightness, or change colors via a smartphone app or voice commands. This level of control optimizes energy usage and customizes the ambiance, transforming a simple light source into an integral part of a smart outdoor ecosystem.
Step-by-Step Fix
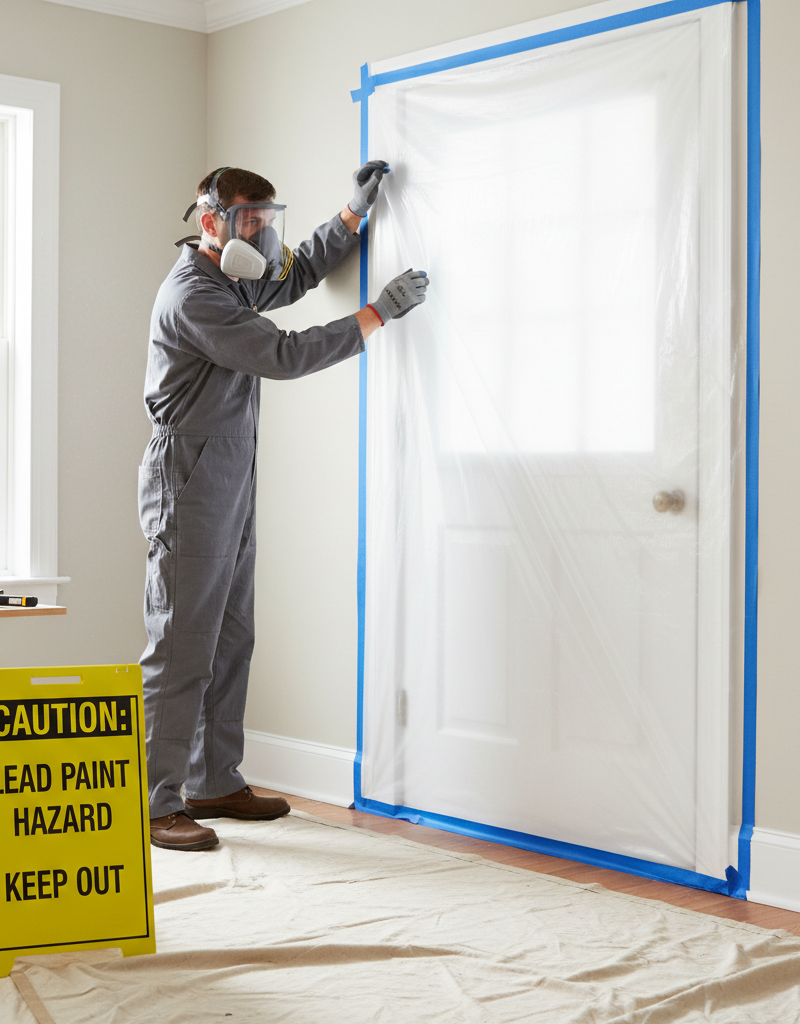
Before undertaking any electrical work around a pool, ensure the power to the circuit is completely shut off at the main breaker. Consult with a licensed electrician for any complex wiring or if you are uncomfortable. Water and electricity are a dangerous combination.
- Assess Your Current Lighting & Needs — Walk around your pool area at night and identify dark spots, tripping hazards, and areas that feel uninviting. Consider how you use the space: Do you entertain frequently? Do children swim at night? This assessment will guide your lighting choices.
- If you have existing lights: Note their type (incandescent, halogen, LED) and condition. Are they bright enough? Are there flickering issues? This helps determine if you need replacements or just additions.
- Tools/Safety: A notepad and pen for sketching, a powerful flashlight (off during actual work).
- Plan Fixture Types and Placement — Based on your assessment, decide where different types of lights are needed. Underwater lights illuminate the pool interior. Path lights brighten walkways. Spotlights highlight landscape features. Floodlights provide general area security.
- Consider layered lighting: Combine ambient (soft, general), task (focused for activities), and accent (decorative) lighting for a rich effect.
- Pro Tip: Avoid placing bright lights directly facing seating areas to prevent glare.
- Choose Appropriate Fixtures — Select lights rated for wet or damp locations. LEDs are highly recommended for pools due to their energy efficiency, longevity, and often, color-changing capabilities. Look for fixtures with a high IP (Ingress Protection) rating, typically IP68 for underwater lights, indicating complete dust and continuous immersion protection.
- Materials: Opt for corrosion-resistant materials like brass, copper, or marine-grade stainless steel, especially for fixtures near saltwater pools.
- Install or Replace Underwater Pool Lights (Pro Recommended) — For in-pool lighting, most systems operate on low-voltage (12-14V AC) power supplied by a transformer. This often involves draining the pool to access the fixture housing. This is a job typically best left to a qualified pool electrician due to precise waterproofing requirements and the inherent danger of electricity near water.
- Pro Callout: If your existing underwater light needs replacement, or if you're installing a new one, always call a licensed pool electrician to ensure proper watertight seals, grounding, and code compliance.
- Install Low-Voltage Landscape Lighting — For path lights, spotlights, and floodlights around the pool deck:
- Safety First: Ensure all power to the transformer is OFF at the breaker.
- Transformer Placement: Mount the transformer in an accessible, protected outdoor location near a GFCI outlet. Ensure it's rated for outdoor use.
- Wire Layout: Lay out low-voltage wire along your planned routes. Bury it at least 6-12 inches deep in non-traffic areas, deeper (18 inches) if crossing pathways or driveways. Use direct-burial cable.
- Fixture Connection: Connect individual fixtures to the main low-voltage cable using waterproof connectors. Test each fixture as you go to ensure it works.
- Install Deck & Step Lighting — These small, often recessed lights are crucial for safety. They can be integrated into deck boards, stair risers, or along handrails. Use low-voltage LED options for minimal energy draw and easy installation.
- Drilling: Use appropriate drill bits for your deck material (wood, composite, concrete) to create openings for recessed fixtures.
- Waterproofing: Use silicone sealant or gaskets to ensure a watertight seal around any deck or step light penetrations.
- Add Smart Controls (Optional but Recommended) — Integrate smart switches, timers, or smart hubs to control your pool and landscape lights. This allows for scheduled on/off times, dimming, and color changes directly from your smartphone.
- Benefits: Enhanced security (simulate occupancy), energy savings (자동 off), and convenience.
- Test and Adjust — Power the system back on. Observe the lighting from various angles and distances. Are there still dark spots? Is there excessive glare? Adjust fixture angles, add more lights, or use dimmers to fine-tune the effect until you achieve your desired ambiance and safety levels.
Common Causes
- Inadequate Initial Planning: Many pools are built with minimal lighting, often just a single in-pool light, without considering the overall outdoor living space. This leads to dark, unsafe, and underutilized areas around the pool deck and pathways. The 'set it and forget it' mentality misses the dynamic needs of a family using the space. Investing in a comprehensive lighting plan from the outset can prevent costly retrofits and ensure maximum enjoyment and safety from day one.
- Outdated Technology: Reliance on older incandescent or halogen bulbs, both in-pool and for landscape lighting, contributes to poor illumination, high energy consumption, and frequent bulb replacements. These older technologies have limited light output per watt and often a single, static color temperature, hindering modern lighting design potential. The slow adoption of energy-efficient and versatile LED technology is a common hindrance.
- Neglect of Maintenance: Over time, dirt, debris, and mineral deposits can accumulate on fixture lenses, significantly reducing light output. Damaged wiring from garden tools, corrosion on connections, or failing transformers can also lead to flickering, dimming, or complete failure. Ignoring these issues degrades both the aesthetics and functionality of the lighting system and can lead to more expensive repairs if not addressed promptly.
- Lack of Layered Lighting: Focusing solely on illuminating the water, or conversely, only the deck, creates an unbalanced and often ineffective lighting scheme. A lack of layered lighting – encompassing ambient, task, and accent lighting – fails to address the multiple needs of a pool area, from general visibility to highlighting features and ensuring safe navigation across different zones.
- Ignoring Glare and Hot Spots: Improper fixture placement or using fixtures with wide, uncontrolled beams can create excessive glare, making the area uncomfortable and paradoxically reducing visibility by causing the eye to squint. 'Hot spots' – areas that are too brightly lit next to areas that are too dark – also disrupt comfortable viewing and create visual discomfort, diminishing the overall appeal and safety of the space.
Common Mistakes
- Installing Incompatible Fixtures: Using indoor-rated or improperly sealed fixtures near a pool or outdoors. These will quickly fail due to moisture, humidity, and direct water exposure, posing electrical hazards and requiring premature replacement. Always check the IP (Ingress Protection) rating, ensuring fixtures are suitable for their intended wet or damp locations.
- Overlooking Glare: Placing bright lights directly in the line of sight from primary viewing or seating areas. This creates uncomfortable glare that diminishes the overall ambiance and can even impair vision, making the area less enjoyable and potentially unsafe. Use shielded fixtures, aim lights away from direct views, or use diffusers to soften the light.
- Under-Illuminating Pathways and Steps: Focusing solely on the pool itself and neglecting the critical need to light all walkways, steps, and transitions around the pool deck. This creates significant tripping hazards in the dark. Implement dedicated path and step lighting to ensure safe navigation, especially where elevation changes occur.
- Incorrect Transformer Sizing: Using a transformer that is too small for the total wattage of all the connected low-voltage landscape lights. This leads to lights flickering, dimming, or not working at all, and can prematurely burn out the transformer. Always calculate the total wattage of your fixtures and choose a transformer with at least a 20% buffer capacity.
- Burying Wires Too Shallowly or Not at All: Leaving low-voltage wires exposed on the ground or burying them only a few inches deep. This exposes them to damage from gardening tools, foot traffic, and UV degradation, leading to shorts or complete system failure. Bury direct-burial wires at least 6-12 inches deep, or deeper in high-traffic zones, and always encased in conduit if near tree roots or heavy equipment.
- Ignoring Local Electrical Codes: Failing to adhere to local building and electrical codes, especially concerning wiring, grounding, and GFCI protection around pools. Code violations can lead to dangerous conditions, void homeowner's insurance, and result in fines or forced removal during inspections. When in doubt, consult a licensed electrician.
Cost & Time Breakdown
| Task | DIY cost | Pro cost | Time |
|---|---|---|---|
| Underwater LED Light (1-2) | $150–$400/ea | $400–$1,200/ea | 1–3 hours |
| Low-Voltage Landscape Kit | $100–$300 | $300–$800 | 3–6 hours |
| Deck/Step LED Lights (6-10) | $50–$150 | $200–$500 | 2–4 hours |
| Smart Control Module | $50–$150 | $150–$300 | 0.5–1 hour |
| Wiring & Connectors | $30–$80 | Included | 1–2 hours |
| Total (DIY vs. Pro) | $380–$1,080 | $1,050–$3,100 | 7–16 hours |
Tips & Prevention
- Regular Fixture Cleaning: Once a month, wipe down the lenses of all outdoor and underwater pool lights to remove dirt, algae, and mineral deposits. This maximizes light output efficiency and prevents buildup that can cause fixtures to overheat or prematurely fail. Use a mild, non-abrasive cleaner for clear lenses.
- Check Wiring Annually: Before pool season starts, inspect all exposed low-voltage wiring for any fraying, cuts, or damaged insulation. Ensure all waterproof connectors are secure and free of corrosion. Addressing minor damage early prevents shorts and system failures, especially important for buried wires that can be disturbed by garden work or pests.
- Invest in Quality LEDs: While the upfront cost may be higher, high-quality LED pool and landscape lights offer significantly longer lifespans (20,000-50,000 hours vs. 1,000-2,000 for halogen) and superior energy efficiency. This reduces maintenance frequency and lowers operating costs over the long term, making them a wise investment.
- Use Timers or Smart Controls: Implement automated timers or smart home integration for your pool lighting. This prevents lights from being left on unnecessarily, conserves energy, and enhances security by ensuring the pool area is always illuminated during desired hours. Smart controls also allow for easy scheduling and remote operation.
- Proper Landscape Maintenance: Keep shrubs, trees, and other landscaping trimmed around light fixtures. Overgrown foliage can block light, reducing its effectiveness and creating shadows. Ensure plants are not growing directly over or into buried wires, which can cause damage over time.
- Test GFCI Outlets Monthly: Any electrical outlets near the pool area, especially those powering transformers or pumps, should be Ground Fault Circuit Interrupter (GFCI) protected. Test these outlets monthly by pressing the
Related Articles
Keep troubleshooting with these hand-picked guides from FixlyGuide:
- The Surprising Trick to Cutting Your Dryer Bill By $100 Per Year — Installing a clothesline can significantly reduce your energy bills and add a fresh scent to your laundry. This guide covers how to choose…
- The Hidden Reason Your GFCI Trips — And Why Most Homeowners Get It Wrong — A continuously tripping GFCI outlet is a safety warning, often indicating a problem like moisture, a faulty appliance, or a wiring issue th…
- 7 Inspection Red Flags That Secretly Signal a $20,000 Bill — Don't let your dream home become a money pit. Many buyers and even some inspectors overlook subtle home inspection red flags that lead to f…
- Is a Wall-Mounted Pressure Washer Right for Your Garage? The Unvarnished Truth — Discover if a wall-mounted pressure washer is the right cleaning solution for your home, offering a powerful and space-saving alternative t…
- The Single Cedar Board Secret to Attracting Bluebirds to Your Yard — Discover how to construct an ideal bluebird nesting box using just one cedar board, providing a safe and inviting habitat for these cherish…
- The 5-Minute Trick for a Stubborn Door Lock (That Isn't Lubricant) — Discover the real reason your door lock is sticking and a quick, effective fix that goes beyond just spraying lubricant, making your lock t…
Get the print-ready PDF of this guide
A clean, ad-free, printable version you can keep on your phone or pin to the workshop wall. We'll also send occasional weekly tips matched to your home situation.
- Print-optimized layout
- Tools, materials & every step included
- Unsubscribe anytime
This article was independently written by FixlyGuide based on the source topic.
Frequently asked questions
How deep should pool light wires be buried?+
Low-voltage landscape lighting wires should be buried at least 6-12 inches deep in non-traffic areas around the pool. If crossing pathways or driveways, burying them 18 inches deep or running them through conduit offers better protection against damage.
Can I replace my old pool light with an LED myself?+
While theoretically possible for a skilled DIYer, replacing an underwater pool light is strongly recommended for a licensed pool electrician. It involves working with electricity near water, ensuring precise watertight seals, and adhering to strict electrical codes to prevent dangerous situations.
What is the best type of lighting for around a pool deck?+
The best type of lighting for a pool deck is a combination of low-voltage LED fixtures including path lights for walkways, recessed deck or step lights for safety, and possibly spotlights for accenting features. LEDs offer efficiency, longevity, and often color-changing options, enhancing both ambiance and safety.
How often should I clean my pool light lenses?+
You should clean the lenses of all outdoor and underwater pool lights at least once a month. This prevents the buildup of dirt, algae, and mineral deposits that can reduce light output and potentially cause fixtures to overheat.

Discussion
Loading comments…