
Tools & materials you'll need
Affiliate links- AmazonNew deadbolt lock1
As an Amazon Associate FixlyGuide earns from qualifying purchases — at no extra cost to you. Prices and availability are accurate as of publication and subject to change.
How it works
A deadbolt lock provides security by projecting a solid metal bolt from the door into a recess in the door frame. Unlike a spring-loaded latch on a doorknob, which can be forced back with a credit card or other tool, a deadbolt cannot be retracted without rotating the lock cylinder. The system has four main components working in concert.
First is the keyed cylinder on the exterior of the door. Inside this cylinder is a series of pin stacks (driver pins and key pins) that prevent the cylinder plug from rotating. When the correct key is inserted, its unique cuts lift the key pins, aligning the break between the key pins and driver pins perfectly with the cylinder's edge (the shear line). This alignment allows the plug to turn.
Second is the interior thumbturn (on a single-cylinder deadbolt) or a second keyed cylinder (on a double-cylinder deadbolt). This provides the manual turning force from inside the house.
Third, connecting the exterior cylinder and interior thumbturn is a flat metal bar called a tailpiece or drive cam. As the key or thumbturn rotates the cylinder, it also rotates the tailpiece.
Finally, the tailpiece fits into the bolt mechanism, which is housed inside the door's edge. This mechanism contains the actual bolt and a simple gear or cam system. When the tailpiece rotates, it engages this system, which drives the heavy steel bolt horizontally into or out of the strike plate on the door frame. The security of the system depends on the length of this "throw" (a 1-inch minimum is standard), the strength of the bolt, and the reinforcement of the strike plate.
Step-by-Step Fix
This guide covers the replacement of a standard, single-cylinder deadbolt in a pre-drilled residential door.
-
Measure and Purchase the Correct Replacement — Before unscrewing anything, confirm the required specifications for your new lock. A mismatch here will halt your project immediately.
- Tools: Tape measure.
- Backset: Measure the distance from the edge of the door to the center of the keyhole. The two standard residential sizes are 2 3/8 inches and 2 3/4 inches. Most new deadbolts are adjustable to fit both, but it's critical to verify.
- Door Thickness: Measure the thickness of your door. Most interior and exterior doors are 1 3/8 inches or 1 3/4 inches thick. Ensure your new lock is compatible with this thickness.
- Handing: Most deadbolts are non-handed (reversible), but check the packaging to be sure, especially for locks with decorative levers.
-
Gather Tools and Prepare the Work Area — Collect all necessary items in one place. Close the door but do not lock it. This prevents the door from swinging while you work and ensures you don't get locked out.
- Tools: #2 Phillips head screwdriver (a longer shaft is helpful), tape measure, painter's tape, and your new deadbolt lock set. A flathead screwdriver can be useful for minor prying or adjustments.
-
Stabilize the Exterior Cylinder — Apply a piece of painter's tape over the exterior keyed portion of the deadbolt. This simple step prevents the exterior half from falling to the ground and getting scratched or damaged once the connecting screws are removed.
-
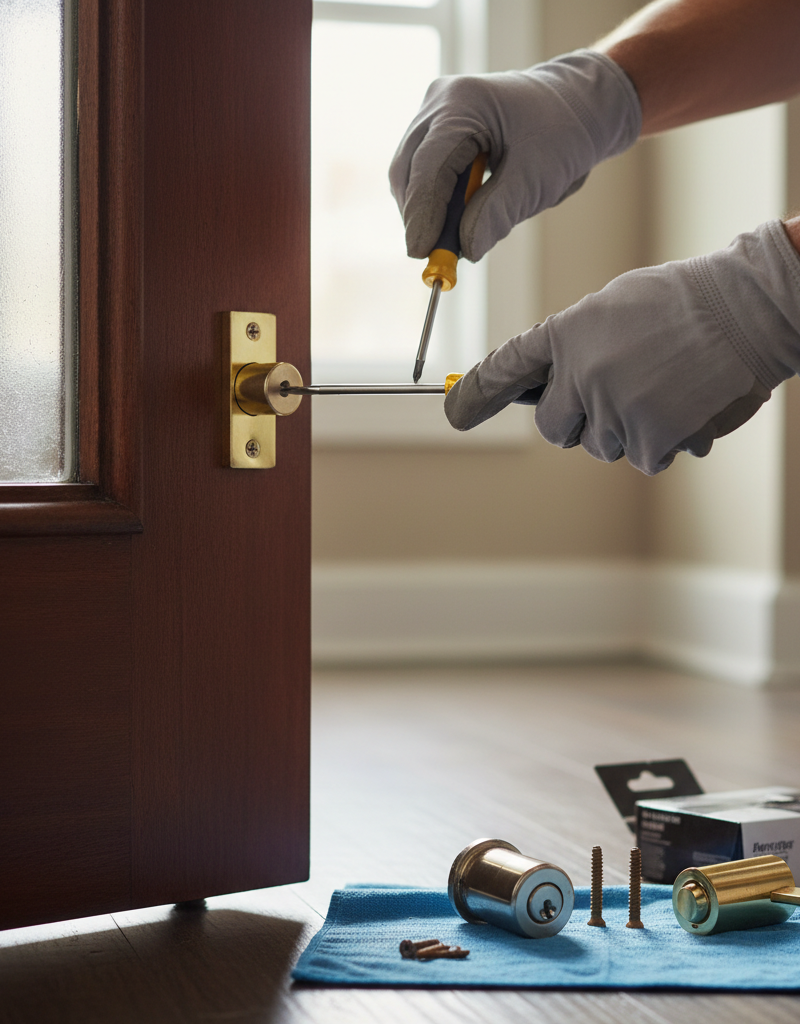
Remove the Interior Mounting Screws — From the inside of the door, locate the two visible screws on the thumbturn assembly. These are the mounting bolts that pass through the door and hold the entire lock together. Using your Phillips head screwdriver, turn them counter-clockwise to loosen and remove them completely.
- Tip: If the screws are painted over, you may need to carefully score the paint edge with a utility knife to break the seal before attempting to unscrew them.
-
Extract the Old Lock Assemblies — With the screws removed, the interior and exterior halves of the deadbolt can be pulled apart. First, pull the interior thumbturn assembly straight off the door. Then, while holding the taped exterior cylinder, gently pull it straight out from the outside of the door. Place all old components aside.
-
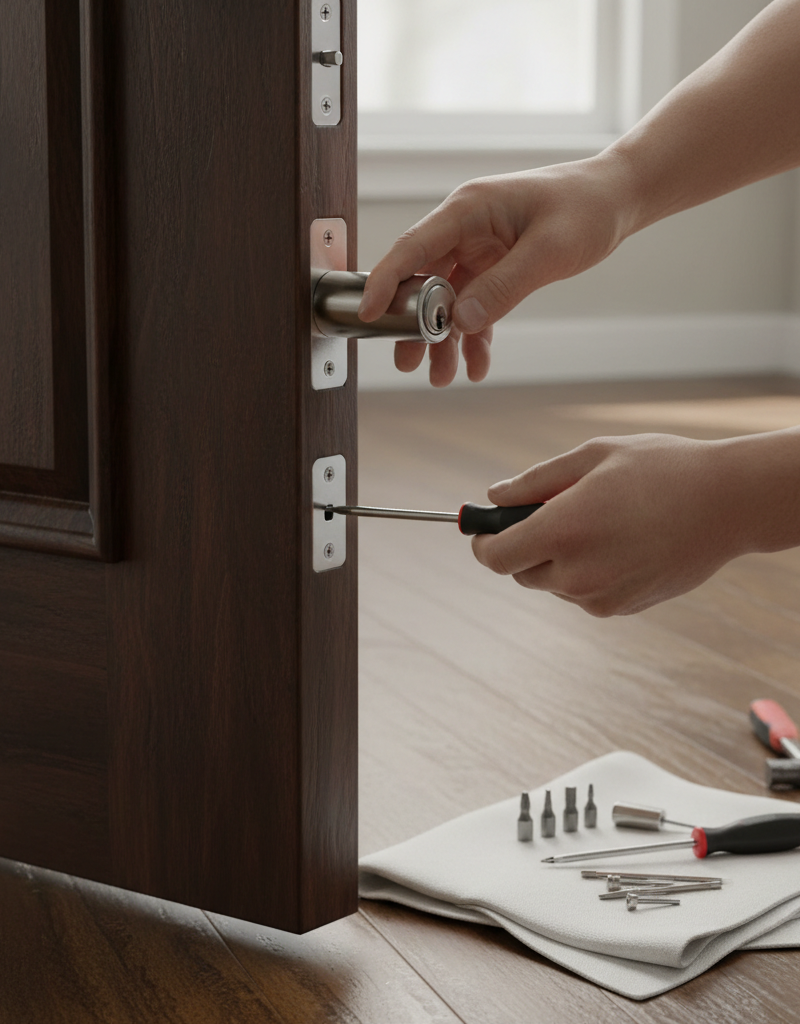
Remove the Old Latch Bolt — The bolt mechanism is still inside the edge of the door, held in by a faceplate. Locate the two screws on this faceplate and remove them. The entire bolt assembly should then slide straight out of the door's edge. You may need to wiggle it gently or use a flathead screwdriver to pry it out if it’s a tight fit.
-
Install the New Latch Bolt — Unpack your new lock set and locate the new bolt assembly.
- Backset Adjustment: If your new bolt is adjustable, ensure it's set to the correct backset measurement you took in Step 1 (2 3/8" or 2 3/4"). This is often done by twisting or sliding the mechanism itself; consult the manufacturer's instructions.
- Installation: Insert the new bolt into the hole on the door's edge, ensuring the "UP" marking is oriented correctly and the bolt's angled surface (if any) faces the direction the door closes. Secure it using the two provided screws. Do not overtighten; they should be snug.
-
Install the Exterior Cylinder — Take the new exterior keyed cylinder. Ensure its tailpiece is in a vertical position. From the outside of the door, slide the cylinder into place, carefully feeding the tailpiece through the central slot in the newly installed latch bolt mechanism. Press the cylinder flush against the door. The painter's tape trick from Step 3 can be useful here as well.
-
Install the Interior Thumbturn — From the inside, take the new interior thumbturn assembly. Align its central hole with the flat tailpiece protruding through the door. The tailpiece must fit into the corresponding slot on the thumbturn. Also, align the two long mounting screw holes with their receptacles on the exterior cylinder.
-
Secure the Mounting Screws — Insert the two new long mounting screws provided with your lock set. Hand-tighten them first to ensure they are not cross-threaded. Then, using your Phillips screwdriver, tighten them until they are snug. Alternate between the two screws to ensure even pressure. The interior and exterior assemblies should sit flush against the door with no gaps.
- Caution: Overtightening can warp the housing and cause the bolt mechanism to bind. The thumbturn should rotate smoothly. If it feels stiff, slightly loosen the screws.
-
Test the Lock with the Door Open — Before closing the door, test the deadbolt's full functionality. Use the thumbturn to extend and retract the bolt completely several times. Then, insert the key into the exterior cylinder and do the same. The bolt should move smoothly and without catching.
-
Test the Lock and Strike Plate Alignment — Slowly close the door and test the lock again. The bolt should extend fully into the strike plate on the door frame without friction or resistance. If it hits the strike plate, you may need to adjust the plate's position by loosening its screws and shifting it slightly, or by filing the opening a tiny amount. Ensure the new, longer strike plate screws are used for maximum security.
Common mistakes
- Buying the wrong size lock. The most common failure is not measuring the backset (distance from door edge to the center of the lock) before purchase. A 2 3/8" lock will not work in a 2 3/4" prep without modification. Always measure first.
- Overtightening the mounting screws. It's tempting to make the lock "extra secure" by cranking down on the two main mounting screws. This is counterproductive. Overtightening can warp the lock housing, causing the internal mechanism to bind. The bolt will become stiff or impossible to turn. Screws should be snug, not forcefully torqued.
- Installing the bolt mechanism upside down. Most latch bolt assemblies have a small stamping that says "UP." This orientation is critical for the lock's internal geometry to function with the tailpiece correctly. Installing it upside down can cause the lock to jam or fail to engage.
- Neglecting the strike plate. Many homeowners install the new lock body but reuse the old, short screws for the strike plate on the door frame. New deadbolts come with 3-inch screws for a reason: they are meant to bite into the wall stud behind the door jamb, not just the soft wood of the jamb itself. This is a massive security upgrade that is often overlooked.
- Using wet lubricants like WD-40. When a new lock feels a bit stiff, people often reach for a can of WD-40. This is a mistake. Wet lubricants attract dust, grime, and sawdust, which will gum up the delicate pin-tumbler mechanism over time, leading to premature failure. Use a dry lubricant like a graphite powder or a PTFE-based spray designed specifically for locks.
- Forcing parts that don't align. If the tailpiece doesn't slide easily into the bolt mechanism or the mounting screws won't thread, stop. Do not force them. This usually indicates a misalignment. Take the pieces apart, re-read the instructions, and ensure everything is oriented correctly (e.g., the bolt isn't upside down, the tailpiece is vertical).
Cost & time breakdown
The cost and time for replacing a deadbolt are minimal for a DIYer, but a professional locksmith provides expertise and speed. Prices for locks vary widely based on security rating (ANSI Grade 1, 2, or 3) and features.
| Task | DIY cost | Pro cost | Time |
|---|---|---|---|
| Purchase New Deadbolt | $25 - $250+ | Included in parts | 30 mins (shopping) |
| Removal of Old Lock | $0 | $75 - $150 (part of service fee) | 5-10 mins |
| Installation of New Lock | $0 | $50 - $100 (labor) | 20-30 mins |
| Minor Strike Plate Adjustment | $0 | Usually included in labor | 5-15 mins |
| Door/Frame Modification | a few dollars for drill bits | $75 - $150+ (additional labor) | 30-60 mins |
| Total Project | $25 - $250+ | $150 - $400+ | 30 - 60 mins |
Note: Pro costs often start with a base service call fee, with labor and parts added on top. Costs can be higher for emergency or after-hours service.
When to call a pro
While replacing a standard deadbolt is a manageable DIY task, certain situations warrant calling a professional locksmith to avoid costly damage or compromised security.
Call a professional if:
- The door or frame is damaged or warped. If the door doesn't align properly with the frame, no new lock will function correctly. A locksmith or carpenter needs to diagnose and fix the underlying alignment issue first, which may involve adjusting hinges or planing the door.
- You need to drill new holes. If you are installing a deadbolt on a new, unprepared door, or if the existing holes are non-standard, a locksmith is recommended. They use specialized jigs to ensure the bore hole (the large hole for the lock body) and the latch hole (on the door edge) are perfectly aligned and drilled to the correct size. Mis-drilling can ruin a door.
- You want to upgrade to high-security or smart locks. High-security locks (like Medeco or Mul-T-Lock) have tight tolerances and complex mechanisms that require precise installation to function correctly and maintain their security rating. Similarly, smart locks involve electronic components and connectivity troubleshooting that can be complex for a novice.
- You need to re-key multiple locks. If you want your new deadbolt to use the same key as other locks in your home, a locksmith can re-key the new lock cylinder for you. While DIY re-keying kits exist, a pro can do it quickly and correctly, ensuring smooth operation.
Prevention & maintenance
A deadbolt is a mechanical device that requires occasional maintenance to ensure longevity and reliable operation. Proactive care can prevent frustrating lockouts and preserve your home's security.
- Lubricate Annually: Once a year, lubricate the lock mechanism. Extend the bolt and apply a small amount of dry lubricant, such as graphite powder or a silicone/PTFE-based lock spray, into the keyway and onto the bolt itself. Cycle the lock with the key and thumbturn several times to distribute the lubricant. Avoid oil-based lubricants (like WD-40), which attract dirt and can gum up the pin tumblers.
- Check Screw Tightness: Every six months, check the two interior mounting screws and the two screws on the strike plate. Door usage can cause vibrations that slowly loosen them. Snug them up with a screwdriver, but be careful not to overtighten and bind the lock.
- Clean Key and Keyway: Keys collect lint and debris in your pocket. Periodically wipe your key clean before inserting it into the lock. If the keyway seems gritty, you can use a can of compressed air to blow out any debris.
- Inspect Bolt Operation: Pay attention to how the lock feels. If you notice grinding, increased resistance, or a "crunchy" feeling when turning the key, it's a sign of internal wear or debris. This is a warning that the lock may be nearing the end of its service life.
- Test Alignment Seasonally: Changes in humidity can cause a house to settle and doors to swell or shrink, affecting lock alignment. Test your deadbolt each season. If the bolt starts to scrape or hit the strike plate, it may need a minor adjustment before the problem becomes severe enough to prevent locking.
- Consider Security Upgrades: Contractor-grade ANSI Grade 3 locks, common in new construction, offer basic security. For enhanced protection, consider upgrading to a more robust ANSI Grade 2 or Grade 1 deadbolt every 7-10 years, even if the old one still works.
Related Articles
Keep troubleshooting with these hand-picked guides from FixlyGuide:
- Your Squeaky Floor's Secret: It's Not the Wood, It's the Gap — Tired of that persistent floor squeak? Discover the hidden causes of noisy floorboards and learn several easy, DIY methods to silence them…
- The 3 Hidden Reasons Your Door Won't Latch (And the Easy DIY Fixes) — Don't live with a door that refuses to latch; discover simple, DIY solutions for common door latch problems and restore security and privac…
- Is Your House Breathing? Why Doors Stick Shut in Summer — Don't just muscle that sticking door shut. It's a sign of a house-wide issue. Learn the surprising reason your doors swell in summer and th…
- That Drywall Hole Isn't Just Ugly, It's a Bat Signal — Learn the pro-approved method for patching drywall holes of any size. We cover the surprising science behind a lasting repair and common mi…
- That Peeling Paint? Your Bathroom Has a Moisture Secret — Discover the hidden causes behind your peeling bathroom ceiling paint. We reveal why moisture is the main culprit and provide a permanent f…
- How to Fix a Wobbly Ceiling Fan: A DIY Guide — A wobbly ceiling fan can be annoying and, in some cases, unsafe. Learn how to diagnose and fix the most common causes of ceiling fan wobble…
Get the print-ready PDF of this guide
A clean, ad-free, printable version you can keep on your phone or pin to the workshop wall. Free with a FixlyGuide account.
- Print-optimized layout
- Tools, materials & every step included
- Saved to your account
Recommended for DIYers & woodworkers
Sponsored
The Top 20 Tools for Workshops of Any Budget
No stationary machines or power tools required — plus 3 fundamental tools that can't be bought at any price.
Get the free guide
Ted's Woodworking — The #1 Woodworking Resource
Detailed instructions, dimensioned drawings, materials & cutting lists, and 3D schematics for every skill level.
See the plansSponsored: links above are affiliate links. FixlyGuide may earn a commission on qualifying purchases — at no extra cost to you.
Frequently asked questions
How long does it take to replace a deadbolt?+
Replacing a standard deadbolt typically takes 15–30 minutes for an experienced DIYer, and 30–60 minutes for a beginner.
Do all deadbolts use the same size hole?+
Most residential deadbolts are designed to fit standard door preparations (2 1/8-inch bore hole and 1-inch edge bore hole). However, it's always best to check the specifications of your new deadbolt to ensure compatibility with your existing door.
Can I replace a deadbolt without changing the door handle?+
Yes, deadbolts and door handles are typically independent components and can be replaced separately. You can upgrade your deadbolt while keeping your existing door handle.

Discussion
Loading comments…