
Tools & materials you'll need
Affiliate linksAs an Amazon Associate FixlyGuide earns from qualifying purchases — at no extra cost to you. Prices and availability are accurate as of publication and subject to change.
How it works
A ceiling fan's stability is a matter of rotational physics and secure mechanical connections. The entire assembly, from the electrical box in the ceiling to the tips of the blades, functions as an integrated system designed for dynamic balance. The process begins at the ceiling, where a fan-rated electrical box must be securely fastened to a structural element, typically a ceiling joist or a 2x4 wood brace installed between joists. This provides the non-negotiable solid anchor point. The fan's mounting bracket is bolted to this box.
The fan motor and blade assembly hang from this bracket via a downrod. At the top of the downrod is a hanger ball that sits inside the mounting bracket, forming a ball-and-socket joint. This joint allows for minor movement, accommodating slight structural imperfections in the ceiling, but it cannot compensate for significant imbalances. The motor housing contains the motor, bearings, and connection points for the blade irons (also called blade arms or brackets). These metal irons are precisely angled and attach the blades to the motor. When the motor spins, any minute difference in weight or angle among the blades is magnified by centrifugal force. An extra gram of dust on one blade, or a blade iron bent by a single degree, creates an uneven pull away from the center of rotation, forcing the entire unit into an oscillating motion we perceive as a wobble.
Step-by-Step Fix
Safety Note: Before beginning any inspection or repair, turn off the power to the ceiling fan at the circuit breaker box. Use a non-contact voltage tester at the wall switch and at the fan's wiring to verify that the power is completely off.
-
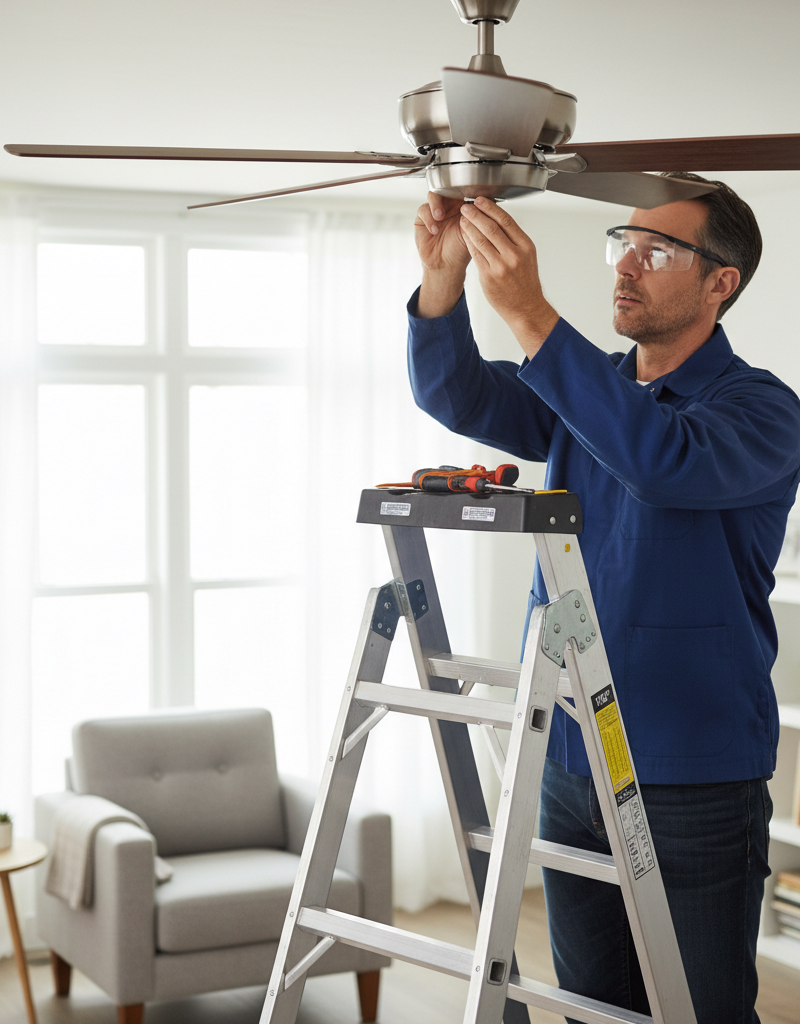
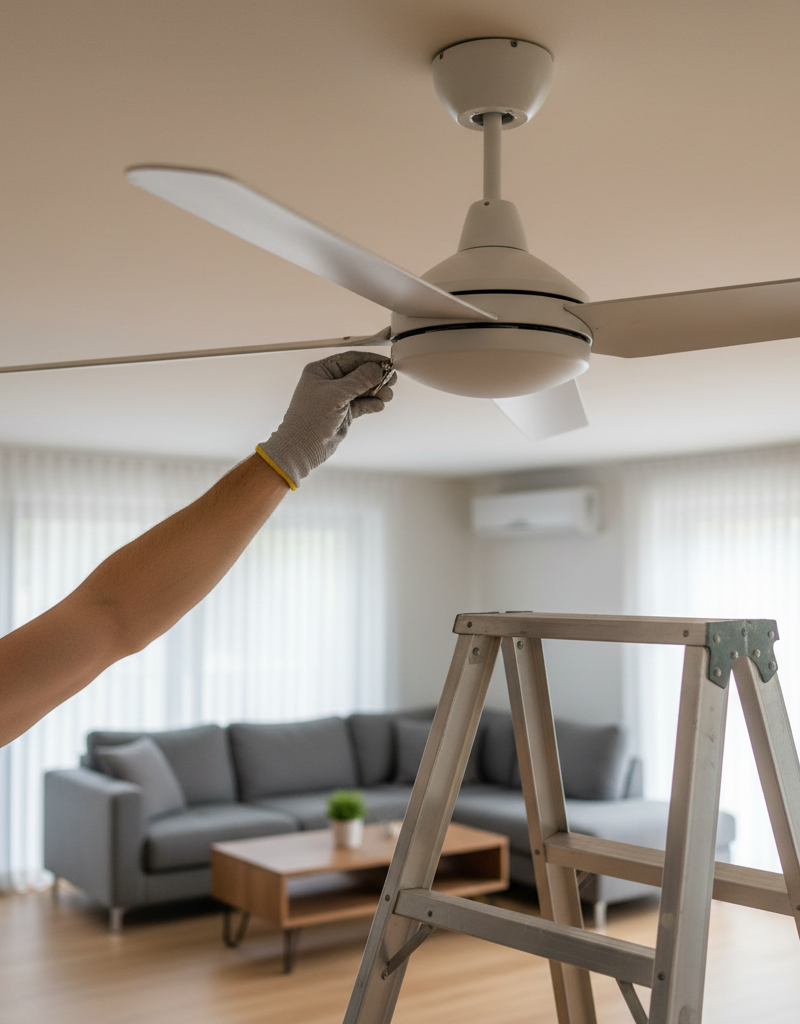
Inspect the Ceiling Mount — First, ensure the fan's foundation is solid. Stand on a sturdy stepladder and gently but firmly try to rock the fan assembly at the point where the downrod enters the canopy. If there is significant play, loosen the canopy screws and slide the canopy down the downrod to expose the mounting bracket and electrical box.
- Tools: Phillips and flathead screwdrivers, non-contact voltage tester.
- Check: Confirm the electrical box is labeled "Acceptable for Fan Support" or "Fan-Rated." Verify the mounting bracket is securely fastened to the electrical box with all screws tight. Tighten any loose screws connecting the bracket to the box or the box to the ceiling joist. If the box itself is loose or not fan-rated, it must be replaced before proceeding; this is a more advanced job that may require a professional.
-
Tighten the Downrod and Canopy Hardware — Locate the screws on the downrod. There is typically a large setscrew (or two) on the motor housing collar that clamps down onto the downrod, preventing it from turning. Ensure this is tight. Check the small "cotter" or "clevis" pin that passes through the downrod and collar, and make sure its retaining clip is secure. Finally, retighten the screws that hold the canopy to the mounting bracket.
-
Clean the Fan Blades — Dust and grime accumulation is a primary cause of imbalance. Over months, this buildup can add several grams of weight unevenly across the blades. Using a damp microfiber cloth and a mild, non-abrasive cleaner, thoroughly wipe the top and bottom surfaces of each blade.
- Pro-Tip: A specialized C-shaped fan blade duster can clean the top and bottom simultaneously, containing dust more effectively than a simple cloth.
-
Tighten All Blade-to-Iron Screws — Each fan blade is attached to a metal blade iron with two or three screws. Using a Phillips screwdriver that fits the screw heads snugly to prevent stripping, check and tighten every one of these screws. Do not overtighten; a "snug" fit is sufficient. A loose screw allows a blade to shift slightly during rotation, immediately causing a wobble.
-
Tighten All Iron-to-Motor Screws — The blade irons themselves are fastened to the rotating part of the motor housing. These screws handle significant rotational stress. Locate these screws, typically on the side or underside of the motor housing, and tighten them firmly.
-
Measure Blade Tracking and Alignment — A bent blade iron is another common culprit. To check for this, you need to measure the "tracking" of the blades. Choose a fixed point on the ceiling a few inches out from the fan blades. Using a tape measure or a yardstick, measure the distance from that ceiling point down to the trailing edge of a blade tip. Record the measurement. Manually rotate the fan to bring the next blade to the exact same position and measure again. Repeat for all blades.
- Analysis: All blade tip measurements should be within 1/8 inch of each other. A greater variance indicates a bent blade iron.
-
Adjust a Bent Blade Iron — If you identified a blade that is out of alignment, you can often correct it. Place your hands on the blade iron (the metal arm, not the blade itself), one near the motor and one about halfway out. Apply firm, steady pressure to gently bend the iron up or down as needed to bring its attached blade into alignment with the others.
- Caution: This requires finesse. The irons are typically cast metal and can snap if bent too aggressively or too many times. Make a small adjustment, re-measure, and repeat as needed until a blade is within the 1/8-inch tolerance.
-
Conduct an Initial Test — With all hardware tightened, blades cleaned, and irons aligned, slide the canopy back into place and secure it. Restore power at the circuit breaker and turn the fan on. Test it at low, medium, and high speeds. In many cases, these steps will have resolved the wobble. If a wobble persists, proceed to the balancing step.
-
Use a Fan Balancing Kit — If the wobble remains, it is caused by a subtle weight difference in the blades or motor. A fan balancing kit, which includes a plastic clip and several self-adhesive weights, is the solution. Turn the power off again. Place the plastic clip on the trailing edge of one blade, midway between the motor and the tip.
-
Systematically Find the Imbalance — Turn the power back on and run the fan on a speed where the wobble is most noticeable.
- If the wobble worsens: Turn the fan off, remove the clip, and place it on the next blade in the sequence. Repeat the test.
- If the wobble improves: You have identified the "light" blade. Now, you must find the optimal position on that blade. Turn the fan off and move the clip in small increments (about 2 inches at a time) along the blade's edge, first toward the tip and then toward the motor, testing the fan's operation after each adjustment. The goal is to find the single spot where the wobble is minimized or eliminated completely.
-
Apply the Permanent Weight — Once you've found the ideal spot with the clip, turn the power off. Take one of the adhesive-backed weights from the kit. Place it on the top surface of the blade, centered directly above the position where the clip was most effective. Press it down firmly for 30 seconds to ensure a strong bond. Remove the plastic clip.
-
Final Test and Refinement — Turn the fan on and test all speeds. The fan should now run smoothly. For very severe wobbles, you may need to repeat the process with the clip to find a spot for a second weight, sometimes on a different blade.
Common mistakes
- Assuming Any Ceiling Box is Sufficient: Standard electrical boxes for light fixtures are not strong enough to support the weight and dynamic motion of a ceiling fan. Attempting to fix a wobble without first confirming the fan is anchored to a fan-rated box secured to a joist is a critical safety oversight. If the mount is the problem, no amount of blade balancing will fix it.
- Over-Tightening Screws: In an effort to eliminate looseness, it's easy to overtighten screws, which can strip the threads in the motor housing or blade iron, or even crack the cast metal of the iron itself. Tighten screws until they are snug, then give them an additional one-eighth to one-quarter turn.
- Aggressively Bending Blade Irons: Blade irons are brittle. Applying sharp, jerking force to bend one back into alignment is more likely to snap it than fix it. Always use slow, steady pressure and make small, incremental adjustments, re-measuring after each one.
- Guessing with the Balancing Kit: Many users become frustrated and simply stick a weight onto a blade they think is the problem. The methodical process of using the clip to test each blade, and then refining the position on the correct blade, is essential. Skipping this diagnostic step rarely works.
- Forgetting to Re-Verify Power is Off: A common mistake is turning the breaker off for the initial inspection, but then forgetting to turn it off again before making a subsequent adjustment after a test run. Always treat the fan as live unless you have just turned off the breaker and tested the circuit.
- Ignoring a Warped Blade: On fans with solid wood blades, especially in humid climates, a blade itself can warp over time. No amount of tightening or balancing will fix a physically warped blade. If you measure tracking and find a blade is twisted (e.g., the leading edge is a different height than the trailing edge), the blade itself must be replaced.
Cost & time breakdown
This table estimates the cost and time involved for a DIYer to fix a wobbly ceiling fan, compared to hiring a professional handyman or electrician.
| Task | DIY Cost | Pro Cost (Labor + Parts) | Time |
|---|---|---|---|
| Inspection & Tightening | $0 (if tools owned) | $100 - $175 | 30 - 60 minutes |
| Blade Cleaning & Iron Alignment | $0 - $5 (for cleaner) | $125 - $200 | 45 - 75 minutes |
| Balancing with a Kit | $5 - $10 | $150 - $225 | 45 - 90 minutes |
| Blade Iron Replacement | $15 - $40 (for part) | $175 - $250 | 1 - 2 hours |
| Ceiling Box Replacement | $25 - $50 (for box/brace) | $250 - $450+ | 2 - 4 hours |
| Full Fan Replacement | $100 - $500+ (for new fan) | $200 - $400 (labor) | 2 - 3 hours |
When to call a pro
While most fan wobbles are simple mechanical issues, certain signs indicate the problem is beyond a basic DIY fix. It is time to call a licensed electrician or experienced handyman if you encounter any of the following:
- The electrical box in the ceiling is loose, made of plastic, or not secured to a joist. Replacing an electrical box is a more involved job that requires knowledge of wiring and potentially some drywall repair. The structural integrity of the mount is non-negotiable for safety.
- You hear audible grinding, scraping, or humming noises from the motor housing. These sounds often point to failing internal motor bearings, which are not typically user-serviceable. A professional can diagnose if the fan motor needs to be replaced.
- The wobble is violent and causes the entire fixture to shake. A minor shimmy is one thing; a severe lurching motion can indicate a critical failure in the downrod assembly, mounting, or motor itself and should be inspected by a professional immediately.
- After following all balancing steps meticulously, the wobble persists. A stubborn wobble could be due to a warped motor shaft or an internal defect that requires a complete fan replacement.
- You see visible cracks in the motor housing, downrod, or blade irons. Do not operate a fan with cracked structural components. A professional will need to replace the fan.
Prevention & maintenance
Proactive maintenance can prevent most ceiling fan wobbles from ever starting. Integrate these checks into your routine home maintenance schedule.
- Clean Blades Seasonally: At least twice a year (e.g., when you reverse the fan's direction for summer/winter), thoroughly clean the fan blades. This prevents the gradual, uneven buildup of dust that is a leading cause of imbalance.
- Annual Screw Tightening Check: Once a year, perform a quick visual and manual inspection. Check the screws holding the blades to the blade irons and the irons to the motor. Gently check that they are snug. Also, check the screws on the exterior of the light kit and canopy.
- Listen for Changes: Pay attention to the sound of your fan. Any new clicking, humming, or grinding noise is an early warning sign of a developing mechanical or electrical issue that needs investigation.
- Verify Proper Installation: If installing a new fan, read the manual from cover to cover. Pay special attention to instructions about securing the mounting bracket, seating the hanger ball, and attaching the blades. Using all supplied hardware, including washers and locking pins, is critical.
- Check for Blade Warping: For fans with natural wood blades, especially in houses with high humidity, visually inspect the blades for any sign of warping or twisting. Look down the length of the blade from the tip toward the motor to spot any deviation.
- Ensure Balanced Light Kits: When replacing bulbs in a multi-bulb light kit, use bulbs of the same type and weight. A significant weight difference between bulbs can be enough to create a minor wobble on a sensitive fan.
Related Articles
Keep troubleshooting with these hand-picked guides from FixlyGuide:
- The Hidden Reason Your Ceiling Fan Wobbles (And 3 Cheap Fixes) — A wobbling ceiling fan isn’t just annoying; it can be a sign of imbalance or loose connections that are simple to fix with the right approa…
- How to Fix a Wobbly Ceiling Fan: A Step-by-Step Guide — A wobbly ceiling fan is not only annoying but can be a safety hazard; this guide helps you diagnose and fix common causes.
- Fix Flickering Lights Throughout Your House: A DIY Guide — Flickering lights throughout your house are usually caused by loose connections. This guide will help you diagnose and fix the most common…
- Why Your Circuit Breaker Keeps Tripping: A DIY Guide — A tripping circuit breaker is a common household problem, often indicating an overloaded circuit or a short circuit. This guide helps you d…
- The Surprising Reason Your Ceiling Fan Wobbles (It’s Not Always Installation) — A wobbling ceiling fan is more than annoying; it can be a sign of imbalance or loose connections that can be easily fixed with a few common…
- The 5-Minute Trick to a Silky-Smooth Door Lock (and Why Yours Is Sticky) — A sticky door lock is annoying and can be a security risk. Learn how to quickly diagnose and fix the common causes of a door lock that won'…
Get the print-ready PDF of this guide
A clean, ad-free, printable version you can keep on your phone or pin to the workshop wall. Free with a FixlyGuide account.
- Print-optimized layout
- Tools, materials & every step included
- Saved to your account
Frequently asked questions
Why is my ceiling fan wobbling?+
The most common reasons for a ceiling fan wobble include loose blade screws or mounting hardware, uneven dust buildup on the blades, or a bent blade arm. Imbalanced weight distribution is the primary culprit.
Can a wobbly ceiling fan fall?+
While rare, a severely wobbly ceiling fan with loose or improperly installed mounting hardware could potentially fall. It's important to address wobbling promptly to ensure safety and prevent further damage.
How do I use a ceiling fan balancing kit?+
A balancing kit usually involves attaching temporary clips to fan blades to identify the exact blade and spot causing the wobble. Once the ideal location is found, a small adhesive weight is applied to that spot to correct the imbalance.
Should I replace a wobbly ceiling fan?+
Most wobbly ceiling fans can be fixed with simple adjustments like tightening screws or balancing the blades. You should only consider replacing it if the fan is old, severely damaged, or the wobble cannot be resolved after troubleshooting.
Is it safe to run a wobbly ceiling fan?+
It is generally not recommended to continuously run a severely wobbly ceiling fan. The constant vibration can put stress on the fan's components, lead to further damage, and potentially loosen its mounting over time, posing a safety risk.

Discussion
Loading comments…