
Tools & materials you'll need
Affiliate linksAs an Amazon Associate FixlyGuide earns from qualifying purchases — at no extra cost to you. Prices and availability are accurate as of publication and subject to change.
How it works
A ceiling fan's stability is a product of mechanical integrity and rotational balance. The entire system begins at the ceiling, where a fan-rated electrical box is securely fastened to a structural joist or a specialized cross-brace. This box is engineered to support the fan's weight (up to 70 pounds) and, more importantly, its dynamic forces during operation.
From this mounting bracket hangs the downrod, a rigid pipe connecting the ceiling mount to the motor housing. At the top of the downrod is a half-spherical hanger ball that rests in a corresponding cupped socket in the mounting bracket. This ball-and-socket joint is critical; it allows the fan to hang perfectly vertical even on a slightly angled ceiling and absorbs minor vibrations.
The motor rotates a hub to which several blade brackets (or "irons") are attached. The fan blades themselves are then screwed onto these brackets. For the fan to rotate smoothly, the combined center of mass of this entire rotating assembly must be perfectly aligned with the vertical axis of rotation. When a fan wobbles, it's because this balance is disrupted. An uneven distribution of weight—caused by a loose screw, a warped blade, or even a small accumulation of dust—creates a centrifugal force that pulls the fan to one side with every rotation. The faster the fan spins, the stronger this force becomes, resulting in the visible and often noisy oscillation. A balancing kit works by adding a tiny, precise amount of weight to the opposite side of the imbalance, restoring equilibrium.
Step-by-Step Fix
This diagnostic process moves from the simplest and most common fixes to the more involved, ensuring you don't waste time on balancing if the issue is just a loose screw.
-
Safety First: De-energize the Circuit — Before you touch the fan, locate the correct circuit breaker in your home's main electrical panel and switch it to the "OFF" position. Verify that the power is off by testing the fan's wall switch and pull chain.
- Tools: Step ladder, non-contact voltage tester (recommended).
- Safety: For an added layer of safety, place a piece of tape over the breaker switch to prevent someone from accidentally turning it back on while you are working.
-
Clean and Inspect the Blades — Dust and grime can accumulate unevenly, adding enough weight to throw a fan off balance. Use a damp cloth or a dedicated ceiling fan duster to thoroughly clean the top and bottom surfaces of each blade.
- During this step: Visually inspect each blade for any signs of cracking, peeling, or warping. Look down the edge of each blade from the tip toward the motor to spot any bows or bends.
-
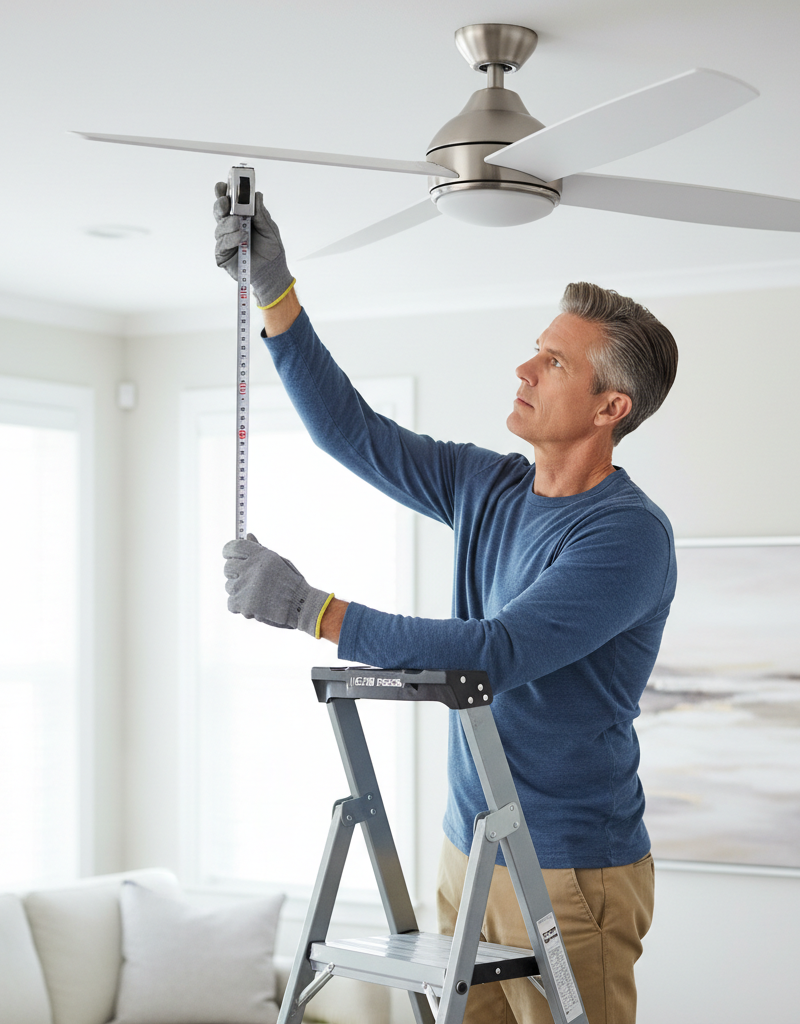
Measure Blade-to-Ceiling Height — A bent blade bracket is a common source of wobble. Use a tape measure or a rigid yardstick to measure the distance from the ceiling to the trailing edge of one blade tip. Manually rotate the fan and measure the same point on each subsequent blade.
- If this doesn't work: If the measurements differ by more than 1/8 inch, you have a bent blade bracket. Gently but firmly bend the bracket of the offending blade(s) up or down until all tips are equidistant from the ceiling. Re-measure to confirm.
-
Tighten the Blade Screws — Using the appropriate screwdriver (usually a Phillips #2), tighten the screws that fasten each blade to its blade bracket. There are typically two or three screws per blade. Check every screw on every blade.
- Note: These screws often loosen over time due to constant vibration. They are the most frequent cause of wobbling. Ensure they are snug, but do not overtighten and strip the threads.
-
Tighten the Blade Bracket Screws — Now, check the screws that secure the blade brackets to the rotating part of the motor housing. These are often less accessible but just as important. Tighten them firmly. If the motor housing has a decorative cover, you may need to remove it to access these screws.
-
Inspect and Tighten the Downrod — Climb your ladder high enough to see where the downrod enters the top of the motor housing. There you will find one or two set screws that lock the downrod to the motor coupling. Use a screwdriver or Allen key to tighten these screws firmly. While there, try to twist the motor housing; there should be no play between it and the downrod.
-
Check the Canopy and Mounting Hardware — Slide the decorative canopy at the ceiling down the downrod to expose the mounting bracket, wiring, and hanger ball. First, confirm the hanger ball is properly seated in the bracket's socket. Next, use a screwdriver or nut driver to tighten the mounting screws holding the fan bracket to the electrical box in the ceiling.
- Crucial Safety Check: While the canopy is down, push firmly up on the mounting bracket. It should not move, flex, or creak. If the entire electrical box moves, it is not secured properly to the ceiling structure and must be fixed before proceeding.
-
Re-energize and Test — Re-secure the canopy. Turn the power back on at the circuit breaker. Test the fan at low, medium, and high speeds. If the wobble is gone or significantly reduced to an acceptable level (a very slight movement is normal for some fans), your work is done. If the wobble persists, proceed to the balancing steps.
-
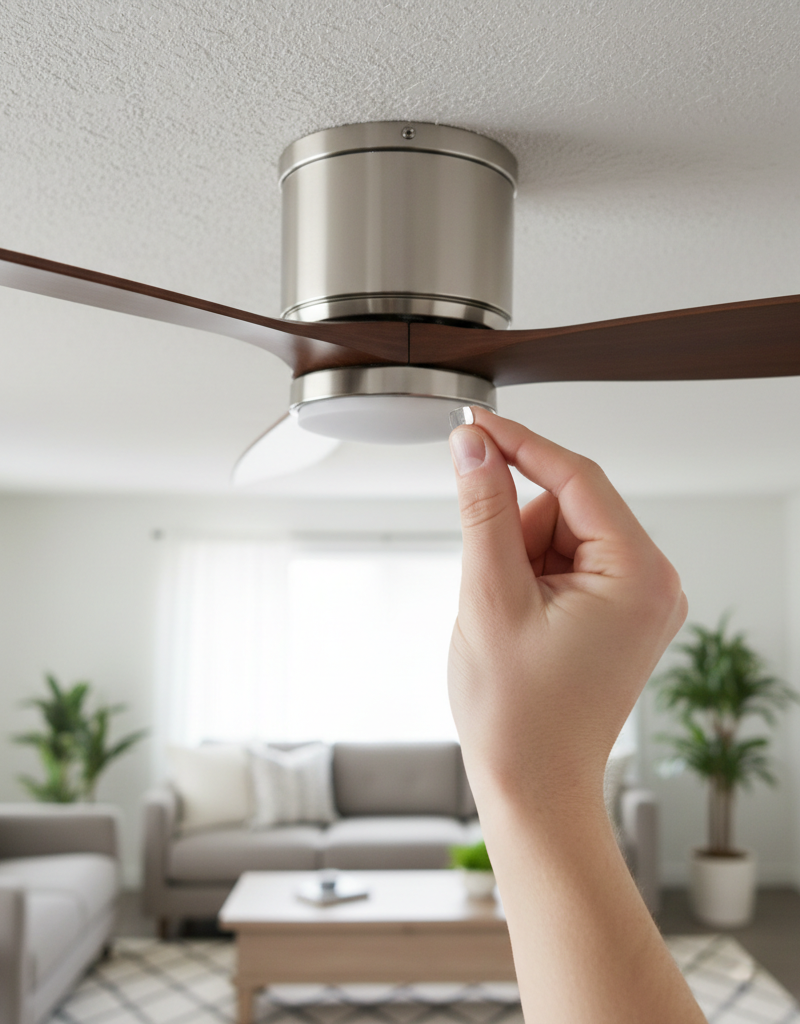
Begin Balancing with the Test Clip — Turn the power off again. Take the plastic clip from a ceiling fan balancing kit and slide it onto the trailing edge of any fan blade. Position it midway between the blade bracket and the blade tip.
-
Isolate the Problem Blade — Turn the power on and run the fan on the speed that produces the worst wobble. Observe the wobble's severity. Turn the fan off, wait for it to stop, move the clip to the next blade in sequence, and re-test. Repeat for all blades. One blade should cause a more significant reduction in wobble than the others; this is the blade that needs a permanent weight.
-
Find the Optimal Weight Position — With the clip on the identified problem blade, experiment with its position. Start at the end of the blade and test the fan. Then, move the clip inwards toward the motor in 2-inch increments, testing at each position. Continue until you find the "sweet spot" where the wobble is nearly eliminated.
-
Install the Adhesive Weight — Turn off the power. Note the exact location of the clip. Remove the clip and take one of the self-adhesive metal weights from the kit. Peel the backing off and press the weight firmly onto the top centerline of the blade, directly across from where the clip was positioned. Remove the clip, re-assemble anything you took apart, and turn the power on for a final test.
- If wobble improves but isn't gone: You may need to add a second weight next to the first one, or use the clip again to fine-tune the position of the first weight.
Common mistakes
-
Installing a Fan on a Standard Electrical Box. Many DIYers assume any ceiling box can hold a fan. Standard plastic or metal lighting boxes are only rated to hold a few pounds and will fail under a fan's weight and vibration. Instead: Always verify the box is fan-rated (it will be stamped "Acceptable for Fan Support"). If not, replace it with a fan-rated box attached directly to a joist or installed with an expandable ceiling fan hanger bar.
-
Balancing Before Tightening. Eagerly reaching for the balancing kit before performing a full mechanical inspection is a common time-waster. The majority of wobbles are caused by loose hardware, not an inherent imbalance. Instead: Always follow a hierarchical troubleshooting process. Start with cleaning and tightening every screw from the blades to the ceiling mount before you even consider balancing.
-
Overtightening Screws. In an attempt to make the fan "extra secure," it's easy to overtighten screws, which can strip the threads in the motor housing, warp the blade brackets, or crack the fan blades themselves. Instead: Use hand tools, not a power drill, for assembly screws. Tighten until snug, then apply a final quarter-turn. The goal is to be firm, not forceful.
-
Mismatching Blades. If one blade is damaged, replacing it with a blade from another fan—even one that looks similar—is a mistake. Blades are manufactured and packaged in weight-matched sets. A single mismatched blade will introduce a severe, often unfixable, imbalance. Instead: Contact the fan's manufacturer to order a replacement blade set for your specific model. Replace all blades to ensure they are balanced as a factory-matched unit.
-
Forgetting to Seat the Hanger Ball. During installation or inspection, failing to ensure the hanger ball is fully seated in the hanger bracket socket. If the slot on the ball is not engaged with the tab in the socket, the entire fan can rotate within the bracket, causing extreme wobble and stress on the electrical wires. Instead: Always double-check that the ball is seated and locked into the bracket's tab before wiring the fan.
Cost & time breakdown
This table outlines typical costs and time commitments. Pro costs include labor and a standard service call fee but may not include parts.
| Task | DIY Cost | Pro Cost | Time Commitment |
|---|---|---|---|
| Cleaning & Screw Tightening | $0 | $100–$175 | 30–60 minutes |
| Blade Balancing | $5–$15 (kit) | $125–$225 | 45–90 minutes |
| Replacing Blade Set | $25–$80 (parts) | $150–$250 | 45–60 minutes |
| Full Fan Replacement | $100–$500+ (fan cost) | $200–$600 | 2–3 hours |
| Replacing Non-Fan-Rated Box | $20–$50 (parts) | $300–$550 | 2–4 hours (DIY), 1-2 hours (Pro) |
When to call a pro
While most wobbles are DIY-friendly, certain signs indicate the problem requires professional expertise. Stop work and call a licensed electrician if you encounter any of the following:
-
A Loose Electrical Box: If you can move the mounting bracket and the electrical box it's attached to, the fan is an immediate falling hazard. The box is not properly secured to the building's structure. An electrician will need to access the ceiling joists, potentially from the attic, to install a fan-rated box and brace correctly. Do not use the fan until this is fixed.
-
Evidence of Electrical Damage: During your inspection, if you see any signs of scorching or melting on wires, the wire nuts, or the fan's housing, or if you smell burning plastic, cut power at the breaker immediately. This points to a dangerous short circuit or faulty wiring that could cause a fire.
-
Persistent Grinding or Scraping Noises: A rhythmic clicking might just be a wire hitting the housing, but a loud, constant grinding or humming noise from the motor suggests the internal bearings are failing. These parts are not typically user-serviceable and attempting a repair can do more harm.
-
Wobble Remains After All Fixes: If you have methodically tightened all hardware, confirmed the blades are straight and level, and meticulously tried to balance the fan with a kit with no success, the issue may be internal. A bent motor shaft from the factory or damage during shipping can cause a wobble that no amount of balancing will fix. In these cases, the fan motor or the entire unit usually needs to be replaced.
Prevention & maintenance
Consistent maintenance is the most effective way to prevent a ceiling fan from developing a wobble.
-
Seasonal Check-up: At least twice a year—a good reminder is when you reverse the fan's direction for summer and winter—perform a quick maintenance check. Turn off the power, wipe down the blades to prevent dust buildup, and check that all blade and bracket screws are snug.
-
Address Minor Wobbles Immediately: Don't ignore a slight wobble. A small imbalance puts continuous stress on all screws and components, causing them to loosen over time and turning a minor issue into a major one. The sooner you investigate, the easier the fix will likely be.
-
Use the Fan Regularly: Letting a fan sit idle for months can cause the lubricating grease in the motor bearings to settle and harden. Running the fan for at least an hour every few weeks (even on low, or in reverse in winter) helps keep the motor in good working order.
-
Ensure Proper Downrod Use: For ceilings higher than 9 feet, a longer downrod is necessary for proper airflow and stability. Always use a downrod from the same manufacturer as your fan to ensure compatible threads and hardware. For angled ceilings, be sure to use a compatible sloped-ceiling adapter to keep the fan hanging vertically.
-
Retain Your Balancing Kit: Don't throw away the balancing kit that came with your fan, or the leftovers from a kit you purchased. Changes in humidity can cause wood blades to swell or contract slightly over time, requiring a new balancing touch-up years after installation.
Related Articles
Keep troubleshooting with these hand-picked guides from FixlyGuide:
- How to Fix a Wobbly Ceiling Fan: A DIY Guide — A wobbly ceiling fan can be annoying and, in some cases, unsafe. Learn how to diagnose and fix the most common causes of ceiling fan wobble…
- The Surprising Reason Your Ceiling Fan Wobbles (It’s Not Always Installation) — A wobbling ceiling fan is more than annoying; it can be a sign of imbalance or loose connections that can be easily fixed with a few common…
- Why Your Circuit Breaker Keeps Tripping: A DIY Guide — A tripping circuit breaker is a common household problem, often indicating an overloaded circuit or a short circuit. This guide helps you d…
- [Why Does Only One Outlet Have No Power (When the Breaker Is O
Get the print-ready PDF of this guide
A clean, ad-free, printable version you can keep on your phone or pin to the workshop wall. Free with a FixlyGuide account.
- Print-optimized layout
- Tools, materials & every step included
- Saved to your account
Frequently asked questions
Why is my ceiling fan wobbling?+
Ceiling fan wobbling is usually caused by loose screws in the blades or mounting bracket, warped blades, or an unbalanced distribution of weight among the fan blades. Uneven dust accumulation can also contribute to imbalance.
Can a wobbly ceiling fan fall?+
Yes, a severely wobbly ceiling fan, especially one with a loose or improperly installed mounting bracket, can eventually fall. It's crucial to address wobbling promptly to prevent potential injury or damage.
How do I use a ceiling fan balancing kit?+
A balancing kit typically includes a clip and adhesive weights. Attach the clip to the trailing edge of a blade and test the fan. Move the clip along the blade and try different blades until the wobble is reduced. Once the optimal spot is found, replace the clip with an adhesive weight on the top of the blade.

Discussion
Loading comments…