
Tools & materials you'll need
Affiliate linksNo materials required.
As an Amazon Associate FixlyGuide earns from qualifying purchases — at no extra cost to you. Prices and availability are accurate as of publication and subject to change.
How it works
A circuit breaker is a reusable, automatic safety switch designed to protect your home's electrical circuits from damage caused by excess current. It is the modern equivalent of a fuse, but instead of burning out and needing replacement, it can be reset. Inside a standard thermal-magnetic breaker, two primary mechanisms are at work.
First, a bimetallic strip handles overloads. When a circuit draws slightly more current than its rating for a sustained period—for instance, when a toaster and a coffee maker run simultaneously on a 15-amp circuit—the excess current flowing through the strip causes it to heat up and bend. Once it bends past a certain point, it releases a spring-loaded trip latch, causing the internal contacts to snap open and interrupt the flow of electricity. This is a relatively slow-acting mechanism, designed to tolerate brief, harmless surges like a motor starting up.
Second, an electromagnet handles short circuits and ground faults. In a short circuit, where a hot wire directly touches a neutral or ground wire, the current spikes to hundreds of amps almost instantly. This immense surge of current flows through a coil, creating a powerful magnetic field that immediately pulls on an armature, tripping the same latch mechanism. This action is nearly instantaneous, cutting power in milliseconds to prevent catastrophic overheating and fire. Specialized breakers like GFCIs (Ground Fault Circuit Interrupters) and AFCIs (Arc Fault Circuit Interrupters) add further layers of protection by detecting current imbalances and dangerous electrical arcs, respectively.
Step-by-Step Fix
Follow these steps in order to safely diagnose and resolve the cause of a tripping circuit breaker. Do not skip steps, as the sequence is designed to move from the most common and simple issues to more complex ones.
- Tools & Safety:
- Flashlight or headlamp
- Voltage non-contact tester (optional, but recommended)
- Screwdriver with insulated handle (for labeling panel)
- Pen and paper or label maker
-
Note the Context — Before you touch anything, pause and consider what was happening when the breaker tripped. Did you just turn on a high-power device like a microwave, hair dryer, or power tool? Was there a lightning storm? Did you smell or see anything unusual, like a "pop" from an outlet or a faint burning odor? This information is the most valuable clue for diagnosis.
-
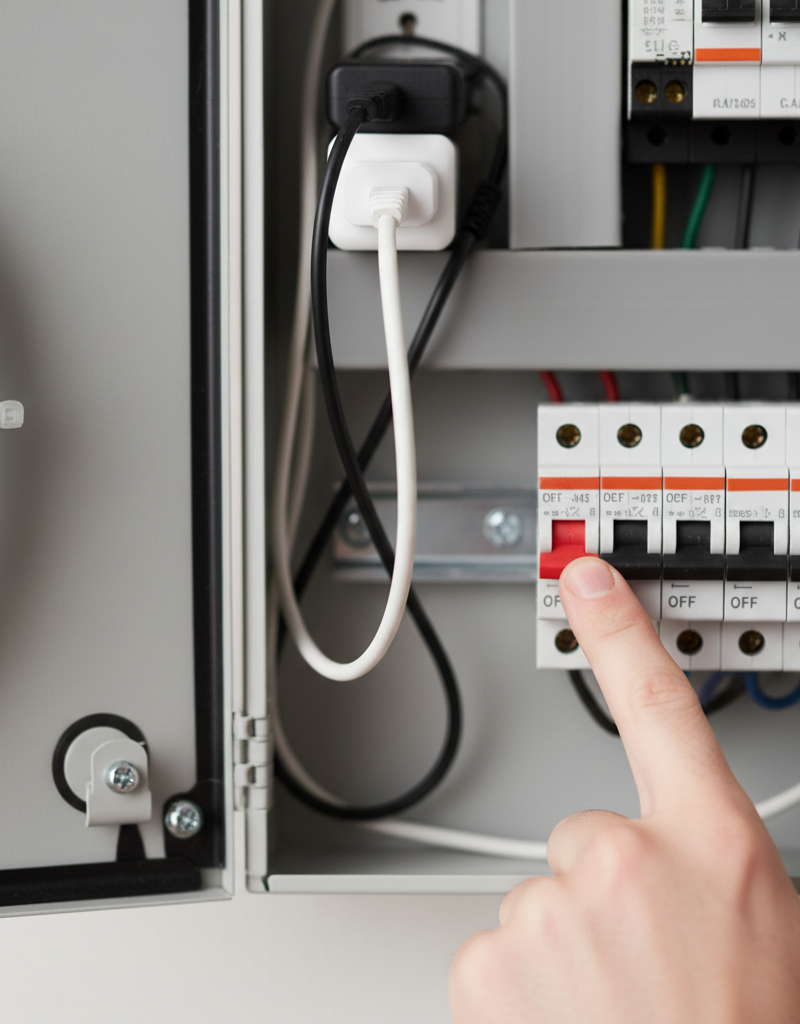
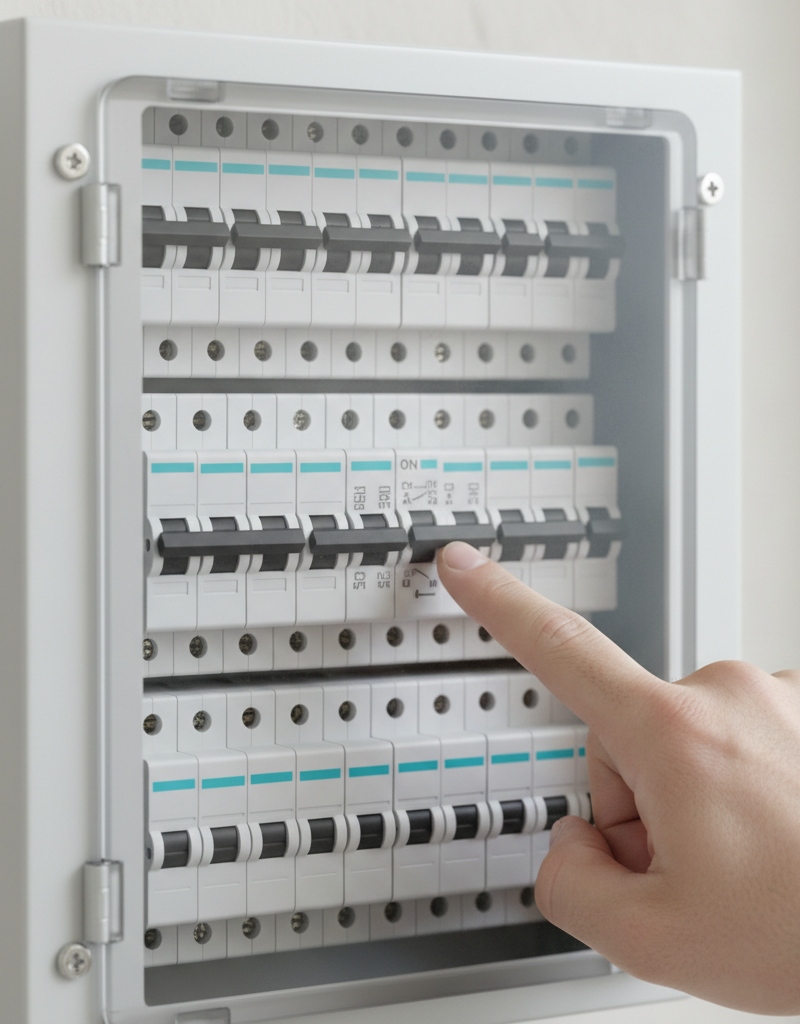
Locate the Panel and Identify the Tripped Breaker — Go to your main electrical service panel (breaker box). It is typically a gray metal box located in a utility room, garage, basement, or closet. Open the door and look for a breaker switch handle that is out of alignment with the others. Most will be in the "ON" position. A tripped breaker will be in the center "TRIPPED" position or, on some models, fully in the "OFF" position. Some breakers may also have a small colored indicator window that appears when tripped.
-
Perform a Firm Reset — To properly reset the breaker, you must first fully deactivate it. Push the handle of the tripped breaker firmly and all the way to the "OFF" position. You should feel a distinct click. Then, push the handle back to the "ON" position. If it clicks and stays on, you have successfully reset the circuit. If it immediately snaps back to the tripped or off position, do not force it. This indicates a persistent fault is present.
-
Isolate the Circuit by Unplugging Everything — If the breaker tripped immediately upon reset, turn the breaker back to the full "OFF" position for safety. Your next task is to eliminate all loads from the circuit. Go through the area of your home that has lost power and unplug every single item from the outlets on that circuit. This includes lamps, televisions, chargers, power strips, and major appliances. Don't forget inconspicuous items like clocks or nightlights.
-
Test for a Short Circuit in the Wiring — With everything on the circuit confirmed to be unplugged, return to the panel and attempt to reset the breaker again (OFF, then ON).
- If the breaker now stays ON: The problem is almost certainly one of the devices you unplugged. Proceed to the next step.
- If the breaker still trips immediately: The fault is not with your appliances. It indicates a "hard short" within the building's wiring—such as a nail that has pierced a wire inside a wall, a faulty outlet, or a loose connection in a junction box. This situation requires a professional electrician to trace and repair.
-
Identify the Faulty Appliance — Assuming the breaker held after unplugging all devices, you can now begin a methodical process of elimination. Turn the breaker OFF again for safety. Go back to the affected area and plug in just one item—preferably a simple device like a lamp that you know works. Turn the breaker ON. If it holds, the first device is likely fine. Turn the breaker OFF, plug in the second device, and repeat. Continue this process, turning the breaker off each time you add a new device, until the breaker trips. The last device you plugged in is the culprit.
-
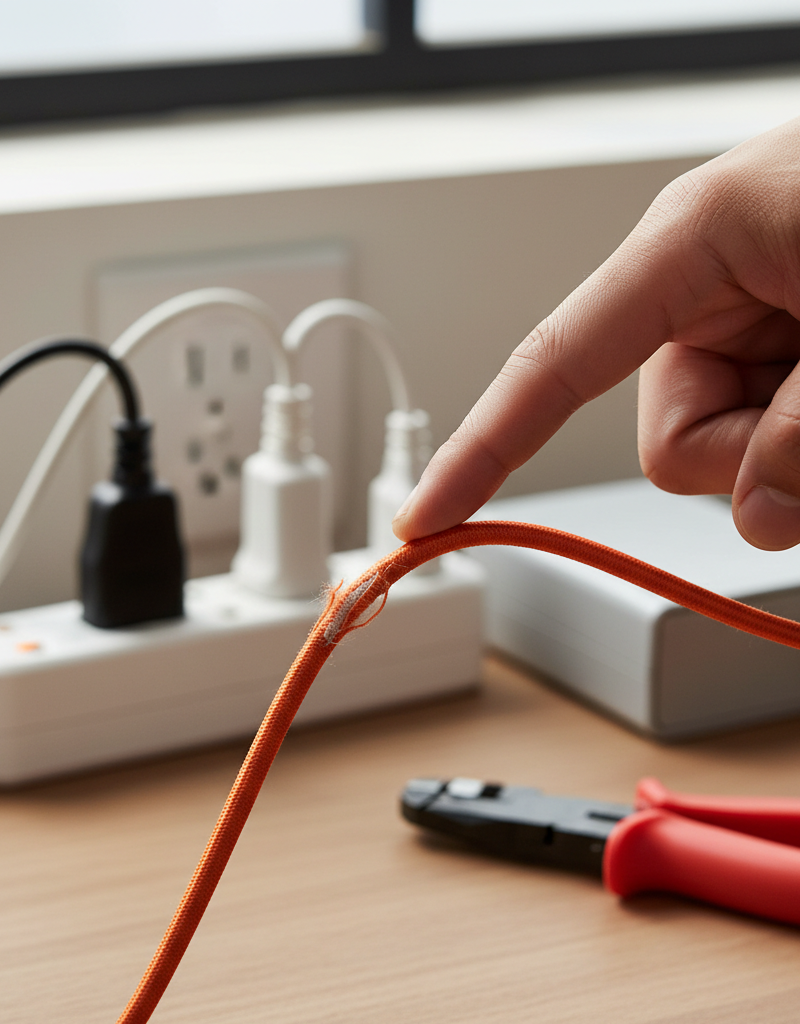
Inspect and Isolate the Problem Device — Once you identify the appliance that causes the trip, unplug it. Closely inspect its power cord and plug for any signs of damage: frayed insulation, exposed wires, kinks, burn marks, or a loose-fitting plug. If the cord is damaged, the appliance has a short circuit. Do not use it again until it is repaired or replaced. If the appliance trips the breaker the moment it is switched on (not just plugged in), it has an internal fault.
-
Diagnose a Circuit Overload — If no single device trips the breaker, but it trips when you use several items at once (e.g., making toast while the coffee maker is brewing and the microwave is running), you have a classic circuit overload. This is not a fault, but an operational issue: you are asking the circuit to deliver more power than it is rated for. Standard kitchen and living room circuits are often 15 amps (1800 watts) or 20 amps (2400 watts). High-power appliances can draw 1000-1500 watts each.
-
Resolve the Overload by Redistributing Loads — The solution for an overload is to manage your power consumption. Identify the high-draw appliances (look for a label stating wattage or amps) and avoid running them simultaneously on the same circuit. Move one of the devices to an outlet in a different area of the room or a different room entirely, as it will likely be on a separate circuit. For kitchens with persistent overload issues, the long-term solution is to have an electrician install a new, dedicated circuit for a power-hungry appliance like a microwave.
-
Interpret GFCI and AFCI Trips — If your tripped breaker has a "TEST" button on it, it is a specialized GFCI or AFCI breaker. A GFCI trip is caused by a ground fault, where a small amount of current is leaking to ground. This often happens with appliances used near water or with failing heating elements. An AFCI trip is caused by an arc fault, which is dangerous sparking in a damaged cord, a loose connection, or a faulty appliance motor. While a faulty appliance is still a common cause, these trips signal more specific dangers than a simple overload and should be investigated thoroughly.
Common mistakes
- Repeatedly Resetting the Breaker. Forcing a breaker to stay on by repeatedly resetting it without diagnosing the cause is extremely dangerous. Each time it trips, it is signaling an unsafe condition. Continuously re-energizing a circuit with a short or overload can cause wires inside your walls to overheat, melt their insulation, and ignite surrounding wood framing. Always investigate the cause of the trip first.
- Replacing a Breaker with a Higher-Amperage Model. Never replace a 15-amp breaker with a 20-amp breaker to "solve" an overload problem. This is a critical fire hazard and a major electrical code violation. The wiring in the circuit (typically 14-gauge for 15 amps) is not thick enough to handle the 20 amps the new breaker would allow. The wires will overheat long before the breaker trips, creating a perfect recipe for a house fire. The breaker's rating must match the wire gauge it protects.
- Ignoring a Panel or Breaker That is Hot or Buzzing. A circuit breaker that is warm to the touch under heavy load is normal. However, a breaker that is noticeably hot, or a panel that emits a buzzing or crackling sound, indicates a serious problem. This is usually caused by a loose wire connection at the breaker terminal or a failing breaker. This poor connection creates arcing, which generates intense heat and can lead to a panel fire. Turn off the main breaker immediately and call an electrician.
- Overloading Power Strips. Plugging a power strip into an outlet does not create more power; it only creates more places to draw power from the same, single circuit. Plugging multiple high-draw appliances into one power strip, or "daisy-chaining" multiple strips together, is a very common way to create a circuit overload and a fire hazard. Use them for low-power electronics only.
- Misdiagnosing GFCI/AFCI Trips. Assuming a trip from a GFCI or AFCI breaker is just a simple overload is a frequent mistake. These devices are designed to detect specific, hazardous conditions a standard breaker would ignore. An AFCI trip means there's arcing somewhere, and a GFCI trip means current is leaking. The troubleshooting process should focus on finding the damaged cord, faulty appliance, or moisture intrusion that is causing the specific fault, not just reducing the load.
Cost & time breakdown
Costs are estimates and can vary by location and job complexity. Pro costs typically include a service call fee plus labor and materials.
| Task | DIY cost | Pro cost | Time |
|---|---|---|---|
| Diagnosing the Cause of a Trip | $0 | $100 – $225 | 30 minutes – 2 hours |
| Replacing a Damaged Appliance Cord Plug | $5 – $15 | Not applicable | 15 – 30 minutes |
| Replacing a Standard 15A/20A Breaker | $10 – $25 | $125 – $250 | 30 minutes (experienced DIY) |
| Replacing a GFCI or AFCI Breaker | $40 – $70 | $175 – $350 | 30 minutes (experienced DIY) |
| Installing a New Dedicated Circuit | Not recommended | $400 – $900+ | 2 – 5 hours |
| Finding & Repairing a Short in Wall Wiring | Not recommended | $300 – $1,000+ | 2 – 8+ hours |
When to call a pro
While many tripping breaker issues are simple to resolve, certain symptoms are clear indicators that you should immediately stop and contact a licensed electrician. Do not attempt DIY repairs in these situations, as they involve significant risk of electrocution or fire.
Call a professional if:
- The breaker trips again instantly, even after you have unplugged every device on the circuit. This points to a dangerous short circuit within the permanent wiring inside your walls.
- You smell burning plastic, ozone, or char, or you see smoke or scorch marks around the breaker panel, an outlet, or a switch. Turn off the main breaker if it is safe to do so and call an electrician for an emergency service.
- The breaker itself feels hot to the touch (not just slightly warm) or you hear any buzzing, sizzling, or cracking sounds from the electrical panel. This can signal an imminent breaker failure or a dangerous loose connection that can lead to an arc flash.
- The problem persists after you have replaced a faulty appliance, or you cannot identify a root cause. An electrician has diagnostic tools to trace faults that are not obvious.
- You are in any way uncomfortable or unsure about working with your electrical system. The main lugs in a service panel are always live—even with the main breaker off—and carry enough voltage to be lethal.
Prevention & maintenance
Proactive maintenance can prevent most nuisance trips and identify potential electrical hazards before they become critical.
- Map and Label Your Breaker Panel. This is the single most effective preventative step. On a clear day, work with a partner to turn each breaker off and on, identifying exactly which outlets, lights, and appliances it controls. Use a label maker or a fine-point permanent marker to create a clear, durable directory on the inside of the panel door. An accurate map turns a 2-hour diagnostic puzzle into a 10-minute fix.
- Perform an Electrical Load Audit. Be mindful of your home's circuits, especially in the kitchen, garage, and laundry room. Use a "one-at-a-time" rule for high-wattage appliances on a shared circuit. Check appliance labels for wattage; anything over 1200 watts is a high-draw device. On a standard 15-amp (1800-watt) circuit, running two such devices is a guaranteed overload.
- Test GFCI and AFCI Devices Monthly. Every GFCI outlet, AFCI outlet, and GFCI/AFCI breaker has a "TEST" and "RESET" button. Once a month, press the "TEST" button. It should click off and cut power to the circuit/outlet. Then press "RESET" to restore power. If the test button fails to trip the device, the protective mechanism is worn out and the device must be replaced.
- Regularly Inspect Cords and Plugs. At least twice a year, visually inspect the power cords on your most-used appliances and any extension cords. Look for cracking insulation, exposed wires, frayed areas (especially near the plug), and discoloration. A damaged cord is a primary cause of short circuits and AFCI trips. Replace damaged cords or the entire appliance.
- Check for Loose Outlet Connections. If you notice a plug feels loose in an outlet, the internal contacts are worn. A loose connection creates resistance and heat, which can melt the outlet and create a fire hazard. Replacing a worn outlet is a simple and inexpensive DIY task that greatly improves safety.
Related Articles
Keep troubleshooting with these hand-picked guides from FixlyGuide:
- That tripped breaker? 80% miss the hidden cause. — A tripping circuit breaker is a common household problem, often indicating an overloaded circuit or a short circuit. Understanding the caus…
- Why Does My Circuit Breaker Keep Tripping in One Room? Easy DIY Fixes — A circuit breaker repeatedly tripping in one room usually points to an overloaded circuit or a faulty appliance; addressing these issues ca…
- Why Your Extension Cord Keeps Tripping the Breaker (And the Simple Test to Find the Hidden Cause) — Discover why your extension cord keeps tripping the circuit breaker and learn how to safely diagnose and fix the real problem with a simple…
- The 3 Hidden Reasons Your Circuit Breaker Keeps Tripping (And How to Stop It) — Uncover the surprising culprits behind repeatedly tripping circuit breakers and learn practical, actionable steps to diagnose and resolve t…
- Extension Cord Keeps Tripping Breaker? Easy Fixes for Homeowners — An extension cord tripping a breaker usually indicates an overloaded circuit or a faulty cord/appliance, a problem often solvable with simp…
- Toilet Keeps Clogging? Common Causes & Easy Fixes for Homeowners — A toilet that clogs frequently can be a frustrating and unsanitary problem, often indicating an underlying issue from flushing habits to pl…
Get the print-ready PDF of this guide
A clean, ad-free, printable version you can keep on your phone or pin to the workshop wall. Free with a FixlyGuide account.
- Print-optimized layout
- Tools, materials & every step included
- Saved to your account
Frequently asked questions
What does a tripped circuit breaker look like?+
A tripped circuit breaker will typically be in the 'off' position, or sometimes halfway between 'on' and 'off,' unlike the other switches that are fully 'on.'
Can I just keep resetting a tripped breaker?+
No. While resetting it once is fine, repeatedly resetting a breaker without addressing the underlying cause is dangerous. It means there's a recurring electrical issue that needs to be fixed to prevent damage or fire.
How do I know if my circuit is overloaded?+
If your breaker trips when you plug in or turn on multiple high-power appliances (like a microwave, toaster, and coffee maker) on the same circuit simultaneously, it's likely overloaded. Try redistributing these appliances to different circuits.
When should I call an electrician for a tripping breaker?+
You should call an electrician if your breaker trips immediately after being reset (even with nothing plugged in), if you smell burning, see sparks, or if you're unsure how to safely diagnose the problem.
Discussion
Loading comments…