Tools & materials you'll need
Affiliate linksAs an Amazon Associate FixlyGuide earns from qualifying purchases — at no extra cost to you. Prices and availability are accurate as of publication and subject to change.
Quick Answer
Is your shower delivering a sad trickle instead of a refreshing spray? The likely culprit isn't your water heater or plumbing, but rather tiny mineral deposits slowly strangulating your shower head's nozzles. A simple, acidic soak using everyday household white vinegar, often combined with baking soda for extra scrubbing power, can dissolve these deposits and have your shower back to full pressure in about an hour of active effort. You'll save money on replacement parts and enjoy a much better shower experience.
The Problem
Over time, tap water, especially in hard water areas, leaves behind mineral deposits. These aren't just cosmetic; they actively clog the small orifices in your shower head designed to spray water. Calcium (limescale), magnesium, and even rust can accumulate, reducing water flow, causing erratic spray patterns, and diminishing your overall shower experience. What starts as a minor annoyance can quickly escalate to a frustration as your once-powerful shower turns into a weak drizzle. Ignoring the problem can also lead to premature wear on the shower head itself, as increased backpressure stresses its internal components.
How It Works
Water contains dissolved minerals like calcium and magnesium. When water evaporates, these minerals are left behind, forming hard, crystalline deposits. This is particularly noticeable in areas where water is heated, as heat accelerates the precipitation of these minerals. Your shower head, with its intricate spray plate and constant exposure to heated water, is a prime location for this buildup. Limescale, for instance, is predominantly calcium carbonate. White vinegar, which is essentially diluted acetic acid (typically 5% concentration), is an effective, non-toxic descaler because it reacts chemically with these alkaline mineral deposits. The acid dissolves the calcium carbonate and other mineral bonds, effectively breaking down the hardened scale into a soluble form that can then be rinsed away. For tougher buildup, adding baking soda (sodium bicarbonate) creates a mild abrasive fizzing action when combined with vinegar, further loosening deposits. Dish soap, on the other hand, acts as a surfactant, breaking down grime, soap scum, and oils that often trap mineral particles, allowing them to be more easily rinsed away. Understanding this chemical reaction is key to appreciating why these common kitchen ingredients are so powerful for shower head restoration.
Step-by-Step Fix
1. Assess the Buildup — Determine if your shower head is removable or if you'll need to clean it in place.
- Look carefully at the nozzles. Do you see white, chalky deposits or reddish-brown rust? Is the water flow noticeably weaker or spraying in odd directions?
- If the shower head can be easily unscrewed by hand, that's often the simplest approach for a thorough cleaning. If it's tightly fixed or caulked in place, an in-situ cleaning might be necessary.
2. Prepare Your Cleaning Solution — Mix the descaling agents for maximum effectiveness.
- For typical buildup: Fill a sturdy plastic bag (like a gallon-sized freezer bag) with enough undiluted white vinegar to fully submerge the shower head, or half-fill a bucket if you're detaching it.
- For heavy buildup (optional): Add 1/2 cup of baking soda directly to the vinegar, or a few drops of dish soap. The baking soda will fizz, indicating a reaction, and the dish soap helps break down oils and soap scum.
3. Soak the Shower Head — Allow the acidic solution to work its magic on the mineral deposits.
- If removable: Unscrew the shower head counter-clockwise (you might need pliers wrapped in a cloth to prevent scratching). Fully submerge it in the vinegar solution in your bucket. Ensure all spray nozzles are covered.
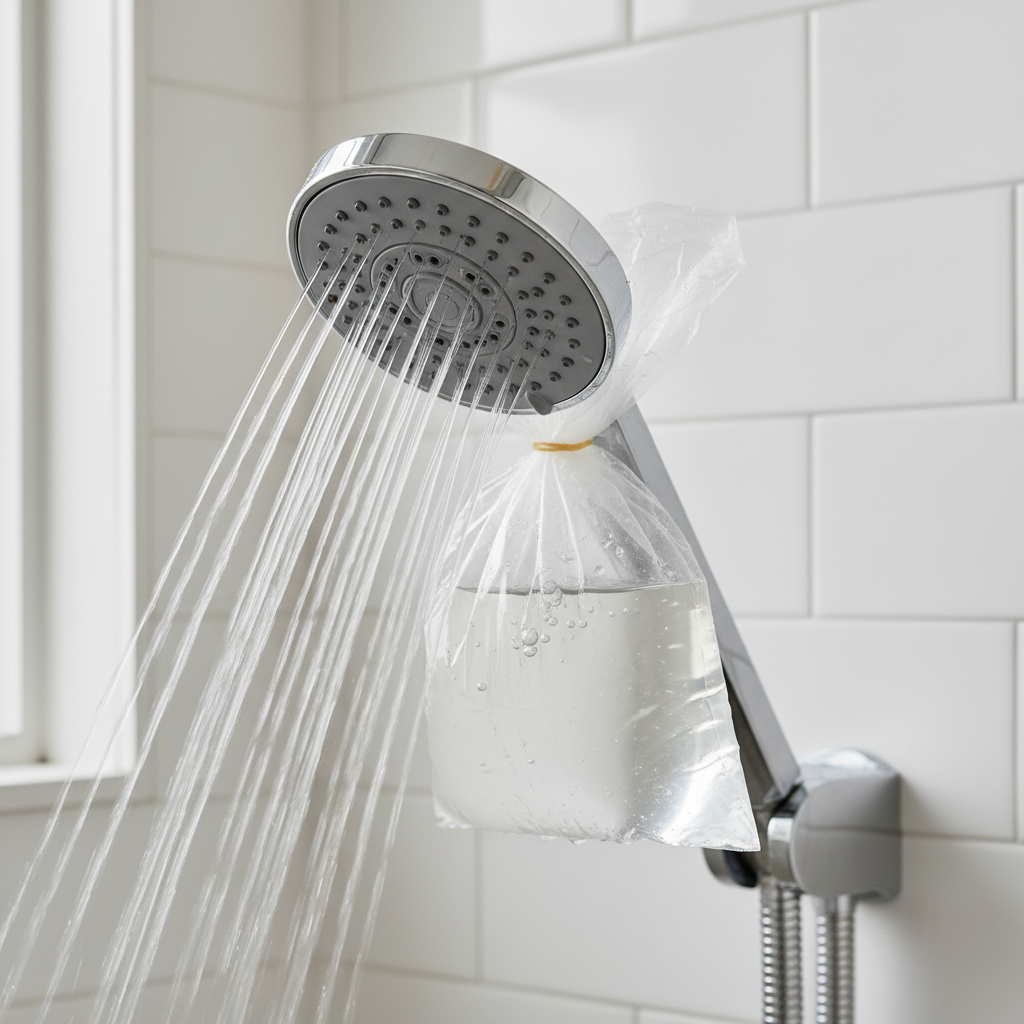
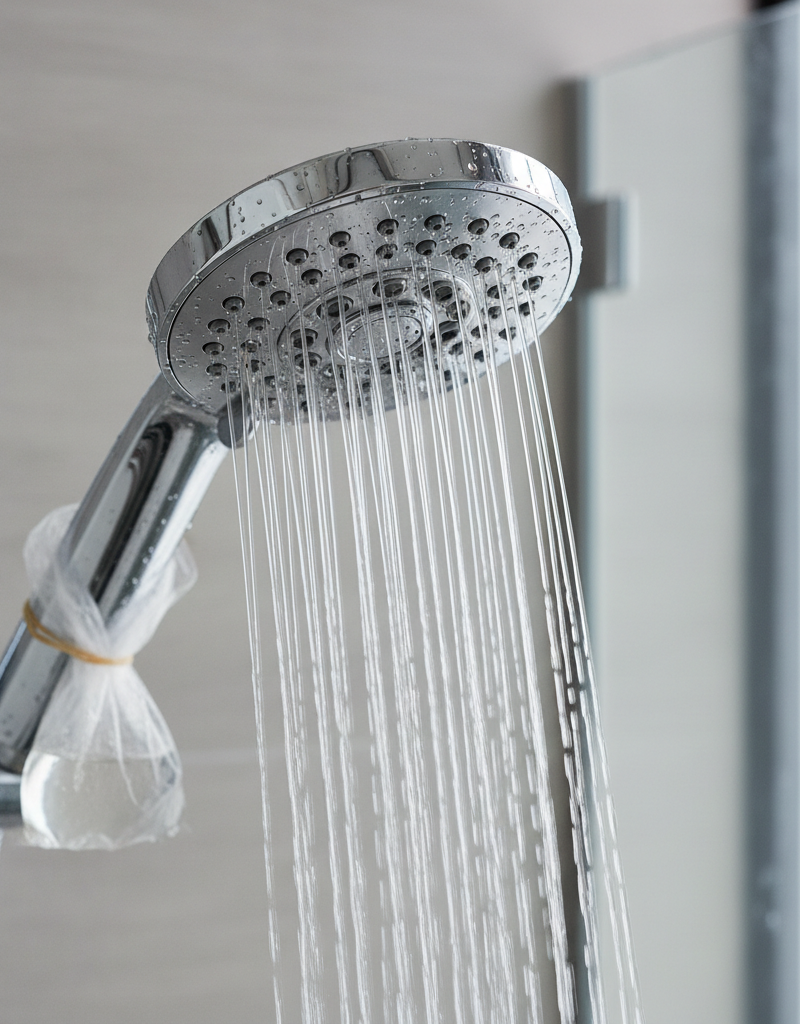
- If non-removable: Secure the bag filled with solution around the shower head using a rubber band or zip tie, making sure the entire head is submerged in the liquid. Try to position it so no liquid leaks out.
- Soaking Time: Let it soak for at least 30 minutes for light buildup, or up to 4-8 hours (or even overnight) for severe cases. Avoid soaking brass or sensitive finishes for more than a few hours, as prolonged exposure to acid can potentially dull them.
- Safety Note: Never mix vinegar with bleach or ammonia, as this creates dangerous chlorine gas.
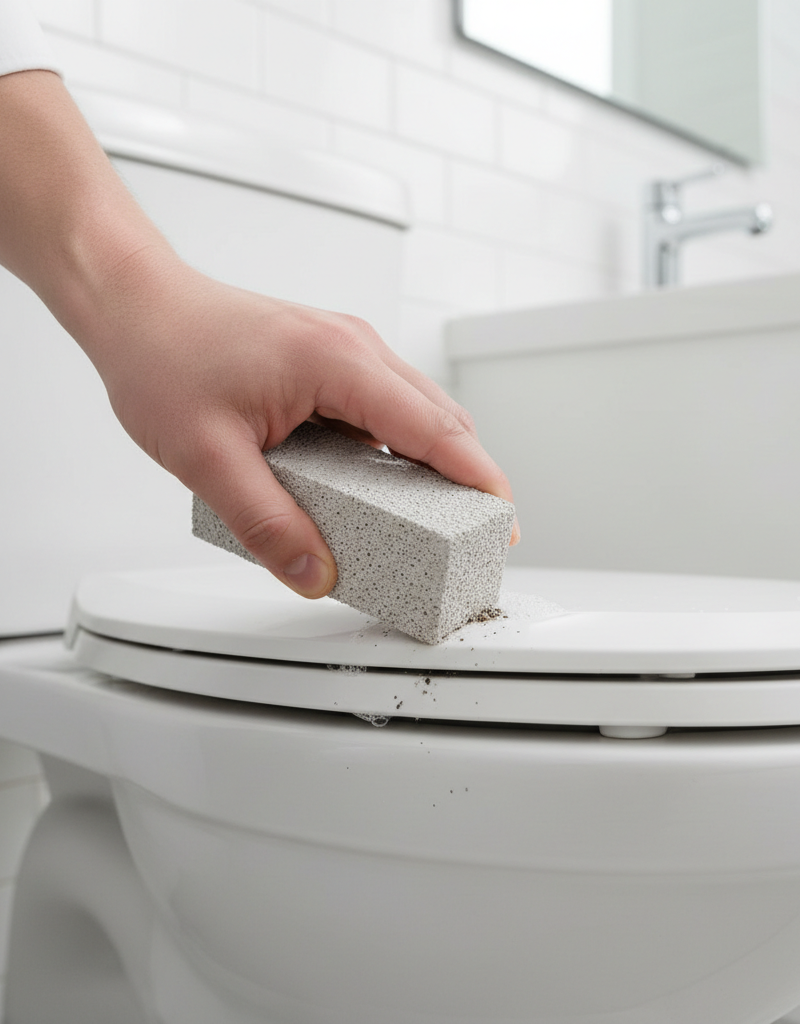
4. Scrub Away Loosened Deposits — Physically remove any remaining gunk.
- After soaking, remove the shower head from the bag or remove the bag from the shower head. Use an old toothbrush, a small, stiff-bristled brush, or even a toothpick/paperclip for individual nozzles.
- Gently scrub the face of the shower head, paying close attention to the tiny spray holes. You should see mineral deposits flaking off or dissolving away. Rinse frequently with warm water.
- If this doesn't work: If significant buildup remains, consider repeating the soaking process for a longer duration, or gently scraping with a non-metallic tool.
5. Flush the System — Clear out any dislodged particles from the inside.
- Reattach the shower head securely to its arm. Turn on the hot water to full pressure for several minutes.
- This flushes out any internal debris that the cleaning solution may have loosened but not fully expelled. Cycle through hot and cold water to ensure both lines are cleared.
- Watch for improved water flow and an even spray pattern.
6. Polish and Protect (Optional) — Add a final touch and prevent future buildup.
- Wipe down the shower head with a soft cloth. For added shine, a dab of car wax or a specialized shower fixture protectant can deter future mineral adhesion.
- Regularly wipe down your shower head after each use to prevent water spots and light mineral accumulation. A quick spray with a 50/50 vinegar-water solution once a week can also keep buildup at bay.
Common Causes
- Hard Water: The most prevalent cause. Water with high concentrations of dissolved minerals like calcium and magnesium naturally leaves behind scale when it evaporates. The harder your water, the faster buildup will occur.
- Infrequent Cleaning: Neglecting regular cleaning allows mineral deposits to harden and accumulate over time, making them much more difficult to remove later.
- Hot Water: Heating water accelerates the precipitation of minerals, meaning shower heads exposed to hot water are more prone to buildup than cold-water fixtures.
- Old Plumbing/Rusty Pipes: While less common than hard water, rust particles from aging galvanized steel pipes can travel to the shower head and contribute to clogging, manifesting as reddish-brown stains.
- Poorly Designed Shower Heads: Some shower head designs, particularly those with very small or intricate nozzle patterns, are more susceptible to clogging because their tiny orifices are easily blocked by even small mineral particles.
Common Mistakes
- Using Abrasive Cleaners or Tools: Never use steel wool, harsh scouring pads, or metal scrapers, as these can scratch or damage the finish of your shower head, making it more prone to future buildup and corrosion.
- Mixing Cleaning Chemicals: As mentioned, never mix vinegar with bleach or ammonia. This creates dangerous, toxic gases. Always use cleaning products independently.
- Not Soaking Long Enough: Rushing the cleaning process won't allow the acid sufficient time to dissolve the mineral deposits. Patience is key, especially for heavy buildup.
- Ignoring Internal Buildup: Only cleaning the visible face of the shower head misses internal blockages. Flushing with hot water after cleaning is crucial to clear dislodged particles from the inner components.
- Using the Wrong Bag: A flimsy plastic bag can tear, spilling vinegar everywhere. Use a sturdy, gallon-sized freezer bag or another robust plastic bag that can withstand the weight of the liquid and the shower head.
- Discarding the Washer/Filter: When removing a shower head, be careful not to lose the small rubber washer or mesh screen filter located inside the neck. These prevent leaks and catch larger debris. If damaged, replace them.
Cost & Time Breakdown
| Task | DIY cost | Pro cost | Time |
|---|---|---|---|
| Gather supplies | $5–$15 | — | 5 minutes |
| Preparation & soaking | $0 | — | 30 min – 8 hrs |
| Scrubbing & flushing | $0 | — | 15–30 minutes |
| Reassembly & testing | $0 | — | 5 minutes |
| Total (active hands-on time) | $5–$15 | $100–$250 | ~1 hour |
Tips & Prevention
- Weekly Wipe Down: After your last shower of the day, quickly wipe down the shower head with a dry cloth or towel. This prevents water from evaporating and leaving behind new mineral deposits.
- Monthly Vinegar Spray: Keep a spray bottle with a 50/50 mix of white vinegar and water in your bathroom. Once a month, give the shower head a quick spray and let it sit for 5-10 minutes before rinsing. This helps prevent major buildup.
- Consider a Water Softener: If you live in an area with very hard water, a whole-house water softener is an investment that will benefit all your plumbing fixtures, extending their life and effectiveness.
- Install a Filter: A shower head filter can reduce chlorine and some minerals, though it won't entirely eliminate limescale buildup. It's a good supplementary measure.
- Gentle Cleaning Cycle: Make it a habit to do a full vinegar soak every 3-6 months. Regular maintenance is far easier than battling severe, hardened deposits.
- Check for Leaks: Persistent drips can also lead to concentrated mineral buildup. If your shower head drips, address that issue promptly.
When to Call a Professional
While most shower head cleaning is a straightforward DIY task, there are instances when a professional plumber should be called. If, after thorough cleaning, your water pressure hasn't improved, the problem might stem from deeper within your plumbing system, such as blockages in the pipes leading to the shower, a faulty pressure balancing valve, or issues with your home's main water supply. Additionally, if you notice significant leaks from the shower arm connections that you cannot tighten or seal, or if you suspect issues with a thermostatic mixing valve that affects water temperature, a licensed plumber has the expertise and specialized tools to diagnose and repair these more complex issues safely and effectively. Never attempt to open walls or cut into existing plumbing lines yourself; leave that to the experts.
Related Articles
Keep troubleshooting with these hand-picked guides from FixlyGuide:
- The Secret to Lush Raised Beds? It's Not Just About How You Water — Smart irrigation for raised garden beds isn't just about automation; it's about delivering the right amount of water precisely when your pl…
- The 5-Minute Trick to Vacation-Proof Your Garden (Before You Leave Town) — Prevent your garden from wilting while you're away with simple, proactive steps that ensure lush growth and minimal fuss upon your return.
- The 6 Cleaning Secrets Hiding in Your Power Drill (Plus Attachments to Master) — Your power drill isn't just for DIY projects; with the right attachments, it's a powerful and efficient cleaning tool for tackling tough gr…
- The Hidden Reason Your AC Isn't Cooling (And Why Most Homeowners Get It Wrong) — Is your central AC blowing warm air or struggling to cool your home? The culprit is often a silent but serious issue many homeowners overlo…
- The Hidden Reason Your GFCI Trips (It’s Not Always a Bad Outlet) — A tripping GFCI outlet is a safety mechanism doing its job, often indicating a problem like moisture, a faulty appliance, or a wiring issue…
- The 5-Minute Trick to Restore Your Kitchen Sink Sprayer's Lost Pressure — Restore your kitchen sink sprayer's low pressure with a quick, simple trick that often takes less than five minutes and requires no special…
This article was independently written by FixlyGuide based on the source topic.
Frequently asked questions
How often should I clean my shower head?+
For optimal performance, aim for a deep cleaning every 3-6 months, especially if you have hard water. A quick wipe-down after each shower and a monthly vinegar spray can help prevent buildup between deep cleans.
Can I use bleach to clean my shower head?+
No, you should never mix bleach with vinegar as it creates dangerous chlorine gas. While bleach can kill mold and mildew, it is not effective for dissolving mineral buildup and can damage some finishes. Stick to vinegar or specialized descalers.
What if my shower head is still clogged after cleaning?+
If cleaning doesn't restore pressure, the issue might be deeper in your plumbing, such as a clogged pipe, a faulty pressure-balancing valve, or problems with your home's main water supply. In such cases, it's best to consult a licensed plumber.
Will cleaning my shower head damage its finish?+
Generally, white vinegar is safe for most shower head finishes, but avoid prolonged soaking (over 8 hours) for brass or very delicate finishes. Never use abrasive cleaners or tools that can scratch the surface.

Discussion
Loading comments…