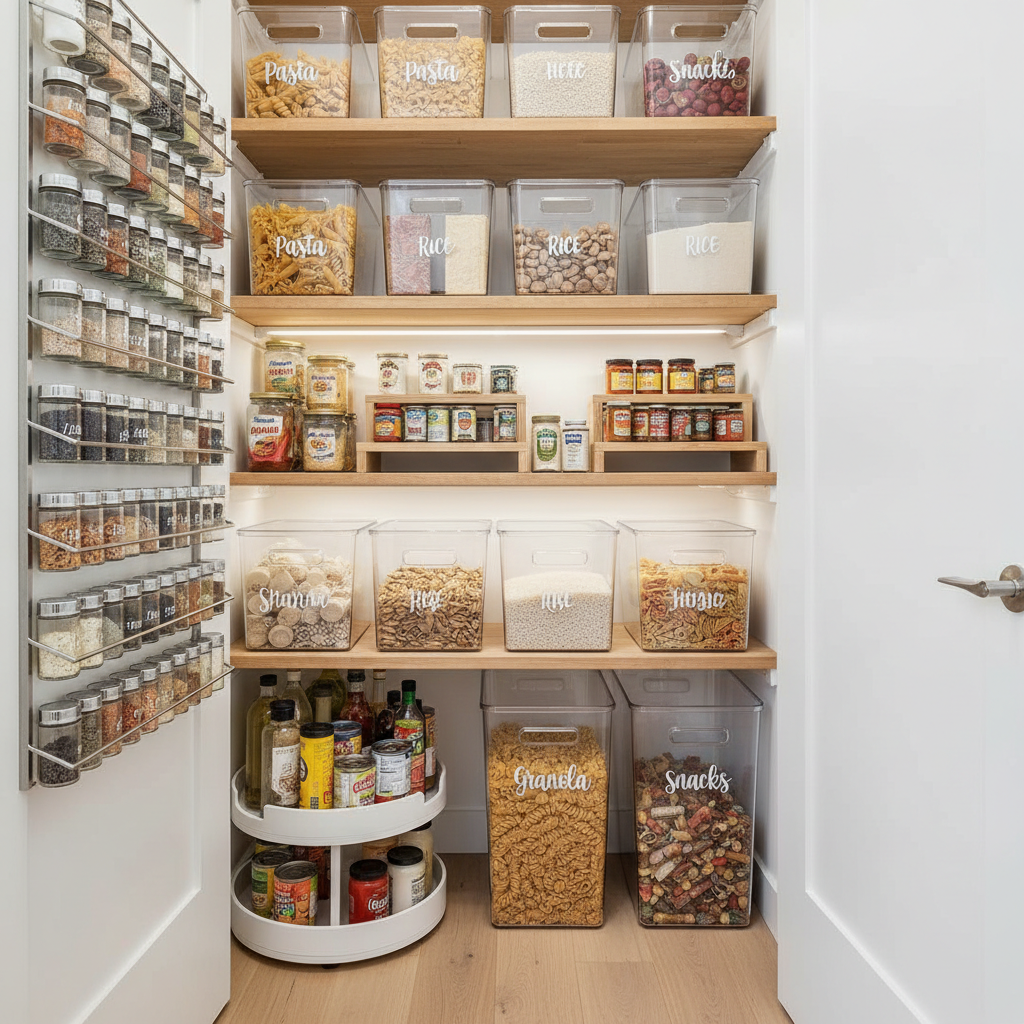
- Buying Organizers First: Never buy a single bin or riser before you’ve measured your pantry and decluttered your contents. This leads to owning expensive organizers that don’t actually fit the space or your items.
- Ignoring Door Clearance: Enthusiastically mounting a door rack only to find the door will no longer close because the rack hits the front edge of the shelves. Always measure the gap between your shelf fronts and the closed door first.
- Choosing Round Containers: While stylish, round containers are incredibly inefficient on a shelf. The air space between them adds up quickly. Always opt for square or rectangular stackable containers to maximize every square inch.
- One-Size-Fits-All Bins: Buying a 12-pack of identical bins seems efficient, but it's a mistake. You need a variety of sizes: small bins for packets, larger bins for bags of chips, and tall containers for pasta.
- Forgetting to Label: You might think you’ll remember what’s in each identical white-lidded container, but you won't. Skipping the labeling step will lead to confusion and frustration, negating much of your hard work.
General remodeling · Renovation planning
| Project category | General remodeling |
|---|---|
| Problem type | Renovation planning |
| Trade required | General contracting |
| Urgency | Planned project |
| Safety risk | Low safety risk |
| DIY suitability | Pro recommended |
| Cost category | Major investment |
| Typical timeline | Design and permitting often 2–4 months before work starts |
| Contractor type | General contractor |
Repair option
Phase the work and fix the building envelope first.
Replacement option
Full renovation with permits, design, and a general contractor.
Common causes
- Space no longer fits how the household lives
- Resale preparation
- Deferred maintenance stacking up
Relevant tools:project cost estimatorcompare quoteshome improvement material prices
Published June 20, 2026Last updated August 17, 2026
Tools & materials you'll need
Affiliate links- AmazonTiered Shelf Risers2-3 · 10-15 inches wide, depending on shelf width
- AmazonClear Airtight Food ContainersVaries · Assorted sizes for flour, sugar, pasta, etc.
- AmazonTurntable / Lazy Susan1-2 · 10-11 inch diameter for a 12-inch deep shelf
- AmazonOver-the-Door Pantry Rack1
- AmazonHollow-Door AnchorsAs needed
As an Amazon Associate FixlyGuide earns from qualifying purchases — at no extra cost to you. Prices and availability are accurate as of publication and subject to change.
'''
Quick Answer
A total small pantry organization makeover involves emptying the space, installing space-maximizing hardware like tiered shelf risers and door-mounted racks, and decanting items into clear, labeled containers. This strategy transforms a chaotic 24-inch pantry from a source of waste into a model of efficiency, making every item visible and accessible, which drastically reduces food waste and simplifies meal preparation.
The Problem
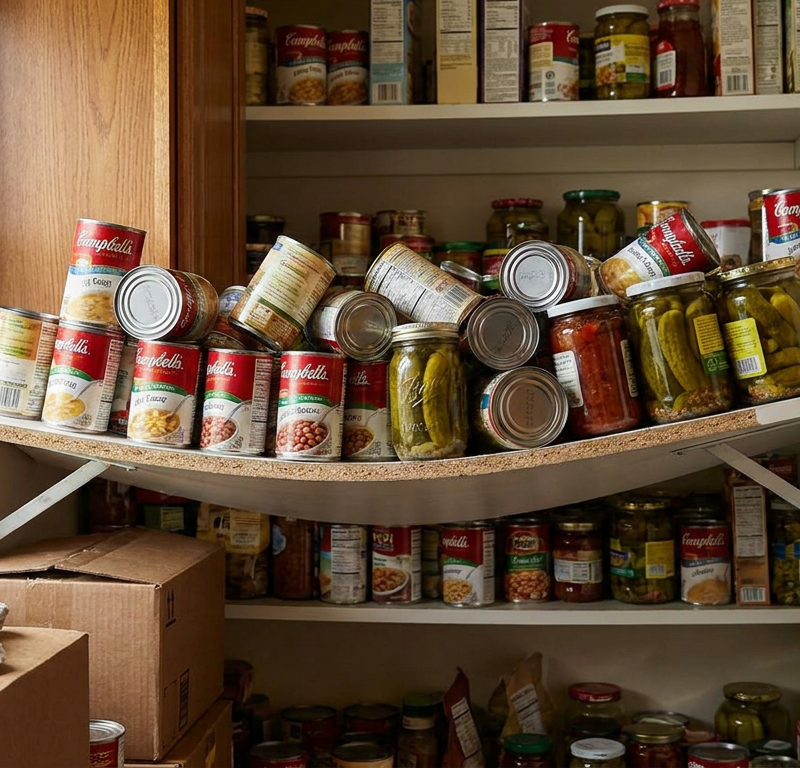
The 24-inch-wide pantry is a common feature in many homes, but it often becomes a black hole of culinary chaos. Its deep, narrow shelves make it impossible to see what you own. Items get pushed to the back, forgotten, and expire, leading to wasted food and money. Cans are stacked precariously, bags of flour spill, and half-used boxes of pasta create a jumble that makes finding any single ingredient a frustrating excavation. Every trip to the pantry is a gamble; you might find what you need, or you might discover a can of soup from three years ago. This disorganization doesn't just create stress; it actively works against your budget and meal-planning efforts. The core issue is a failure of the space to provide visibility and accessibility, turning a potential asset into a daily source of friction in your kitchen.
How It Works
A successful small pantry organization project isn't about just tidying up; it's about implementing a system that engineers efficiency into a compact space. The strategy relies on several key principles and tools that work in concert to maximize vertical space, improve visibility, and create logical zones.
First, verticality is your best friend. Standard pantry shelves, often spaced 12-16 inches apart, leave a massive amount of unused air space above shorter items like cans and spice jars. Tiered shelf risers, essentially creating stadium seating for your cans and jars, are the solution. A typical 3-tier riser is about 9 inches deep and 10-15 inches wide, allowing you to place three rows of cans on a single shelf while seeing the label of each one. You’ve instantly tripled the visible, accessible storage in that one section of the shelf.
Second, transparency eliminates guesswork. The human brain processes visual information incredibly fast. When items are decanted from their bulky, opaque original packaging into clear, airtight containers (like OXO Pops or similar acrylic/glass bins), you can assess your inventory at a glance. You see exactly how much flour, sugar, or pasta you have left without opening a single box. This visual clarity reduces cognitive load during meal prep and makes building a grocery list take seconds.
Third, accessibility prevents waste. The deepest, darkest corners of a pantry are where food goes to expire. The "Lazy Susan," or turntable, is a brilliant mechanical solution that brings the back of the shelf to the front. Placing a 10- or 11-inch turntable on a 12-inch deep shelf transforms that dead corner into prime real estate. It’s perfect for grouping oils, vinegars, and other bottled items. Nothing gets lost in the back because a simple spin reveals all.
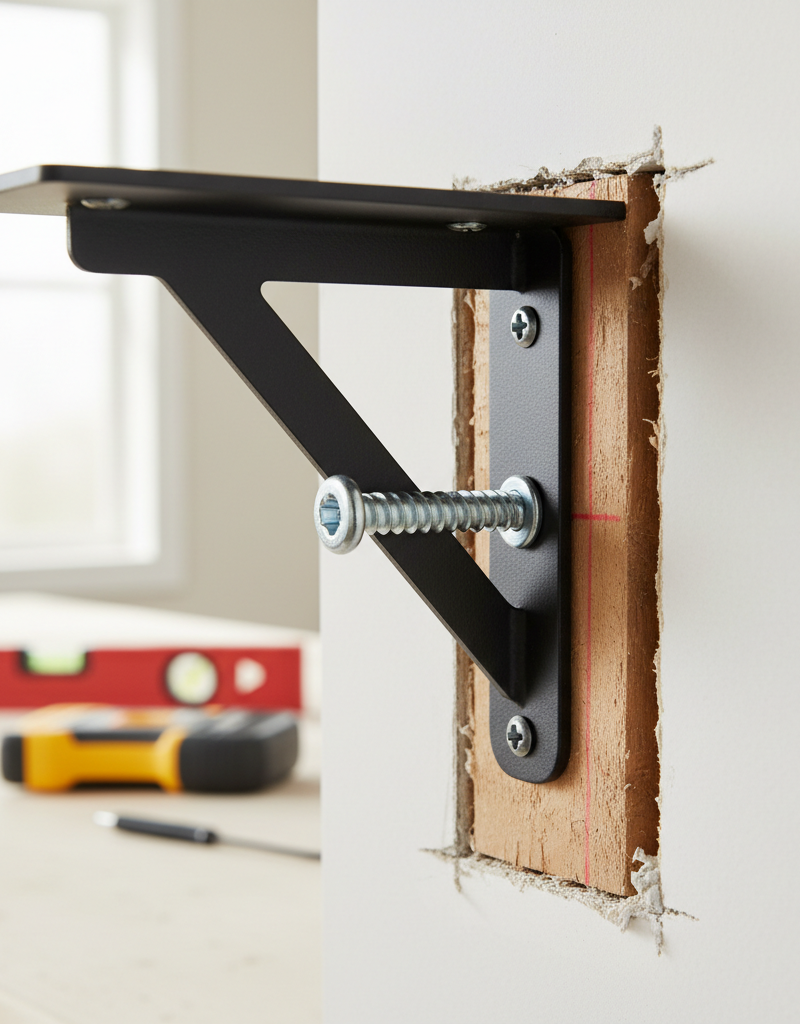
Finally, the door is a secret weapon. A standard 24-inch pantry door offers approximately 6-8 square feet of untapped storage potential. A door-mounted rack system, typically 18-20 inches wide to allow for door jamb clearance, can add 4-6 shallow shelves. These are perfect for spices, small jars, packets, and snack bars. SAFETY NOTE: It is critical to use hollow-door anchors or drill into the solid wood frame of the door to ensure the rack is secure; a loaded rack can weigh 20-30 pounds. By moving these smaller items to the door, you free up the main shelves for bulkier goods, effectively increasing the pantry's total capacity by 25-40%.
By combining these elements—risers for verticality, clear bins for visibility, turntables for accessibility, and door racks for bonus capacity—you create a cohesive system where every inch is optimized and every item has a logical, visible home.
Step-by-Step Guide
1. The Great Unloading — First, take everything out. Everything. This is non-negotiable. Set up a temporary staging area on your countertops or dining table. As you remove items, group them into broad categories: baking, pasta/grains, canned goods, snacks, oils/vinegars, breakfast items. This is also your chance to be ruthless. Check expiration dates and discard anything that’s past its prime.
2. Deep Clean and Measure — With the pantry completely empty, give it a thorough cleaning. Wipe down all shelves, walls, and the floor. Now, grab your tape measure. Measure the width, depth, and height of your pantry, as well as the height between each shelf. Write these numbers down. For a typical 24-inch pantry, your interior width might be closer to 23 inches and depth around 12-24 inches. These precise measurements are critical for the next step.
3. Plan Your Zones & Buy Your Gear — Using your measurements, create a map. A 24-inch wide by 12-inch deep shelf can comfortably fit two 10-inch wide clear bins side-by-side, or a 15-inch wide tiered riser next to a stack of smaller boxes. A deeper 24x24 inch space could use large floor bins for bulk items. Assign zones based on your categories: top shelf for backstock and lesser-used items, middle shelves for daily use (cans, grains, snacks), and the floor for heavy items (bags of flour, pet food). Now, purchase the specific organizers you need for your plan: tiered risers, clear bins, turntables, a door rack, and a label maker or labels.
4. Install the Door Rack — SAFETY NOTE: Wear safety glasses when drilling. Unbox your door-mounted rack. Hold it against the door to find the optimal placement, ensuring it won't hit the shelves when the door is closed. Use a pencil and a level to mark your pilot holes. If you have a hollow-core door, use the screw-in hollow-door anchors that often come with the rack. For solid doors, a small pilot hole is sufficient. Drill your holes and securely fasten the rack to the door with the provided screws. Tug on it firmly to ensure it’s stable.
5. Set Up Shelf Hardware — Place your tiered risers and turntables on the shelves according to your plan. The most common spot for a tiered riser is a middle shelf at eye level, perfect for soup and vegetable cans. A lazy susan works wonders on a deep shelf or in a corner to wrangle bottles of oils, vinegars, and sauces.
6. Decant Dry Goods — This is the most transformative step. Transfer your flour, sugar, rice, pasta, cereal, and other dry goods from their inefficient bags and boxes into your new clear, airtight containers. Not only does this look better and save space, but it also protects food from pests and keeps it fresh longer. Choose containers that are square or rectangular to maximize shelf space, as round containers create wasted air gaps between them.
7. Create Your Labeling System — Use a label maker or pre-printed labels to clearly identify the contents of each clear bin and container. Be specific ("All-Purpose Flour," "Quinoa," "Lentils"). It’s also wise to add the expiration date on the back or bottom of the container using a small piece of masking tape and a marker; this is easily updated when you refill.
8. Zone Your Canned Goods — Place your canned goods on the tiered shelf risers. Group them logically: all tomatoes together, all beans together, soups in one section. This "like with like" grouping, combined with the riser's visibility, means you’ll never buy a can of black beans when you already have five hiding in the back.
9. Load the Bins — Use your other clear or wire bins for bagged items that don't get decanted. Create a "Breakfast" bin for oatmeal packets and granola bars, a "Pasta Night" bin with spaghetti and jarred sauce, or a "Snacks" bin for kids. These bins act as drawers, allowing you to pull the entire category out at once to find what you need.
10. Strategically Reload the Pantry — Now, put everything back according to your zone map. Heavy items like large containers of flour or potatoes in bins go on the floor. Mid-weight, high-use items go on the easily accessible middle shelves. Lighter-weight, less-used items and backstock go on the top shelf. Small spice jars, packets, and sauces go into the new door rack. Step back and admire your work!
Common Mistakes
- Buying Organizers First: Never buy a single bin or riser before you’ve measured your pantry and decluttered your contents. This leads to owning expensive organizers that don’t actually fit the space or your items.
- Ignoring Door Clearance: Enthusiastically mounting a door rack only to find the door will no longer close because the rack hits the front edge of the shelves. Always measure the gap between your shelf fronts and the closed door first.
- Overloading Door Racks: Pantry doors, especially hollow-core ones, are not designed for immense weight. Exceeding the weight limit (usually 20-30 lbs total) with heavy cans or jars can rip the screws out, damaging the door. Use door racks for lightweight items only.
- Choosing Round Containers: While stylish, round containers are incredibly inefficient on a shelf. The air space between them adds up quickly. Always opt for square or rectangular stackable containers to maximize every square inch.
- One-Size-Fits-All Bins: Buying a 12-pack of identical bins seems efficient, but it's a mistake. You need a variety of sizes: small bins for packets, larger bins for bags of chips, and tall containers for pasta.
- Forgetting to Label: You might think you’ll remember what’s in each identical white-lidded container, but you won't. Skipping the labeling step will lead to confusion and frustration, negating much of your hard work.
Cost & Time Breakdown
This project is highly scalable, but here is a realistic breakdown for a comprehensive makeover of a 24-inch wide pantry.
| Task | DIY Cost | Pro Cost (Custom Cabinetry) | Time (DIY) |
|---|---|---|---|
| Planning, Measuring, Cleaning | $0 | $150 (Designer Consult) | 1-2 hours |
| Organizers (Bins, Risers, etc.) | $150 - $300 | N/A | 1 hour (shopping) |
| Door Rack & Hardware Installation | $40 - $80 | $200 (Handyman) | 1 hour |
| Decanting, Labeling & Reloading | $10 (Labels) | N/A | 2-3 hours |
| TOTAL | $200 - $400 | $800 - $2,500+ | 5-7 hours |
Tips & Prevention
- The One In, One Out Rule: To maintain your new system, force yourself to follow this rule. If you buy a new bag of quinoa, it doesn't go in the pantry until the old one is used up or consolidated into the primary container.
- Decant Immediately: Don't let groceries pile up on the counter. Make it a habit to decant new flour, sugar, and snacks into their designated containers as soon as you get home from the store.
- Keep a "Backstock" Bin: If you buy in bulk, dedicate one bin, likely on the top shelf or in another closet, for "backstock." This keeps your main pantry shelves clean and uncluttered with only the items you are actively using.
- Schedule a 5-Minute Tidy: Once a week, take five minutes to quickly straighten up. Put that misplaced jar back, wipe up any small spills, and consolidate half-empty boxes. This tiny investment of time prevents chaos from creeping back in.
- Use Shelf Liners: Before you load everything in, install easy-to-wipe shelf liners. They make cleaning up future spills from sticky jars or leaky bottles a simple, one-minute task instead of a major chore.
- Think Like a Retailer: Grocery stores use a "First In, First Out" (FIFO) system. When you add a new can of tomatoes to the riser, put it in the back row and slide the older cans forward. This ensures you’re always using your oldest items first.
When to Call a Professional
While organizing your pantry is a very achievable DIY project, there are scenarios where a professional’s touch is necessary. If your pantry has fundamental structural flaws, no amount of bin-shuffling will fix it. Consider calling a professional carpenter or a custom closet company if you have deep, fixed shelves (24 inches or deeper) that make access impossible. A pro can replace these with custom-built, full-extension pull-out shelves. These sliding drawers allow you to access the entire depth of the shelf effortlessly, representing the ultimate solution for deep pantries.
Additionally, if you want a truly integrated look with built-in dividers, custom-sized drawers for produce, or electrical work for appliance nooks within the pantry, you are in the realm of custom cabinetry. A professional can design a solution that is perfectly tailored to your space and needs, a job that requires specialized tools and carpentry skills far beyond a simple DIY makeover. While the cost is significantly higher, the result is a permanent, high-functioning storage space that can add real value to your home. ''', meta_title=
What should this project cost?
Enter your project details for a realistic cost range before you call anyone.
Cosmetic refreshes start near $5,000; full remodels commonly $25,000–$45,000.
- Regional adjustment
- National average
- Labor share (typical)
- ~$8,550
- Quotes to collect
- 3 written estimates
Educational estimate based on national averages — not a binding quote. Always confirm with written local estimates.
Recommended for DIYers & woodworkers
Sponsored
The Top 20 Tools for Workshops of Any Budget
No stationary machines or power tools required — plus 3 fundamental tools that can't be bought at any price.
Get the free guide
Ted's Woodworking — The #1 Woodworking Resource
Detailed instructions, dimensioned drawings, materials & cutting lists, and 3D schematics for every skill level.
See the plansSponsored: links above are affiliate links. FixlyGuide may earn a commission on qualifying purchases — at no extra cost to you.
Frequently asked questions
What if my pantry shelves are not adjustable?+
If your shelves are fixed, maximizing the vertical space between them is even more critical. Use stackable bins that fill the height, and consider under-shelf baskets that hang from the shelf above to create an extra tier of storage for small items like packets or snack bars.
How do I store bulk items like a 25-lb bag of flour?+
For very large bulk items, decant a manageable amount (e.g., 5 lbs) into a countertop-accessible container in your pantry. Store the main bag in its original packaging inside a large, food-safe, lidded bucket or bin on the floor of the pantry or in a nearby garage or basement to protect it from pests.
Are wire baskets or clear plastic bins better?+
Both are great, but for different purposes. Clear plastic bins are best for loose items like flour, sugar, and pasta because they are airtight and you can see the quantity. Wire baskets are excellent for produce like onions and potatoes that need air circulation, or for pre-packaged goods like snack bags and condiment jars.
My pantry is just a deep cabinet, not a closet. Do these tips still work?+
Absolutely. For a deep cabinet pantry, pull-out solutions are your best friend. Use long, narrow bins that act as drawers, allowing you to slide them out to access items in the back. A turntable (Lazy Susan) is also essential in a deep cabinet to avoid losing things in the back corners.
Discussion
Loading comments…