Tools & materials you'll need
Affiliate links- AmazonOverhead Storage Rack Kit
As an Amazon Associate FixlyGuide earns from qualifying purchases — at no extra cost to you. Prices and availability are accurate as of publication and subject to change.
Quick Answer
The most common reason garage overhead storage fails is improper anchoring. When lag bolts are secured only into drywall instead of penetrating the solid wood ceiling joists, they can't support the load. Over time, the weight, combined with vibrations, will pull the fasteners straight out of the ceiling, causing the entire unit to fall.
The Problem
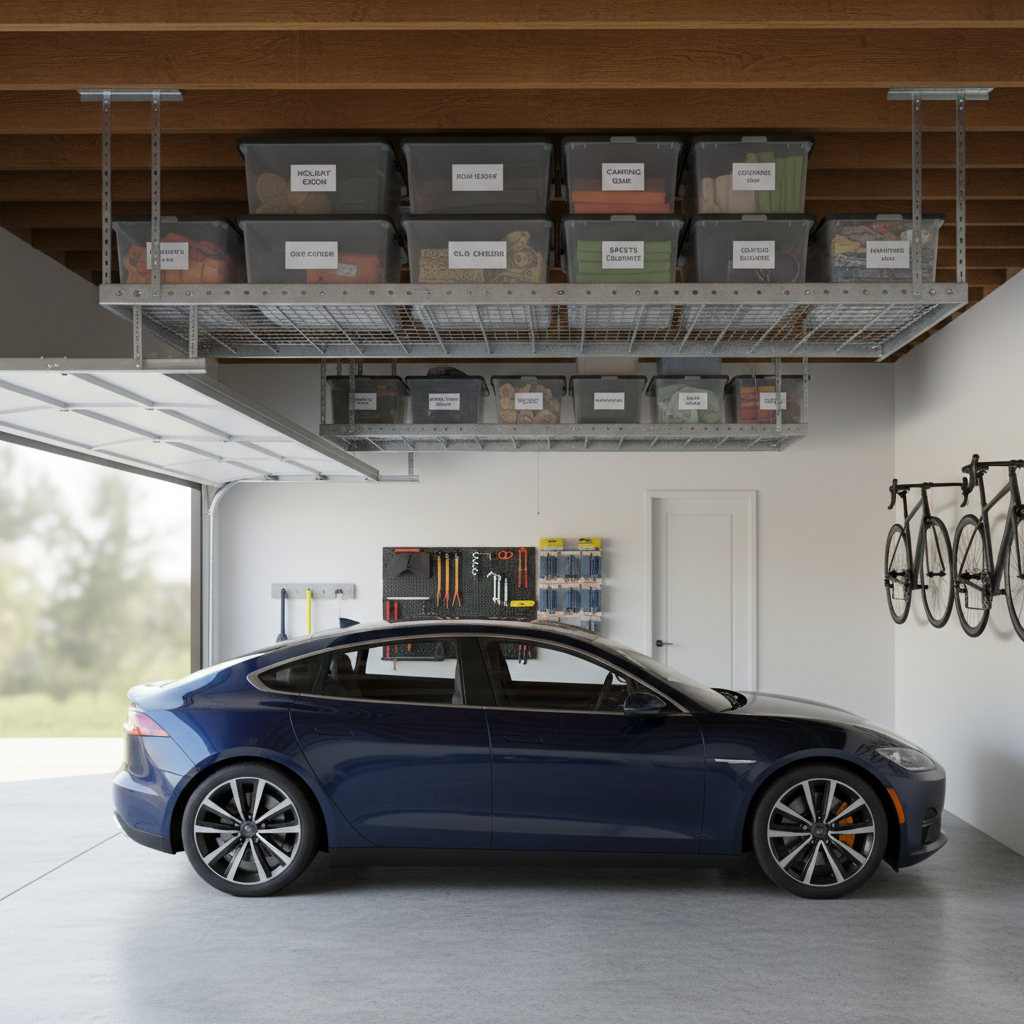
You walk into your garage and see it: a twisted mess of metal shelving, shattered plastic bins, and years of stored belongings strewn across the floor and, worse, the roof of your car. That sturdy overhead storage rack, rated to hold 600 pounds, has catastrophically failed. The culprit isn’t a faulty shelf or a manufacturing defect; it’s a few lag screws that now have tell-tale puffs of white gypsum powder on their threads. They pulled right out of the ceiling.
This nightmare scenario is the direct result of the single most critical mistake in overhead storage installation: missing the ceiling joists. The drywall that makes up your garage ceiling has virtually zero structural holding power. It's essentially compressed chalk held between two sheets of paper. Relying on it to support hundreds of pounds of weight is like trying to hang a grand piano from a nail in a corkboard. The connection is doomed to fail; it's only a matter of when.
How It Works
To understand why this failure happens, you need to understand the structure of your garage ceiling. It’s not a single, solid surface. It consists of a grid of structural wooden members, called joists or trusses, covered by sheets of drywall. These joists are the skeleton of the ceiling, designed to carry the building's load.
-
Joists vs. Drywall: Your garage ceiling joists are typically 2x6 or larger pieces of lumber, spaced either 16 inches or 24 inches apart "on center" (from the center of one joist to the center of the next). All the weight of the ceiling, and anything attached to it, must be transferred to these joists. Drywall, usually 1/2-inch thick, is just a cosmetic covering. A lag screw driven only into drywall has a pull-out strength of maybe 10-20 pounds in a perfect scenario. A 4-inch, 3/8" lag screw driven 2.5 inches into a solid wood joist has a pull-out strength of over 800 pounds.
-
The Physics of Failure: An overhead storage rack is subjected to a constant downward force called a "static load." A 600-pound rated rack filled with 500 pounds of stuff exerts 500 pounds of force, distributed among its mounting points. If a rack has four ceiling brackets, each with two lag screws, each screw is responsible for over 60 pounds of static load. This is far beyond what drywall can handle. The threads of the screw simply crush the soft gypsum core, and with the slightest vibration from the garage door opener or a slammed car door, the screw loosens and pulls out.
-
Shear vs. Tensile Strength: When a lag screw is properly installed into a joist, it benefits from the wood's incredible shear and tensile strength. The downward force (tensile) is resisted by the friction of the threads against a huge mass of wood fibers. Any sideways force (shear) is resisted by the thickness of the screw itself against the rigid wood. In drywall, there are no fibers and no rigidity, so both forces work to simply create a wider, crumbling hole until the fastener is free.
Finding the exact center of these joists isn't just a suggestion; it's the only way to ensure a safe and permanent installation. This is the entire foundation upon which a secure overhead system is built.
Step-by-Step Fix
Let's walk through the process of installing a garage overhead storage unit correctly, with an obsessive focus on finding those all-important joists. For this guide, we assume a standard kit-based rack with four mounting points.
SAFETY NOTE: You will be working on a ladder, drilling overhead, and lifting a heavy, awkward object. Wear safety glasses at all times. Use a sturdy, properly-sized ladder and always maintain three points of contact. This is a two-person job.
-
Step 1: Plan and Map Your Airspace — Before you even open the box, decide where the rack will go. Use a tape measure to check for clearance. Will it interfere with the path of your garage door when open? Will it block light fixtures? Can you still open your car's trunk or hatch? Use a pencil to mark the four corners of your desired rack location on the ceiling.
-
Step 2: Unpack and Inventory Your Kit — Open the box and lay out all the parts. Compare what you have to the parts list in the instruction manual. Identify the ceiling brackets, vertical posts, the shelf grid pieces, and all the various nuts, bolts, and lag screws. Ensure the provided lag screws are substantial, at least 5/16-inch or 3/8-inch in diameter and 3-4 inches long.
-
Step 3: Hunt for Joists — This is the most crucial step. First, determine the direction the joists run. They will almost always run perpendicular to the main garage door. A deep-scan stud finder is your primary tool. Starting in one corner of your planned area, slide the stud finder across the ceiling until it indicates the edge of a joist. Mark it. Continue until it indicates the other edge. Mark that too. The center is your target. Repeat this process to find the centers of all joists within your planned rack footprint.
-
Step 4: Confirm Joist Locations — Do not trust the stud finder alone. Confirm your marks using two analog methods. First, use a strong neodymium magnet to locate the drywall screws that hold the ceiling to the joists; they will be in a straight line along the joist's center. Second, use a small 3/32" drill bit to drill a tiny, exploratory hole at your marked center. If you feel the bit bite into wood after passing through the drywall, you've found it. If it punches through with no resistance, you've missed. Move an inch to the left or right and try again until you hit solid wood. This confirmation is non-negotiable.
-
Step 5: Mount the First Ceiling Bracket — Now that you have confirmed joist locations, align your first ceiling bracket. It must be mounted perpendicular to the joist direction to distribute the load across multiple joists. Mark the hole locations on the ceiling, ensuring they are on your joist center lines. Use a drill bit that is slightly smaller than the lag screw's shaft (not the threads) to drill pilot holes through the drywall and 2.5-3 inches deep into the joists. A common pairing is a 1/4" bit for a 3/8" lag screw. Secure the bracket using a socket wrench, not an impact driver, which can easily strip the wood. Stop when the bracket is snug; do not overtighten.
-
Step 6: Measure and Mount Remaining Brackets — Refer to your rack’s instructions for the precise distance between brackets (e.g., 48 inches). Measure this distance from your first installed bracket and mark the location for the next one. Use a chalk line or laser level to ensure they are perfectly parallel. Repeat the process from Step 4 and 5: find the joists, confirm with a test hole, drill pilot holes, and secure the bracket with lag screws into the wood.
-
Step 7: Attach the Vertical Posts — With all ceiling brackets securely mounted to the joists, you can now attach the adjustable vertical support posts. Attach them loosely for now, using the provided bolts, washers, and nuts. This allows for easier adjustment later.
-
Step 8: Assemble the Lower Platform — Working on the garage floor, assemble the main wire grid or solid platform of the storage rack according to the manufacturer’s instructions. This usually involves bolting several pieces together to form the rectangular base.
-
Step 9: Lift and Secure the Platform (2-Person Job) — With a helper, lift the assembled platform up to the dangling vertical posts. This is the most awkward part of the installation. One person can support one side while the other inserts the bolts to connect the platform to the vertical posts at the desired height. Do not try this alone. Once one side is connected, move to the other. Do not let go until at least one bolt is secured on each of the four corners.
-
Step 10: Final Tightening and Safety Check — Go back and tighten all the bolts connecting the vertical posts to the ceiling brackets and the platform. Use a socket wrench and a box wrench to ensure every nut and bolt is tight. Check that the platform is level. Finally, perform a safety check. Grab the rack and give it a firm shake. There should be no wobble or play at the ceiling mounts. Before loading it with your valuable or heavy items, place 50-100 lbs of known weight (like sandbags or exercise plates) on the rack and leave it overnight as a confidence test.
Common Causes of Failure
- Missing Joists Entirely: The number one cause. The installer uses drywall anchors or simply drives screws into the void between joists.
- Hitting Only the Edge of a Joist: Not finding the center of the joist can cause the wood to split and the lag screw to lose its grip under load.
- Using Inadequate Fasteners: Some kits come with undersized hardware. Using screws that are too short (not enough penetration into wood) or too thin (prone to shearing) is a major risk.
- Overloading the Rack: Every rack has a clear weight limit (e.g., 600 lbs). This limit assumes even distribution. Placing the entire load in one small area can overstress specific components.
- Incorrect Assembly: Leaving bolts loose on the platform or vertical posts can create instability, leading to swaying and dynamic loads that the ceiling mounts aren't designed to handle.
Common Mistakes
- Trusting a Stud Finder Blindly: Inexpensive electronic stud finders can give false positives. Always confirm with a magnet or a small pilot hole.
- Skipping Pilot Holes: Driving a thick lag screw directly into a joist without a pilot hole can crack the wood, severely compromising its holding power.
- Using a Drill/Driver for Lag Screws: It is very easy to either undertighten or overtighten and strip the wood with a powerful impact driver. A manual socket wrench gives you the control and feel to get it just right.
- Uneven Load Distribution: Piling all the heavy stuff like engine blocks or paper records in the middle while leaving the edges empty.
- Ignoring Garage Floor Slope: Garage floors are sloped. Measuring height from the floor can result in a rack that isn't level with the world. Measure down from the ceiling or use a level.
- Working Alone: This job presents a high risk of injury from falls or dropping heavy components. It requires a second set of hands.
Cost & Time Breakdown
| Task | DIY Cost | Pro Cost (Handyman) | Time |
|---|---|---|---|
| Purchase Overhead Rack Kit | $150 - $400 | (Client provides) | 1 hour |
| Installation & Assembly | $30 (better screws) | $200 - $450 | 3-5 hours |
| Tools & Safety Gear | $50 - $150 (if none) | Included in labor | - |
| Total | $180 - $600 | $200 - $450 (Labor) | 4-6 hours |
Tips & Prevention
- Map, Then Drill: Use a pencil and a chalk line. Draw a complete map of your joist locations and rack footprint on the ceiling before you drill a single lag screw hole.
- Buy Better Hardware: If the lag screws included in your kit seem flimsy (less than 5/16" diameter), spend $10 at the hardware store for beefier 3/8" x 4" galvanized lag screws and washers. It's the cheapest insurance you can buy.
- Embrace the Socket Wrench: Use a manual socket wrench for the final tightening of the lag screws. You will feel the wood bite and compress, and you'll know when it's perfectly snug without stripping.
- Weight Distribution is Key: Store the heaviest items near the edges and corners, closer to the vertical supports. Place lighter, bulkier items in the center.
- Annual Inspection: Once a year, get on a ladder and inspect the ceiling mounts. Look for any signs of sagging, bowing, or gaps appearing between the bracket and the ceiling. Check that all nuts and bolts on the frame are still tight.
- Use Quality Storage Bins: Avoid flimsy cardboard boxes. Use sealed, locking plastic totes (like HDX or Commander brands) that stack securely and protect your items from moisture and pests.
When to Call a Professional
While this is a manageable DIY project for a careful homeowner, you should call a professional handyman or garage organization specialist if you encounter any of the following:
- Unusual Ceiling Structure: If you have an open web-style truss system, a cathedral ceiling, or steel joists, the standard installation method will not work. A pro will know how to safely bridge the trusses or use the correct fasteners.
- Extreme Ceiling Height: If your garage ceiling is over 12 feet high, the risk of working on tall ladders increases dramatically. Professionals have the proper scaffolding, ladders, and safety equipment for this.
- Lack of Confidence or Tools: If you are not 100% confident in your ability to locate joists, or if you don't have the right tools (sturdy ladder, socket set, deep-scan stud finder), the cost of hiring a pro is significantly less than the cost of your car's roof and windshield.
- Physical Limitations: The rack platform is heavy and unwieldy. If you and a helper cannot safely lift 50-70 pounds overhead, this job is not for you.
Get the print-ready PDF of this guide
A clean, ad-free, printable version you can keep on your phone or pin to the workshop wall. We'll also send occasional weekly tips matched to your home situation.
- Print-optimized layout
- Tools, materials & every step included
- Unsubscribe anytime
Recommended for DIYers & woodworkers
Sponsored
The Top 20 Tools for Workshops of Any Budget
No stationary machines or power tools required — plus 3 fundamental tools that can't be bought at any price.
Get the free guide
Ted's Woodworking — The #1 Woodworking Resource
Detailed instructions, dimensioned drawings, materials & cutting lists, and 3D schematics for every skill level.
See the plansSponsored: links above are affiliate links. FixlyGuide may earn a commission on qualifying purchases — at no extra cost to you.
Frequently asked questions
How do I know which way my garage ceiling joists run?+
In almost all cases, the joists run perpendicular to the large garage door opening. The shorter dimension of your garage is the direction the joists span. You can confirm this with a stud finder.
Can I install overhead storage on a sloped or vaulted ceiling?+
Yes, but it requires a specialized approach. You cannot use the standard brackets that come in most kits. You'll need to either install a level wood blocking perpendicular to the slope, securely fastened to the joists, or use special swivel-head brackets designed for angled installations. This is often a job best left for a professional.
What if the joists don't line up with where I want to put the rack?+
You must mount the rack to the joists, not the other way around. If the joist spacing (e.g., 24 inches) doesn't match the rack's fixed mounting width (e.g., 48 inches), the best solution is to first mount a piece of 2x6 lumber, called a ledger board, to the ceiling, screwed securely into the joists. Then you can mount your rack brackets to that solid wood ledger board at any position you need.
How much weight can garage overhead storage *really* hold safely?+
You should never exceed the manufacturer's stated weight limit. A 600-pound limit assumes even distribution. For safety, it's a good practice to stay below 80% of the maximum rated load. So, for a 600-pound rack, aim for a maximum of around 480-500 pounds.


Discussion
Loading comments…