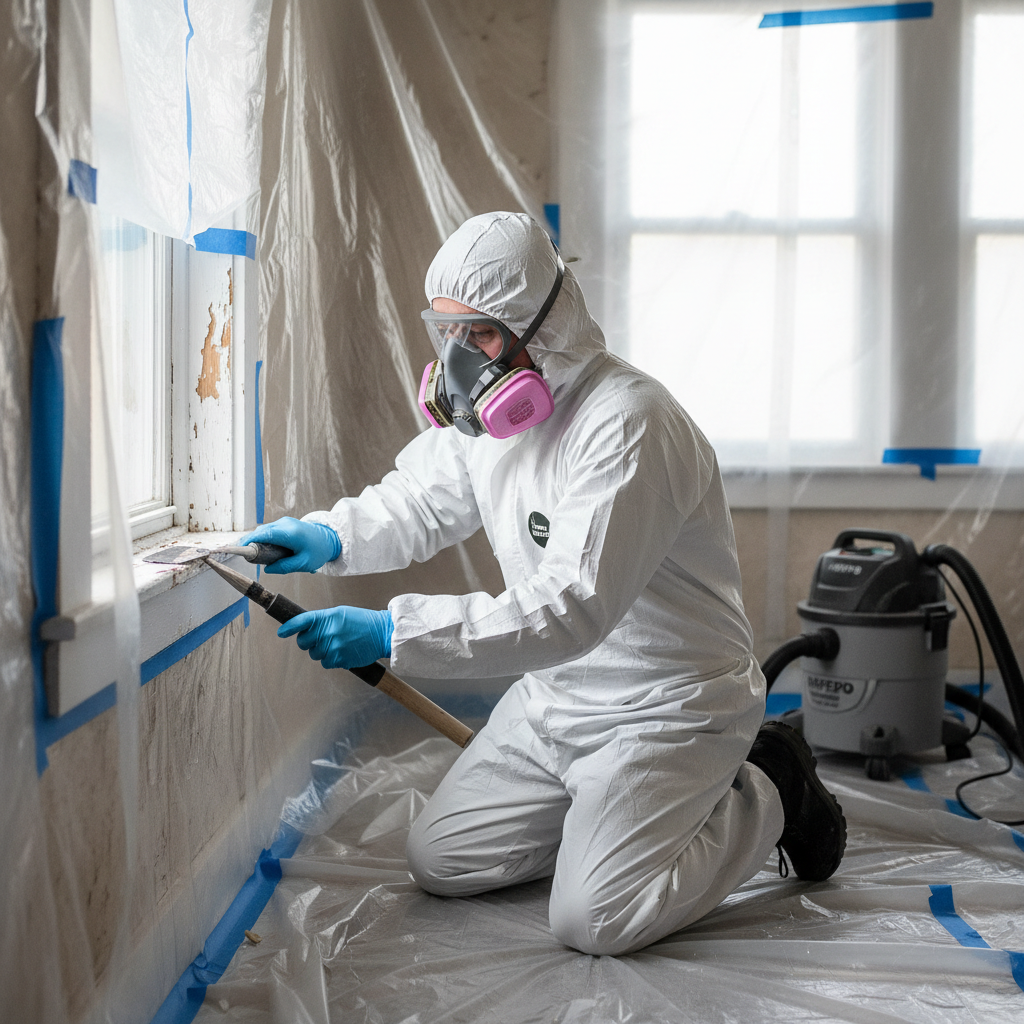
- Demolition or renovation activity without proper containment: This is the big one. Bust through walls, rip out trim, sand old doors—if you're sloppy, you're making a lead dust disaster.
- Chipping, flaking, or deteriorated paint: Especially on exterior surfaces, but friction points like windows get hit too. That old peeling paint can shed lead dust and chips that kids might pick up.
- Friction surfaces: Window sashes rubbing against frames, doors swinging open and shut, old stair treads. That movement makes lead dust over time, even if you aren't tearing the place apart.
- Using improper tools for removal: Dry scraping or sanding with a non-HEPA vacuum is just asking for trouble. It kicks the lead into the air and makes it easy to inhale.
Published July 28, 2026Last updated August 17, 2026
Tools & materials you'll need
Affiliate links- AmazonSpray bottle
As an Amazon Associate FixlyGuide earns from qualifying purchases — at no extra cost to you. Prices and availability are accurate as of publication and subject to change.
Quick Answer
Look, if your house went up before 1978, assume you've got lead paint. Seriously. Assume it. The real danger isn't always the paint just sitting there, nice and quiet. It's when you start scraping, sanding, drilling, or gutting stuff that you kick up that nasty lead dust. That's the stuff that gets you. Invisible. Mean. And you’ve got to protect yourself and your family from it.
The Problem
I've seen it a hundred times. Homeowner gets fired up about a reno project—maybe freshening up some old trim, maybe stripping a vintage built-in—and next thing you know, they're sanding like crazy and making a dust storm. They don't realize they're spreading a silent poison through the house. Lead exposure is no joke. We're talking real health problems, especially for kids: developmental delays, learning troubles, even nervous system damage. For adults, it can mean high blood pressure, joint pain, and memory issues. And once that lead dust gets into your carpet, your vents, or on your kid's toys, good luck. It's a bear to clean up.
I remember one job out in Northwood, a gorgeous old Victorian. The owners wanted to strip some old window sills. They didn't test a thing, just went after it with a belt sander. By the time I got called in for a completely unrelated plumbing issue, their toddler was already showing signs of lead exposure. Dust was everywhere. We had to bring in a specialized remediation crew—cost 'em a fortune, way more than a simple test and a few protective steps would've been. I pulled a water heater in Frisco last month that had exactly this kind of mess around the trim. Same story. Same headache. A little caution would've saved a pile of grief.
How It Works
So how'd we end up with lead paint all over the place? Back in the day, manufacturers loved the stuff. It made paint tougher, helped it dry faster, and gave it a rich color that lasted. Lead-based paints were common on both interior and exterior surfaces right up until 1978, when they were finally banned from residential use in the U.S. Before that, you'd find it on just about everything: walls, trim, doors, windows, even radiators.
The problem is, lead doesn't break down. It doesn't disappear over time. It just sits there, baked into that paint layer. When the paint starts to fail—flaking, chipping, chalking—or when you disturb it on purpose, tiny lead particles become airborne. Microscopic stuff. You can't see it. But you can breathe it in, or it can settle on counters and floors, get on your hands, and then get swallowed, especially by little kids who put everything in their mouths. Even a tiny amount—think a sugar packet's worth spread over an entire house—can turn into a dangerous lead hazard. That's why containment and cleanup matter so much; you're not just tidying up, you're trapping and removing microscopic poison.
Step-by-Step Fix
Alright, you've got an older house and you're doing a reno. First thing, before you even think about swinging a hammer or firing up a sander, figure out if lead paint's in the mix. Here's how I handle it.
-
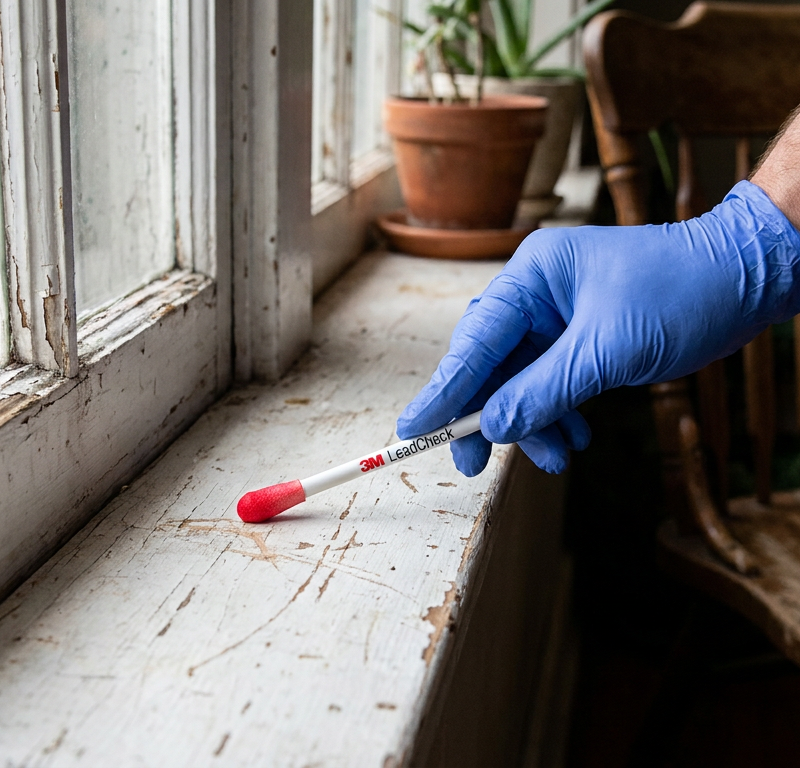
Get a Test Kit — Don't guess, test. You can grab these at just about any hardware store, usually for about $10-$20. They're simple enough: swab the surface, and if it changes color (usually red or pink), you've got lead. I like the 3M LeadCheck swabs; they've treated me right.
- Pro Tip: Test multiple layers if you can. Sometimes lead paint is buried under newer, lead-free coats.
- Safety First: Wear gloves when you do it. It's a small sample, sure, but why roll the dice?
-
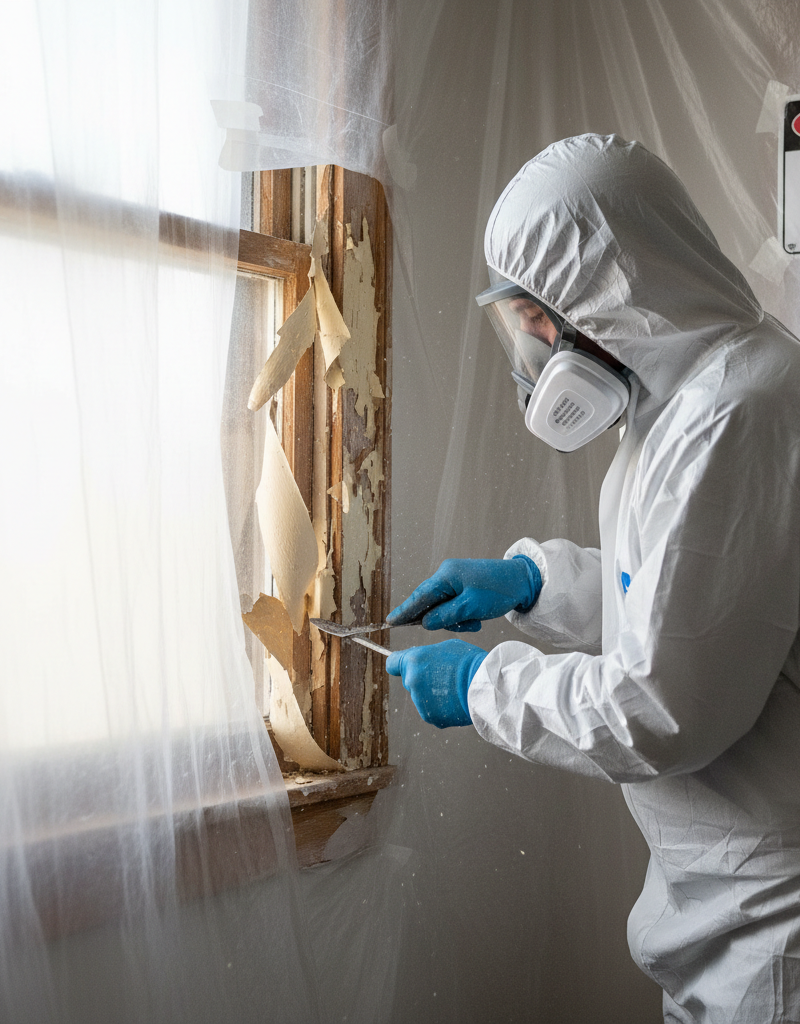
Visual Inspection — Look for the tell-tale signs. Lead paint often fails in a pretty specific way. It chips off in thick, brittle flakes, sometimes with an 'alligatoring' or 'crazing' pattern. You might also see multiple thick layers built up over decades. Old windows and doors are prime suspects, along with baseboards and doorframes.
- Look out for: Friction points like window sills and door jambs that've been painted over and over.
-
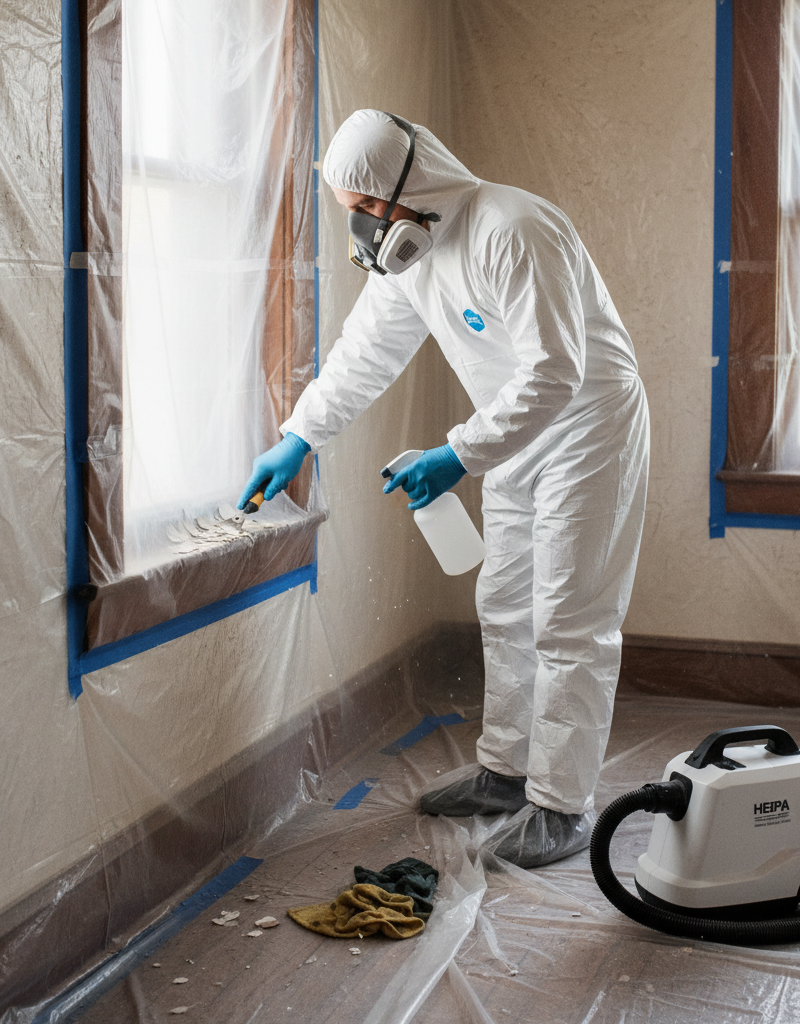
Contain the Work Area — Seal it up like Fort Knox. Before you touch anything if you've confirmed lead, or even if you just suspect it, isolate the area. Close off the room with plastic sheeting (6 mil thick is good) taped tight to every opening—doors, windows, HVAC vents. Use painter's tape or duct tape. Double layer the plastic on the floor inside the work zone.
- Tools: 6 mil plastic sheeting, painter's tape or duct tape.
- Goal: Keep dust from migrating into the rest of the house.
-
Protect Yourself — Gear up, seriously. This isn't a shorts-and-T-shirt job. You need a Tyvek suit, disposable booties, gloves, and a NIOSH-approved P100 respirator. Not a dust mask—a P100 respirator. That's what protects your lungs from those microscopic lead particles.
- Safety First: Make sure the respirator fits snug. Do a seal check. If you can smell anything, it ain't sealed right.
-
Remove Components Safely (If Possible) — Take it outside. If you're working on something small and removable, like a door or a window sash, move it to a designated outdoor work area. That spot needs containment too, with plastic sheeting laid out to catch debris. It's a lot easier to control dust out there.
- Remember: Kids and pets get curious fast. Keep them way out of the zone.
-
Use Wet Methods — Keep that dust down. Instead of dry sanding or scraping, which sends dust flying, wet the surface with a spray bottle of water. That helps bind the lead particles and keeps them from going airborne. Scrape carefully with a wet scraper. If you absolutely must sand, use a HEPA-filtered sander, but wet sanding is usually the safer play.
- Avoid: Heat guns that go above 1,100°F (593°C) since they can vaporize lead. Low-heat guns might be acceptable, but check the specs first.
-
HEPA Vacuum Only — Your shop-vac just won't cut it. A regular shop vacuum or household vacuum will just blow lead dust right back into the air. You need a vacuum with a HEPA filter, certified to capture 99.97% of particles 0.3 microns or larger. Rent one if you don't own it; trust me, it's worth it.
- After work: Vacuum the area thoroughly, then wet wipe every surface. Keep doing the wet wipe until your cloth comes up clean.
-
Dispose of Waste Properly — Treat it like hazardous waste. All the plastic sheeting, disposable suits, gloves, and paint chips need to go into heavy-duty plastic bags (6 mil minimum), sealed up tight, and labeled as lead waste. Check with your local waste management facility; they usually have specific instructions for hazardous household waste disposal.
- Don't: Toss it in your regular trash. That's a big no-no environmentally and legally.
Common Causes
Really, the cause of lead paint is simple: outdated manufacturing. But the causes of lead exposure are usually the same old mess:
- Demolition or renovation activity without proper containment: This is the big one. Bust through walls, rip out trim, sand old doors—if you're sloppy, you're making a lead dust disaster.
- Chipping, flaking, or deteriorated paint: Especially on exterior surfaces, but friction points like windows get hit too. That old peeling paint can shed lead dust and chips that kids might pick up.
- Friction surfaces: Window sashes rubbing against frames, doors swinging open and shut, old stair treads. That movement makes lead dust over time, even if you aren't tearing the place apart.
- Lead dust tracked in from outside: If you live near an old building or industrial site, or if exterior lead paint is falling apart, you can track lead from outside into the house. This happened to a buddy of mine whose neighbor was dry sanding their home's exterior lead paint—it drifted right over.
- Using improper tools for removal: Dry scraping or sanding with a non-HEPA vacuum is just asking for trouble. It kicks the lead into the air and makes it easy to inhale.
Common Mistakes
I've seen homeowners make just about every mistake in the book with lead paint. Here's the short list of the big ones:
Related Articles
Keep troubleshooting with these hand-picked guides from FixlyGuide:
- 7 Inspection Red Flags That Secretly Signal a $20,000 Bill — Don't let your dream home become a money pit. Many buyers and even some inspectors overlook subtle home inspection red flags that lead to f…
- The Single Board Secret to Attracting Bluebirds: A Quick DIY House — Discover how to construct an ideal bluebird house using just one cedar board, providing a safe and inviting home for these cherished backya…
- 7 Hidden Equity Drains Costing You Thousands Annually — Your home is an asset, but silent problems like minor leaks, poor insulation, and deferred maintenance can drain its value. Discover the se…
- The 12 Checks That Prevent 80% of Costly Home Repairs — Don't wait for a disaster. Our comprehensive monthly home maintenance checklist reveals the surprising, simple tasks that catch small issue…
- The 3 Hidden Ways Your — Uncover the surprising habits and hidden household issues that are silently increasing your homeownership costs and learn how to fix them.
- The Dryer Fire Hazard Hiding in Plain Sight (and How to Eliminate It in 30 Minutes) — Lint buildup in your dryer vent is a silent fire hazard. Learn how to clean it thoroughly and prevent a potential disaster with simple tool…
What should this project cost?
Enter your project details for a realistic cost range before you call anyone.
Cost depends heavily on which system turns out to be the source.
- Regional adjustment
- National average
- Labor share (typical)
- ~$1,620
- Quotes to collect
- 3 written estimates
Educational estimate based on national averages — not a binding quote. Always confirm with written local estimates.
Get the print-ready PDF of this guide
A clean, ad-free, printable version you can keep on your phone or pin to the workshop wall. Free with a FixlyGuide account.
- Print-optimized layout
- Tools, materials & every step included
- Saved to your account
This article was independently written by FixlyGuide based on the source topic.
Frequently asked questions
How do I know if my house has lead paint?+
The only way to definitively know is to test for it. You can use an EPA-recognized lead test kit from a hardware store, or hire a certified lead inspector. If your home was built before 1978, it's safest to assume lead paint is present.
What parts of my home are most likely to have lead paint?+
Lead paint is commonly found on windows and doors (especially sills and frames), trim, baseboards, radiators, and exterior surfaces like siding and porches. Any surface that was painted repeatedly over the years is a good candidate.
Is intact lead paint dangerous?+
Intact, undisturbed lead paint that's in good condition usually isn't a direct hazard. The danger arises when the paint chips, flakes, or is disturbed by activities like sanding, scraping, or demolition, which releases lead dust or fumes.
What's the safest way to remove lead paint myself?+
I generally advise against full DIY lead paint removal due to the risks. Encapsulation (painting over it with a special sealant) or enclosing the surface are safer DIY options than removal. If you must remove small areas, use wet scraping or chemical strippers, never dry sand, and follow strict containment protocols.
What kind of respirator do I need for working with lead paint?+
You need a NIOSH-approved P100 particulate respirator. A simple dust mask isn't enough to filter out the microscopic lead particles. Ensure it fits snugly and creates a good seal around your face.
Can I remove lead paint with a heat gun?+
Using a heat gun to remove lead paint can be extremely dangerous. High temperatures (above 1,100°F or 593°C) can vaporize lead, creating highly toxic fumes. If you must use heat, use a low-temperature model and ensure excellent ventilation and respiratory protection.
How do I clean up lead dust after a project?+
Do not use a regular vacuum cleaner. You need a HEPA-filtered vacuum. After vacuuming, wet wipe all surfaces repeatedly with a disposable cloth and a general all-purpose cleaner. Dispose of all cleaning materials as hazardous waste.
When should I call a professional for lead paint issues?+
If you're dealing with a large area of lead paint, extensive deterioration, or if you're not confident in your ability to follow strict safety protocols, call a lead-certified professional. Any work involving more than minor, localized paint disturbance should ideally be handled by experts.
Discussion
Loading comments…