- Improper Waterproofing: Simply putting up cement board is not enough. Every seam, screw hole, and corner must be meticulously waterproofed with membrane and tape before tiling. A single pinhole leak can cause thousands in water damage.
- Ignoring a 2-Inch Drain: Bathtubs use a 1.5-inch drainpipe, but plumbing codes mandate a 2-inch drain for showers to handle the water volume and prevent clogs. Failing to upgrade this is a common and critical error.
- Not Replacing the Shower Valve: It's tempting to tile around the old mixing valve. However, these valves have a finite lifespan. Replacing the in-wall valve during the renovation is cheap insurance against a very expensive future repair.
- Forgetting a Permit: Most municipalities require a permit for a tub-to-shower conversion because it involves plumbing and sometimes structural changes. Skipping this can lead to fines and problems when you sell your home.
- Poor Glass Measurement: Custom glass is expensive and non-refundable. Measurements must be taken after the tile is installed and must account for out-of-plumb walls. A professional measurement is highly recommended.
General remodeling · Renovation planning
| Project category | General remodeling |
|---|---|
| Problem type | Renovation planning |
| Trade required | General contracting |
| Urgency | Planned project |
| Safety risk | Low safety risk |
| DIY suitability | Pro recommended |
| Cost category | Major investment |
| Typical timeline | Design and permitting often 2–4 months before work starts |
| Contractor type | General contractor |
Repair option
Phase the work and fix the building envelope first.
Replacement option
Full renovation with permits, design, and a general contractor.
Common causes
- Space no longer fits how the household lives
- Resale preparation
- Deferred maintenance stacking up
Relevant tools:project cost estimatorcompare quoteshome improvement material prices
Published June 20, 2026Last updated August 17, 2026
Tools & materials you'll need
Affiliate linksNo materials required.
As an Amazon Associate FixlyGuide earns from qualifying purchases — at no extra cost to you. Prices and availability are accurate as of publication and subject to change.
Quick Answer
A tub-to-walk-in-shower conversion can range from a $2,500 basic kit installation to over $15,000 for a custom, curbless design with high-end finishes. The project involves significant plumbing and potentially structural floor modifications, especially for a curbless entry, and typically requires a building permit.
The Problem
That builder-grade bathtub-and-shower-combo is a bathroom staple, but it's far from a perfect solution for many homeowners. For one, it presents a significant accessibility challenge. Climbing over a 15- to 20-inch tub wall is a daily hazard for anyone with limited mobility, children, and the elderly, leading to a high risk of slips and falls. A standard tub is also surprisingly inefficient for those who primarily shower. It takes up a large footprint—typically around 60 inches by 30 inches—that could be used for a more spacious and luxurious shower. Aesthetically, an old, stained, or dated tub can drag down the entire look and feel of your bathroom, making it feel cramped and out of style. Furthermore, the tub-surround combination, often made of acrylic or fiberglass, is prone to yellowing, cracking, and the persistent growth of mold and mildew in grout and caulk lines, creating a constant cleaning chore and potential health concerns. A tub-to-walk-in-shower conversion addresses these issues head-on, offering improved safety, more efficient use of space, and a major aesthetic upgrade that can significantly increase your home's value.
How It Works
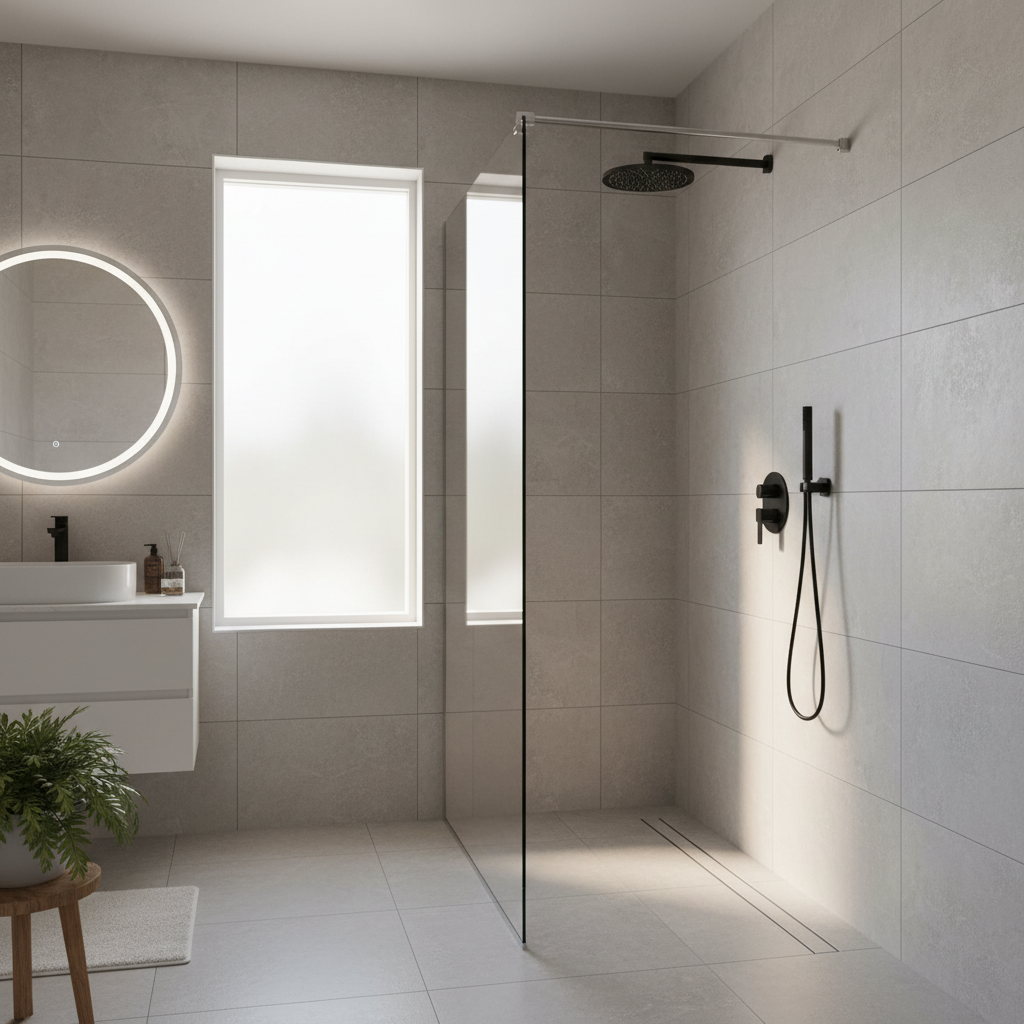
The process of converting a tub to a walk-in shower is a multi-layered construction project that goes far beyond simply swapping one fixture for another. At its core, the project involves removing the old bathtub, which often includes a significant amount of demolition of the surrounding walls (tile, backer board) and sometimes the floor. Once the tub is out, the real work begins. The most critical part is reconfiguring the plumbing. The existing drain, which was set for a tub, must be lowered and repositioned for a shower pan. For a standard walk-in shower with a curb, this involves cutting into the subfloor to relocate the drain trap (the P-trap). For a curbless, zero-entry shower, this is far more intensive, requiring the plumber and carpenter to recess the entire shower floor area by lowering the floor joists or "sistering" them to create a gentle, continuous slope to the drain. This ensures water flows correctly without needing a curb to contain it.
Waterproofing is the next non-negotiable stage. This involves installing a shower pan liner (a thick, flexible membrane) or applying a liquid waterproofing membrane over the entire shower floor and up the walls at least 3-6 inches. A new drain assembly is clamped to the liner, creating a watertight seal. The walls are then prepped with cement backer board or a foam board system like Schluter-Kerdi, with every seam sealed and waterproofed. Only after this multi-step waterproofing process is complete can the finish materials, like tile, be installed. The final steps include installing the shower fixtures (valve, head), a glass door or panels, and sealing every joint and corner with silicone caulk. This entire system works together to create a fully waterproof, durable, and functional shower space where your old tub used to be.
Step-by-Step
1. Plan & Permit – Before you lift a single hammer, finalize your design. Decide on a curb or curbless entry, the type of glass, tile, and fixtures. Obtain a building permit from your local municipality; this is almost always required for projects involving plumbing and structural changes. This ensures the work is inspected and up to code.
2. Demolition – Safety First: Shut off the water supply to the bathroom at the main shutoff valve. Wear safety glasses, gloves, and a dust mask. Begin by removing the old faucet handles, spout, and showerhead. Then, start demolishing the walls around the tub, cutting away drywall or prying off tile until the tub's flange is exposed. Use a pry bar and hammer to carefully pry the old tub away from the wall studs.
3. Disconnect Plumbing – Once the tub is accessible, use a pipe wrench or channel locks to disconnect the drain and overflow. This may require cutting into the ceiling or floor below for access. With the plumbing disconnected, you and a helper can lift and remove the old, heavy bathtub from the space.
4. Assess & Reframe – With the alcove empty, inspect the studs and subfloor for any water damage or rot. Replace any compromised wood. If you're planning a curbless shower, this is the stage where you or a professional will need to modify the floor joists to lower the subfloor in the shower area to create the necessary slope.
5. Reroute Plumbing – The most crucial plumbing step is relocating the drain. The existing tub drain is typically 1.5 inches in diameter, while a shower requires a 2-inch drain line by code. You'll need to cut out the old P-trap and install a new 2-inch line, positioning it precisely where your new shower drain will be. The hot and cold water supply lines may also need to be adjusted for the new shower valve.
6. Install Shower Pan & Waterproofing – Install the pre-sloped shower pan or create a custom mortar bed that slopes ¼ inch per foot towards the drain. Install the waterproof membrane (pan liner or liquid membrane), ensuring it runs up the walls and is properly sealed to the new 2-inch drain assembly. This is the most critical step to prevent future leaks.
7. Install Wall Backer & Tile – Install cement backer board on the walls, taping and sealing the seams with thin-set mortar. Now, you can begin tiling the shower floor and walls. Use a high-quality, polymer-modified thin-set mortar and plan your layout carefully to avoid small, awkward cuts.
8. Grout & Seal – After the tile has set for at least 24-48 hours, apply grout to the tile joints. After the grout has cured (another 24-72 hours), apply a grout sealer to protect it from stains and moisture. Seal all corners and seams where tile meets the pan or walls with 100% silicone caulk.
9. Install Fixtures & Glass – Install the new shower valve trim, showerhead, and any other accessories like a handheld sprayer. Finally, professionally install the glass enclosure. While some kits are DIY-friendly, the weight and precision required for heavy glass panels often make this a job for a pro to ensure a perfect, watertight fit. Turn the water back on and test everything thoroughly.
Common Mistakes
- Incorrect Slope: A shower floor must slope ¼ inch per vertical foot towards the drain. Getting this wrong leads to pooling water, mildew, and leaks. A curbless shower requires this slope to be perfectly integrated with the main bathroom floor.
- Improper Waterproofing: Simply putting up cement board is not enough. Every seam, screw hole, and corner must be meticulously waterproofed with membrane and tape before tiling. A single pinhole leak can cause thousands in water damage.
- Ignoring a 2-Inch Drain: Bathtubs use a 1.5-inch drainpipe, but plumbing codes mandate a 2-inch drain for showers to handle the water volume and prevent clogs. Failing to upgrade this is a common and critical error.
- Not Replacing the Shower Valve: It's tempting to tile around the old mixing valve. However, these valves have a finite lifespan. Replacing the in-wall valve during the renovation is cheap insurance against a very expensive future repair.
- Forgetting a Permit: Most municipalities require a permit for a tub-to-shower conversion because it involves plumbing and sometimes structural changes. Skipping this can lead to fines and problems when you sell your home.
- Poor Glass Measurement: Custom glass is expensive and non-refundable. Measurements must be taken after the tile is installed and must account for out-of-plumb walls. A professional measurement is highly recommended.
Cost & Time Breakdown
| Task | DIY Cost | Pro Cost | Time |
|---|---|---|---|
| Demolition & Debris Removal | $150 - $300 (tools, dumpster bag) | $500 - $1,000 | 1-2 Days |
| Plumbing (Drain & Valve) | $200 - $400 (materials) | $1,500 - $3,000 | 1 Day |
| Structural Floor Work (for Curbless) | $300 - $700 (lumber, hardware) | $2,000 - $4,000 | 1-2 Days |
| Waterproofing & Tiling | $800 - $2,000 (materials) | $3,000 - $6,000 | 4-6 Days |
| Glass Enclosure | $700 - $1,500 (kit) | $2,000 - $5,000 (custom) | 1 Day |
| TOTALS | $2,150 - $4,900+ | $9,000 - $19,000+ | 7-12 Days |
Tips & Prevention
- Choose the Right Glass: 3/8-inch or 1/2-inch thick tempered glass is the standard for quality and safety. Applying a protective coating like EnduroShield or ShowerGuard from the factory makes cleaning dramatically easier.
- Think About Niches: Plan for built-in shower niches to hold shampoo and soap. Ensure they are slightly sloped to drain water. This is far better than a flimsy shower caddy.
- Ventilation is Key: A high-quality, powerful bathroom exhaust fan is non-negotiable. It should be rated for the size of your bathroom (in CFM, or cubic feet per minute) and vented directly outside, not into the attic. This is your number one defense against mold.
- Plan for Lighting: The shower area can be dark. Consider installing a wet-rated recessed LED light directly above the shower for better visibility and a more spa-like feel. This requires a GFCI-protected circuit.
- Anchor Grab Bars Properly: If you're adding grab bars for safety, they must be anchored directly into wall studs or solid wood blocking, not just the tile and backer board. Their weight rating is only as good as their anchoring.
- Use Epoxy Grout: For the ultimate in stain and mildew resistance, consider using epoxy grout on the shower floor. It's more difficult to work with than cement-based grout but is virtually waterproof and never needs sealing.
When to Call a Professional
While a motivated DIYer can tackle a basic conversion using a pre-fabricated shower pan and walls, a tub-to-walk-in-shower conversion crosses into pro territory for most homeowners. You should hire a licensed general contractor and plumber if your project involves any of the following: moving load-bearing walls, sistering or cutting floor joists for a curbless design, significant rerouting of drain or supply lines, or if you find extensive water damage or rot after demolition. A licensed plumber is essential to ensure the 2-inch drain is installed correctly and that the shower valve is soldered without leaks. A professional tile setter is invaluable for creating the perfect, leak-proof mortar bed and for working with expensive or complex tiles. Finally, installing heavy, custom-frameless glass doors is a specialized task. An improper installation can lead to leaks or even shattering glass. Given the high potential for catastrophic water damage from a poorly executed job, the investment in a professional who guarantees their work is often the wisest financial decision in the long run.
What should this project cost?
Enter your project details for a realistic cost range before you call anyone.
Mid-range remodels commonly $12,000–$22,000; small repairs often under $600.
- Regional adjustment
- National average
- Labor share (typical)
- ~$5,603
- Quotes to collect
- 3 written estimates
Educational estimate based on national averages — not a binding quote. Always confirm with written local estimates.
Recommended for DIYers & woodworkers
Sponsored
The Top 20 Tools for Workshops of Any Budget
No stationary machines or power tools required — plus 3 fundamental tools that can't be bought at any price.
Get the free guide
Ted's Woodworking — The #1 Woodworking Resource
Detailed instructions, dimensioned drawings, materials & cutting lists, and 3D schematics for every skill level.
See the plansSponsored: links above are affiliate links. FixlyGuide may earn a commission on qualifying purchases — at no extra cost to you.
Frequently asked questions
Do I need a permit for a tub-to-shower conversion?+
Yes, in most jurisdictions you will need a building permit. The project involves altering plumbing drains and supply lines, which requires inspection to ensure it meets local building and plumbing codes for safety and function.
What is the biggest difference between a curb and curbless shower?+
A curbed shower has a small threshold (curb) to step over that contains the water. A curbless shower has no threshold and the bathroom floor flows seamlessly into the shower. While aesthetically pleasing and great for accessibility, a curbless design is much more complex and expensive as it requires recessing the shower floor structure to create the necessary slope for drainage.
How long does a tub-to-shower conversion take?+
A typical professional conversion takes 7-12 working days. This accounts for demolition, plumbing, inspection, tiling (and drying times for mortar and grout), and glass installation. DIY projects can take several weeks or even months depending on your skill level and available time.
Is a walk-in shower a good investment?+
Generally, yes. A tub-to-walk-in-shower conversion is a highly desirable upgrade that can increase home value, particularly if it's a well-designed, quality installation. It improves accessibility and modernizes the bathroom, which are major selling points for many buyers.

Discussion
Loading comments…