- Skimping on Prep Work: Rushing the cleaning and taping stages will lead to sloppy paint lines and, more critically, peel-and-stick tiles that fail to adhere properly over time. Dirt and grease are the enemies of adhesion.
- Ignoring the Shut-Off Valves: Forgetting to turn off the water before removing the old faucet is a classic mistake that leads to an instant, high-pressure flood. Always test that the water is fully off before disconnecting any lines.
- Not Using a Level: Eyeballing the placement of your mirror, towel bars, or light fixture will almost certainly result in a crooked installation that cheapens the final look. A 24-inch level is your best friend.
- Starting Tile in a Corner: Beginning your peel-and-stick flooring in a corner guarantees that any imperfections in the squareness of your room will be magnified, leaving you with a crooked final row. Always start from the center.
- Over-tightening Plumbing Connections: Cranking down on the supply line nuts with all your strength can crack the connections or damage the rubber seals, causing leaks. The rule is hand-tight, then a final quarter-turn with a wrench.
Bathroom · Bathroom remodel
| Project category | Bathroom |
|---|---|
| Problem type | Bathroom remodel |
| Trade required | General contracting |
| Urgency | Planned project |
| Safety risk | Low safety risk |
| DIY suitability | Pro recommended |
| Cost category | High cost |
| Typical timeline | Typically 2–4 weeks on site |
| Contractor type | Bathroom remodeler or licensed plumber |
Repair option
Refresh fixtures, grout, and vanity without moving plumbing.
Replacement option
Gut remodel when the pan leaks or the layout changes.
Common causes
- Dated finishes
- Failing tile or pan
- Accessibility needs
Relevant tools:project cost estimatorcompare quotes
Published June 20, 2026Last updated August 17, 2026
Tools & materials you'll need
Affiliate links- AmazonBEHR PREMIUM PLUS Interior Eggshell Enamel (1 Gallon)1 · Choose a light, moisture-resistant color.
- AmazonMoen Wellton Single-Handle Bathroom Faucet (Matte Black)1 · Ensure you get a 4-inch centerset design for a standard vanity.
- AmazonFramed Vanity Mirror (e.g., 24x36 inch)1 · Choose a finish that matches your new faucet and hardware.
- AmazonFloorPops "Comet" Peel & Stick Floor Tiles4-5 boxes · Calculate your square footage and add 10% for cuts and mistakes.
- AmazonCabinet Pulls/Knobs2-4 · Count your cabinet doors/drawers to get the right quantity.
- AmazonTowel Ring and Toilet Paper Holder Set1 · Match the finish to your faucet.
As an Amazon Associate FixlyGuide earns from qualifying purchases — at no extra cost to you. Prices and availability are accurate as of publication and subject to change.
Quick Answer
A small bathroom can be completely transformed for under $500 by focusing on high-impact DIY projects. Strategic upgrades like a fresh coat of paint, a new faucet and mirror, updated hardware, and peel-and-stick floor tiles provide the most visual bang for your buck, creating a modern look without touching the plumbing or major fixtures.
The Problem
That small bathroom—be it a powder room or a cramped full bath—is one of the hardest-working spaces in your home. It's also one of the easiest to neglect. Over time, it becomes a collection of dated finishes, builder-grade mediocrity, and worn-out surfaces. The honey-oak vanity, the sheet mirror with rusting edges, the tarnished chrome faucet, and the cracked or discolored vinyl flooring all conspire to make the space feel drab, dark, and much smaller than it actually is. You know it needs an update, but the thought of a full-scale remodel, with its five-figure price tag and weeks of dust and disruption, is overwhelming. The problem isn’t just aesthetic; a dated bathroom can be a source of daily friction, a room you use out of necessity rather than enjoyment. You need a solution that delivers a massive visual and functional return on a minimal investment of time and money.
How It Works
The sub-$500 bathroom remodel works by leveraging the principle of "visual return on investment." Instead of gutting the space, you target the most prominent and impactful surfaces and fixtures. This strategy delivers the feeling of a complete overhaul without the associated cost and complexity. It’s a cosmetic facelift, not a full reconstruction. We are intentionally avoiding any changes that require moving plumbing, altering electrical wiring significantly, or replacing the core fixtures like the toilet or vanity cabinet.
Here's the breakdown of why this specific combination of upgrades is so effective:
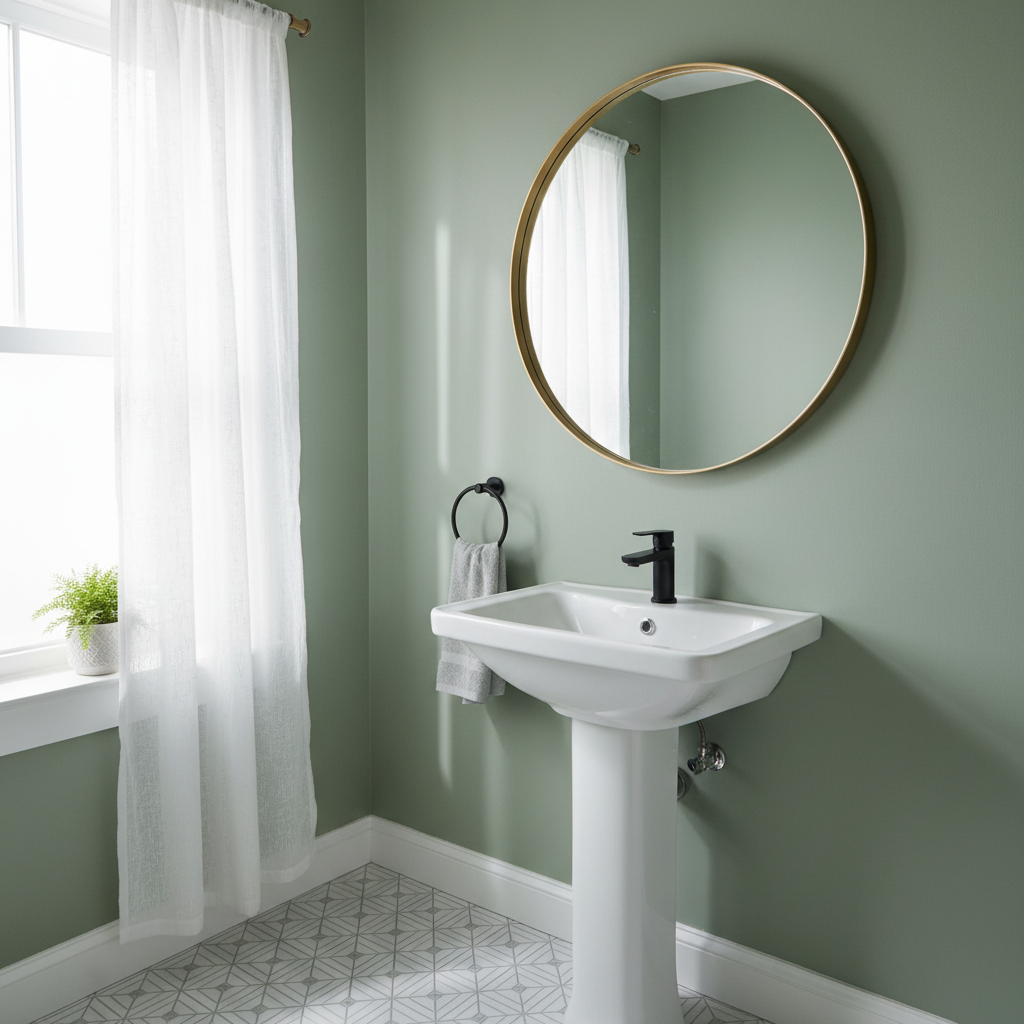
- Paint: This is the undisputed champion of budget transformations. A gallon of quality paint can radically alter the mood and perceived size of a room. For a small bathroom, choosing a light, reflective color (like a soft white, pale gray, or light sage green) instantly makes the space feel brighter and more open. Using a paint with a satin or eggshell finish provides crucial moisture and mildew resistance, a non-negotiable for a humid bathroom environment.
- Faucet & Mirror: These are the functional and aesthetic centerpieces of the vanity area. Swapping a dated, builder-grade faucet for a modern design in a finish like matte black, brushed gold, or polished nickel is a surprisingly simple plumbing task that adds a touch of luxury. Paired with a new, framed mirror, it elevates the entire wall. Ditching the giant, frameless sheet mirror for a round or rectangular one with a defined border creates a focal point, making it feel like a deliberate design choice rather than a default installation.
- Hardware Refresh: This is the secret weapon of the budget remodel. It’s about the small details that collectively make a huge difference. Replacing old cabinet knobs or pulls, the toilet paper holder, and towel bars with new items in a finish that matches your new faucet creates a cohesive, high-end look. It ties the entire room together.
- Peel-and-Stick Floor Tile: Modern peel-and-stick tile is nothing like the cheap-looking vinyl squares of the past. Today’s options are thick, durable, highly water-resistant, and available in a vast array of sophisticated patterns and colors. For a small bathroom, this is a perfect DIY solution. It can be installed directly over most existing clean, flat flooring (like old sheet vinyl or linoleum) in just a few hours, completely erasing one of the largest and most-dated surfaces in the room.
Together, these five upgrades target the key visual elements—walls, floor, and vanity—to deliver a complete and dramatic transformation that looks and feels far more expensive than its sub-$500 price tag.
Step-by-Step
SAFETY FIRST: Before starting, turn off the water supply to the faucet using the shut-off valves under the sink. For any electrical work like replacing a light fixture, shut off the corresponding breaker at your main electrical panel and verify the power is off with a voltage tester.
-
Prep and Paint — Clear everything out of the bathroom: towels, toiletries, shower curtain, and floor mats. Use painter's tape to carefully mask off the vanity top, toilet, floor trim, and any fixtures you aren't removing. Lay down a drop cloth. If walls are grimy, wash them with a TSP (trisodium phosphate) substitute. Patch any holes with spackling compound, let it dry, then sand smooth. Now, you're ready to paint. Apply one to two coats of a quality bathroom-specific paint (one with primer included is a great time-saver).
-
Remove the Old Mirror and Faucet — While the paint dries, tackle the vanity. To remove the old mirror, which is often held on by strong adhesive, you may need a pry bar and some patience. Safety Note: Wear safety glasses and gloves, as the mirror can break. For the faucet, use an adjustable wrench and basin wrench to loosen the nuts securing it from underneath the sink. Disconnect the water supply lines and lift the old faucet out.
-
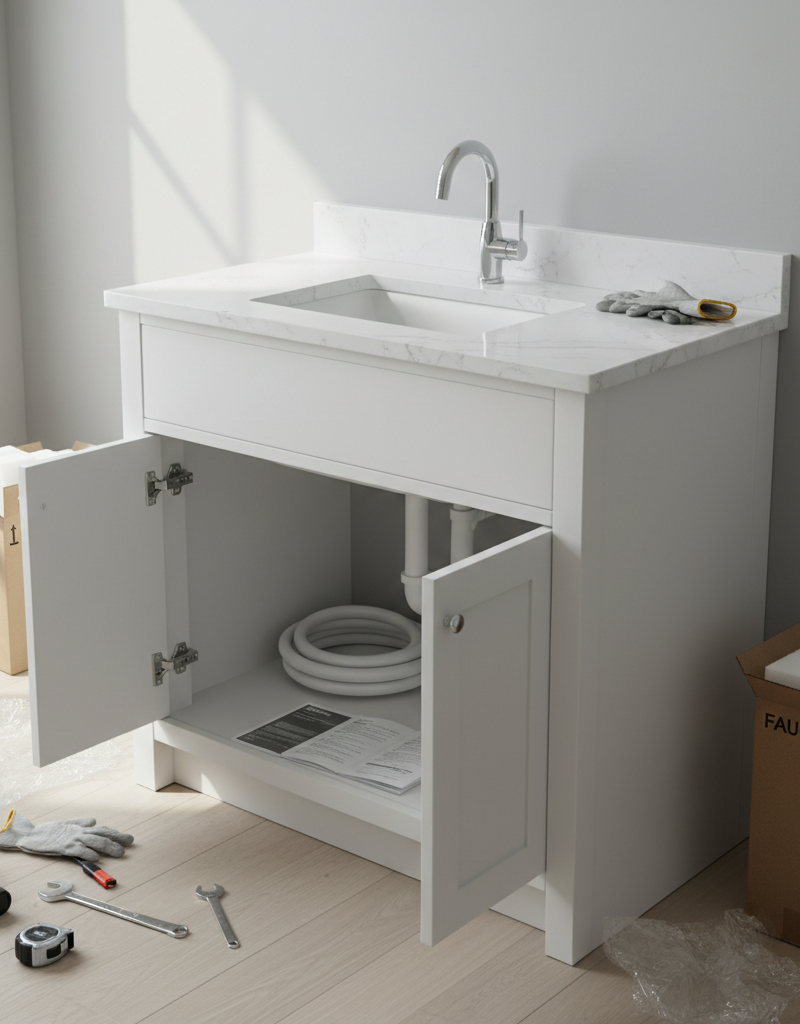
Install the New Faucet — Clean the sink surface thoroughly. Most new faucets can be installed from the top. Feed the faucet and its gaskets into the holes in the sink or countertop. From below, hand-tighten the mounting nuts, then give them a final quarter-turn with a wrench. Connect the hot and cold water supply lines—red for hot (left) and blue for cold (right). Do not overtighten these connections.
-
Hang the New Mirror — It's time to install your new focal point. Whether it’s a vanity light or mirror, measure carefully to find the center point over your vanity. Use a level to ensure it will be straight. Mark your anchor points. If you are not drilling into a wall stud, you must use appropriate drywall anchors rated for the weight of your mirror. Install the anchors, then the screws or mounting hardware, leaving them out just enough to hang the mirror.
-
Swap the Hardware — This is a quick and satisfying step. Get your screwdriver and simply unscrew the old cabinet knobs/pulls, toilet paper holder, and any towel bars. Install the new hardware in its place. This simple action immediately creates a sense of cohesion with your new faucet.
-
Thoroughly Clean the Floor — This is the most critical step for a successful peel-and-stick tile installation. The floor must be immaculate. Sweep, then vacuum meticulously to remove all dust and debris. Then, mop the floor with a strong degreasing cleaner to remove any residue, grime, or oils. Let it dry completely—wait at least an hour.
-
Plan Your Tile Layout — Do not start tiling from a corner! Find the center of your room by measuring and snapping chalk lines. Do a "dry run" by laying out the tiles without removing the backing to see how they will look and where you'll need to make cuts. The goal is to avoid having tiny, awkward slivers of tile along a prominent wall.
-
Lay the Peel-and-Stick Tile — Start at your center point and work your way out towards the walls. Peel the backing off your first tile, carefully align it with your chalk lines, and press it down firmly, starting from the center and moving outwards to push out any air bubbles. Use a J-roller or a rolling pin to ensure strong adhesion. For cuts around the toilet or vanity, create a template with paper or cardboard, trace it onto the tile, and cut with a sharp utility knife.
Common Mistakes
- Skimping on Prep Work: Rushing the cleaning and taping stages will lead to sloppy paint lines and, more critically, peel-and-stick tiles that fail to adhere properly over time. Dirt and grease are the enemies of adhesion.
- Ignoring the Shut-Off Valves: Forgetting to turn off the water before removing the old faucet is a classic mistake that leads to an instant, high-pressure flood. Always test that the water is fully off before disconnecting any lines.
- Wrong Paint Finish: Using a flat or matte paint in a bathroom is a recipe for disaster. These porous finishes will absorb moisture, leading to mildew growth and water streaks. Always use a satin, semi-gloss, or specially formulated "kitchen and bath" paint.
- Not Using a Level: Eyeballing the placement of your mirror, towel bars, or light fixture will almost certainly result in a crooked installation that cheapens the final look. A 24-inch level is your best friend.
- Starting Tile in a Corner: Beginning your peel-and-stick flooring in a corner guarantees that any imperfections in the squareness of your room will be magnified, leaving you with a crooked final row. Always start from the center.
- Over-tightening Plumbing Connections: Cranking down on the supply line nuts with all your strength can crack the connections or damage the rubber seals, causing leaks. The rule is hand-tight, then a final quarter-turn with a wrench.
Cost & Time Breakdown
| Task | DIY Cost | Pro Cost | Time (DIY) |
|---|---|---|---|
| Painting (Walls & Trim) | $70 - $100 | $300 - $500 | 4-6 hours |
| Faucet Replacement | $80 - $150 | $200 - $350 | 1-2 hours |
| Mirror & Light Fixture | $100 - $200 | $250 - $450 | 1-2 hours |
| Hardware (Pulls, TP Holder, etc.) | $40 - $75 | $150 - $250 | 1 hour |
| Peel-and-Stick Flooring (40 sq ft) | $50 - $120 | $250 - $400 | 3-4 hours |
| TOTALS | $340 - $545 | $1,150 - $1,950 | 10-15 hours (A Weekend) |
Tips & Prevention
- Buy a Coordinated "Family" of Products: When choosing your faucet, hardware, and light fixture, try to buy from the same brand and product line. This ensures the matte black or brushed gold finish is a perfect match across all items.
- Save and Label Old Hardware: Keep the old faucet, mirror, and hardware for a few weeks. If anything goes wrong with the new installation, you have a temporary backup. Label the parts in a ziplock bag.
- Use 100% Silicone Caulk: After installing the floor tile, apply a thin bead of clear or paintable 100% silicone caulk around the perimeter of the room and the base of the toilet. This creates a waterproof seal, preventing any water from seeping under the tiles.
- Ventilate, Ventilate, Ventilate: After your remodel, make it a habit to run the bathroom exhaust fan during every shower and for 20-30 minutes afterward. This is the single best way to prevent the moisture that leads to peeling paint, mildew, and warping.
- Keep Extra Tiles: Always buy about 10% more flooring than your square footage requires. Keep the extra tiles stored flat. If a tile gets damaged in the future, you'll have a perfect match for a quick repair.
- Measure Twice, Buy Once: Before you buy anything, take detailed measurements of your bathroom, vanity width, distance between faucet holes ("widespread" vs. "centerset"), and the dimensions of your current mirror and light fixture. This prevents return trips to the store.
When to Call a Professional
This DIY project is designed to be cosmetic. You should immediately stop and call a professional if you encounter any of the following issues. If you discover soft spots in the subfloor when you're prepping for the peel-and-stick tile, this is a sign of a deeper water leak and potential rot that must be addressed by a contractor. If the plumbing shut-off valves under the sink are rusted, won’t turn, or start leaking when you try to close them, call a plumber. Attempting to force them can cause them to break, leading to a major leak. Similarly, if the wiring for your light fixture appears frayed, brittle, scorched, or is old knob-and-tube wiring, do not touch it; call a licensed electrician. Finally, if you discover any signs of mold (aside from minor surface mildew), it’s best to consult a mold remediation specialist to ensure it’s dealt with safely and effectively before you cover it up with new paint and flooring.
What should this project cost?
Enter your project details for a realistic cost range before you call anyone.
Mid-range remodels commonly $12,000–$22,000; small repairs often under $600.
- Regional adjustment
- National average
- Labor share (typical)
- ~$5,603
- Quotes to collect
- 3 written estimates
Educational estimate based on national averages — not a binding quote. Always confirm with written local estimates.
Get the print-ready PDF of this guide
A clean, ad-free, printable version you can keep on your phone or pin to the workshop wall. Free with a FixlyGuide account.
- Print-optimized layout
- Tools, materials & every step included
- Saved to your account
Recommended for DIYers & woodworkers
Sponsored
The Top 20 Tools for Workshops of Any Budget
No stationary machines or power tools required — plus 3 fundamental tools that can't be bought at any price.
Get the free guide
Ted's Woodworking — The #1 Woodworking Resource
Detailed instructions, dimensioned drawings, materials & cutting lists, and 3D schematics for every skill level.
See the plansSponsored: links above are affiliate links. FixlyGuide may earn a commission on qualifying purchases — at no extra cost to you.
Frequently asked questions
Can I really use peel-and-stick tile in a bathroom?+
Absolutely. Modern, high-quality peel-and-stick vinyl tiles are designed to be highly water-resistant and durable. The key to success is meticulous floor prep—the surface must be perfectly clean, dry, and flat. Sealing the perimeter with silicone caulk adds an extra layer of protection against moisture.
What kind of paint is best for a small, steamy bathroom?+
You should always use a paint formulated for high-moisture environments. Look for products labeled "kitchen and bath" paint or select an acrylic interior paint with a satin or semi-gloss finish. These finishes are less porous than flat or eggshell, making them easier to clean and far more resistant to mildew growth.
My vanity top is ugly but I can't afford to replace it. What can I do?+
For a project under $500, replacing the vanity top is likely out of budget. However, you can refinish it with a special tub-and-tile or countertop refinishing kit. These epoxy-based paints can cover old laminate or cultured marble, but require significant prep work and ventilation. A simpler, effective alternative is to use a high-quality contact paper designed for countertops to give it a new look.
How do I choose the right size mirror for my vanity?+
A good rule of thumb is to choose a mirror that is not wider than your vanity cabinet. For a balanced look, the mirror's width should be about 70-80% of the vanity's width, or a few inches narrower than the vanity on each side. Center it between the vanity lighting and the faucet.
Discussion
Loading comments…