
Tools & materials you'll need
Affiliate linksAs an Amazon Associate FixlyGuide earns from qualifying purchases — at no extra cost to you. Prices and availability are accurate as of publication and subject to change.
Quick Answer
If your washing machine is leaking from the bottom, the most frequent offender is a faulty drain pump or compromised seals within the pump assembly. This issue often presents as a puddle forming underneath the machine during the drain or spin cycle. Fortunately, diagnosing and replacing the drain pump is a manageable DIY repair that can save you the expense of a service call and prevent further water damage to your laundry area.
The Problem
Imagine finishing a load of laundry, only to discover a growing puddle underneath your washing machine. This isn't just an annoyance; it's a potential household disaster. Water leaks can damage flooring, subflooring, and even lead to mold growth if left unaddressed. A leak specifically from the bottom of the washer, especially during the drain or spin cycle, strongly points to a problem with the machine's drain system—most often, the drain pump itself.
The drain pump is a crucial component responsible for expelling wastewater from the tub after the wash and rinse cycles. Over time, wear and tear, foreign objects (like coins, buttons, or pet hair), or simply age can cause the pump to fail. Its seals can degrade, allowing water to escape, or the impeller inside can crack, leading to inefficient draining and eventual leakage. Identifying this specific source early can save you significant time, money, and stress.
How It Works
Understanding how your washing machine's drain system operates is key to troubleshooting a bottom leak. After the wash and rinse cycles, the washing machine's control board sends a signal to the drain pump. This pump, typically an electric motor with an impeller, then activates. The impeller rapidly spins, creating a centrifugal force that pushes the wastewater from the washer tub, through a filter (if present), and into the drain hose, which empties into your standpipe or utility sink.
Many modern washing machines use a direct-drive drain pump, meaning the motor is directly connected to the impeller. Older models might use a belt-driven pump. Regardless of the drive mechanism, the purpose is the same: to forcefully remove soiled water. The pump assembly also includes seals and gaskets that prevent water from escaping the pump housing and motor. Over years of operation, these seals can harden, crack, or become dislodged. Foreign objects that bypass the lint filter can also become lodged in the pump's impeller or housing, causing vibrations, blockages, or damage that leads to leaks.
When a leak occurs from the bottom, particularly during the drain or spin cycle, it's a strong indicator that the integrity of the drain pump or its connections has been compromised. Water might be escaping directly from a cracked pump housing, a failed seal, or a loose hose clamp connecting the pump to the tub or drain hose. A slow drip can often escalate into a significant flow, depending on the extent of the damage.
Step-by-Step Fix
1. Safety First
- Unplug the machine. Always disconnect power to prevent electrical shock. Even a small amount of water combined with electricity can be hazardous.
- Turn off water supply. Close the hot and cold water valves behind the washer to prevent accidental flooding.
2. Prepare the Work Area
- Move the washer. Carefully pull the washing machine away from the wall to access the rear or bottom panel. You may need assistance for heavier machines.
- Place towels and a pan. Position old towels and a shallow pan (like a baking sheet) underneath the suspected leak area to catch any residual water when disconnecting hoses.
3. Access the Drain Pump
- Identify access points. Depending on your washer model (front-load vs. top-load), you'll access the pump differently. For most front-loaders, the pump is behind the lower front kick panel. For many top-loaders, it's accessible from the rear or by tilting the machine back and accessing from the bottom.
- Remove panels. Use a screwdriver or nut driver to remove the screws securing the access panel(s). Keep screws organized.
4. Locate and Inspect the Drain Pump
- Visual inspection. Once the pump is exposed, look for obvious signs of a leak: water stains, rust, or drips directly from the pump housing or its hose connections.
- Check hoses and clamps. Ensure all hoses connected to the pump (from the tub and to the drain) are securely attached with their clamps. Tighten any loose clamps with pliers or a screwdriver.
- Inspect pump housing for cracks. Carefully examine the plastic housing of the drain pump for any visible cracks or damage. Small cracks can be difficult to spot but can cause significant leaks.
5. Drain Residual Water
- Disconnect hoses. Before removing the pump, you'll need to drain any water remaining in the tub. Place your shallow pan under the pump's inlet hose (the one coming from the tub) and carefully disconnect it. Allow the water to flow into the pan.
- Use towels. Have extra towels ready, as this step can be messy. You might only get a small amount of water, or a surprising amount, depending on the blockage or recent usage.
6. Disconnect the Pump
- Unplug wiring harness. Gently pull the electrical connector from the drain pump motor. Be careful not to tug on the wires themselves.
- Remove mounting screws/clips. Drain pumps are typically held in place by screws, clips, or a combination of both. Remove these fasteners, usually with a screwdriver or nut driver.
7. Remove the Old Drain Pump
- Twist and pull. Some pumps twist out of their housing, while others simply slide off a mounting bracket. Consult your washer's service manual if unsure for your specific model.
- Inspect for foreign objects. Once removed, look inside the old pump's intake and impeller area. Foreign objects (coins, buttons, hairpins) are very common causes of pump failure and leaks. Remove any obstructions found.
8. Install the New Drain Pump
- Check for compatibility. Ensure the new drain pump is the exact replacement part for your washer's make and model. While pumps can look similar, internal specifications may differ.
- Reverse removal steps. Place the new pump into position, securing it with the mounting screws or clips. Reconnect the electrical wiring harness, ensuring it's seated firmly.
- Reconnect hoses. Attach the inlet and outlet hoses to the new pump. Secure them tightly with the original hose clamps. If clamps appear corroded or weak, replace them with new spring-loaded or screw-type clamps.
9. Test for Leaks
- Temporarily re-power and run a short cycle. Before replacing all access panels, plug the washer back in and turn on the water supply. Run a short drain/spin cycle (or a rinse-and-spin cycle). Watch the new pump and all connections closely for any signs of leakage.
- Tighten as needed. If you see drips, immediately shut off power and water, then tighten the responsible connection.
10. Reassemble and Final Test
- Replace access panels. Once you're confident there are no leaks, securely reattach any removed access panels.
- Push washer back in place. Carefully slide the washing machine back into its original position.
- Run a full cycle. For a final confirmation, run a complete wash cycle (maybe with an old towel) to ensure everything is functioning correctly and remains leak-free.
Common Causes
- Worn or Damaged Drain Pump: This is by far the most common reason. Over time, the internal components of the pump (impeller, motor bearings) wear out, or the plastic housing can crack due to vibrations or excessive pressure. The seals around the motor shaft also degrade, leading to water seeping out.
- Clogged Pump or Filter: Foreign objects like coins, keys, buttons, socks, or accumulating lint and hair can get past the lint filter and into the drain pump. These blockages not only hinder draining but can also damage the impeller, strain the motor, and compromise seals, causing leaks.
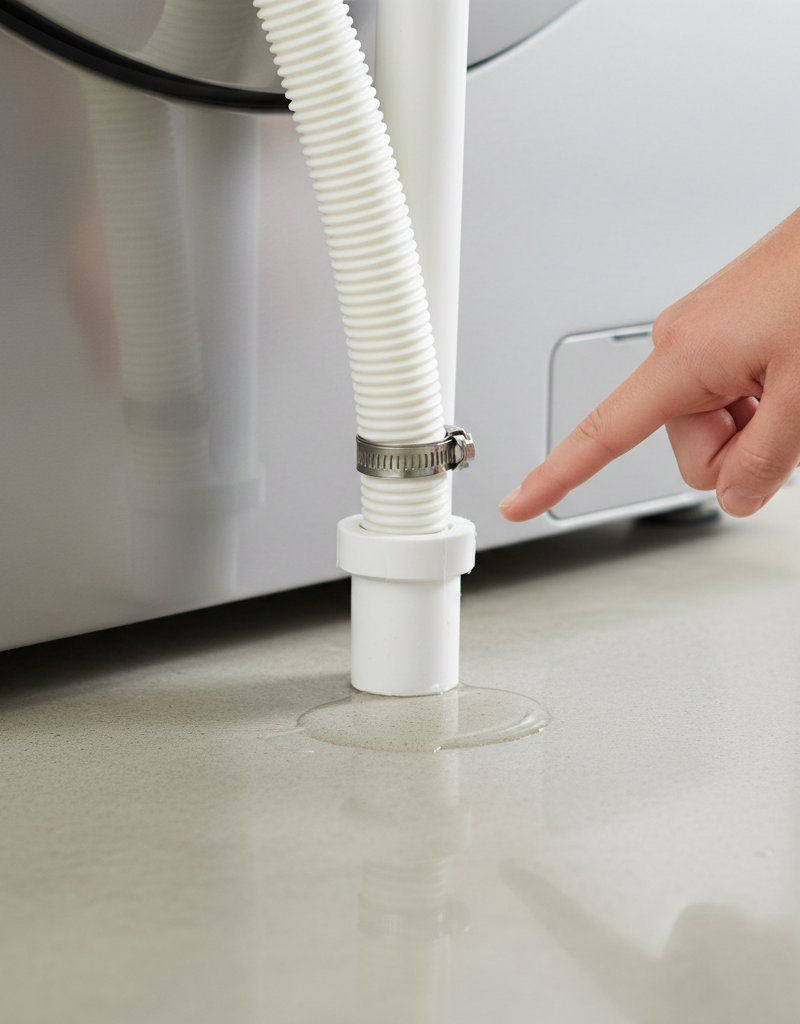
- Loose or Damaged Hose Clamps: The hoses connecting the drain pump to the wash tub and the drainpipe are secured by clamps. If these clamps become loose, corroded, or damaged, water can easily escape from the connections during the draining process.
- Cracked or Detached Hoses: The rubber or plastic hoses themselves can develop cracks, punctures, or simply detach from the pump or their connection points due to vibrations, age, or improper installation. Inspect both the large corrugated hose coming from the tub and the smaller discharge hose.
- Failed Tub Seal (less common for bottom leaks): While less common for a true
Related Articles
Keep troubleshooting with these hand-picked guides from FixlyGuide:
- The Secret Culprit Behind Your Leaking Washer (It's Not Always the Hose) — A washing machine leaking water from the bottom can often be traced to common, easily fixable issues like loose hoses or a clogged drain pu…
- The Secret Culprit Behind Your Leaky Refrigerator (It's Not What You Think) — Discover the often-overlooked reason your refrigerator is leaking water and how a simple, inexpensive fix can prevent costly damage.
- The Secret Culprit Behind Your Leaking Refrigerator (It’s Not Always a Big Fix) — Discover the most common and often overlooked reasons why your refrigerator is leaking water on the floor, and how to fix them yourself.
- The Secret Culprit Behind Your Leaking Refrigerator (It’s Not Always a Big Repair) — Discover the most common, often overlooked reason your refrigerator is leaking water onto your kitchen floor and how to fix it yourself.
- The Secret Culprit Behind Your Leaky Refrigerator (It’s Not Always the Water Line) — Discover the most common, often overlooked, reasons your refrigerator is leaking water and how to fix them with simple DIY steps.
- The $5 Part That Stops Your Dryer From Heating (And How to Replace It in 30 Minutes) — A dryer that tumbles but doesn't heat often points to a blown thermal fuse, a simple and inexpensive fix most homeowners can do themselves.
Frequently asked questions
Why is my washing machine leaking from the bottom?+
The most common reason for a washing machine leaking from the bottom is a faulty drain pump or its associated seals and hoses. Over time, internal components wear out, or foreign objects can damage the pump, causing water to escape during the drain or spin cycle.
Can I replace a washing machine drain pump myself?+
Yes, replacing a washing machine drain pump is a common DIY repair. It typically involves accessing the pump from the front or rear of the machine, disconnecting hoses and electrical wiring, and installing a new pump. Most repairs take 1-2 hours and require basic tools.
How much does it cost to fix a leaking washing machine drain pump?+
The cost of replacing a washing machine drain pump yourself is usually between $20 and $60 for the part itself. If you hire a professional, the total cost could range from $150 to $350, including parts and labor.
What tools do I need to replace a washer drain pump?+
You will typically need a screwdriver (Phillips and/or flathead), pliers (slip-joint or channel-lock), a nut driver, a shallow pan, towels, and possibly a headlamp or flashlight for better visibility. Ensure you have the correct replacement drain pump for your specific washer model.


Discussion
Loading comments…