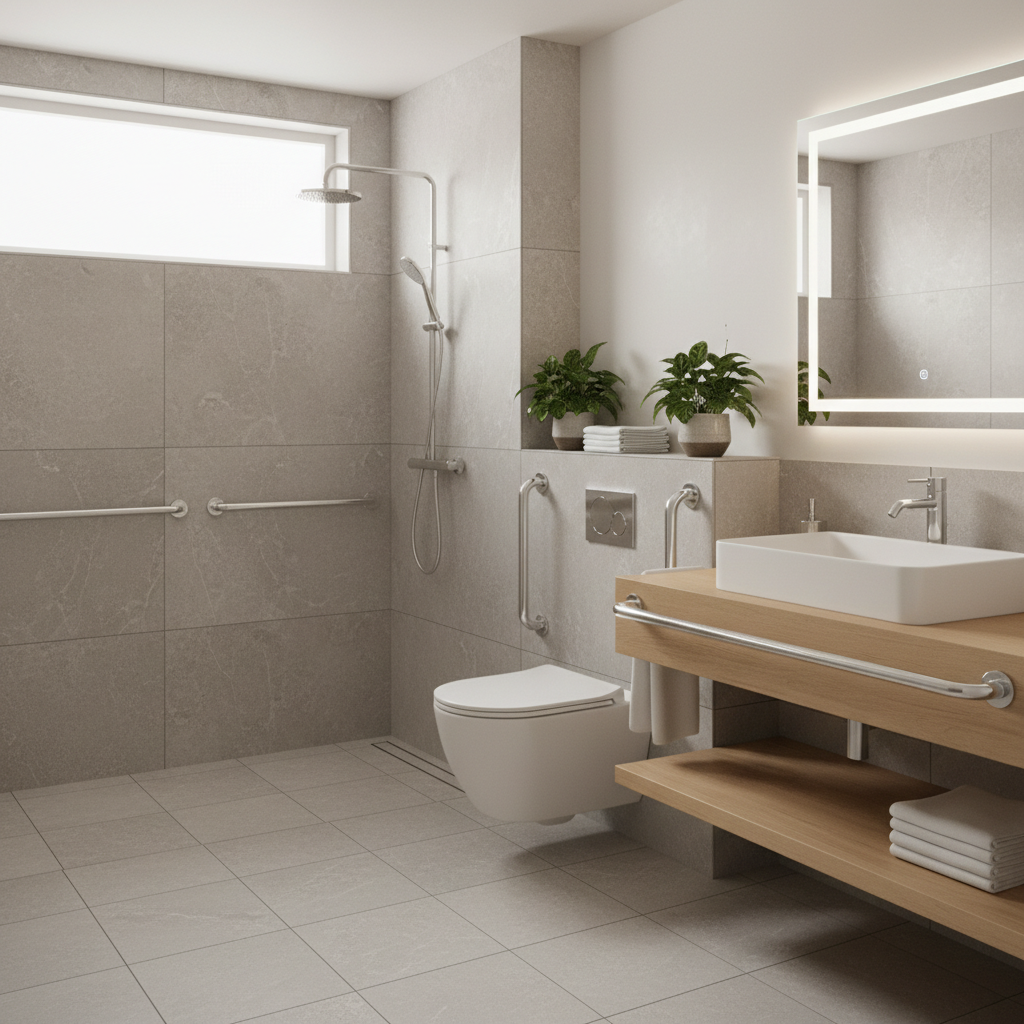
- Plan for Wider Entryways — Assess your current bathroom door and adjacent walls.
- Pro Tip: Consider pocket doors or barn doors in tight spaces to eliminate door swing interference, but ensure the pocket door mechanism is robust.
- If this doesn't work: If widening an entryway is too disruptive or costly, focus on the interior layout, ensuring adequate clear floor space.
Bathroom · Bathroom remodel
| Project category | Bathroom |
|---|---|
| Problem type | Bathroom remodel |
| Trade required | General contracting |
| Urgency | Planned project |
| Safety risk | Low safety risk |
| DIY suitability | Pro recommended |
| Cost category | High cost |
| Typical timeline | Typically 2–4 weeks on site |
| Contractor type | Bathroom remodeler or licensed plumber |
Repair option
Refresh fixtures, grout, and vanity without moving plumbing.
Replacement option
Gut remodel when the pan leaks or the layout changes.
Common causes
- Dated finishes
- Failing tile or pan
- Accessibility needs
Relevant tools:project cost estimatorcompare quotes
Published July 7, 2026Last updated August 17, 2026
Tools & materials you'll need
Affiliate linksAs an Amazon Associate FixlyGuide earns from qualifying purchases — at no extra cost to you. Prices and availability are accurate as of publication and subject to change.
Quick Answer
Many homeowners prioritize aesthetics over function in bathroom remodels, overlooking crucial accessibility features. This oversight can lead to expensive retrofits later or significantly limit a home's usability and resale value as needs change. Intentional planning for future accessibility, even in a style-focused remodel, can save thousands and make your home adaptable for anyone.
The Problem
You're in the middle of a bathroom remodel, envisioning stunning tiles, a sleek vanity, and a spa-like shower. You've picked out all the finishes, and the contractor is ready to go. But what if, years down the line, a sudden injury, an aging parent moving in, or even your own changing needs make that beautiful, new bathroom difficult or even impossible to use? Most homeowners, focused on immediate gratification and current trends, fail to bake in even basic accessibility features during a renovation. The result isn't just an inconvenience; it's a future financial burden, potentially costing thousands to remodel again or forcing a difficult move.
Imagine a scenario: You install a beautiful, raised-lip shower pan. Five years later, a family member needs a walker or wheelchair. Suddenly, that lip becomes an insurmountable barrier. The cost to tear out the new shower, re-waterproof, and install a curbless system can easily run from $5,000 to $15,000. Or consider a standard 28-inch doorway. If someone needs a wheelchair, the minimum clear opening required is 32 inches, often necessitating a 36-inch rough opening. Widening a doorway after the fact involves demoing drywall, disturbing electrical or plumbing if present, reframing, patching, and repainting. This seemingly small change can escalate into a multi-thousand-dollar project. The true cost of overlooking accessibility isn't just the future renovation; it's the potential loss of independence, the stress on caregivers, and the diminished long-term value and versatility of your home.
How It Works
Accessibility in a bathroom isn't about creating a sterile, institutional space; it's about thoughtful design that allows anyone, at any age or ability, to use the space comfortably and safely. It's often referred to as "universal design." At its core, it means anticipating potential needs and integrating solutions proactively, rather than reactively.
Think about the structural components first. Wall reinforcement, often just a few pieces of two-by-eight or blocking installed between studs at specific heights (usually 33-36 inches and 90-96 inches from the finished floor), provides solid backing for grab bars before the drywall goes up. This simple step costs virtually nothing during rough-in but saves hundreds or even thousands on future retrofits, which would otherwise require tearing into finished walls. Water-resistant backing like cement board or plywood is secured to studs, allowing grab bars to be screwed directly into this robust support without needing to locate individual studs precisely later.
Plumbing rough-ins also play a role. Positioning the shower valve controls on the entry wall, rather than directly under the showerhead, allows someone to turn on the water and adjust temperature before stepping into the spray. This prevents scalding or a cold shock. Lever-style handles, rather than knobs, are easier for hands with limited dexterity. Toilet flange placement can be shifted a few inches closer to a side wall to accommodate future grab bars more effectively, or a wall-mounted toilet can be specified, allowing for adjustable height later if needed.
Electrical considerations include rocker-style light switches, which are easier to operate than toggles, and ensuring outlets are placed at heights that can be reached from a seated position (typically 18 inches above the finished floor). Lighting itself should be layered and bright, reducing shadows and improving visibility for those with visual impairments. Even the type of flooring matters: large-format, slip-resistant tiles with minimal grout lines make for easier rolling of wheelchairs and reduce trip hazards, while high-contrast colors can help delineate different areas of the room.
Step-by-Step Fix
-
Plan for Wider Entryways — Assess your current bathroom door and adjacent walls. A standard interior door is often 28 or 30 inches wide, providing a clear opening of about 26 or 28 inches. For true accessibility, aiming for a minimum 32-inch clear opening is ideal, which typically requires a 34-inch or 36-inch door slab and a corresponding wider rough opening. Evaluate if adjacent walls are load-bearing, as this will significantly impact the complexity and cost of widening.
- Pro Tip: Consider pocket doors or barn doors in tight spaces to eliminate door swing interference, but ensure the pocket door mechanism is robust.
- If this doesn't work: If widening an entryway is too disruptive or costly, focus on the interior layout, ensuring adequate clear floor space.
-
Rough-in Grab Bar Blocking — Install plywood or 2x8 blocking inside walls before drywall. This is a critical, low-cost step during framing or prior to re-drywalling. Install solid wood blocking (2x8s are common) horizontally between studs at key locations: around the toilet at 33-36 inches and 90-96 inches from the finished floor, and in the shower/tub surround at these same heights. Also, add vertical blocking where a future fold-down shower seat might go. Ensure solid, non-rotting wood is used for longevity.
- Safety Note: Always ensure blocking doesn't interfere with existing or planned plumbing or electrical lines within the wall cavity.
- Materials: Two-by-eight lumber, construction screws, measuring tape, level, drill.
-
Future-Proof Your Shower/Tub — Design for a curbless entry or easy conversion. A curbless (roll-in) shower is the gold standard for accessibility. This involves properly sloping the subfloor to a linear or central drain. If a curbless design isn't feasible right now, install a low-profile curb (2 inches or less) that can be easily removed later. Ensure the shower area is large enough (minimum 30x60 inches, ideally 36x60 inches) to accommodate a transfer bench or wheelchair maneuverability.
- Pro Tip: Install a hand-held shower wand with an adjustable height bar alongside a fixed showerhead for versatility.
- Consider: A bench or built-in seat in the shower, even if not immediately needed, adds comfort and future utility.
-
Install Lever-Style Faucets & Handles — Replace traditional knobs with lever equivalents. Lever-style handles on faucets and shower valves are far easier to operate for those with arthritis, limited grip strength, or motor skill challenges. They require less dexterity and force than twist-knobs. Ensure single-handle fixtures or clearly marked hot/cold levers for ease of use.
- Tools: Adjustable wrench, plumber's putty, basin wrench (for sink faucets).
- Maintenance: Regularly check for leaks around new faucet installations.
-
Elevate the Toilet Height — Choose a comfort-height toilet or use a riser. Standard toilet bowls are typically 14-15 inches high, while comfort-height toilets are 17-19 inches, mimicking chair height. This significantly reduces strain when sitting down and standing up. If replacing the toilet isn't in scope, a toilet seat riser can provide a temporary solution, though it may not be as stable or aesthetically pleasing.
- Cost Savings: While a new comfort-height toilet costs $200-$400, a seat riser is $30-$80.
-
Ensure Adequate Clear Floor Space — Plan for a 5-foot turning radius. The most commonly overlooked aspect. A 5-foot (60-inch) diameter clear turning circle is essential for wheelchair maneuverability. This means no fixtures or furniture should impede this space. Measure your bathroom for this clearance, especially around the toilet and in front of the vanity and shower. If your bathroom cannot accommodate a full 60-inch circle, aim for clear pathways of at least 36 inches wide throughout.
- Layout Tip: Consider a wall-mounted vanity to free up floor space underneath for wheelchair access.
-
Optimize Electrical & Lighting — Install rocker switches and thoughtful illumination. Replace toggle switches with rocker or paddle switches, which are easier to operate with a forearm or closed fist. Place switches at 40-48 inches from the floor, and electrical outlets at 18-24 inches from the floor. Use layered lighting: overhead ambient light, task lighting at the vanity, and perhaps a night light for safety during nighttime use. Ensure high color rendering index (CRI) bulbs for better visibility of colors.
- Safety Note: Always turn off power at the circuit breaker before working on electrical components. Use a non-contact voltage tester to confirm power is off.
-
Prioritize Non-Slip Flooring — Select large-format, textured tiles or sheet vinyl. Smooth, highly polished tiles become extremely slippery when wet. Opt for tiles with a COF (Coefficient of Friction) rating of 0.6 or higher for wet areas. Textured surfaces, smaller tiles with more grout lines (though these can impede wheeled mobility), or sheet vinyl with a textured finish are excellent choices. Minimize transitions between different flooring types to prevent trip hazards.
- Cleaning: Regularly clean grout and textured surfaces to maintain their slip resistance.
Common Causes
- Lack of Foresight: Homeowners rarely consider their future needs or the needs of aging family members when designing a bathroom, focusing only on current style trends.
- Budget Constraints: Perceived higher costs for accessible features lead homeowners to cut them out, not realizing the long-term savings.
- Unawareness of Options: Many homeowners simply don't know what accessible design truly entails or how seamlessly it can be integrated into a stylish bathroom.
- Contractor Ignorance: Not all contractors are well-versed in universal design principles, and may not proactively suggest accessibility features.
- Focus on Resale Value (Misguided): Homeowners might believe accessibility features detract from resale value, when in fact, they broaden appeal for a wider range of buyers.
Common Mistakes
- Installing a High Threshold Shower: While beautiful, a high curb (over 2 inches) becomes a significant barrier for anyone with mobility issues. Instead, plan for a curbless shower or the lowest possible threshold that can be easily converted later.
- Forgetting Grab Bar Backing: The most common and most costly mistake to fix later. Putting nothing behind the drywall means future grab bars are limited to stud locations or require tearing open walls. Always install blocking during rough-in.
- Narrow Doorways: Standard 28-30 inch doors might be fine initially, but they are too narrow for most wheelchairs and walkers. If possible, opt for 34-36 inch doors to provide a 32-inch clear opening.
- Slippery Flooring Choices: Polished marble or porcelain looks luxurious but is a major fall hazard when wet. Choose textured, slip-resistant tiles with a high Coefficient of Friction (COF) for shower floors and the main bathroom floor.
- Inaccessible Fixture Placement: Placing towel bars, toilet paper holders, or electrical outlets too high or too low for someone seated or with limited reach. Plan these based on seated and standing reach ranges (e.g., switches 40-48 inches, outlets 18-24 inches).
- Ignoring Clear Floor Space: Renovating without considering a 60-inch turning radius for wheelchairs, leading to a cramped and unusable space. Always ensure adequate maneuvering room, especially around the toilet and in the shower.
Cost & Time Breakdown
| Task | DIY Cost | Pro Cost | Time |
|---|---|---|---|
| Grab Bar Blocking (rough-in) | $20–$50 | $100–$250 | 1–3 hours |
| Widening Doorway (minor) | $100–$300 | $800–$2,500 | 4–8 hours |
| Curbless Shower Prep (subfloor) | $50–$150 | $500–$1,500 | 1–2 days |
| Lever Faucet Installation | $0–$50 | $150–$300 | 1–2 hours |
| Comfort-Height Toilet Install | $200–$400 | $300–$700 | 2–4 hours |
| Electrical Switch/Outlet Adjust | $20–$100 | $200–$500 | 1–3 hours |
Tips & Prevention
- Think 10 Years Ahead: When making renovation decisions, project your needs and potential challenges a decade into the future. Could a family member need assistance? Could you? Planning now saves headaches later.
- Visit Showrooms: Explore showrooms specializing in accessible design. You'll often find stylish products that seamlessly integrate universal design features, inspiring practical solutions.
- Consult with an Expert (Even Briefly): If your budget doesn't allow for a full accessible design consultant, consider an hour-long consultation with an occupational therapist or a certified aging-in-place specialist (CAPS) at the planning stage. Their insights can be invaluable.
- Document Rough-in: Take photos and precise measurements of where you installed grab bar blocking. This documentation will be immensely helpful years later when you want to install grab bars without guessing.
- **Prioritize
Related Articles
Keep troubleshooting with these hand-picked guides from FixlyGuide:
- The Hidden Reason Your AC Isn't Cooling (And Why Most Homeowners Get It Wrong) — When your central AC unit isn't cooling, the culprit often isn't what you think, leading to frustration and unnecessary repair calls.
- The Hidden Reason Your GFCI Trips — And Why Most Homeowners Get It Wrong — A continuously tripping GFCI outlet is a safety warning, often indicating a problem like moisture, a faulty appliance, or a wiring issue th…
- 7 Inspection Red Flags That Secretly Signal a $20,000 Bill — Don't let your dream home become a money pit. Many buyers and even some inspectors overlook subtle home inspection red flags that lead to f…
- The 3 Hidden Ways Your — Uncover the surprising habits and hidden household issues that are silently increasing your homeownership costs and learn how to fix them.
- The Hidden Culprit Behind Your AC Not Cooling (and How to Find It) — If your central AC isn't cooling your home, the issue often stems from a surprisingly simple problem that's easy to overlook. Learn how to…
- The #1 HVAC Mistake Costing You Hundreds (And How Often to Really Change Your Filter) — Discover the crucial mistake most homeowners make with HVAC filters, leading to higher energy bills, poor air quality, and system damage. L…
What should this project cost?
Enter your project details for a realistic cost range before you call anyone.
Mid-range remodels commonly $12,000–$22,000; small repairs often under $600.
- Regional adjustment
- National average
- Labor share (typical)
- ~$5,603
- Quotes to collect
- 3 written estimates
Educational estimate based on national averages — not a binding quote. Always confirm with written local estimates.
Get the print-ready PDF of this guide
A clean, ad-free, printable version you can keep on your phone or pin to the workshop wall. Free with a FixlyGuide account.
- Print-optimized layout
- Tools, materials & every step included
- Saved to your account
This article was independently written by FixlyGuide based on the source topic.
Frequently asked questions
How much does it cost to make a bathroom accessible later?+
Retrofitting a bathroom for accessibility can be significantly more expensive than building it in during an initial remodel. Widening doorways can cost $800-$2,500, adding grab bar blocking to existing walls can be $300-$800 per bar location, and converting a curbed shower to curbless can range from $5,000 to $15,000, not including finishes. This is why planning ahead is crucial.
What is the most important accessibility feature to include in a bathroom remodel?+
The most critical, and easiest to overlook, feature is installing proper grab bar blocking in the walls around the toilet and shower during the rough-in phase. This nearly free step during construction saves immense cost and disruption if grab bars are needed later, allowing them to be securely mounted anywhere within the blocked area without tearing open walls.
Can an accessible bathroom still be stylish?+
Absolutely. Modern universal design emphasizes aesthetics and seamless integration. Many high-end fixtures, tiles, and vanities are designed with accessibility in mind, offering features like lever handles, wall-mounted sinks for wheelchair clearance, and curbless showers that enhance the spa-like feel rather than detract from it. The key is planning and selecting products that combine form and function.

Discussion
Loading comments…