Tools & materials you'll need
Affiliate links- AmazonWhite Vinegar32 oz · 5% acidity, standard household type
- Amazon#0000 Steel Wool1-2 pads · Optional, for tough spots. Ensure it is Four-Zero grade ONLY.
- AmazonGlass Polishing Compound or Hard Water Stain Remover Paste4-8 oz · Look for products containing cerium oxide or marketed for glass cooktops.
- AmazonHydrophobic Glass Sealant (e.g., Rain-X for Shower Doors)1 bottle · This is a critical final step.
As an Amazon Associate FixlyGuide earns from qualifying purchases — at no extra cost to you. Prices and availability are accurate as of publication and subject to change.
Quick Answer
That stubborn cloudiness on your glass shower door is not just soap scum; it's likely hard water minerals that have bonded with and etched the glass surface. A simple squeegee or all-purpose cleaner can't fix it. You need a two-pronged approach: first, dissolve the mineral deposits with a mild acid like white vinegar, then polish away any remaining etching with a specialized, non-damaging abrasive paste to restore the glass to its original clarity. The final, crucial step is applying a hydrophobic glass sealant to prevent the problem from immediately returning.
The Problem
You've done everything right. You squeegee the glass after every shower. You've tried every daily shower spray on the market. You've scrubbed with bathroom cleaners that promise to cut through any grime. Yet, your glass shower door remains stubbornly, depressingly cloudy. It has a whitish, milky haze that seems to be embedded in the glass itself, especially noticeable on the bottom half of the door. From a distance, it looks dirty, and up close, you can sometimes see the outlines of countless water droplets, permanently ghosted onto the surface. No amount of elbow grease with Windex or a standard bathroom tile cleaner makes a lasting difference. The clarity might improve for a few minutes while the glass is wet, but as soon as it dries, the fog returns. This is the tell-tale sign that you’re dealing with more than simple soap scum. You're fighting a chemical and physical battle against mineral deposits that have corroded and etched the surface of your shower glass.
How It Works
To understand the solution, you must first understand the science behind the stubborn haze. The culprit is your water. If you live in an area with "hard water," your tap water contains a high concentration of dissolved minerals, primarily calcium (CaCO₃) and magnesium (MgCO₃). When water droplets from your shower evaporate on the glass, they leave these microscopic mineral crystals behind. This is Stage 1 corrosion.
Initially, these are just surface deposits. When they mix with body oils and soap, they form the familiar, pasty grime known as soap scum. But the real problem—the one your squeegee can't fix—is what happens next. The alkaline nature of these mineral deposits (pH greater than 7) slowly attacks the silica structure of the glass itself. Glass, while seemingly inert, is a porous, silica-based material. Over months and years, the constant presence of these alkaline deposits creates a chemical reaction that corrodes, or "etches," the surface. This is Stage 2 corrosion. The once-smooth surface becomes microscopically pitted and rough, which scatters light instead of letting it pass through cleanly. This light-scattering effect is what you perceive as a permanent, cloudy haze.
This is why a simple squeegee is ineffective for this problem. A squeegee removes water before it can evaporate, preventing new mineral deposits from forming. It’s an essential preventative tool, but it cannot reverse the existing corrosion. Likewise, pH-neutral or all-purpose cleaners lack the chemical power to dissolve the hardened, bonded mineral scale.
The solution requires a targeted, two-phase attack.
-
Chemical Dissolution: First, you must dissolve the mineral deposits. Since the minerals are alkaline, you need an acid (pH less than 7) to neutralize and break them down. A common household acid like acetic acid (white vinegar) is the perfect starting point. When applied to the glass, the acid reacts with the calcium and magnesium carbonates, dissolving them into water-soluble salts that can be washed away.
-
Physical Polishing: If the cloudiness persists after the acid treatment, it means the glass surface itself has been physically etched. The minerals are gone, but the microscopic pitting remains. At this point, you need a micro-abrasive. This isn't a harsh scour pad, which would cause massive scratches. Instead, you need an extremely fine polishing compound, often a paste containing something like cerium oxide. This compound is used by professionals to polish gemstone facets and remove scratches from watch faces. It works by physically smoothing out the microscopic peaks and valleys on the etched glass surface, restoring its ability to let light pass through without scattering. It essentially resurfaces the glass on a micro-level, bringing back its original clarity.
Step-by-Step Fix
Restoring clarity to a cloudy glass shower door is a project of patience. Follow these steps precisely for the best results, starting with the least aggressive method first.
1. Pre-Clean the Surface
- Goal: Remove all surface-level grime, soap scum, and oils so the treatments can work directly on the mineral deposits.
- Action: Create a solution of a few drops of dish soap in a spray bottle of warm water. Spray the entire door, inside and out. Scrub with a non-scratch sponge or microfiber cloth. Use a plastic razor blade or scraper to gently lift any heavy, pasty soap scum buildup. Rinse the door thoroughly with warm water and dry it with a towel. This initial cleaning is vital.
2. Safety Preparations
- Goal: Protect yourself and your bathroom from the cleaning agents.
- Action: Open a window and turn on the bathroom exhaust fan for maximum ventilation. Put on waterproof chemical-resistant gloves and safety glasses to protect your eyes from any splashes.
3. Apply the Acidic Cleaner
- Goal: Use a mild acid to dissolve the mineral scale bonded to the glass.
- Action: Fill a spray bottle with a 50/50 solution of plain white vinegar (5% acetic acid) and warm water. Liberally spray this solution onto the cloudy areas of the glass, ensuring the surface is completely saturated. Do not let it drip off and dry out; reapply as needed.
4. Let it Dwell
- Goal: Give the acid enough time to chemically break down the mineral deposits.
- Action: Let the vinegar solution sit on the glass for a minimum of 20-30 minutes. For extremely stubborn stains, you can soak paper towels in the vinegar solution and press them against the glass to keep the acid in constant contact with the stains. Do not allow the solution to dry on the surface.
5. Gentle Agitation
- Goal: Scrub away the now-loosened mineral deposits without scratching the glass.
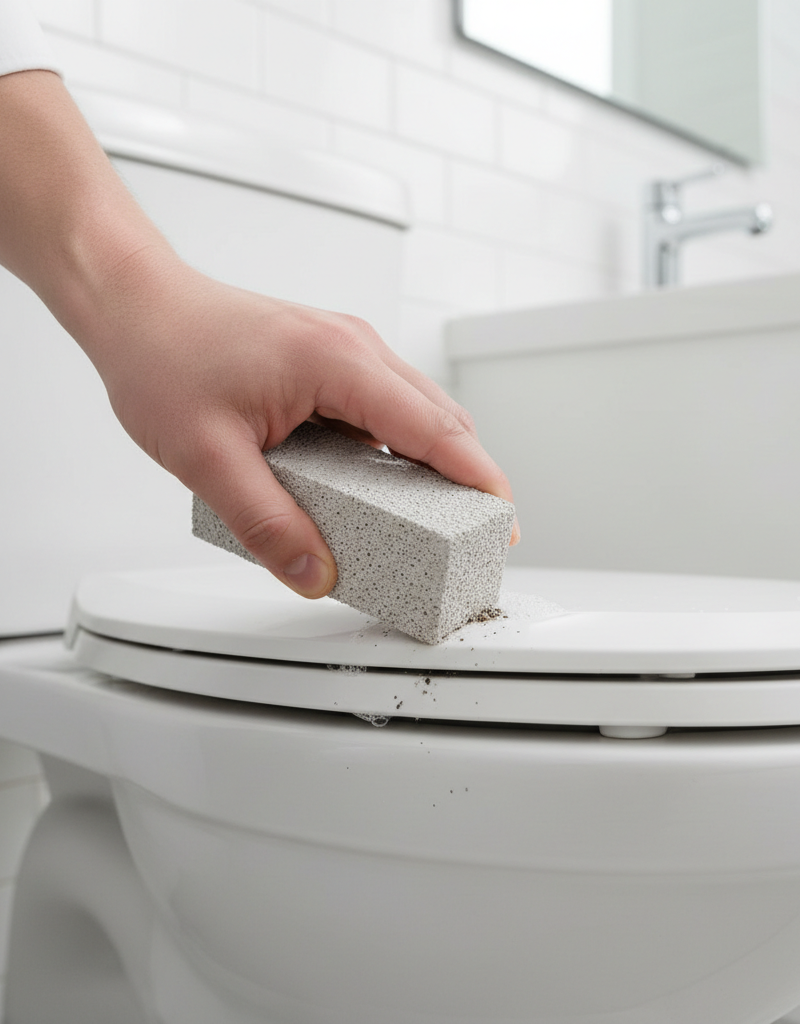
- Action: After the dwell time, use a non-abrasive scrubbing tool. A melamine foam sponge (like a Magic Eraser) is an excellent choice. Alternatively, for very tough spots, you can use #0000 grade (four-zero) steel wool. CRITICAL: The #0000 grade is ultra-fine and, when used wet with a lubricant like the vinegar solution, will not scratch the glass. Never use any other grade of steel wool. Scrub in small, circular motions with light to moderate pressure.
6. Rinse and Assess
- Goal: Check your progress before escalating the treatment.
- Action: Rinse the entire shower door thoroughly with clean, warm water. Dry the glass completely with a clean, dry microfiber towel. A squeegee will not suffice here; you need to eliminate all moisture to see the true state of the glass. Inspect the glass in good light. If it’s crystal clear, proceed to Step 11. If a faint haze or cloudiness remains, the glass is etched, and you must proceed to the next phase.
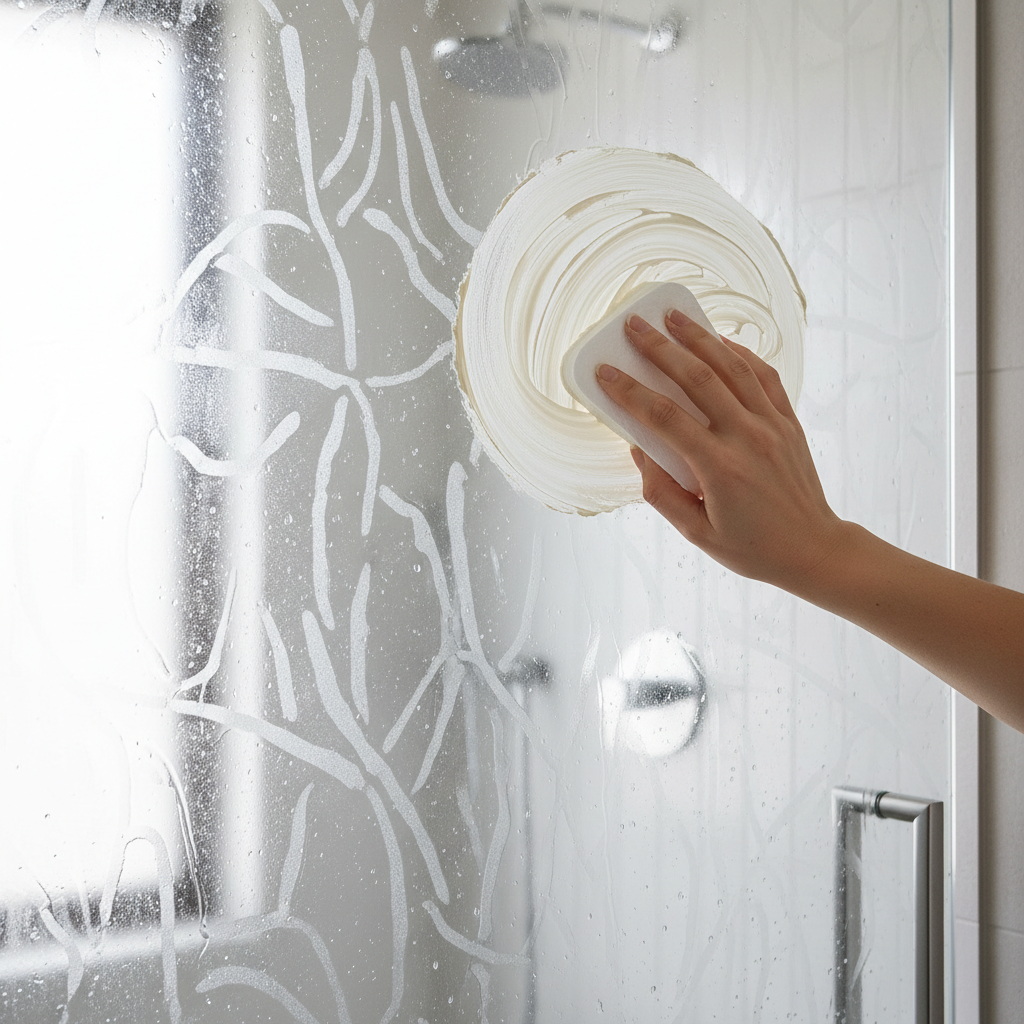
7. Escalate to an Abrasive Paste
- Goal: Polish away the microscopic etching on the glass surface itself.
- Action: You will need a specialized hard water spot remover paste or a fine glass polishing compound. Products marketed as "glass cooktop cleaner" or those containing cerium oxide are effective. These are micro-abrasives designed to polish, not just clean.
8. Apply the Polishing Compound
- Goal: Work the compound into the etched glass in a controlled manner.
- Action: Apply a small, dime-sized amount of the paste directly onto a damp microfiber cloth or a non-scratch foam applicator pad. Do not apply it directly to the dry glass. It's best to work in small, 2-foot by 2-foot sections at a time.
9. Polish the Glass Surface
- Goal: Systematically smooth the glass surface to restore its clarity.
- Action: Using firm, consistent pressure, polish the glass in overlapping circular motions. Then, go back over the same area with overlapping vertical and horizontal strokes. This ensures even coverage and a uniform finish. You should feel a slight drag as the paste works. As it polishes, the paste will dry to a haze.
10. Final Rinse and Buff
- Goal: Remove all residue and reveal the final, restored surface.
- Action: Rinse the glass with clean water until all traces of the polishing paste are gone. Dry the door completely with a fresh, clean microfiber towel. The glass should now be exceptionally smooth to the touch and visually transparent.
11. Apply a Protective Sealant
- Goal: Protect your hard work and prevent future mineral buildup.
- Action: This step is not optional. Apply a hydrophobic glass sealant (such as Rain-X for showers or a dedicated shower glass protectant). This creates an invisible barrier that repels water, causing it to bead up and roll off instead of sitting and evaporating. Apply according to the product directions, which usually involves wiping it on with one cloth and buffing it clear with another. This sealant is the key to long-term clarity.
Common Causes
- Hard Water: This is the primary cause. Water with high mineral content (over 7 grains per gallon or 120 mg/L) will inevitably leave deposits.
- Inconsistent Squeegeeing: Failure to remove water droplets after every single shower allows minerals to be left behind as the water evaporates.
- Bar Soap: Many bar soaps contain talc and fats that react with hard water minerals to create a thick, stubborn soap scum that traps mineral deposits against the glass.
- Poor Ventilation: A humid bathroom with poor airflow slows evaporation, giving water more time to sit on the glass and for the alkaline minerals to react with the silica.
Common Mistakes
- Using Scratchy Abrasives: Never use green kitchen scouring pads, standard steel wool, or abrasive powders like Comet. These will leave permanent, visible scratches that are worse than the original cloudiness.
- Not Letting Cleaners Dwell: Spraying on vinegar and immediately wiping it off does nothing. The acid needs 20-30 minutes of contact time to dissolve the minerals chemically.
- Mixing Cleaning Chemicals: SAFETY WARNING: Never mix different cleaning agents, especially anything containing bleach with a cleaner containing ammonia. This can create toxic chloramine gas.
- Scrubbing Dry: Always use a lubricant (water, vinegar solution, or the paste itself) when scrubbing or polishing. Scrubbing a dry surface, even with a "safe" abrasive, dramatically increases the risk of scratching.
- Skipping the Final Sealant: Doing all the work to restore the glass without applying a sealant means the hard water spots will begin to re-form within a week.
- Giving Up on the Polishing Step: The polishing phase requires significant elbow grease. If you stop too soon, you may have a partially polished surface that looks splotchy. Consistency and patience are key.
Cost & Time Breakdown
| Task | DIY Cost | Professional Cost | Time |
|---|---|---|---|
| Initial Soap Scum Cleaning | $5 (Dish Soap) | Included in Service | 30 minutes |
| Vinegar Acid Treatment | $10 (Vinegar, Spray Bottle) | Included in Service | 1 hour (including dwell time) |
| Abrasive Paste Polishing | $15-$25 (Polishing Compound) | Included in Service | 1-2 hours |
| Glass Sealant Application | $10-$20 (Sealant) | Often an add-on ($50+) | 30 minutes |
| Full DIY Restoration (Total) | $20 - $60 | $250 - $500+ | 2-4 hours |
| Professional Restoration | N/A | $250 - $500+ | 2-3 hours |
Tips & Prevention
- Squeegee Without Fail: Make it a non-negotiable household rule to squeegee the glass walls and door after the last shower of the day. It takes 30 seconds and is the single most effective preventative measure.
- Switch to Liquid Body Wash: Liquid soaps and body washes are typically synthetic detergents that do not contain the fats and talc found in bar soap, drastically reducing soap scum buildup.
- Install a Water Softener: If you have hard water throughout your home, a whole-house water softener is the ultimate solution. It removes the minerals at the source, preventing the problem from ever starting.
- Reapply a Glass Sealant: The hydrophobic coating is a sacrificial layer that wears off. Reapply it every 3-6 months, or whenever you notice water is no longer beading and rolling off the glass effectively.
- Use a Daily Shower Spray: While not a solution for existing etching, a daily spray can help prevent new buildup on a sealed, clean door. Use it after squeegeeing for best results.
- Run the Exhaust Fan: Run your bathroom fan during your shower and for 20-30 minutes afterward to vent humid air and promote faster drying.
When to Call a Professional
While the DIY method is highly effective for most cases of Stage 1 and mild Stage 2 corrosion, there are times when calling a professional glass restoration specialist is the better choice. If you've performed all the steps, including meticulous polishing, and the glass remains cloudy or hazy, the etching may be too deep for consumer-grade products to handle. Run your fingernail over the cloudy glass; if you can feel a distinct roughness or texture, the glass is severely etched. Professionals have access to industrial-grade cerium oxide slurries and variable-speed orbital polishers that generate the right combination of heat and friction to perform a much more aggressive and effective resurfacing. Furthermore, if you have very expensive, thick, or custom-patterned glass, the risk of causing irreversible damage might outweigh the potential savings. A pro can assess the specific type of glass and damage and use the correct procedure, assuming the liability if something goes wrong. For damage that goes beyond a faint haze, a professional service can often achieve a level of clarity that is simply not possible with DIY methods and elbow grease alone.
Frequently asked questions
Will #0000 steel wool really not scratch my glass shower door?+
Correct, #0000 (four-zero) grade steel wool is an ultra-fine abrasive that is softer than glass. When used wet with a lubricant like a vinegar-water solution and light pressure, it will effectively scrub away mineral deposits without leaving scratches. However, you must ensure it is #0000 grade; any coarser grade (like #000 or #0) will absolutely scratch your glass.
Can I use CLR or Lime-A-Way on my cloudy glass shower door?+
Yes, you can use commercial mineral deposit removers like CLR (Calcium, Lime, Rust) or Lime-A-Way, as they are formulated with acids like sulfamic or phosphoric acid designed for this purpose. However, always start with a milder solution like vinegar first. If you use a commercial product, follow the manufacturer's safety precautions, ensure adequate ventilation, wear gloves, and test it on a small, inconspicuous area first.
How can I tell if my shower door is truly etched or just has bad soap scum?+
A good test is to first clean the door thoroughly with a soap-scum-removing bathroom cleaner. Once rinsed and dried, if a milky, white haze still remains, it's a mineral deposit issue. A second test is to use a plastic razor blade. If you can scrape off a pasty white residue, it's soap scum. If you scrape and nothing comes off and the cloudiness remains, the minerals are bonded to or have etched the glass.
What's the difference between a glass sealant and a daily shower spray?+
A glass sealant is a semi-permanent hydrophobic coating that you apply to clean, dry glass every 3-6 months. It creates a physical barrier that repels water. A daily shower spray is a maintenance product used after each shower to help sheet water off the glass and prevent new mineral deposits from forming on top of the sealant. The sealant is the foundation; the daily spray is the daily upkeep.


Discussion
Loading comments…