
Tools & materials you'll need
Affiliate linksAs an Amazon Associate FixlyGuide earns from qualifying purchases — at no extra cost to you. Prices and availability are accurate as of publication and subject to change.
Quick Answer
The most common reason your clothes dryer is taking too long to dry is a restricted dryer vent. This isn't just an efficiency issue; it's a fire hazard. Lint, debris, and even small animals can accumulate in the ductwork, trapping moisture and hot air, leading to longer drying times, increased energy consumption, and potential appliance damage. Clearing this blockage is a crucial, often free, DIY fix.
The Problem
You load your clothes, set the dryer, and an hour later, they're still damp. You run another cycle, and maybe even a third, wasting electricity and precious time. This frustrating scenario almost always points to an underlying issue preventing your dryer from expelling hot, moist air efficiently. While a failing heating element might seem like the obvious suspect, the vast majority of 'dryer not drying' complaints stem from a clogged or kinked dryer vent. A restricted vent chokes off the appliance's ability to properly ventilate, forcing it to work harder and longer, not only driving up your utility bills but also creating a significant fire risk as lint is highly flammable.
How It Works
To understand why a clogged vent is such a problem, it helps to understand how a dryer works. A typical electric or gas dryer operates by drawing in external air, heating it with an electric heating element or gas burner, and then tumbling it through your wet clothes. As the hot, dry air circulates, it picks up moisture from the fabric. This now-humid, hot air then gets expelled out through the dryer's exhaust vent to the outside of your home. This continuous cycle of hot, dry air in and moist, hot air out is what allows your clothes to dry.
The dryer vent system is essentially a duct, typically 4 inches in diameter, that connects the back of your dryer to an outside wall. This duct allows the humid air to escape, making room for more hot, dry air to enter the drum. Inside the dryer, a powerful fan (the blower wheel) creates the airflow necessary to push this air through the clothes and out the vent. When the vent becomes clogged with lint, heat and moisture get trapped inside the dryer drum. The air becomes saturated, and the clothes never get truly dry. The dryer's internal thermostat senses overheating due to the restricted airflow and cycles the heating element on and off more frequently, further prolonging drying times and stressing the dryer's components. A properly functioning dryer vent should have minimal airflow resistance, allowing for optimal moisture removal and efficient operation.
Step-by-Step Fix
1. Safety First — Unplug your dryer before starting any work.
- For electric dryers: Pull the plug directly from the wall outlet.
- For gas dryers: Turn off the gas supply valve, usually a yellow or red handle on the gas line behind the dryer, then unplug the dryer. This prevents accidental startup or gas leaks.
2. Pull the Dryer Out — Carefully move the dryer away from the wall.
- Work slowly to avoid damaging flooring or the dryer itself. You'll need enough space to comfortably access the rear of the appliance and the vent connection.
- If your dryer is heavy: Consider getting help from another person or using furniture sliders under the dryer's feet.
3. Disconnect the Vent Hose — Gently detach the flexible duct from the dryer and wall.
- Most dryer vent hoses are secured with a clamp (either screw-tightened or spring-loaded). Loosen or release the clamp.
- Carefully pull the hose straight off the dryer's exhaust port and the wall vent hood connection.
- Inspect the hose: Look inside for lint buildup, kinks, or damage. Replace damaged or crushed hoses immediately, preferably with rigid metal ducting, which is less prone to crushing and more fire-resistant than flexible foil or vinyl options.
4. Clear the Dryer's Exhaust Port — Remove lint from the opening on the dryer itself.
- Use a shop vac with a narrow attachment or your hand to reach into the dryer's exhaust port and remove any visible lint.
- Don't force it: Be gentle to avoid damaging internal components.
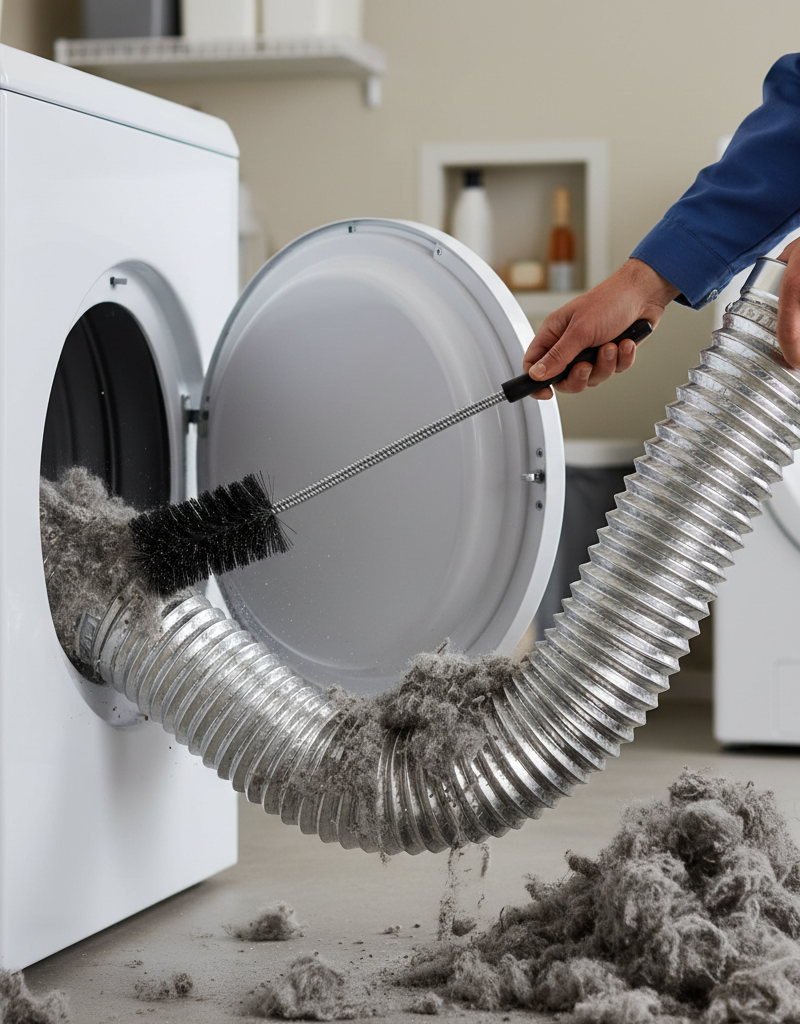
5. Clean the Vent Hose — Thoroughly remove all lint and debris from the detached hose.
- Take the flexible vent hose outside.
- Use a shop vac, a leaf blower (on a low setting), or a long dryer vent cleaning brush to push out accumulated lint.
- Visually inspect: Ensure light can pass through the entire length of the hose after cleaning. If you see significant crushing or damage, replace it.
6. Clean the Wall Vent Duct — Address the hidden section of ductwork inside the wall.
- This is often the most overlooked part. Start from the interior opening (where the flexible hose connects to the wall).
- Use a dryer vent cleaning brush kit with extendable rods. Attach the brush head and slowly feed it into the wall duct, rotating it as you go to dislodge lint.
- Push the brush all the way to the exterior vent hood. Once you see the brush head emerge outside, pull it back, gathering any loosened lint.
- If you have an older, longer run: You may need to clean from both ends – the exterior vent hood and the interior connection point. For very long or complex runs, a professional may be necessary if you can't reach the blockage.
7. Clean the Exterior Vent Hood — Scrub away lint from the part of the vent visible outside.
- Go outside and locate the dryer vent hood.
- Carefully remove any accumulated lint from the flaps or screen (some older vents have screens that are prone to clogging – consider replacing them with a screen-free vent if yours is constantly blocked, as screens can restrict airflow severely).
- Use a brush or vacuum to clear the opening completely.
- Safety Note: If your vent is high up, use a sturdy ladder and have someone spot you. Do not overreach.
8. Reassemble the Vent System — Connect everything back in reverse order.
- Attach the flexible vent hose to the wall connection first, securing it with the clamp.
- Then, connect the other end of the hose to the dryer's exhaust port, securing that clamp as well.
- Ensure tight connections: Loose connections can leak moist air into your home or cause further lint buildup.
- Avoid kinks: As you push the dryer back, ensure the flexible hose is not crushed or kinked. Maintain the shortest, straightest path possible.
9. Test the Dryer — Run a short cycle to confirm the fix.
- Plug the dryer back in and turn on the gas supply (if applicable).
- Run a small load of wet clothes or a damp towel on a timed dry cycle.
- Feel the air exiting the exterior vent hood – it should be strong and hot. Also observe if clothes are drying much faster.
- If drying is still slow: The issue might be a failing heating element, a broken thermistor/thermostat, or a malfunctioning blower wheel. At this point, contact a qualified appliance technician for diagnosis.
Common Causes
- Lint Buildup: The primary culprit. Over time, lint that bypasses the lint trap accumulates in the dryer vent duct, restricting airflow. This is exacerbated by using liquid fabric softener, which creates a waxy residue that lint adheres to.
- Kinks or Crushes in the Vent Hose: Flexible vinyl or foil vent hoses are easily crushed or kinked when the dryer is pushed too close to the wall, severely restricting airflow.
- Excessive Vent Length or Too Many Bends: Long dryer vent runs (over 25 feet for rigid ducting, less for flexible) or multiple 90-degree elbows create significant airflow resistance, making it harder for the dryer's blower to push air out efficiently. Each 90-degree elbow is equivalent to several feet of straight duct in terms of airflow restriction.
- Exterior Vent Hood Obstruction: The flapper on the exterior vent can get stuck, clogged with lint, or even become home to bird nests, blocking exhaust.
- Improper Vent Material: Using flexible vinyl vent hose, especially in concealed spaces, is not only less durable but also poses a fire hazard and increases lint buildup compared to rigid metal ducting.
Common Mistakes
- Ignoring the exterior vent: Many homeowners clean only the lint trap and maybe the first foot of the hose, completely neglecting the exterior vent hood and the main duct run. These unseen sections are often the most problematic.
- Using the wrong vent material: Flexible vinyl or thin foil ducts are prone to crushing, tearing, and lint accumulation. Always opt for rigid or semi-rigid metal ducting when possible, especially for longer runs.
- Not checking for kinks: After reconnecting the dryer, homeowners often push the appliance back against the wall without ensuring the flexible vent hose isn't crushed or sharply bent. This immediately re-creates the airflow problem.
- Overloading the dryer: While not directly a vent issue, overloading restricts airflow within the drum, making it harder for moisture to escape. This can exacerbate vent-related drying problems.
- Forgetting to clean the dryer's internal exhaust port: Lint can build up directly at the dryer's outlet, even before the flexible hose connection. A quick vacuum here can make a difference.
- Neglecting regular cleaning: Thinking a one-time clean is enough. Dryer vents should be inspected and cleaned at least once a year, more often if you do a lot of laundry or have pets.
Cost & Time Breakdown
| Task | DIY Cost | Pro Cost | Time |
|---|---|---|---|
| Gather supplies | $0–$50 (if you need brushes/duct) | N/A | 5 minutes |
| Disconnect/inspect vent | $0 | N/A | 10–15 minutes |
| Clean interior/exterior vent | $0 if you own tools; $20–$40 for brush kit | $100–$250 | 30–60 minutes |
| Reconnect/test | $0 | N/A | 10 minutes |
| Total | $0–$50 | $100–$250+ | 1–1.5 hours |
Tips & Prevention
- Clean the lint trap after every load: This is the easiest and most effective way to prevent lint from entering the vent system.
- Inspect and clean the dryer vent annually: Even if clothes seem to be drying fine, a yearly inspection and cleaning of the entire vent run, from the dryer to the exterior, is crucial for efficiency and fire safety.
- Use rigid or semi-rigid metal ducting: Replace flexible vinyl or foil ducts with metal ones. They offer better airflow, are more durable, and significantly reduce fire risk.
- Keep vent runs short and straight: Minimize the length of the vent duct and the number of 90-degree bends. Each bend adds resistance to airflow.
- Avoid using too much fabric softener: Liquid fabric softeners can create a waxy buildup on lint, making it stickier and harder to remove from the vent system.
- Check the exterior vent regularly: Ensure the flapper opens and closes freely and that no birds or pests have nested inside.
- Don't overload your dryer: This restricts airflow inside the drum, making it harder for clothes to dry and potentially pushing more lint into the vent.
When to Call a Professional
While cleaning a dryer vent is a manageable DIY task for most homeowners, there are specific situations where calling an appliance professional or a specialized vent cleaning service is recommended. If your dryer vent run is exceptionally long (over 25 feet) or has multiple sharp ninety-degree turns, it can be challenging to thoroughly clean the entire duct length with standard DIY tools. If after a thorough cleaning, your clothes are still taking too long to dry, or if you smell a burning odor, hear unusual noises, or experience no heat at all, these could indicate a problem with the dryer's internal components, such as a faulty heating element, thermostat, or blower motor, and require professional diagnosis and repair. Additionally, if your dryer is gas-powered and you suspect any issue beyond a simple vent blockage, always call a licensed HVAC technician for safety reasons to avoid potential gas leaks.
Related Articles
Keep troubleshooting with these hand-picked guides from FixlyGuide:
- The #1 Mistake Homeowners Make When Their Dryer Isnt Drying (And How to Fix It Free) — Most homeowners assume a slow dryer means a broken dryer, but the most common culprit is a simple, often overlooked maintenance issue that'…
- The #1 Mistake Homeowners Make When Their Ice Maker Stops (And the Easy Fix) — Is your refrigerator ice maker on strike? Often, a simple oversight or minor clog is the culprit, easily fixable with basic tools.
- The #1 Mistake Homeowners Make When Their Ice Maker Stops (And the Easy Fix) — Before you call for service, learn the most common and easily fixable reason your refrigerator's ice maker isn't producing ice.
- The Silent Fire Hazard Lurking In Your Laundry Room — Don't let a clogged dryer vent become a silent fire starter. Learn why this common oversight is so dangerous, the clear warning signs to lo…
- The #1 Mistake Homeowners Make When Their Dishwasher Stops Cleaning (And the Simple Fix) — Discover the most common reason your dishwasher isn't cleaning dishes and learn a simple, effective fix you can do yourself in minutes.
- The $5 Part That Stops Your Dryer From Heating (And How to Replace It in 30 Minutes) — A dryer that tumbles but doesn't heat often points to a blown thermal fuse, a simple and inexpensive fix most homeowners can do themselves.
Frequently asked questions
How often should I clean my dryer vent?+
You should clean your dryer vent at least once a year. If you use your dryer frequently, have pets, or notice clothes taking longer to dry, clean it every six months.
Can a clogged dryer vent cause a fire?+
Yes, absolutely. Lint is highly flammable, and a clogged dryer vent can cause heat to build up inside the dryer, leading to overheating and potentially a dryer fire. It's one of the leading causes of house fires.
What kind of dryer vent hose is best?+
Rigid or semi-rigid metal ducting is best for dryer vents. It provides the best airflow, is more durable, and significantly reduces the risk of lint buildup and fire compared to flexible vinyl or foil hoses.
My dryer is still not drying after I cleaned the vent. What's next?+
If cleaning the vent doesn't solve the problem, the issue might be with the dryer's internal components, such as a faulty heating element, thermostat, or blower motor. At this point, it's best to call a qualified appliance repair technician for diagnosis.


Discussion
Loading comments…