
Tools & materials you'll need
Affiliate linksAs an Amazon Associate FixlyGuide earns from qualifying purchases — at no extra cost to you. Prices and availability are accurate as of publication and subject to change.
How it works
A home's siding system is its primary defense against the elements, acting as a protective cladding or "rainscreen." It is not a single, monolithic barrier but a carefully integrated system of layers. The outermost layer is the siding material itself—vinyl, fiber cement, wood, or metal—which sheds the vast majority of water and resists impacts. Behind the siding lies a weather-resistant barrier (WRB), often called house wrap, which serves as a secondary drainage plane. This membrane prevents any wind-driven rain that bypasses the siding from reaching the home's structural sheathing (typically OSB or plywood). Finally, the sheathing is attached to the structural frame of the house.
Hail compromises this system by creating physical breaches. In vinyl siding, hailstones can cause cracks, chips, or puncture holes. With fiber cement, impacts can lead to chipping, cracking, or full fracturing of a panel. Wood siding may dent, split, or have its paint layer shattered. Any opening, no matter how small, disrupts the primary water-shedding function. Water then travels behind the siding, where it can be trapped against the WRB. If the WRB is also compromised or if flashing around windows and doors is inadequate, this moisture penetrates the sheathing and framing, leading to wood rot, mold proliferation, and diminished insulation performance. The interlocking or overlapping design of siding panels relies on each piece being intact to properly channel water down and away from the structure.
Step-by-Step Fix
Follow these steps to replace individual siding panels damaged by hail. This guide addresses both vinyl and fiber cement siding, the two most common modern materials.
- Safety First: This repair requires working on a ladder while handling tools and materials. Always place your ladder on stable, level ground at a 4-to-1 angle (for every four feet of height, the base should be one foot from the wall). Wear ANSI-rated safety glasses to protect against flying debris and sharp edges, and use heavy-duty work gloves. Be aware of nearby overhead power lines and weather conditions.
-
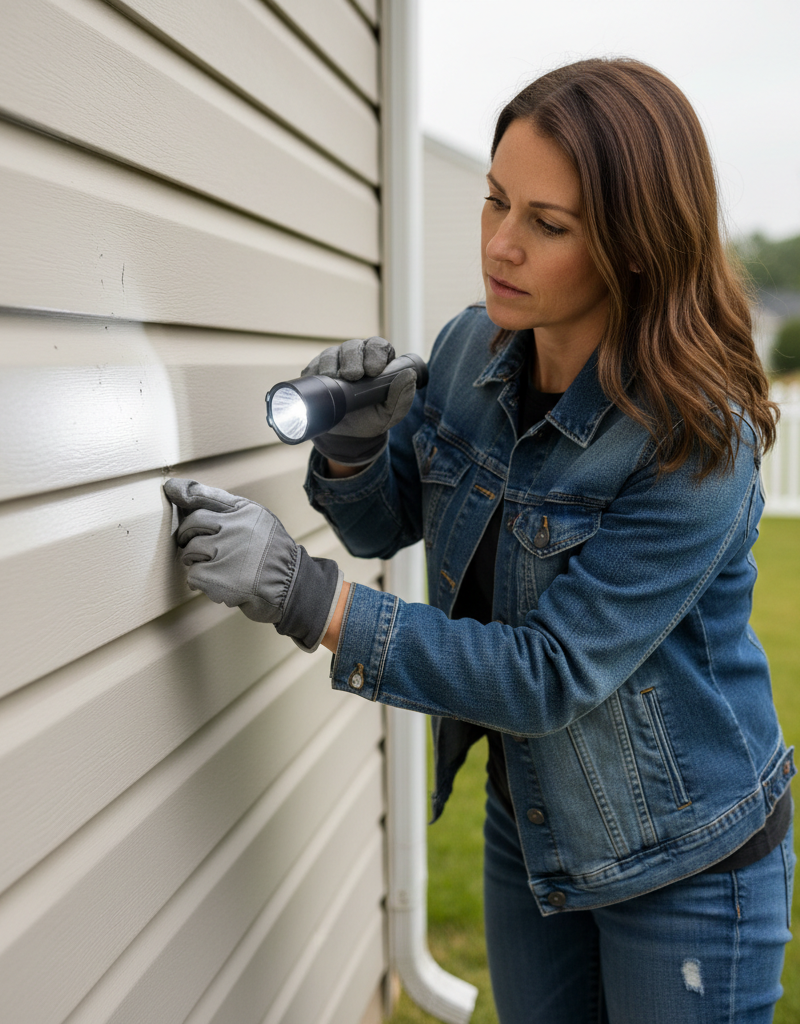
Thoroughly Assess and Document Damage — Meticulously inspect every exterior wall. Examine siding in the morning and late afternoon when low-angle sunlight makes dents, cracks, and impacts more visible. Use a piece of chalk or brightly colored painter's tape to mark every damaged spot. Take wide-angle photos of each side of the house and close-up photos of every instance of damage, preferably with a ruler in the frame for scale. This comprehensive documentation is non-negotiable for an insurance claim.
-
Source Exact Replacement Siding — Obtaining a perfect match is critical for a seamless repair. Start by checking your garage, basement, or attic for leftover siding from the original installation. If none is available, carefully remove a small, easily accessible piece of the damaged siding to take to suppliers. Record the manufacturer, product line, color name/code, and texture if known. Be aware that sun exposure can fade siding, so a new panel may not match perfectly at first but should weather to a closer shade over time.
- Pro Tip: If your siding is discontinued, a professional siding contractor may have access to salvage yards or specialty distributors.
-
Gather Essential Tools & Materials — The tools required depend on your siding material.
- For All Types: Hammer, pry bar, measuring tape, pencil, level, utility knife, chalk line.
- For Vinyl Siding: Siding zip tool, nail puller (cat's paw).
- For Fiber Cement Siding: Fiber cement siding shears or a circular saw with a polycrystalline diamond (PCD) fiber cement blade, caulk gun, high-quality exterior sealant (polyurethane or elastomeric), stainless steel or hot-dipped galvanized siding nails (typically 2-inch, 6d).
-
Remove the Damaged Vinyl Panel — To remove a vinyl panel, you must first unlock it from the panels above and below. Insert the curved tip of a siding zip tool under the bottom edge of the panel above the damaged one and pull down and outward to release its locking hem. This exposes the nailing fin of your damaged panel. Use a nail puller or the claw of a hammer to remove all nails securing the damaged panel. Once un-nailed, slide the panel down and out.
-
Remove the Damaged Fiber Cement Panel — Fiber cement is more rigid and brittle. Carefully slide a flat pry bar under the bottom edge of the board above the damaged one. Gently pry it up just enough (about 1/2 inch) to expose the nail heads on the damaged board. Use a second person or a wood block to hold it up. Slide a nail puller under the nail heads and remove them. If nails are inaccessible, you can use an oscillating multi-tool with a metal-cutting blade to cut the nails flush behind the board. Once all fasteners are removed, the damaged board should slide out.
-
Inspect and Repair the Underlayment — With the siding removed, you have a clear view of the weather-resistant barrier (WRB). Look for any punctures, tears, or signs of water staining on the sheathing behind it. This is a critical checkpoint. If the WRB is damaged, repair it using manufacturer-approved sheathing tape (e.g., Tyvek HomeWrap Tape). Ensure the repair is watertight by layering patches like shingles—top patch over bottom patch. Do not proceed until the underlayment is sound.
-
Cut the Replacement Panel to Length — Measure the opening precisely and transfer that measurement to your new siding panel.
- Cutting Vinyl: For a clean cut, use a utility knife to score the panel deeply, then snap it along the score line. Alternatively, use a circular saw with a fine-tooth blade installed in reverse for a smooth finish.
- Cutting Fiber Cement: Use specialized fiber cement shears for dust-free cuts. For straight cuts, a circular saw with a PCD blade and attached dust-collection vacuum is essential to control hazardous silica dust. Always wear a NIOSH-approved respirator (N95 or better) when cutting fiber cement.
-
Install the New Vinyl Panel — Hook the bottom lip of the new panel onto the lock of the panel below it. Push up gently until the nailing slots align with the wall sheathing. Drive 1-1/4 inch galvanized roofing nails into the center of each nailing slot, spaced about 16 inches apart. Do not drive the nails tight; leave a 1/32-inch gap (the thickness of a dime) between the nail head and the vinyl. This gap is crucial for allowing the panel to expand and contract with temperature changes.
-
Install the New Fiber Cement Panel — Position the new board, ensuring it maintains the same exposure (overlap) as the surrounding siding. Use galvanized or stainless steel siding nails, driving them through the panel and into the wall studs. For most installations ("blind nailing"), nails are placed about 1 inch from the top edge of the board; the subsequent course above will cover them. Ensure nails penetrate at least 1-1/4 inches into the solid wood framing.
-
Lock and Finish the Repair — For vinyl, use the zip tool to re-lock the bottom hem of the upper panel over the top of your newly installed panel. For fiber cement, carefully lower the overlapping board back into place. If you removed and replaced the top-most course of siding, you will need to "face nail" it (drive nails through the face of the board) and then cover the nail heads with a color-matched caulk or putty.
Common mistakes
Avoiding these frequent missteps is key to a durable, professional-looking repair that won't cause future problems.
-
Nailing Vinyl Siding Too Tightly. The most common error is driving nails flush against the nailing hem. Vinyl expands and contracts significantly with temperature. Tight nails prevent this movement, causing the siding to warp, ripple, and buckle on hot days. Instead: Always leave a 1/32-inch gap between the nail head and the vinyl, and center the nail in the slot.
-
Ignoring a Poor Siding Match. Settling for a replacement panel that is a slightly different color, texture, or profile. This creates an obvious patch that detracts from curb appeal and can lower home value. Instead: Spend the extra time and effort to find an exact match. If the siding is aged, clean a section of the old siding to get a better idea of its original color before hunting for a replacement.
-
Covering Up Damaged House Wrap. Removing the damaged siding only to immediately cover the exposed wall without inspecting the layers beneath. A small puncture in the house wrap from hail can channel water directly onto your home's sheathing. Instead: Always inspect the weather-resistant barrier (WRB). Repair any rips or holes with the appropriate sheathing tape before installing the new siding.
-
Using the Wrong Blade or No Dust Control for Fiber Cement. Cutting fiber cement with a standard wood blade creates massive amounts of airborne crystalline silica, a known carcinogen, and results in a chipped, unprofessional edge. Instead: Use a polycrystalline diamond (PCD) blade designed for fiber cement, and connect your saw to a HEPA-filtered dust extractor. At minimum, wear an N95 respirator and cut outdoors.
-
Using Interior-Grade Caulk Outdoors. Grabbing a tube of cheap painter's acrylic latex caulk to seal gaps in fiber cement or around trim. This type of caulk will quickly fail when exposed to UV radiation and temperature swings. Instead: Use a high-performance, exterior-rated sealant. Polyurethane or elastomeric caulks remain flexible and durable for years, providing a long-lasting waterproof seal.
Cost & time breakdown
Costs are estimates and can vary by location and material quality. Pro costs often include a minimum service charge for small jobs.
| Task | DIY Cost | Pro Cost | DIY Time |
|---|---|---|---|
| Damage Assessment & Material Sourcing | $0 - $20 (gas for travel) | $150 - $300 (as part of a larger bid) | 2 - 4 hours |
| Replacing One 12-ft Vinyl Panel | $15 - $40 (panel, nails) | $200 - $450 | 1 - 2 hours |
| Replacing One 12-ft Fiber Cement Panel | $30 - $70 (panel, nails, sealant) | $250 - $550 | 2 - 3 hours |
| One-Time Tool Purchase (Basic) | $50 - $150 (zip tool, pry bar, shears) | N/A | N/A |
| Repair Small Section (50 sq. ft.) | $100 - $250 (materials only) | $600 - $1,200 | 4 - 8 hours |
When to call a pro
While replacing a few panels is a manageable DIY project, certain situations warrant a professional contractor. Extensive or widespread damage across multiple walls is often more efficiently and effectively handled by a full crew. If you can count more than a dozen significant impacts on a single wall, the labor involved may outweigh the cost savings of DIY.
Any work above the first story dramatically increases risk; professionals have the proper scaffolding, safety harnesses, and insurance to work at height safely. If hail has completely punctured the siding and damaged the structural sheathing underneath, a contractor is needed to assess and repair the underlying structure. They can also properly integrate new sheathing with the weather-resistant barrier. Furthermore, if your siding is old and you cannot find a matching replacement, a professional has a network of suppliers and may know of alternative solutions. Finally, if you are navigating a large, complex insurance claim, a reputable contractor can work directly with your adjuster, ensuring the scope of work is accurate and that all damage is properly addressed and compensated.
Prevention & maintenance
Proactive care can minimize future damage and prolong the life of your siding, making repairs easier when they do become necessary.
- Perform Biannual Inspections. Each spring and fall, walk the perimeter of your home and visually inspect the siding. Look for loose or shifting panels, open gaps in caulk joints, chalking (a powdery residue on the surface), fungus growth, or chipping paint.
- Wash Siding Annually. Use a soft-bristled brush on a long pole and a solution of mild soap and water to gently scrub away dirt, pollen, and mildew. Start from the bottom and work up, rinsing from the top down. Avoid using a high-pressure washer, which can drive water up and behind siding panels and damage the surface.
- Maintain Sealant Joints. Inspect the caulk around windows, doors, pipes, and corner trim. If it is cracked, shrinking, or peeling, use a utility knife to cut away the old sealant, clean the joint, and apply a fresh bead of high-quality exterior-grade polyurethane or elastomeric caulk.
- Manage Landscaping. Keep tree branches, shrubs, and bushes trimmed at least 12-18 inches away from your siding. This prevents scratching from wind-blown limbs and allows air to circulate, which helps the siding dry out after rain and discourages mold growth.
- Document Your Siding Details. If you know the manufacturer, product line, and color code of your siding, record this information and store it in a safe place. Keep several extra full-length panels from the original installation and store them flat in a dry, protected area like a garage or attic for future repairs.
Related Articles
Keep troubleshooting with these hand-picked guides from FixlyGuide:
- Is That Hail Damage to Your Siding—Or Something Worse? (And How to Know For Sure) — Distinguishing hail damage from other siding issues is crucial for proper repair and insurance claims. Learn how to identify hail damage an…
- The Invisible Hail Damage Mistake Most Homeowners Make (And How to Spot It) — Discover how to accurately assess hail damage on your home's siding, understand its hidden impacts, and perform essential repairs to protec…
- Hail-Damaged Siding: A Homeowner's Guide to Inspection & Repair — Discover how to assess and repair hail damage on your home's siding, ensuring your home remains protected and looks its best.
- Your Roof is Leaking. Now What? — A leaking roof after a storm is a homeowner's nightmare. Learn how to safely install a temporary roof tarp to prevent further water damage…
- The #1 Mistake That Warps Deck Boards (And How to Fix It for Good) — Prevent and repair warped deck boards by understanding the underlying causes and implementing effective, long-term solutions.
- The Secret Culprit Behind Your Leaky Chimney (It’s Not Always the Obvious Fix) — A leaky chimney during rain can indicate several issues, from simple flashing problems to complex crown damage, requiring homeowners to dia…
Get the print-ready PDF of this guide
A clean, ad-free, printable version you can keep on your phone or pin to the workshop wall. Free with a FixlyGuide account.
- Print-optimized layout
- Tools, materials & every step included
- Saved to your account
Frequently asked questions
How do I know if my siding is hail damaged?+
Look for visible dents, chips, cracks, or holes on the siding panels, especially on the sides of your house most exposed to the storm. You might also notice a white or powdery residue around impact points on vinyl siding.
Can I replace just one piece of siding?+
Yes, for minor damage, you can often replace individual siding panels. This is a common and effective DIY repair for both vinyl and fiber cement siding, provided you can find a matching replacement piece.
Will my homeowner's insurance cover hail damage to siding?+
Most homeowner's insurance policies cover hail damage, but coverage details and deductibles vary. It's important to review your policy and document the damage thoroughly with photos before filing a claim.
Is it safe to repair hail damage myself?+
Minor repairs, such as replacing a few damaged panels, can be done safely by a homeowner with basic DIY skills and proper safety precautions, especially when using ladders. For extensive damage or if working at significant heights, it's safer to hire a professional.


Discussion
Loading comments…